Import, update, troubleshoot, and export Sanka records with CSV files, including inventory transactions, custom objects, mapping, failed rows, and parent-child companies.
Last updated: July 2, 2026
This guide explains how to bulk-create, update, troubleshoot, and export records in Sanka with CSV files. It consolidates object-specific CSV import guidance for companies, contacts, items, orders, invoices, inventory transactions, custom objects, and other objects, including mapping, failed rows, duplicate checks, and retry decisions.
Start with Claude / Codex review
Before importing a CSV, ask Claude or Codex connected to Sanka to review the target object, CSV columns, mapping candidates, create/update behavior, duplicate risks, and missing required fields.
Sample prompt
/sanka I want to import records from CSV. Review the target object, CSV columns, Sanka property mapping candidates, create/update behavior, possible duplicate records, and missing required fields. Do not run the import yet.
If you are unsure about the file or mapping, test with a small sample first, then import the full file after review. Claude and Codex can only read or update data allowed by the connected user's permissions.
Put column names in the first row. Use column names that are close to your Sanka property names so mapping is easier to review.
Text
Company Name,Email,Phone,Owner
Green Salon Group,info@example.com,555-0100,Taylor
When updating existing records, include an ID or unique value that identifies the target record, such as company ID, SKU, or order number.To start from a sample file, download the Company CSV import sample and replace the columns and values with your own data.
Import from the web app
You can import manually from the web app after preparing the CSV and mapping plan.
Open the object list you want to import into.
Click Import in the upper-right corner.
Select CSV as the source.
Upload the CSV file.
Map CSV columns to Sanka properties.
Choose whether to create new records or update existing records.
For updates, select the key property that identifies existing records.
Review the mapping and run the import.
After import, review the records and status in the target object list.
Set parent-child companies by CSV
Special updates such as company hierarchy can also be handled with CSV import. To set parent-child companies, create the company records first, then update existing companies with a column that points to the parent company.Prepare at least these columns:
A column that identifies the company to update, such as company ID
A column that identifies the parent company
Text
Company ID,Parent Company
0001,
0002,0001
In this example, 0001 is the parent company and 0002 is the child company. During mapping, map the parent company column to the company-to-company association used for parent-child relationships. It is usually safer to create the companies first, then run a second CSV update for hierarchy.
Special import cases
Use an extra review step for imports that involve relationships, quantities, or accounting fields.
Company hierarchy: Update parent-child company associations.
Item structures: Confirm item codes and parent-child relationships for items or BOMs.
Inventory and transactions: Confirm locations, items, quantities, and dates.
Purchase orders and bills: Confirm supplier, items, amounts, tax, and payment terms.
Custom objects: Confirm target object properties and the key property before importing.
Import inventory transactions
Inventory Transaction CSV imports change stock movement history, so treat them as high-impact imports. Before importing, confirm the inventory, item, location, quantity, transaction date, transaction type, and source reference for every row.Use inventory transaction import when you need to create or update movement records such as inbound, outbound, adjustment, transfer, or shipment-related transactions. Do not use it to guess current stock levels without confirming the movement that should explain the change.Before running the import:
Confirm the related item and inventory records already exist.
Confirm the location or warehouse values match the workspace setup.
Use positive and negative quantities consistently with your team's transaction type rules.
Include the Inventory Transaction record ID or another unique key when updating existing transaction records.
Keep a source reference, such as order number, stock count file, or adjustment reason, so the movement can be audited later.
Test with a small file before importing a large adjustment or migration.
Expected success state: each valid row creates or updates one inventory transaction, the related item and inventory can be reviewed, the quantity and date match the CSV, and the import history shows which rows succeeded or failed.
Sample prompt
/sanka Review this Inventory Transaction CSV import before it runs. Check item identifiers, inventory records, locations, transaction type, quantity signs, transaction dates, source references, create/update mode, matching key, and rows that could change stock unexpectedly. Summarize expected results and risky rows. Do not run the import or change inventory records yet.
Import custom object records
Custom Object CSV imports depend on the custom object schema in your workspace. The target custom object, properties, required fields, unique keys, views, forms, and associations should be reviewed before the file is uploaded.Before running the import:
Confirm the custom object already exists.
Confirm every CSV column maps to an existing property or decide which new property should be created before import.
For updates, choose a stable key such as record ID or an external ID property.
For associations, include the related record ID or another approved matching value.
Confirm required properties are present on every row.
Check property types such as date, number, checkbox, select, multi-select, image, file, and association before importing.
Expected success state: records are created or updated on the target custom object, required fields are populated, associations point to the intended records, and failed rows explain missing properties, invalid values, or duplicate keys.
Sample prompt
/sanka Review this Custom Object CSV import before it runs. Identify the target custom object, required properties, property types, create/update mode, matching key, association columns, duplicate risks, and rows likely to fail validation. Summarize what should be created or updated and what must be fixed first. Do not run the import or change custom object records yet.
Review errors and history
After import, review successful rows, failed rows, and the error file. Common issues include mismatched columns, missing required values, invalid IDs, and duplicate candidates.Use the troubleshooting checklist below before rerunning the import or changing your workspace settings.
Troubleshooting import and export
CSV issues usually come from the file, the mapping, the selected create/update mode, permissions, or filters. Start by asking AI to summarize what happened, but do not rerun the import until you know which rows should be retried.
Sample prompt
/sanka Review this CSV import or export issue. Summarize the target object, selected create/update mode, matching key, mapped columns, failed rows, error messages, and whether this looks like a file problem, mapping problem, permission problem, expected filter behavior, or possible product bug. Do not rerun the import or change records yet.
If the file cannot be uploaded
Confirm the file is a CSV file, not an Excel workbook or a renamed spreadsheet.
Keep the header row in the first row.
Remove merged cells, formulas, hidden rows, and extra title rows before exporting from a spreadsheet tool.
If Japanese characters appear garbled, save the file again with a standard CSV encoding such as UTF-8.
If columns do not map correctly
Compare each CSV header with the Sanka property name.
Confirm the property exists on the target object.
For custom properties, confirm the property type matches the value in the CSV.
For association fields, confirm the related record already exists or that your import plan allows missing records to be created.
If records were created instead of updated
Check that you selected update mode instead of create mode.
Confirm the matching key is present on every row.
Use a stable unique value such as record ID, external ID, SKU, order number, invoice number, or another key your team manages.
Avoid matching only by names when duplicates or spelling differences are possible.
If records are missing after import
Check the import history, successful row count, failed row count, and error file.
Confirm the current object view is not filtering out the new or updated records.
Check whether the records were archived or whether your role can view them.
For imports that create related records, confirm the customer, item, location, or other required related record exists.
If an export is missing records or columns
Confirm you have permission to view and export the target object.
Check the selected properties and filters on the export screen.
Include record ID when the export will be used for later updates.
If the export is processed in the background, check the export history and email notification before running a second export.
When to treat it as a possible bug
Treat the issue as a possible product bug only after you confirm the file format, mapping, matching key, permissions, view filters, and import/export history. When contacting support, include the target object, import or export time, selected create/update mode, matching key, a redacted sample CSV, the error file if available, and the expected result.
Object list — Review the objects available in Sanka
Bulk upload product images
For item records, you can register images on each product. When you have many images, use bulk image upload from the list screen or use an Image Group property so one property can store multiple images.
What is an Image Group property?
An Image Group is a property type that stores multiple images in one property. Use it alongside the regular Image property, which stores one image, when you need product photos, detail shots, package photos, or other image sets on the same item.
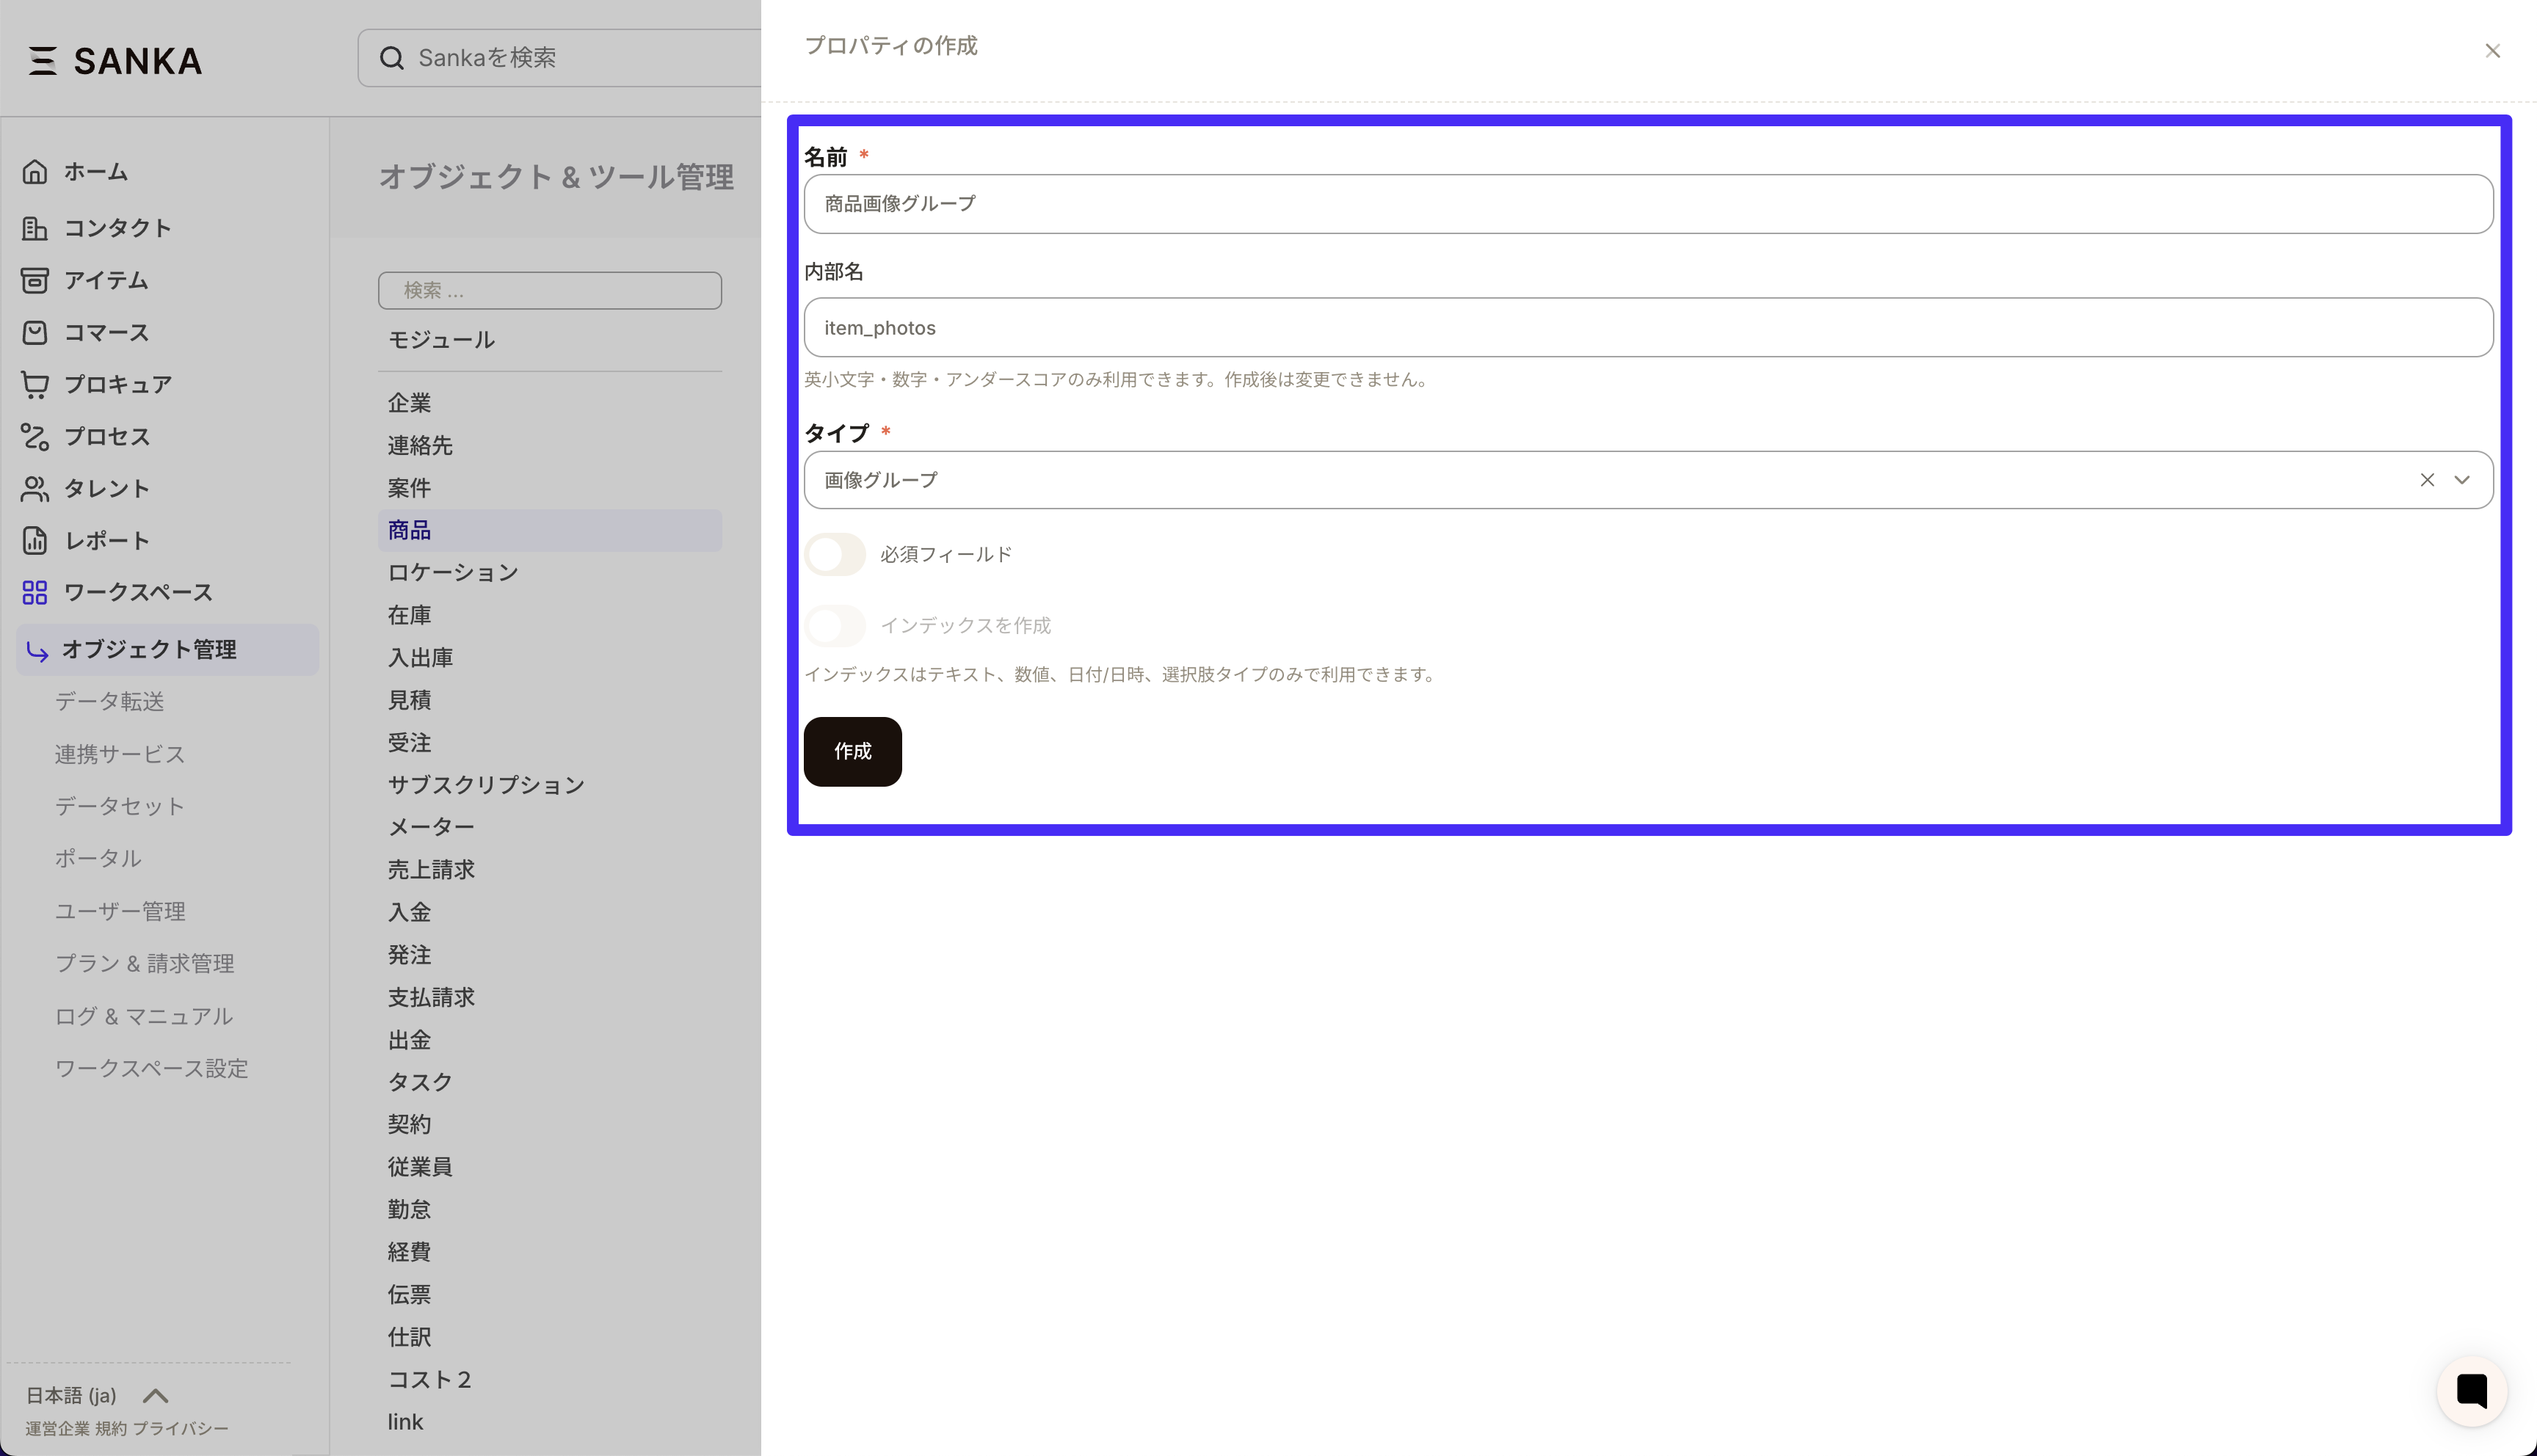
Create an Image Group property
Open Workspace from the lower-left menu, then click Object management.
Select Item from the list and click New in the upper-right corner.
Enter the property name, such as Product Image.
Select Image Group as the type and click Create.
If you want to show the property in record creation forms or views, add it from View / Manage Forms.
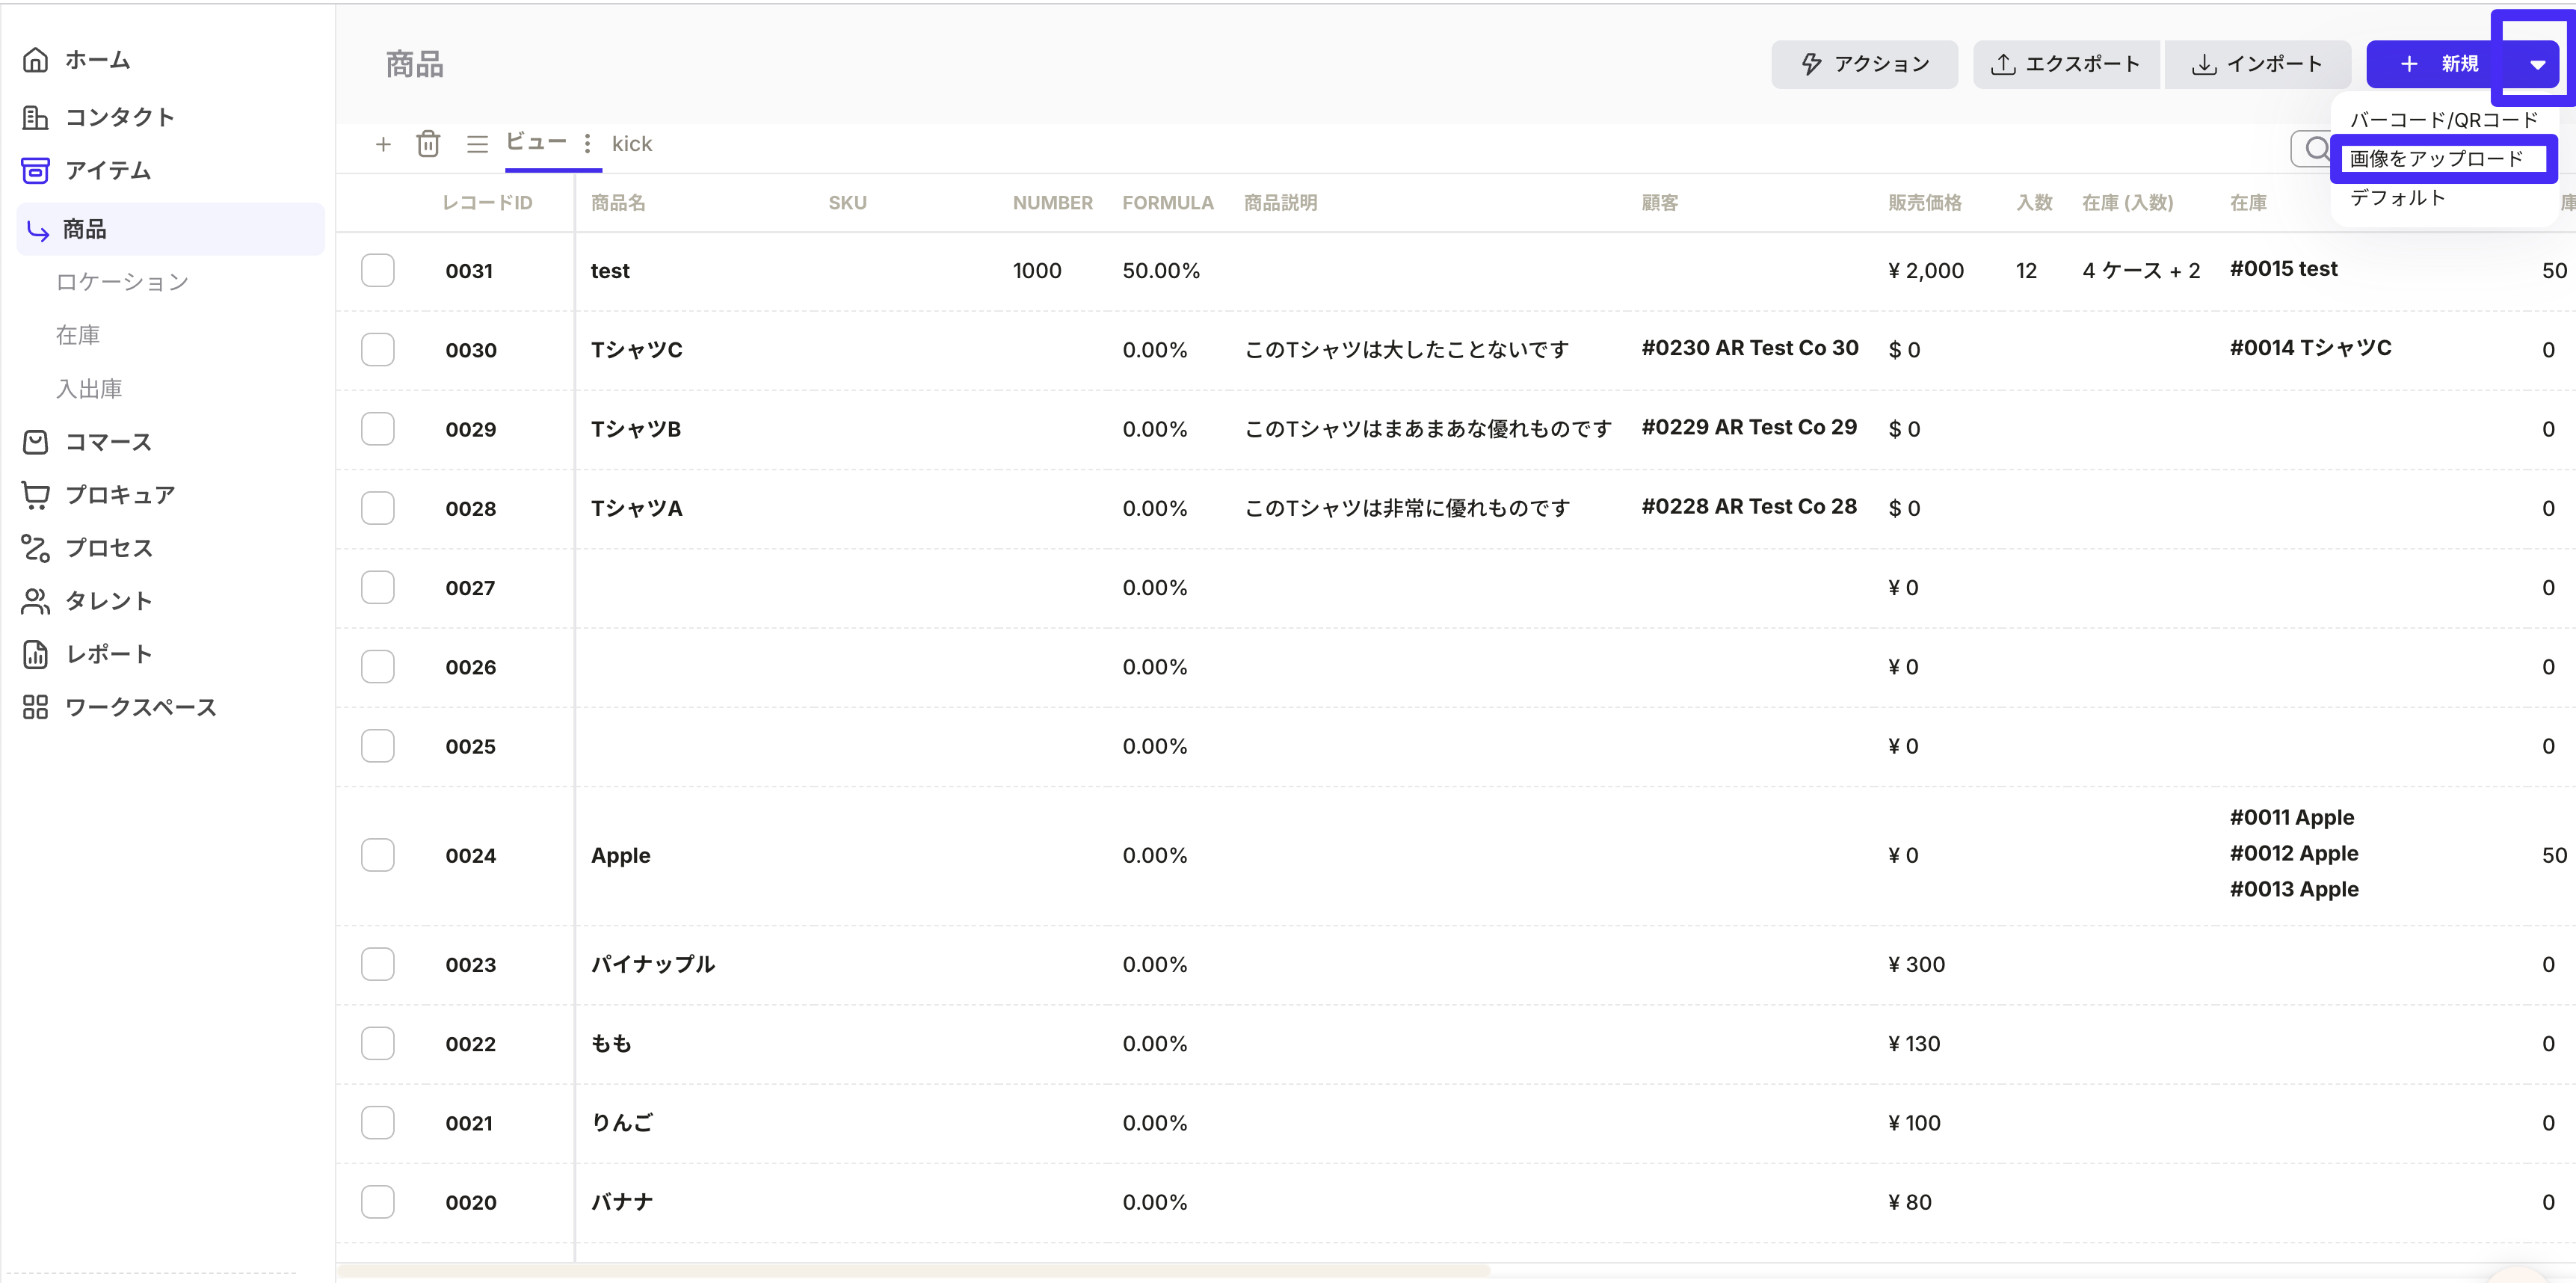
Upload product images in bulk
Bulk upload matches image file names to a property value on the product record. Before you start, confirm the following.
Prepare the image property where images will be saved, either Image or Image Group.
Decide which text property will be used for matching, such as record ID, SKU, or product number.
Use a matching key with unique values to avoid linking the same image to multiple products by mistake.
Open the item object list and click Upload image from the action menu in the upper-right corner.
Under Image Property, select the property where images should be saved. Select Image Group when you want to register multiple images at once.
Under Text Property, select the matching key used to link images to records.
Prepare image file names so they match the selected text property value. The file name without .jpg, .jpeg, or .png is used for matching.
Drag and drop the images, or click to select them.
Review the file list and click Upload Image.
Example: using Product ID as the text property
Product ID on the record
Image file name
001
001.jpg
002
002.png
003
003.jpeg
Register multiple images on one record
To add multiple images to the same product, select Image Group for the image property. Then prepare multiple image files for the same matching key.For the second and later files, add a number at the end of the file name. Sanka matches by removing trailing -number or _number, so hyphen-separated names also work.
Matching key
Image file name
001
001.png
001
001-1.png
001
001-2.jpg
Even when the matching key itself contains a hyphen, only the final number is treated as the suffix. For example, if the SKU is ABC-1, use names such as ABC-1.jpg and ABC-1-2.jpg.
Confirm after upload
After the upload finishes, open the target product record and confirm that the selected image property contains the image. For Image Group properties, multiple images appear side by side inside the same property.
If images do not appear
Confirm that the image file name exactly matches the text property value. Watch for leading or trailing spaces and full-width or half-width character differences.
Records with an empty matching text property are not linked.
Supported formats are .jpg, .jpeg, and .png. Other formats cannot be uploaded.
If multiple products share the same key, the same image is registered on all matching products.
Set up a company price table
Use a Price Table property on Company records to enter company-specific prices and make estimates use those prices before the standard item price.
What you’ll accomplish
Create a Price Table property on Company and place it on the form layout.
Enter item-level prices or a company-level percentage for each company.
Verify that estimates prioritize the company price table before item defaults.
Prerequisites
Workspace admin access to edit objects and forms.
Items you plan to quote, such as sample items for testing.
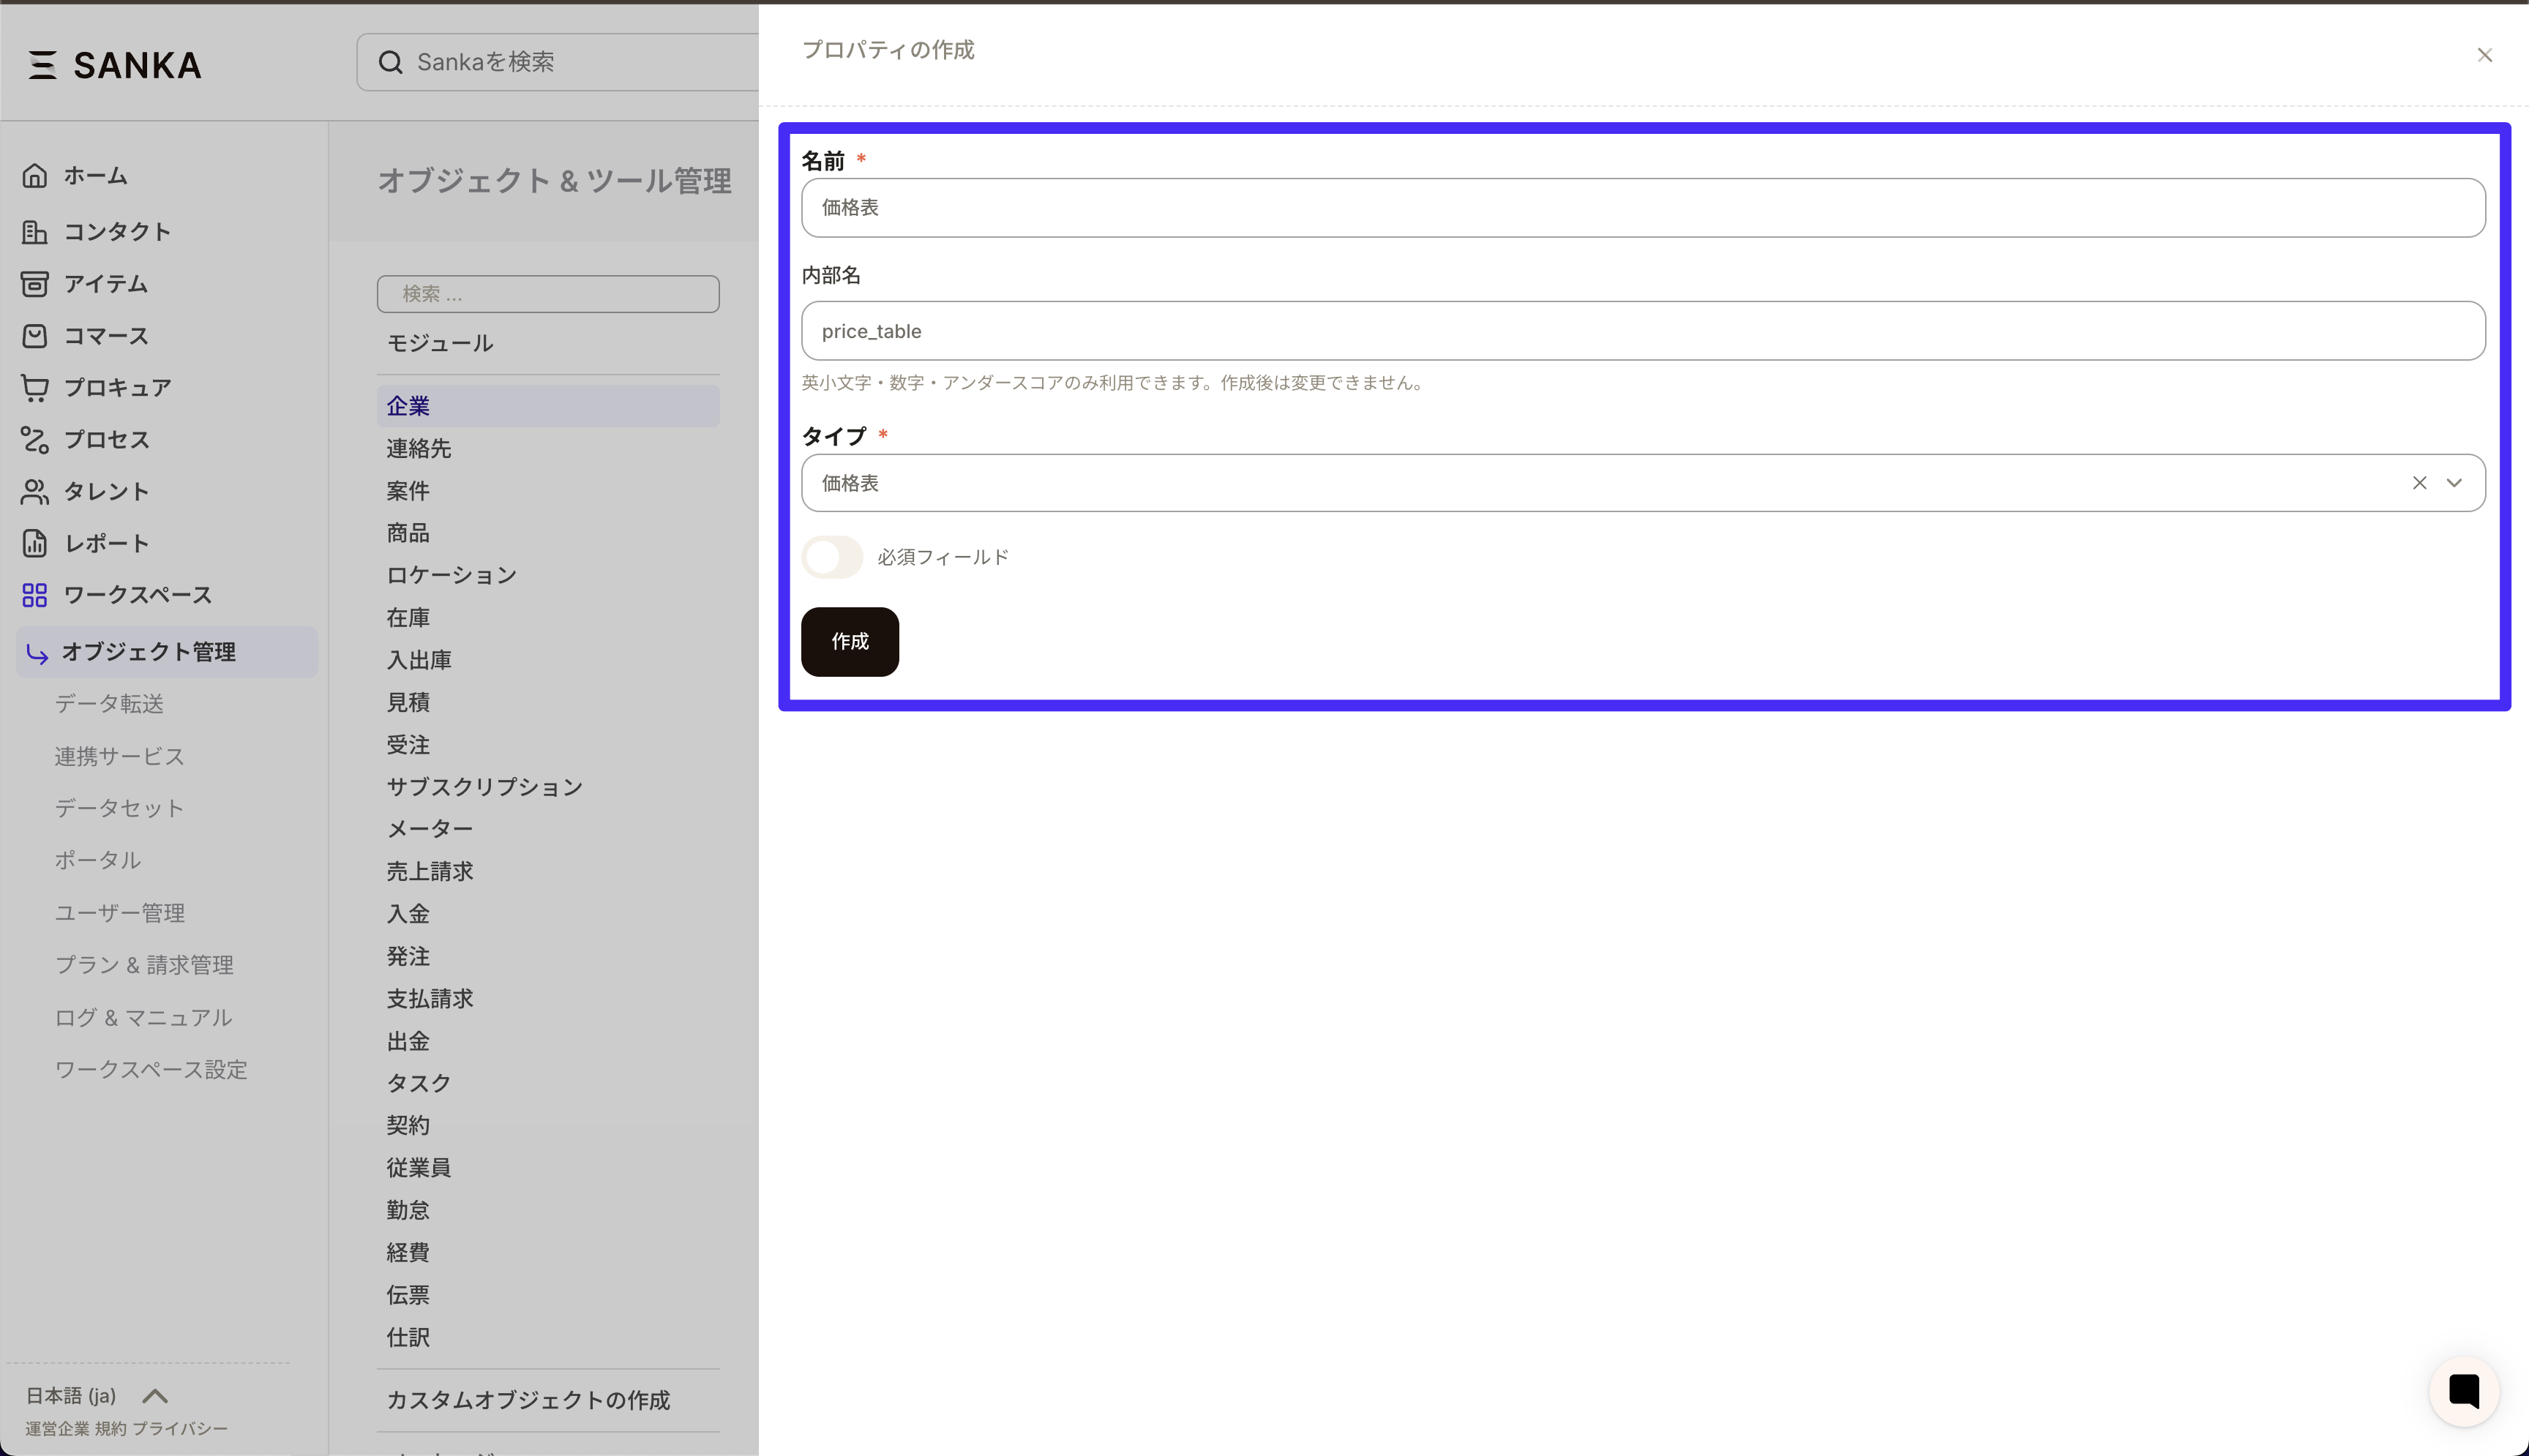
Add the Price Table property to Company
Go to Settings → Object / Property management → Company.
Click New Property, name it (for example, Price Table), set Type = Price Table, and save.
Add the property to the Company form or layout and save the layout.
Create a company record and surface the field
Open Companies from the left navigation and click New. Enter required basics such as Name and save.
Re-open the saved company detail. The Price Table button appears in the properties panel only after the record exists.
Enter company-specific prices
Item Level
Click Price Table on the company record.
In Item Level, search for or select items and enter an Item Price per row.
To bulk-adjust visible items, enter a value in %, such as 90 for 10% off, and click Apply.
Click Save at the bottom of the drawer.
Company Level
Switch to the Company Level tab.
Enter a percentage such as 90 to apply to all items, then click Save.
If an item does not have an Item Level price, the Company Level percentage is used.
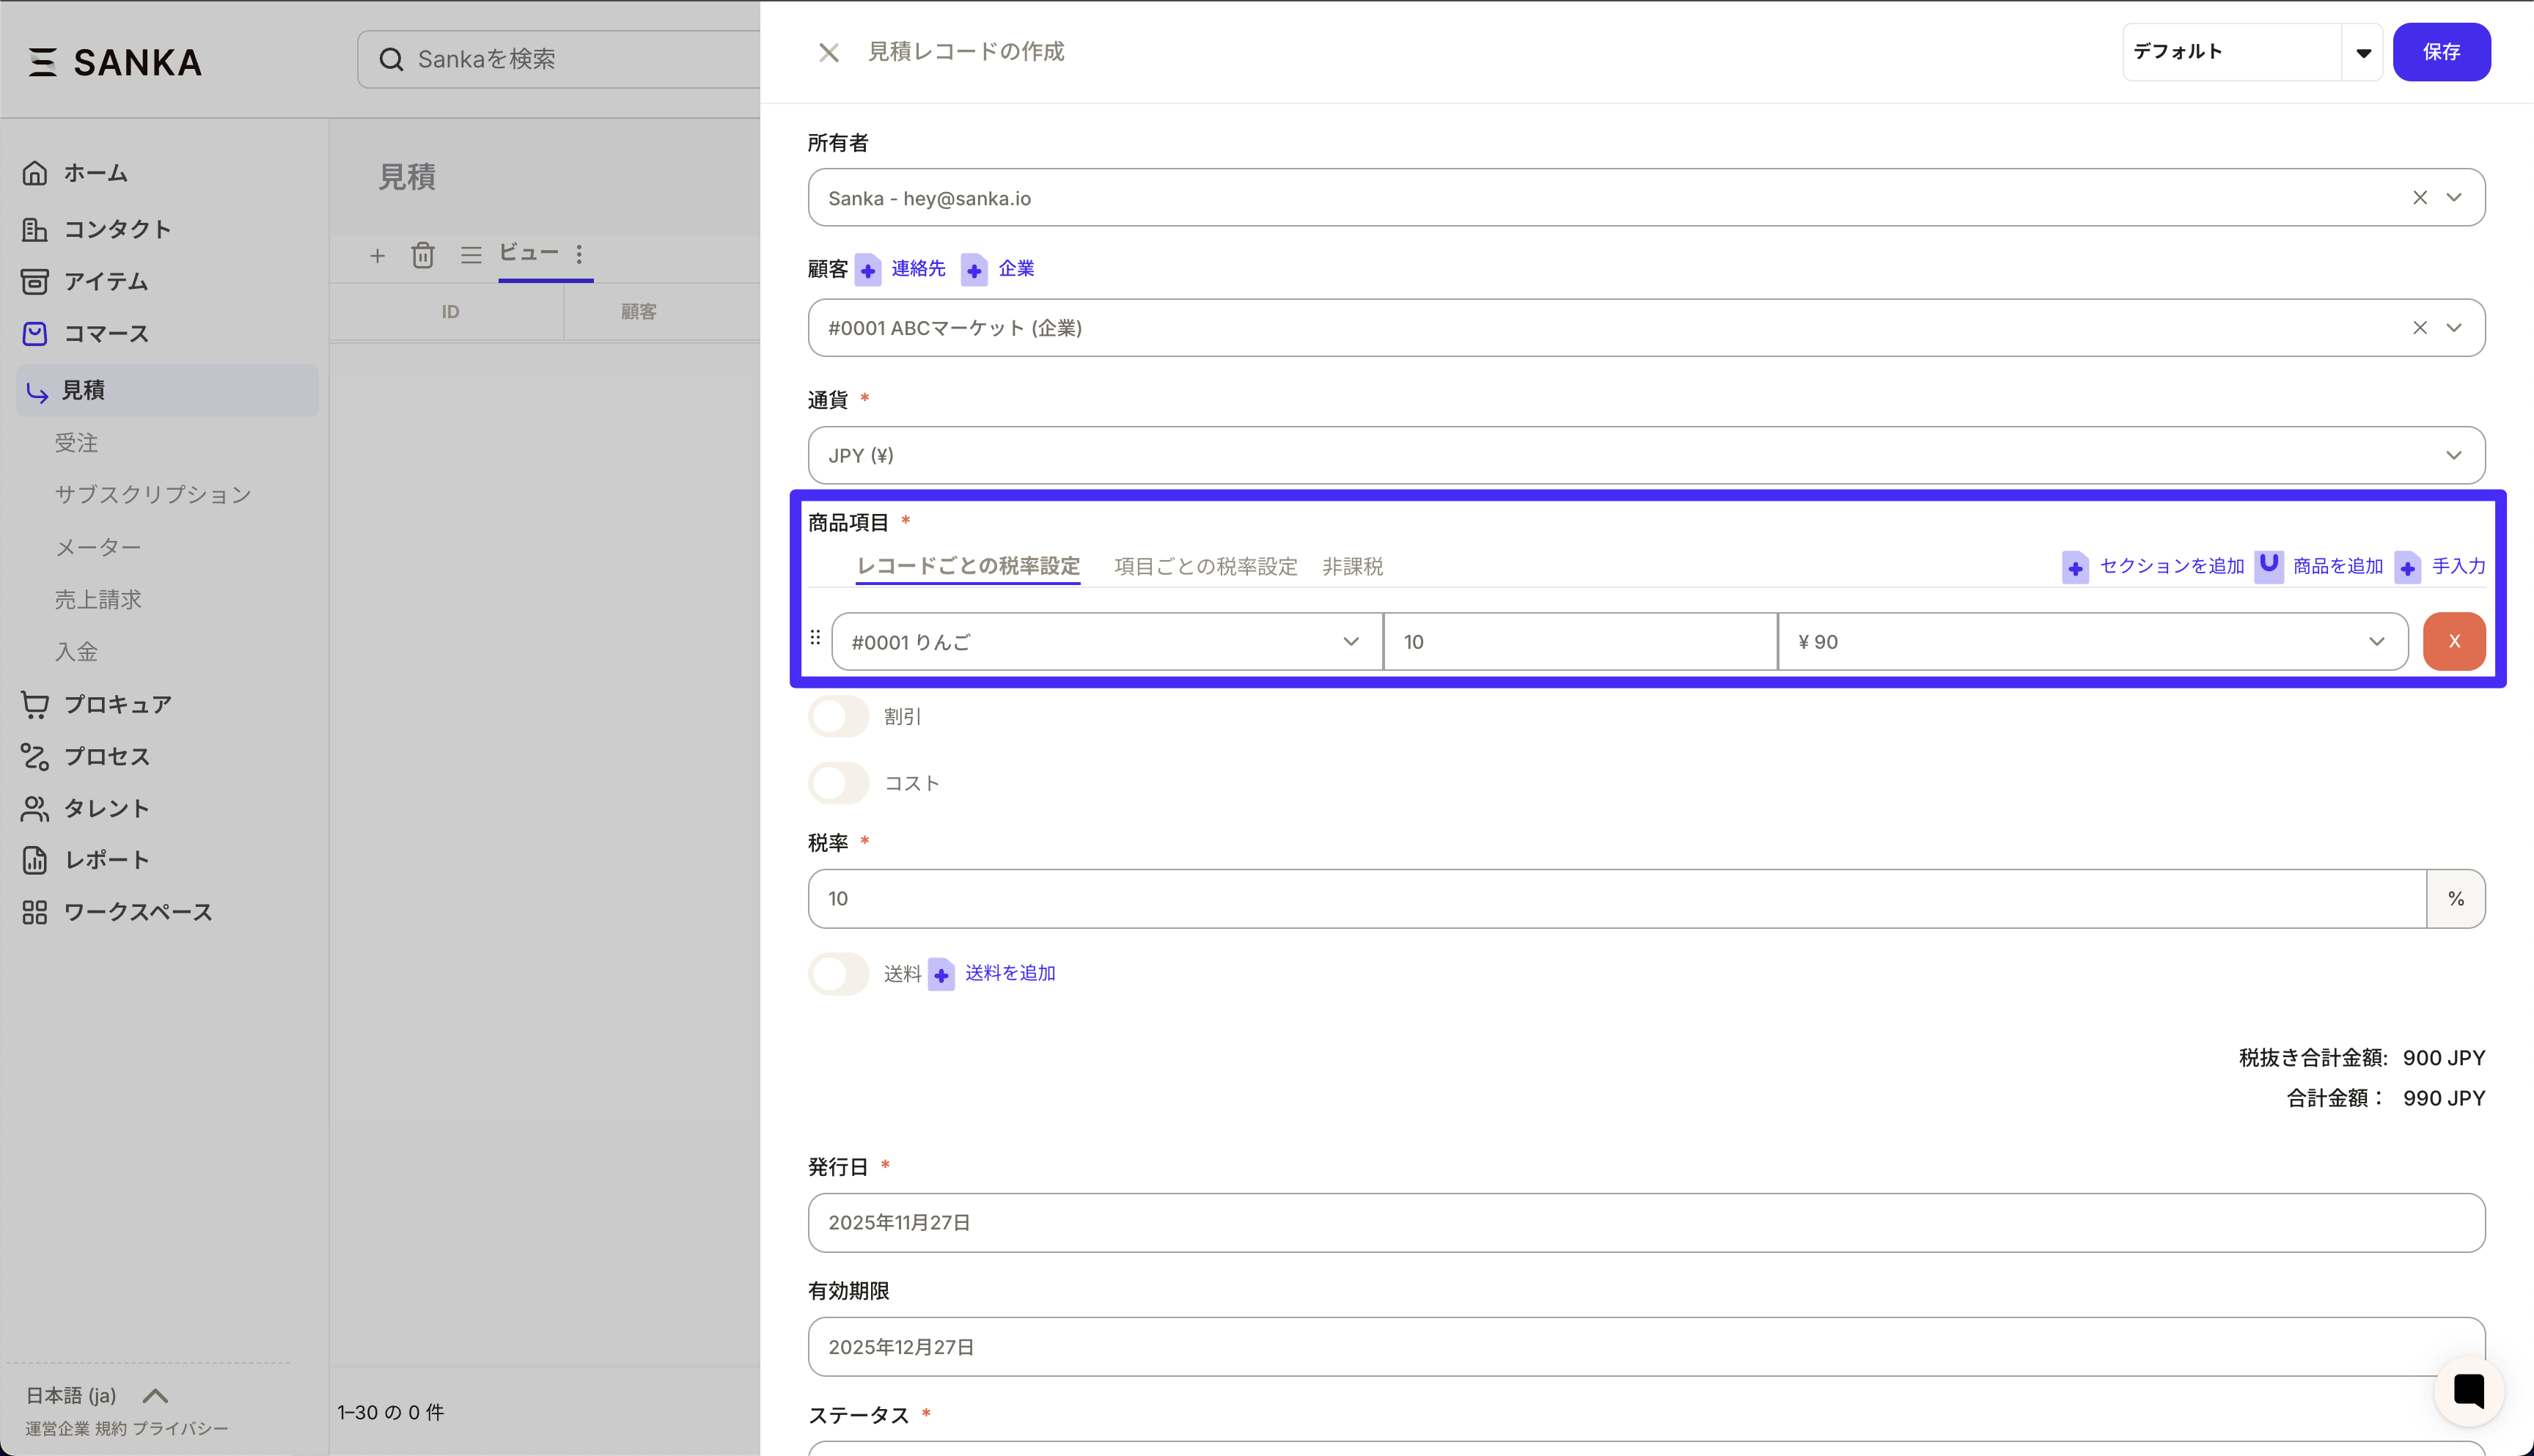
Verify the price table in Estimates
Go to Estimates → New Estimate, or open a draft.
Set Customer to the company with a price table. Sanka checks the table automatically.
Add line items. The price dropdown defaults to item-level company price, then company-level percent, then item default price.
Confirm totals reflect the company pricing and save.
Tips and troubleshooting
If the Price Table button is missing, confirm the property is on the Company form and the record has been saved once.
Make sure items exist before opening the Price Table drawer. Only active items appear.
Price tables are stored per company. Changing the Customer on an estimate reloads prices for that company.
Use Company Level for a universal adjustment and override specific items in Item Level when needed.