How to connect HubSpot and Sanka
How to connect HubSpot account with Sanka
Last updated: June 6, 2026
Overview
By integrating HubSpot with Sanka, you can keep HubSpot as your CRM while managing quotes, billing, and post-sale operations end-to-end in Sanka. Contacts, companies, deals, and properties stay in sync, so your team and AI agents can run sales operations on top of Sanka. This guide walks you through connecting Sanka and HubSpot to smoothly bridge your CRM and sales operations.Prerequisites
- Admin access to your Sanka workspace, and a HubSpot Super Admin (or a user with permission to approve app integrations).
What the integration supports
Use the HubSpot integration when HubSpot remains the CRM source and Sanka handles quote-to-cash, billing, subscription, fulfillment, or operations work. Depending on your workspace setup, the integration can help with:- Syncing HubSpot contacts, companies, deals, and properties with matching Sanka records
- Importing HubSpot deal data into Sanka orders, subscriptions, invoices, or related sales records
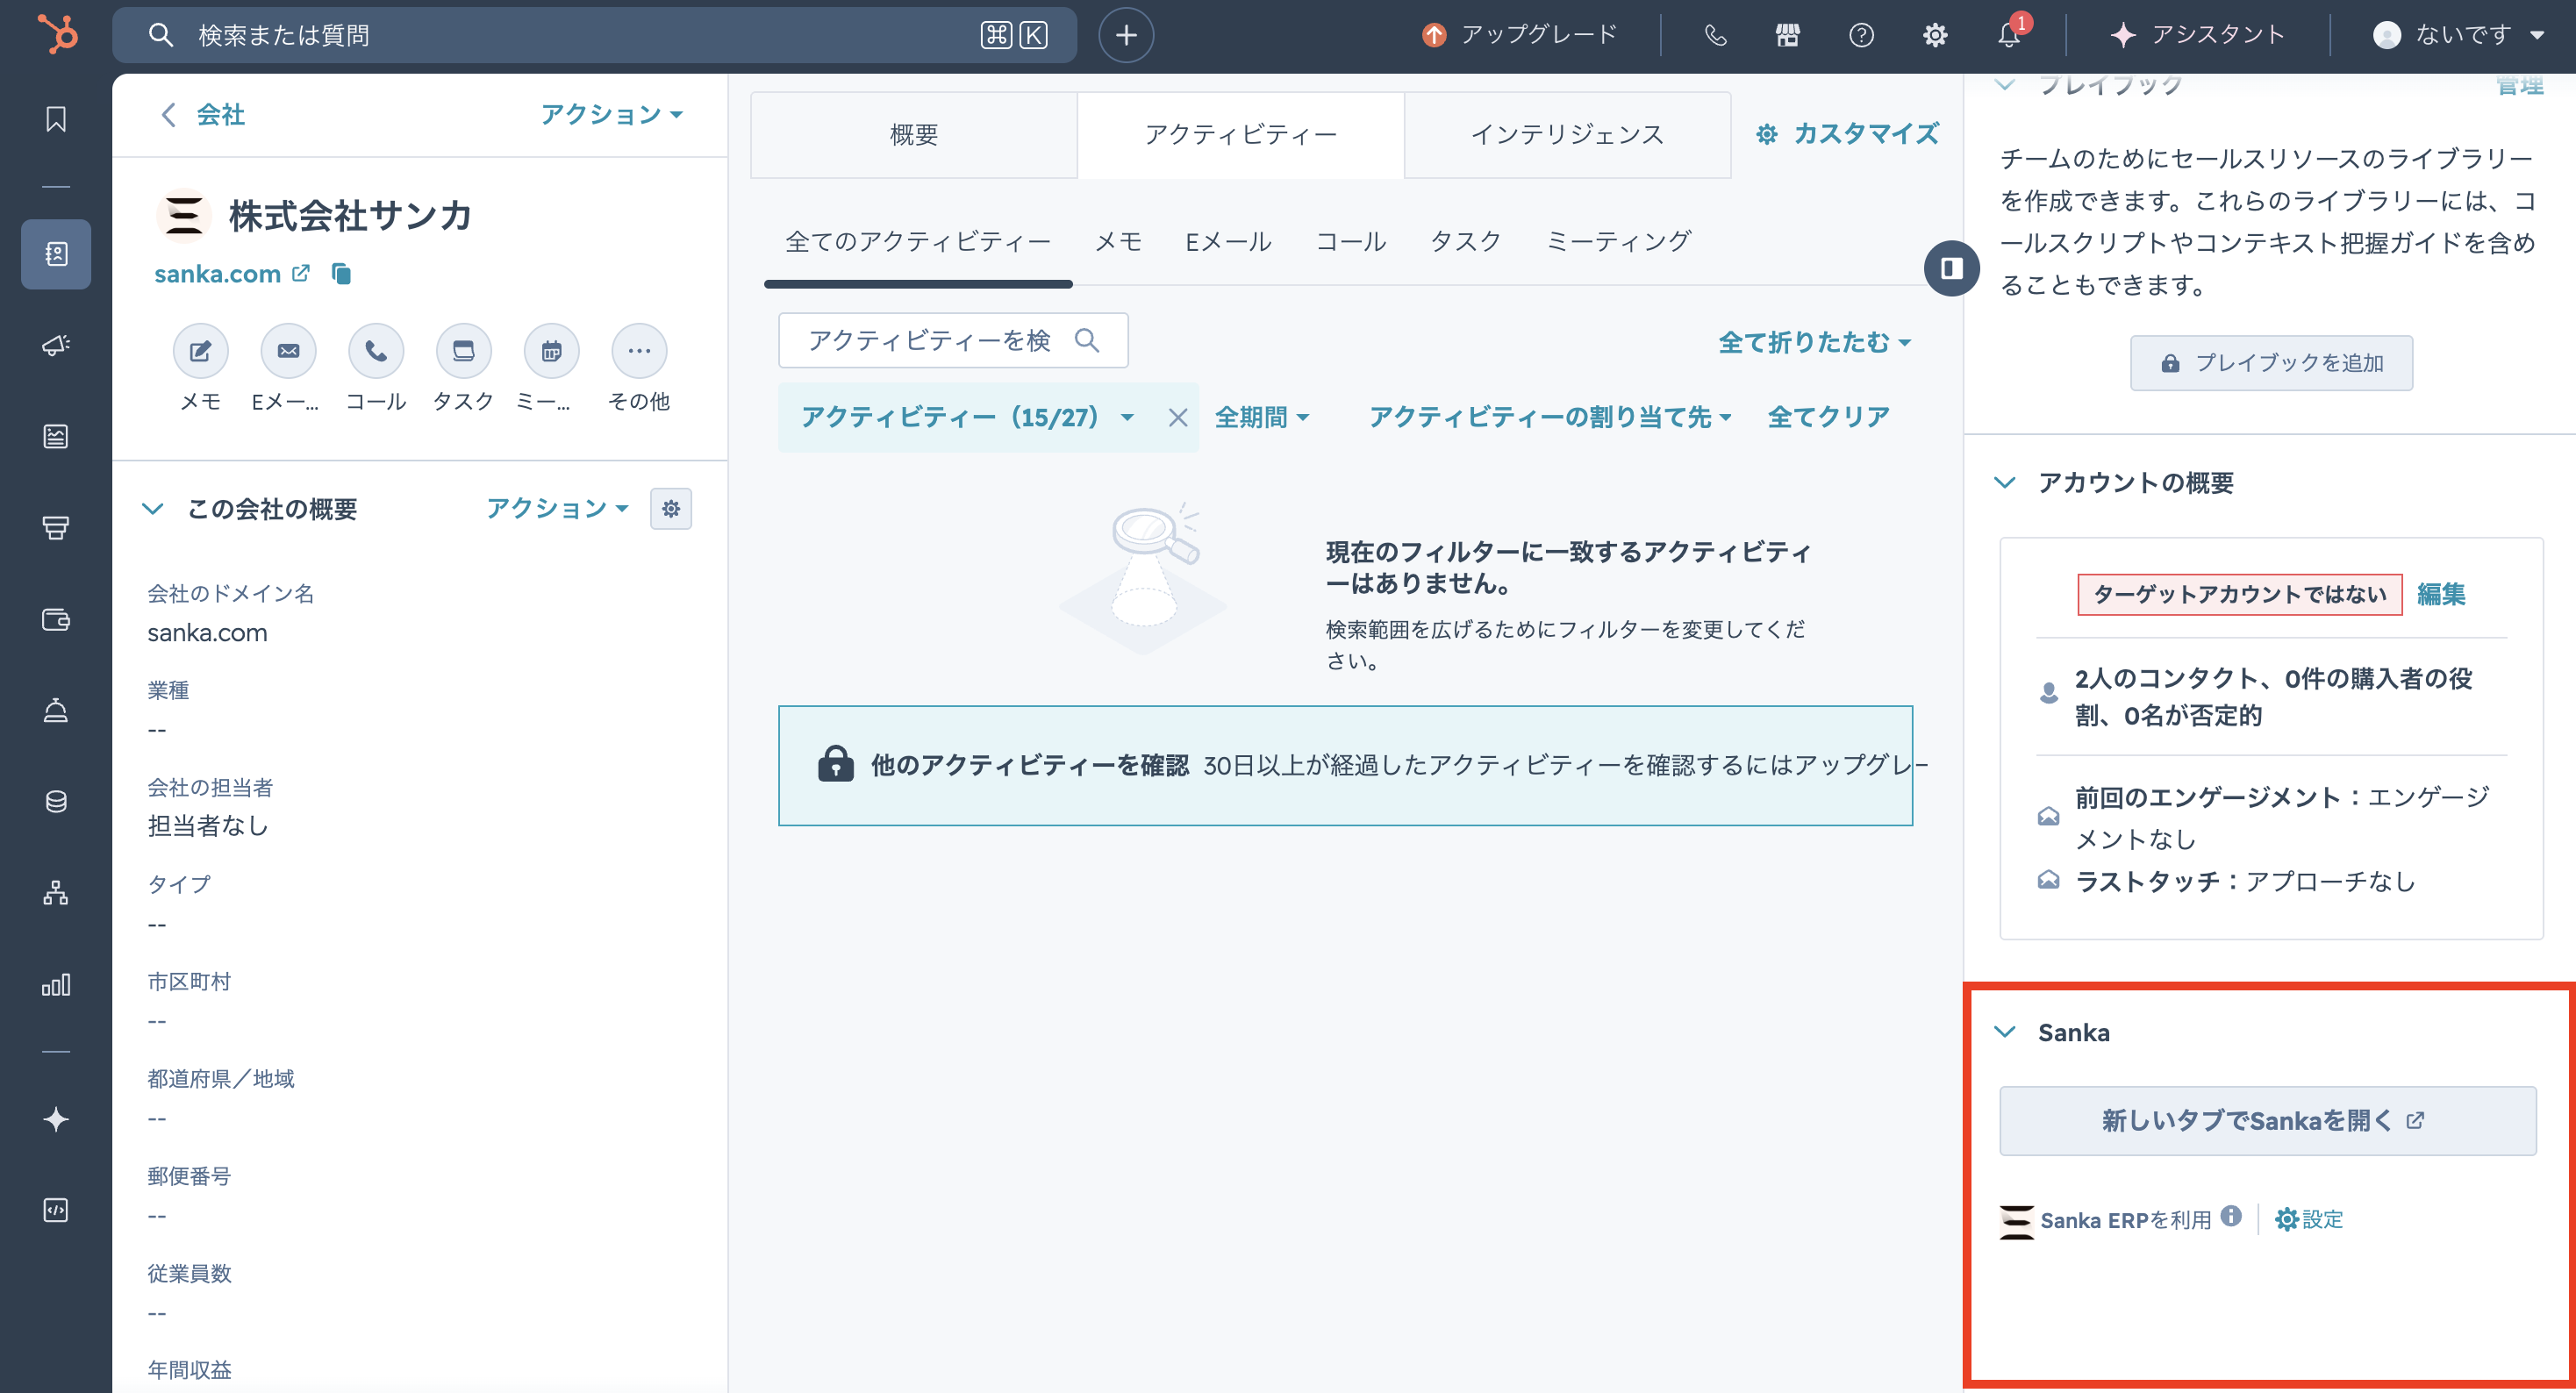
- Opening Sanka from HubSpot contact, company, or deal pages through the HubSpot app card
- Running Sanka actions or workflows after imported or synced records meet your team's conditions
- Reviewing ownership, source, mapping, and record history before updating downstream business data
Sample prompt
/sanka Review this HubSpot and Sanka record before making any changes. Confirm the matching company, contact, deal or order, the sync direction, mapped fields, owner, required fields, and whether any action or workflow should run. Do not create, update, send, or convert records until I approve the plan.Expected behavior
After the connection succeeds, HubSpot appears on the Sanka integrations page. Records sync or import only when the relevant mapping, permissions, and manual or automated job are configured. When a HubSpot deal is imported or converted into Sanka sales operations, the expected success state is:- The Sanka record keeps a clear source back to the HubSpot record
- Required fields such as company, contact, amount, currency, status, owner, line items, or billing terms are filled or reviewed
- Associated records are linked so teams can trace the flow from CRM deal to quote, order, subscription, invoice, or payment
- Any follow-up action or workflow runs only when it is enabled and its conditions match
- Record history and audit logs show what changed, who or what changed it, and when it happened
How to connect HubSpot and Sanka
① In the left sidebar of the dashboard, click the Workspace tab, then click Integrations.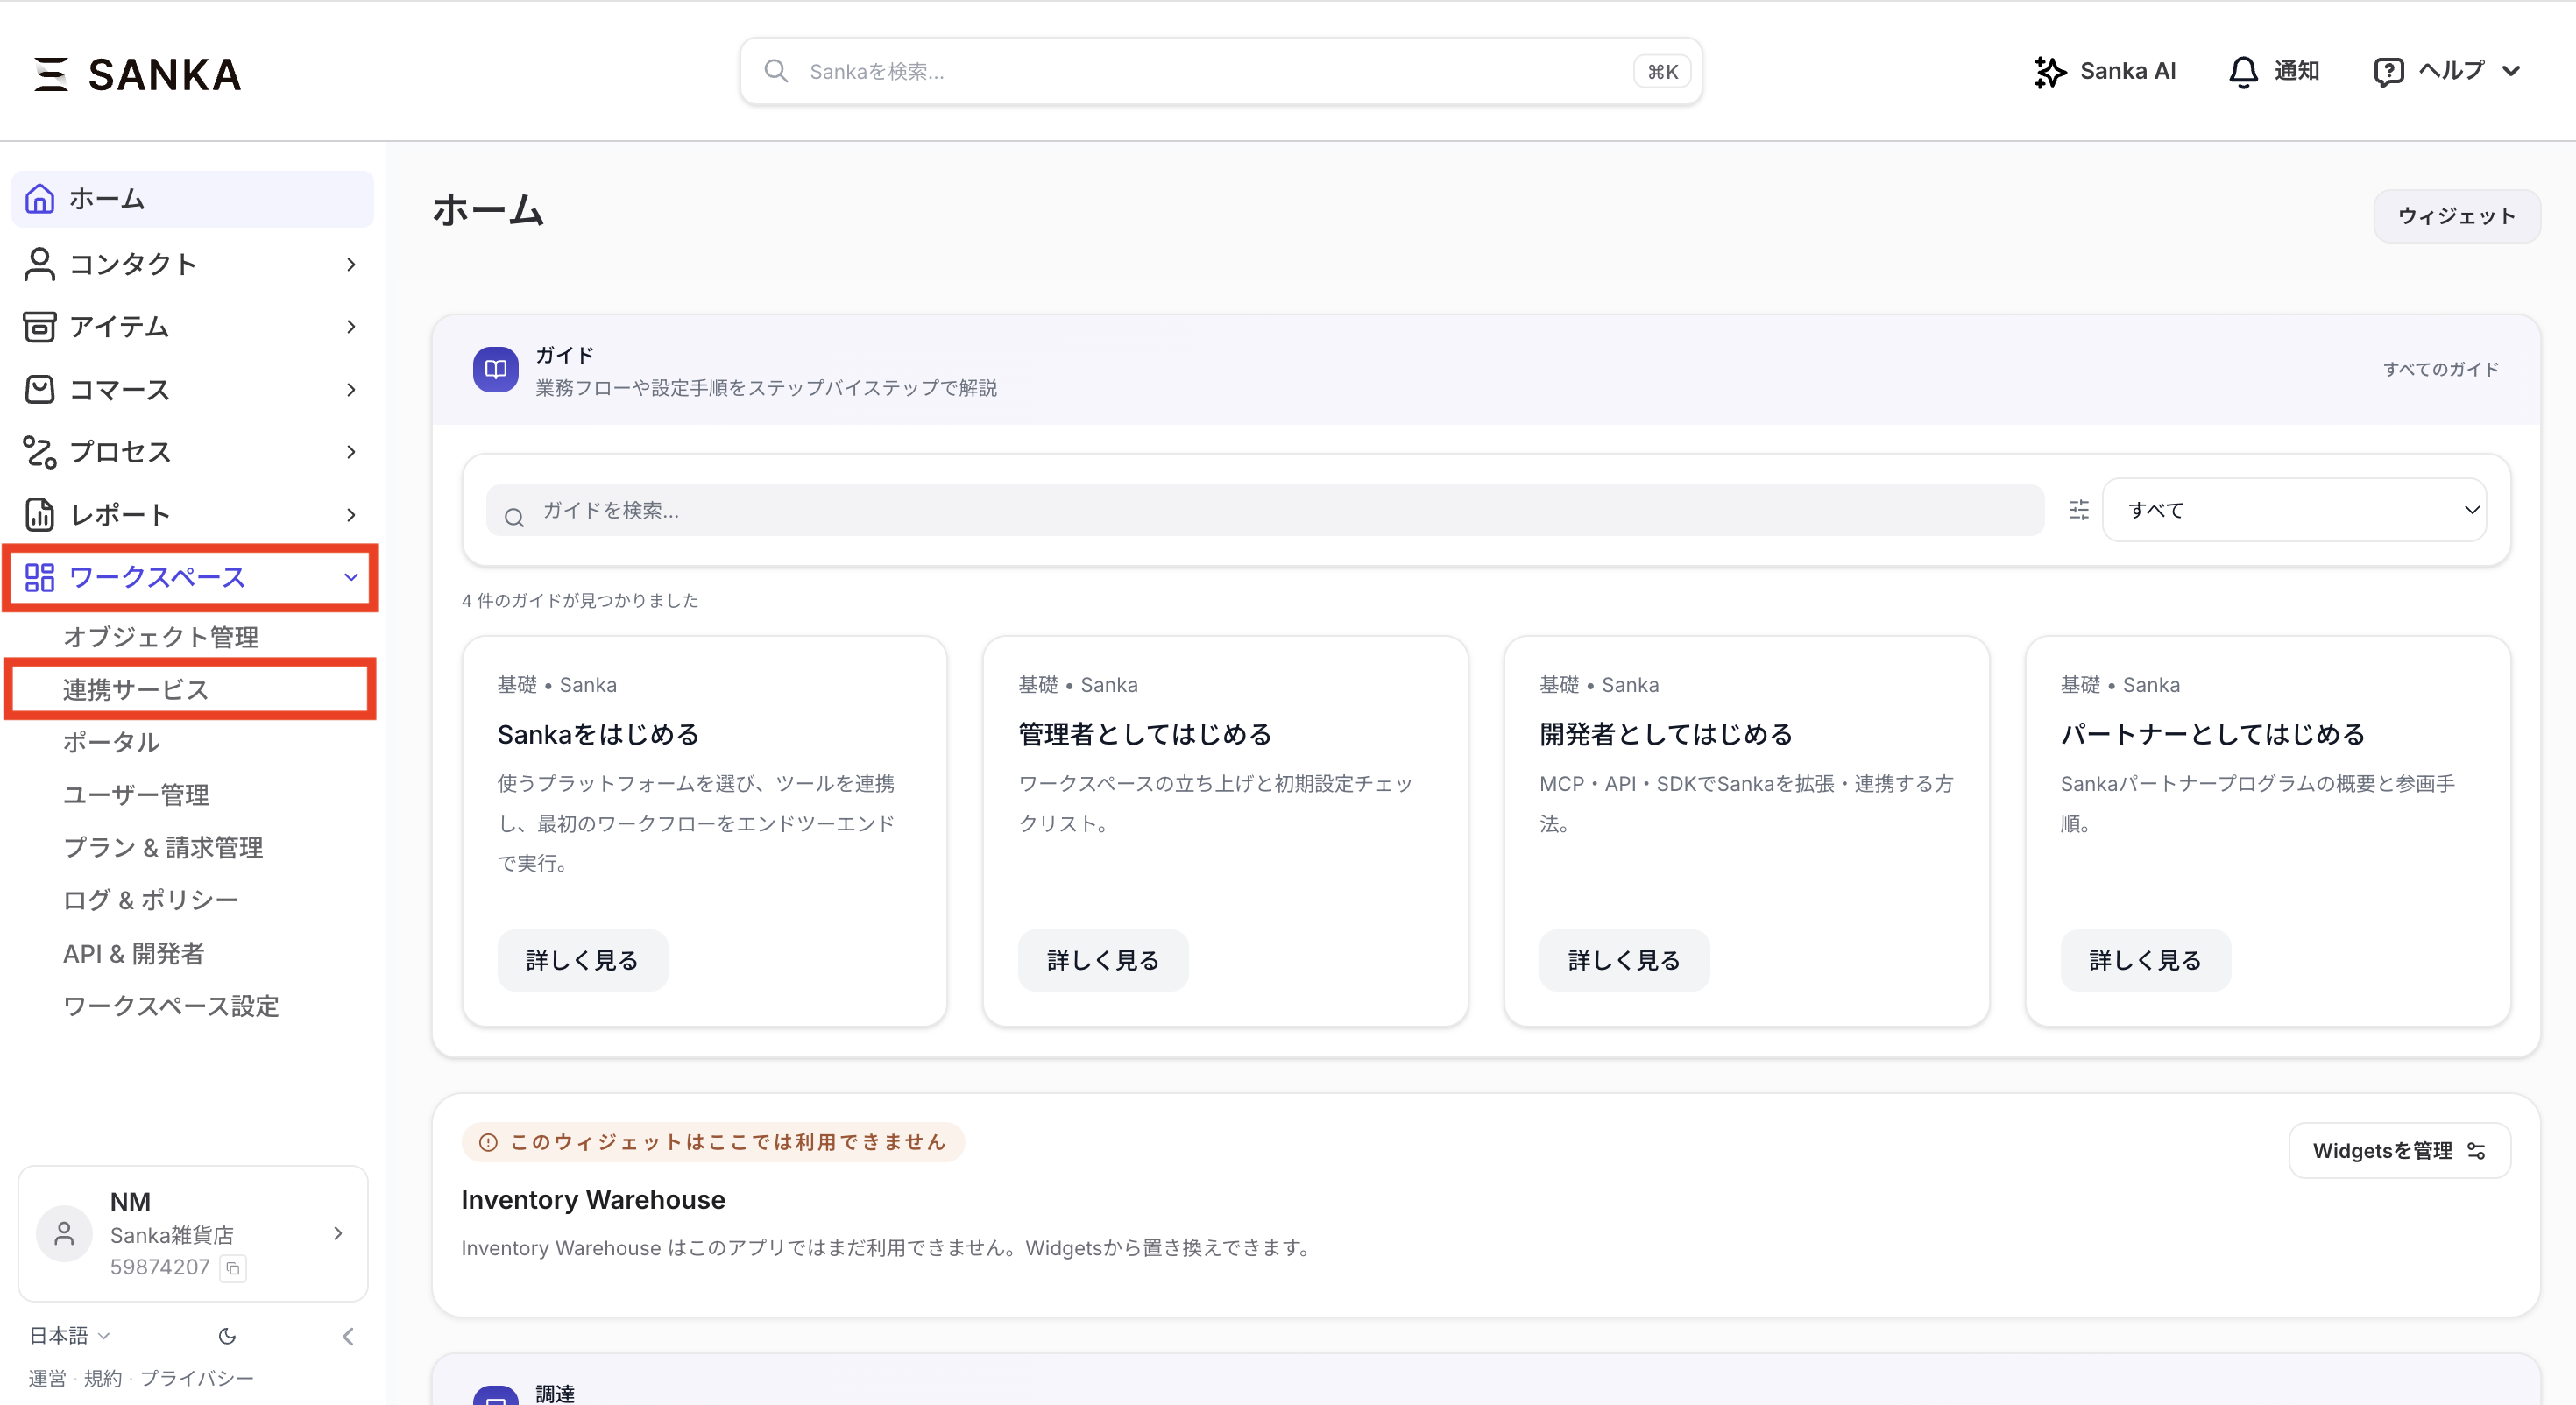 ② Start the integration setup from Create integration or the :heavy_plus_sign: New button.
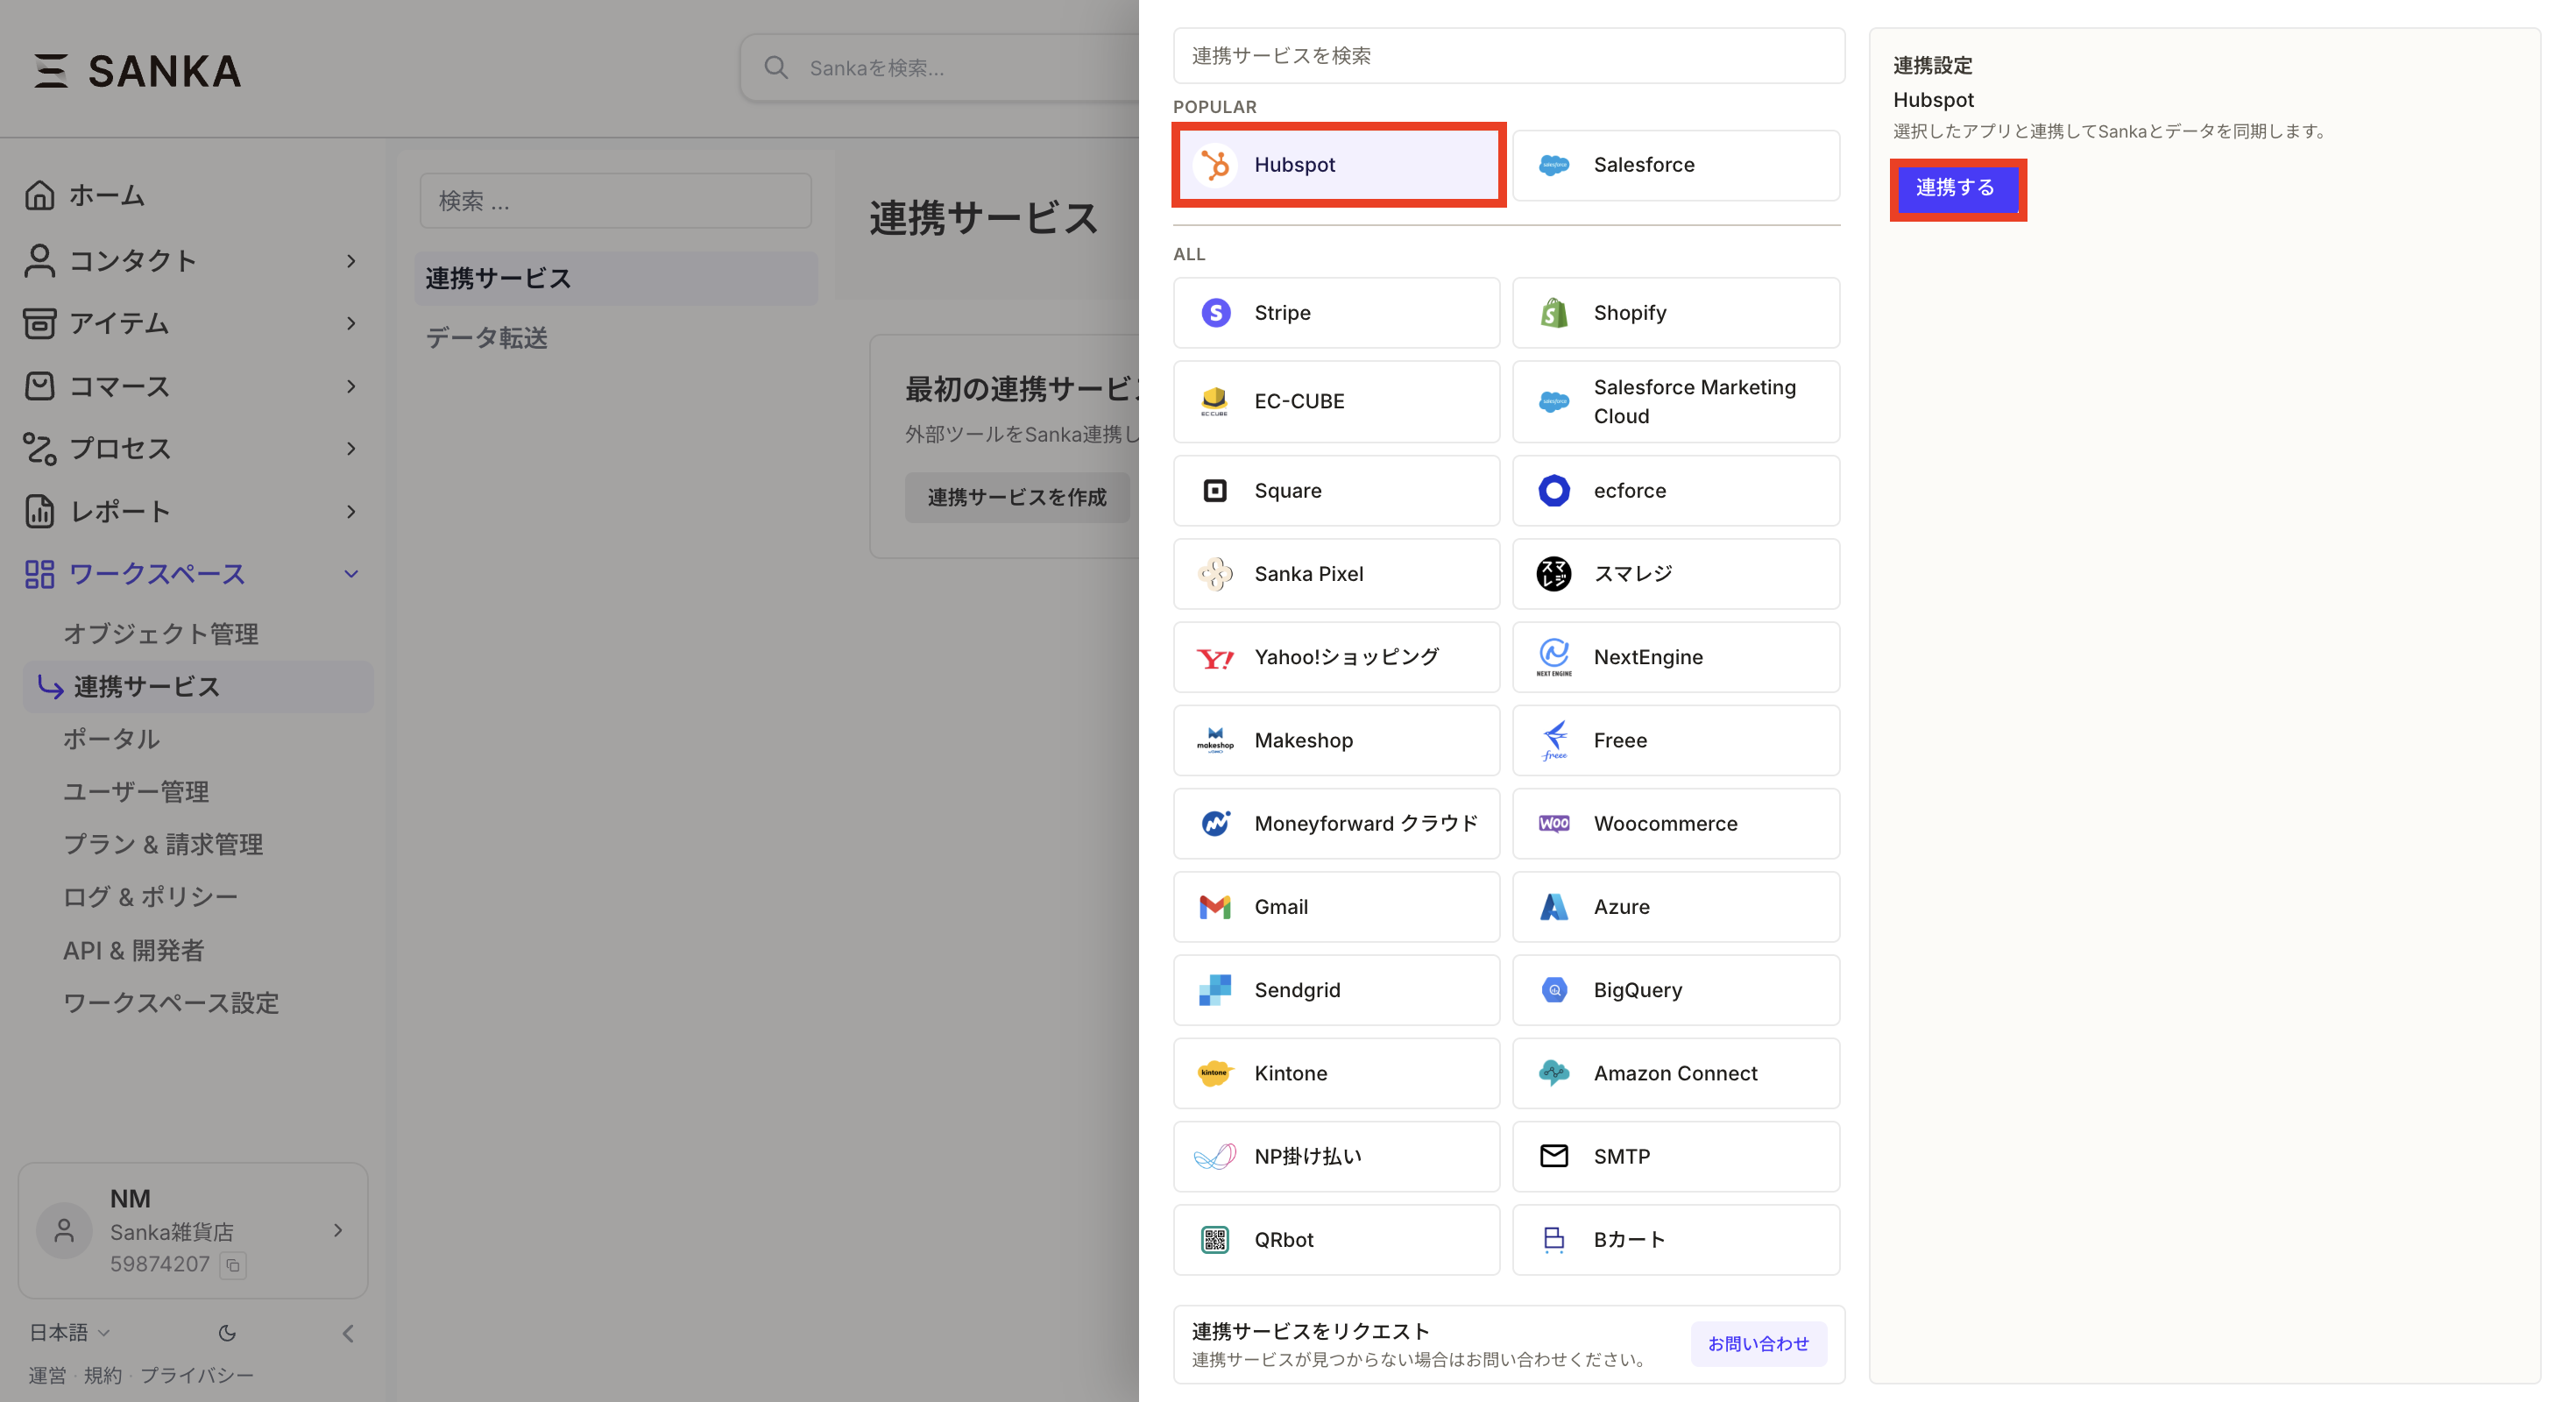
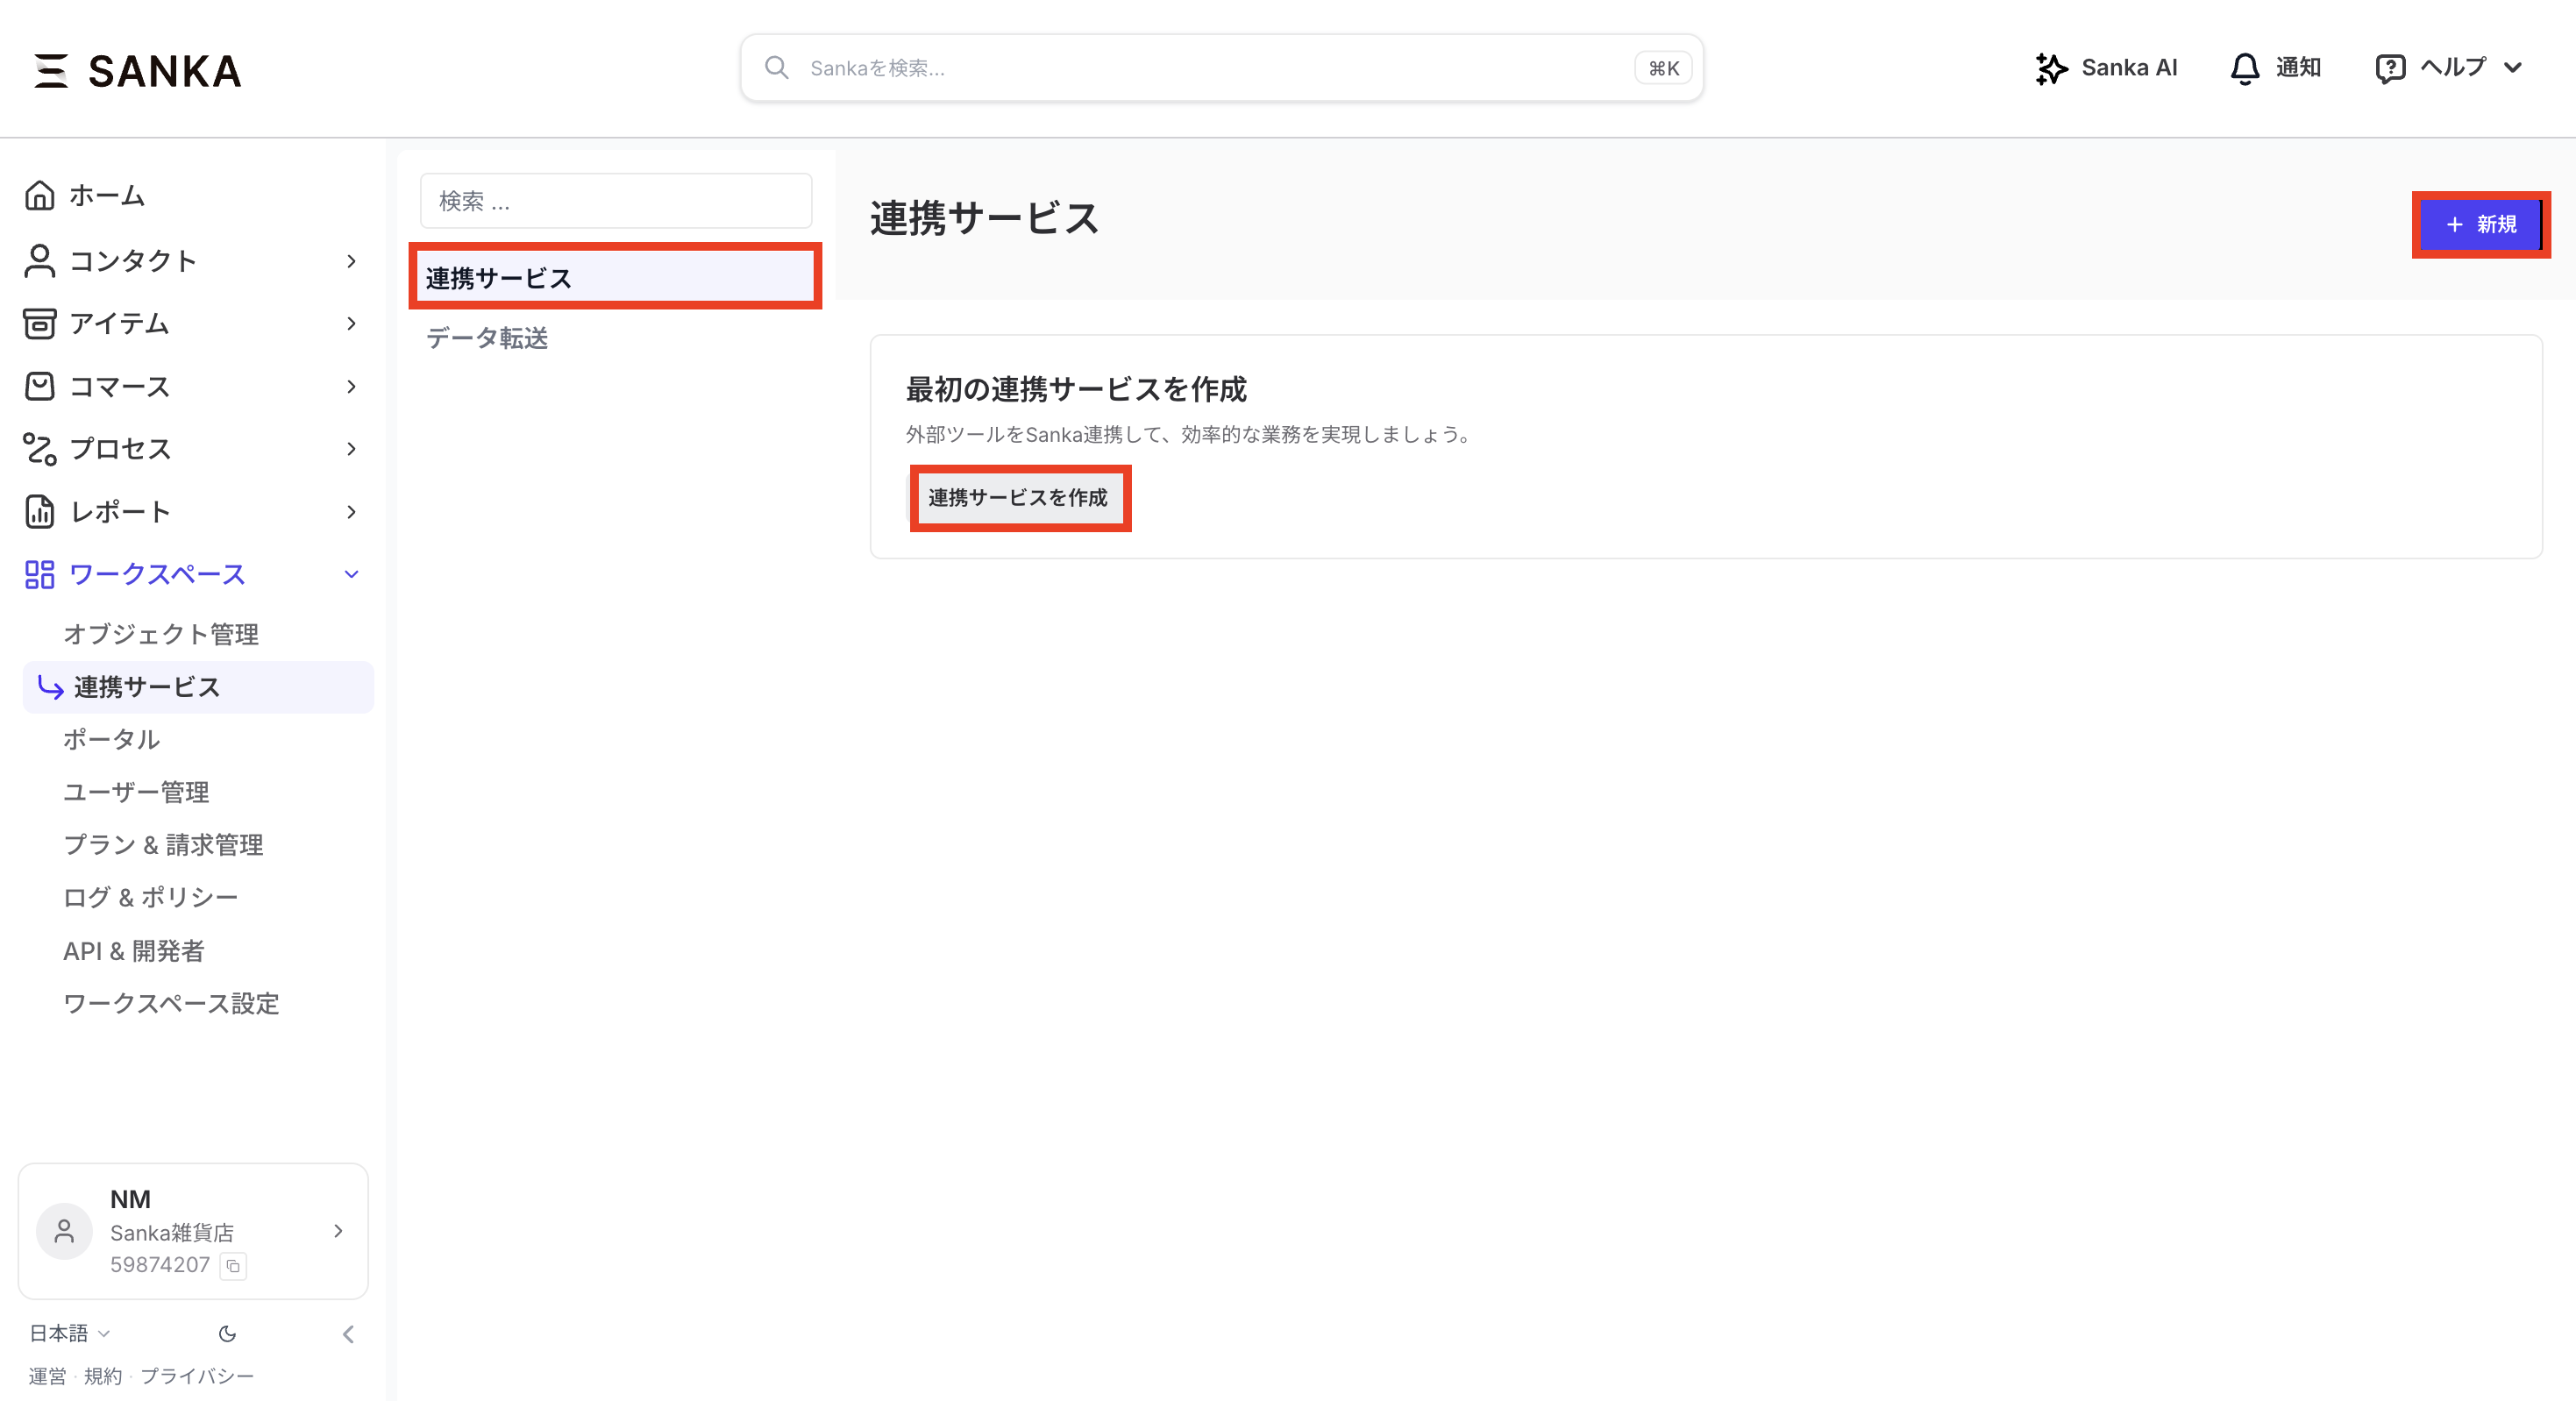 ③ A list of all applications you can connect to Sanka is shown. Select HubSpot and click the Connect button.
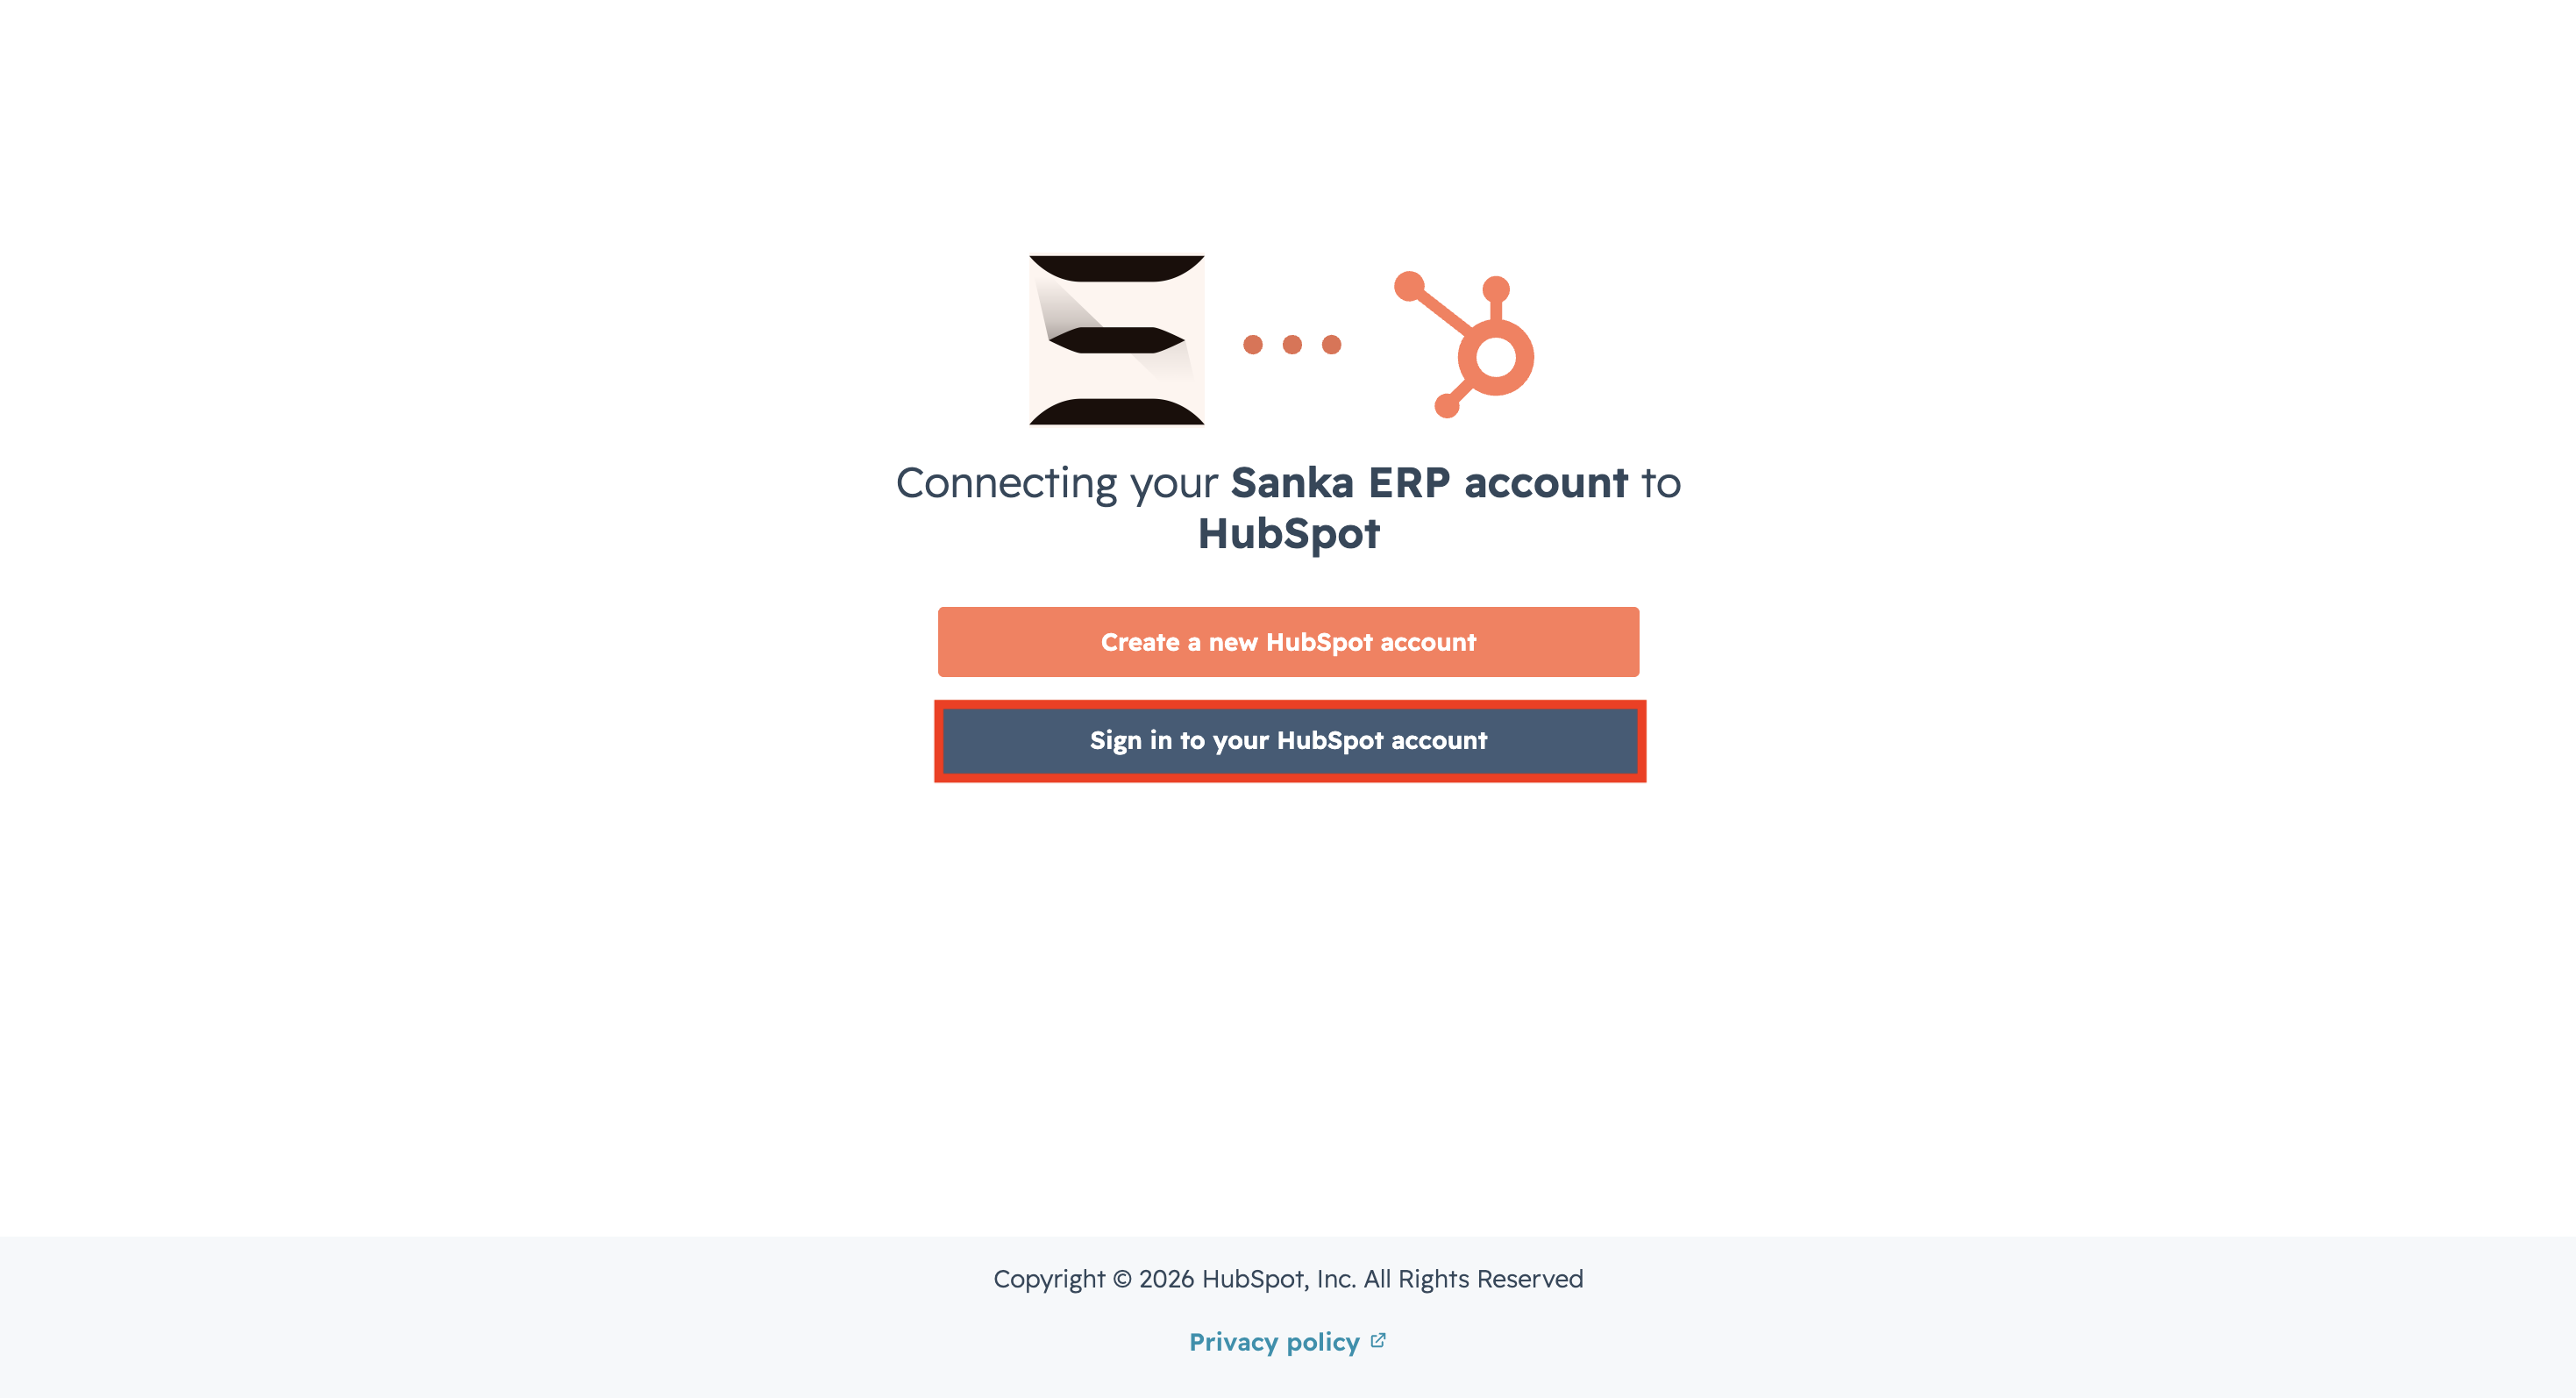
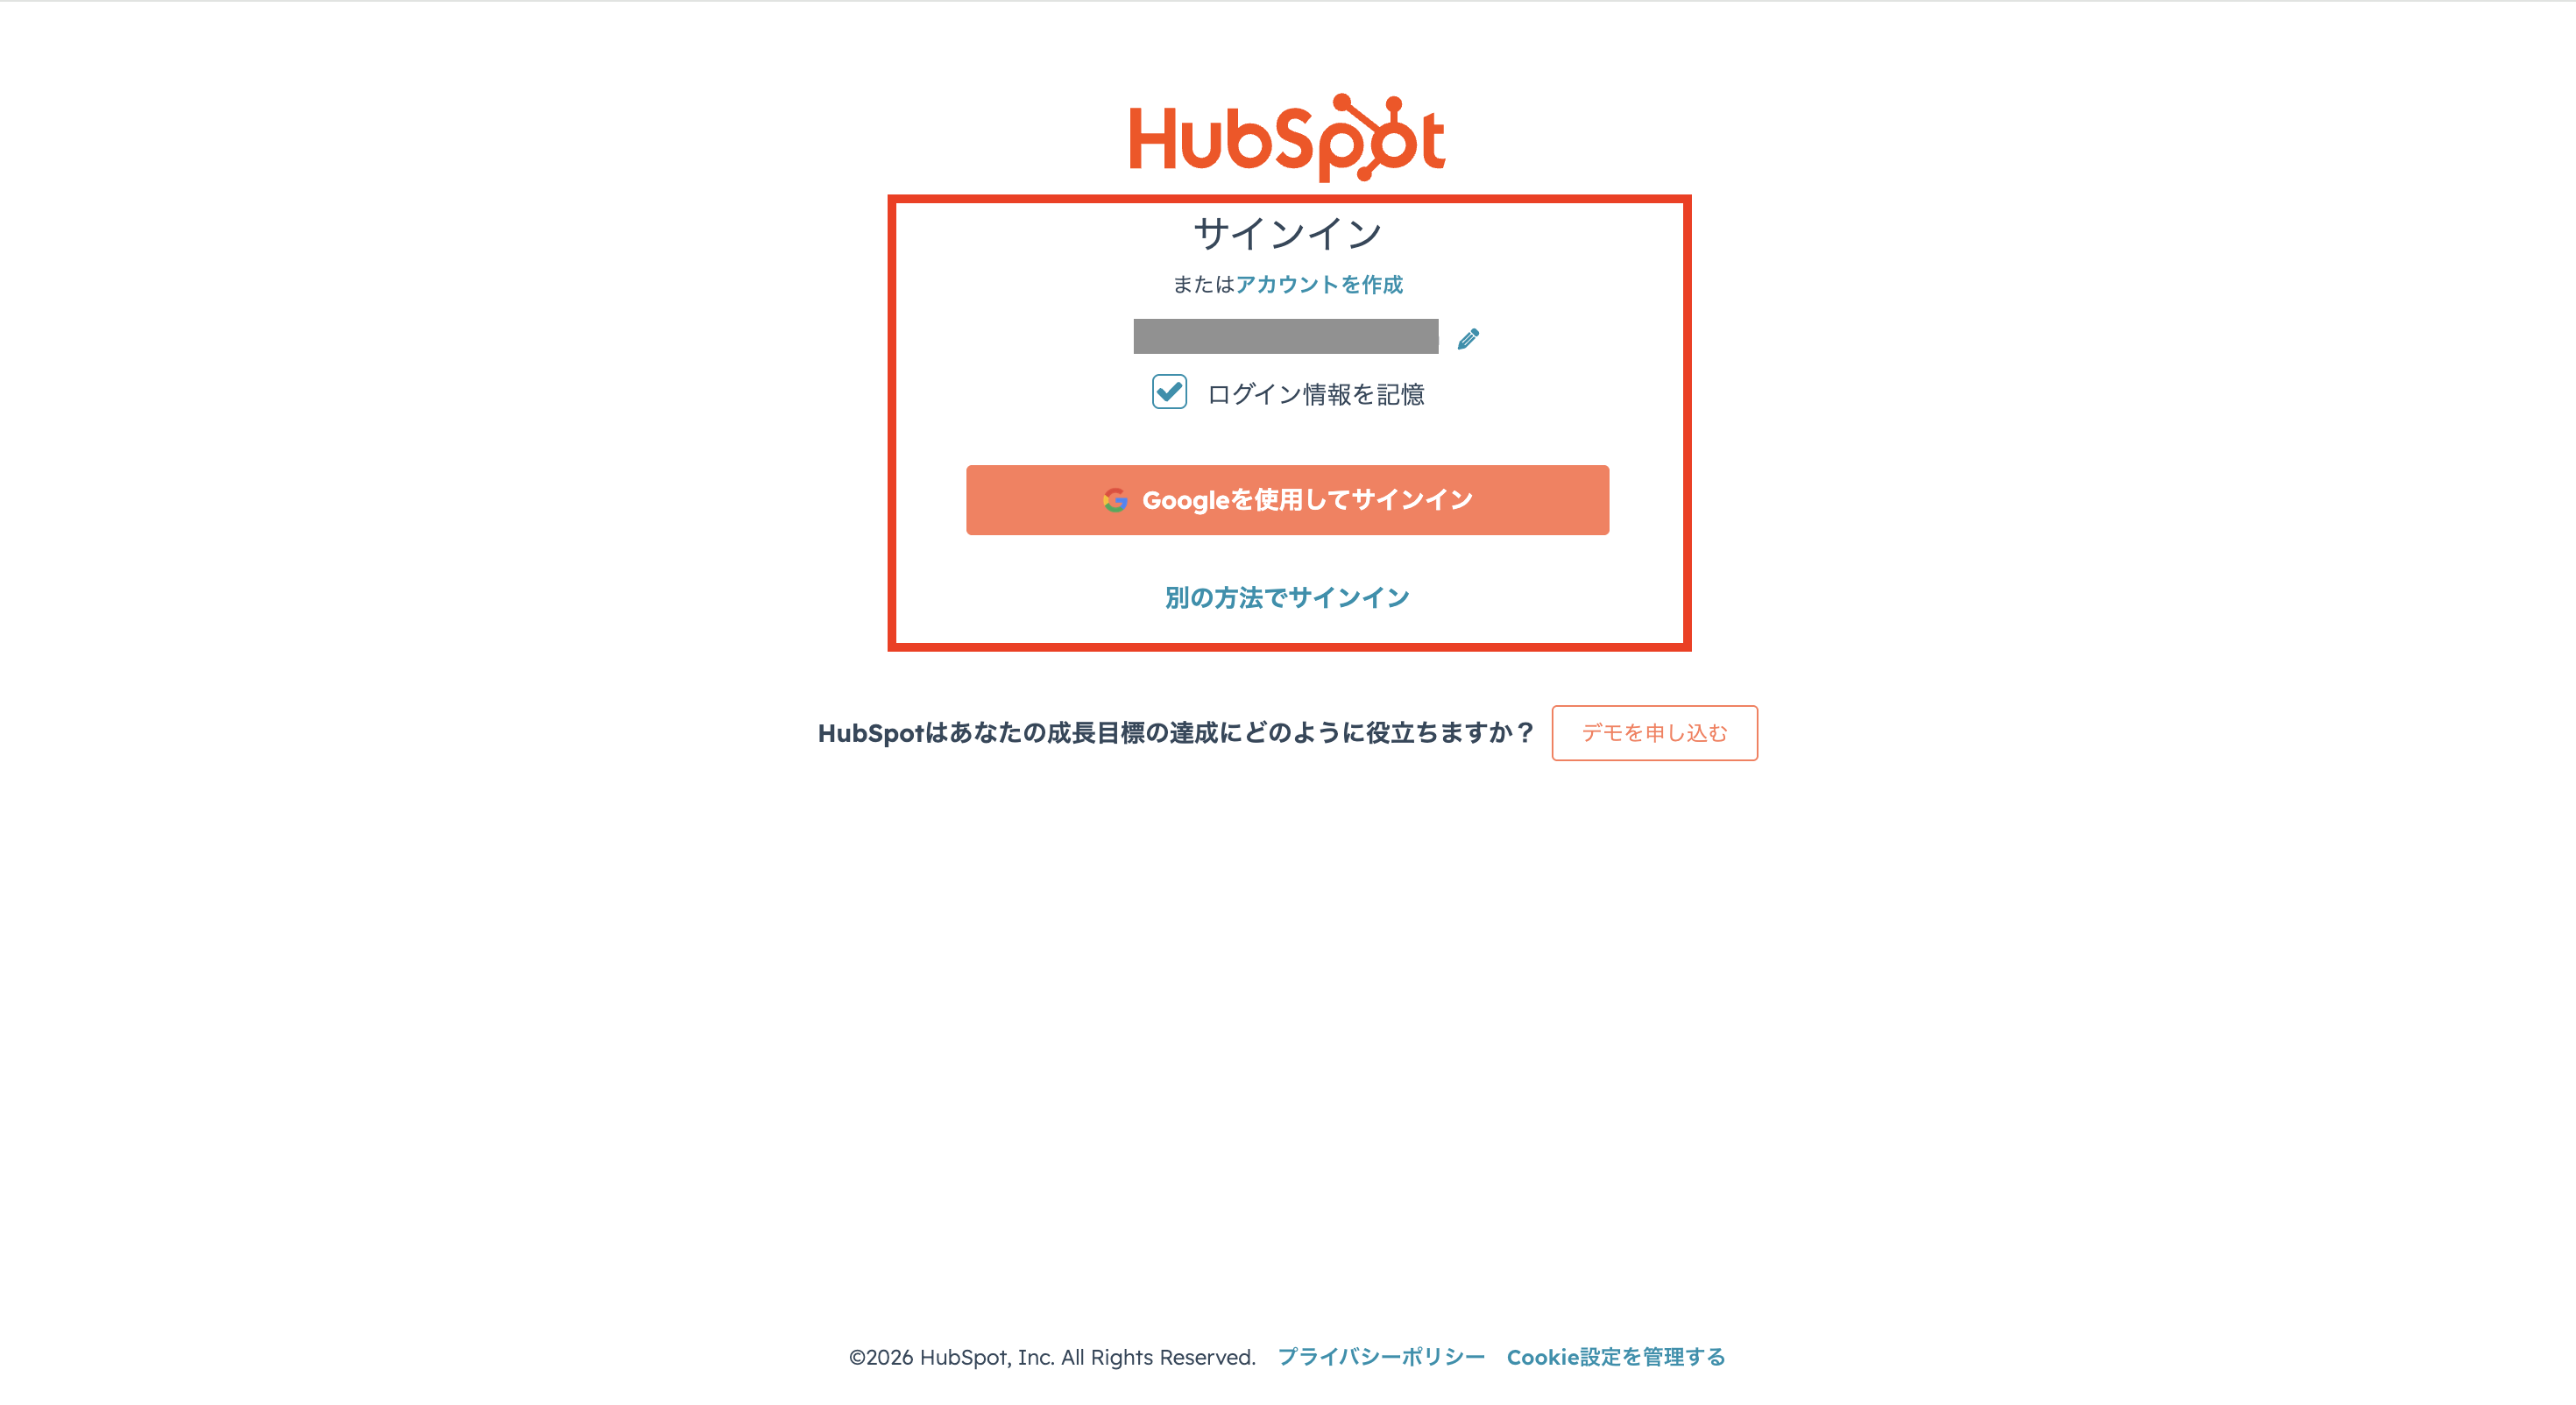
 ④ You will be taken to the HubSpot login screen. Select Sign in to your HubSpot account.
 ⑤ Sign in to HubSpot.
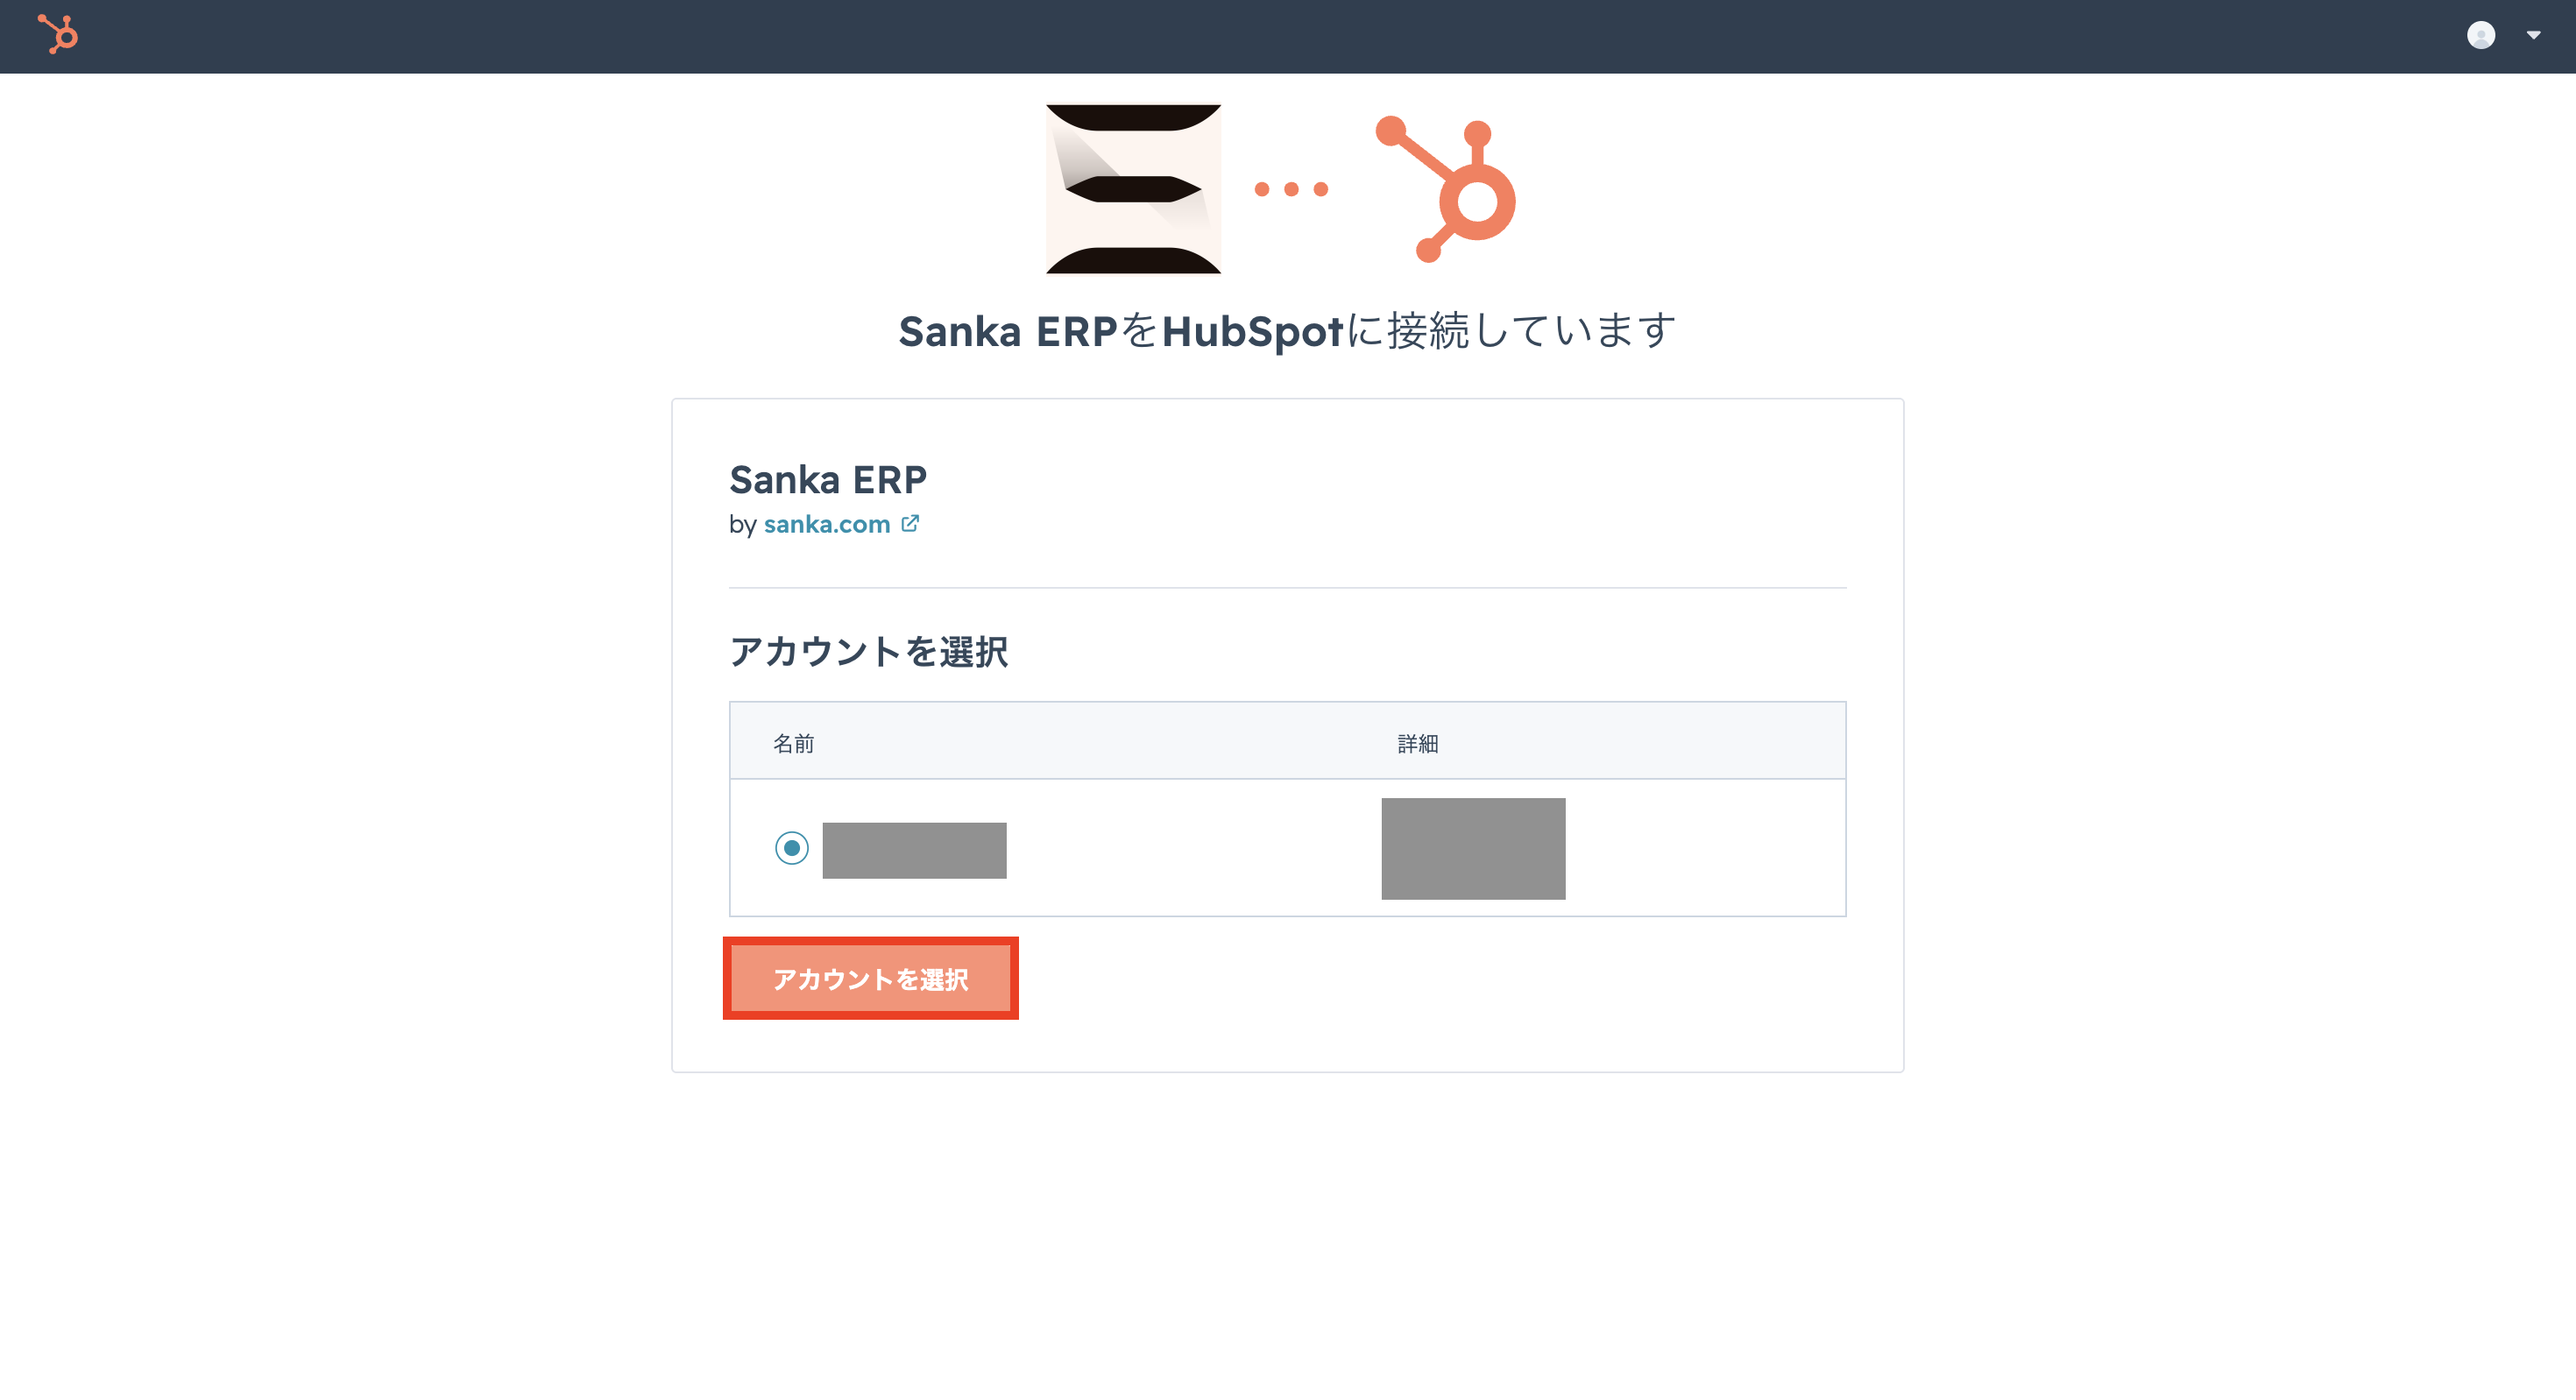
 ⑥ Select your HubSpot account. If you have multiple accounts, pick the one you want to connect.
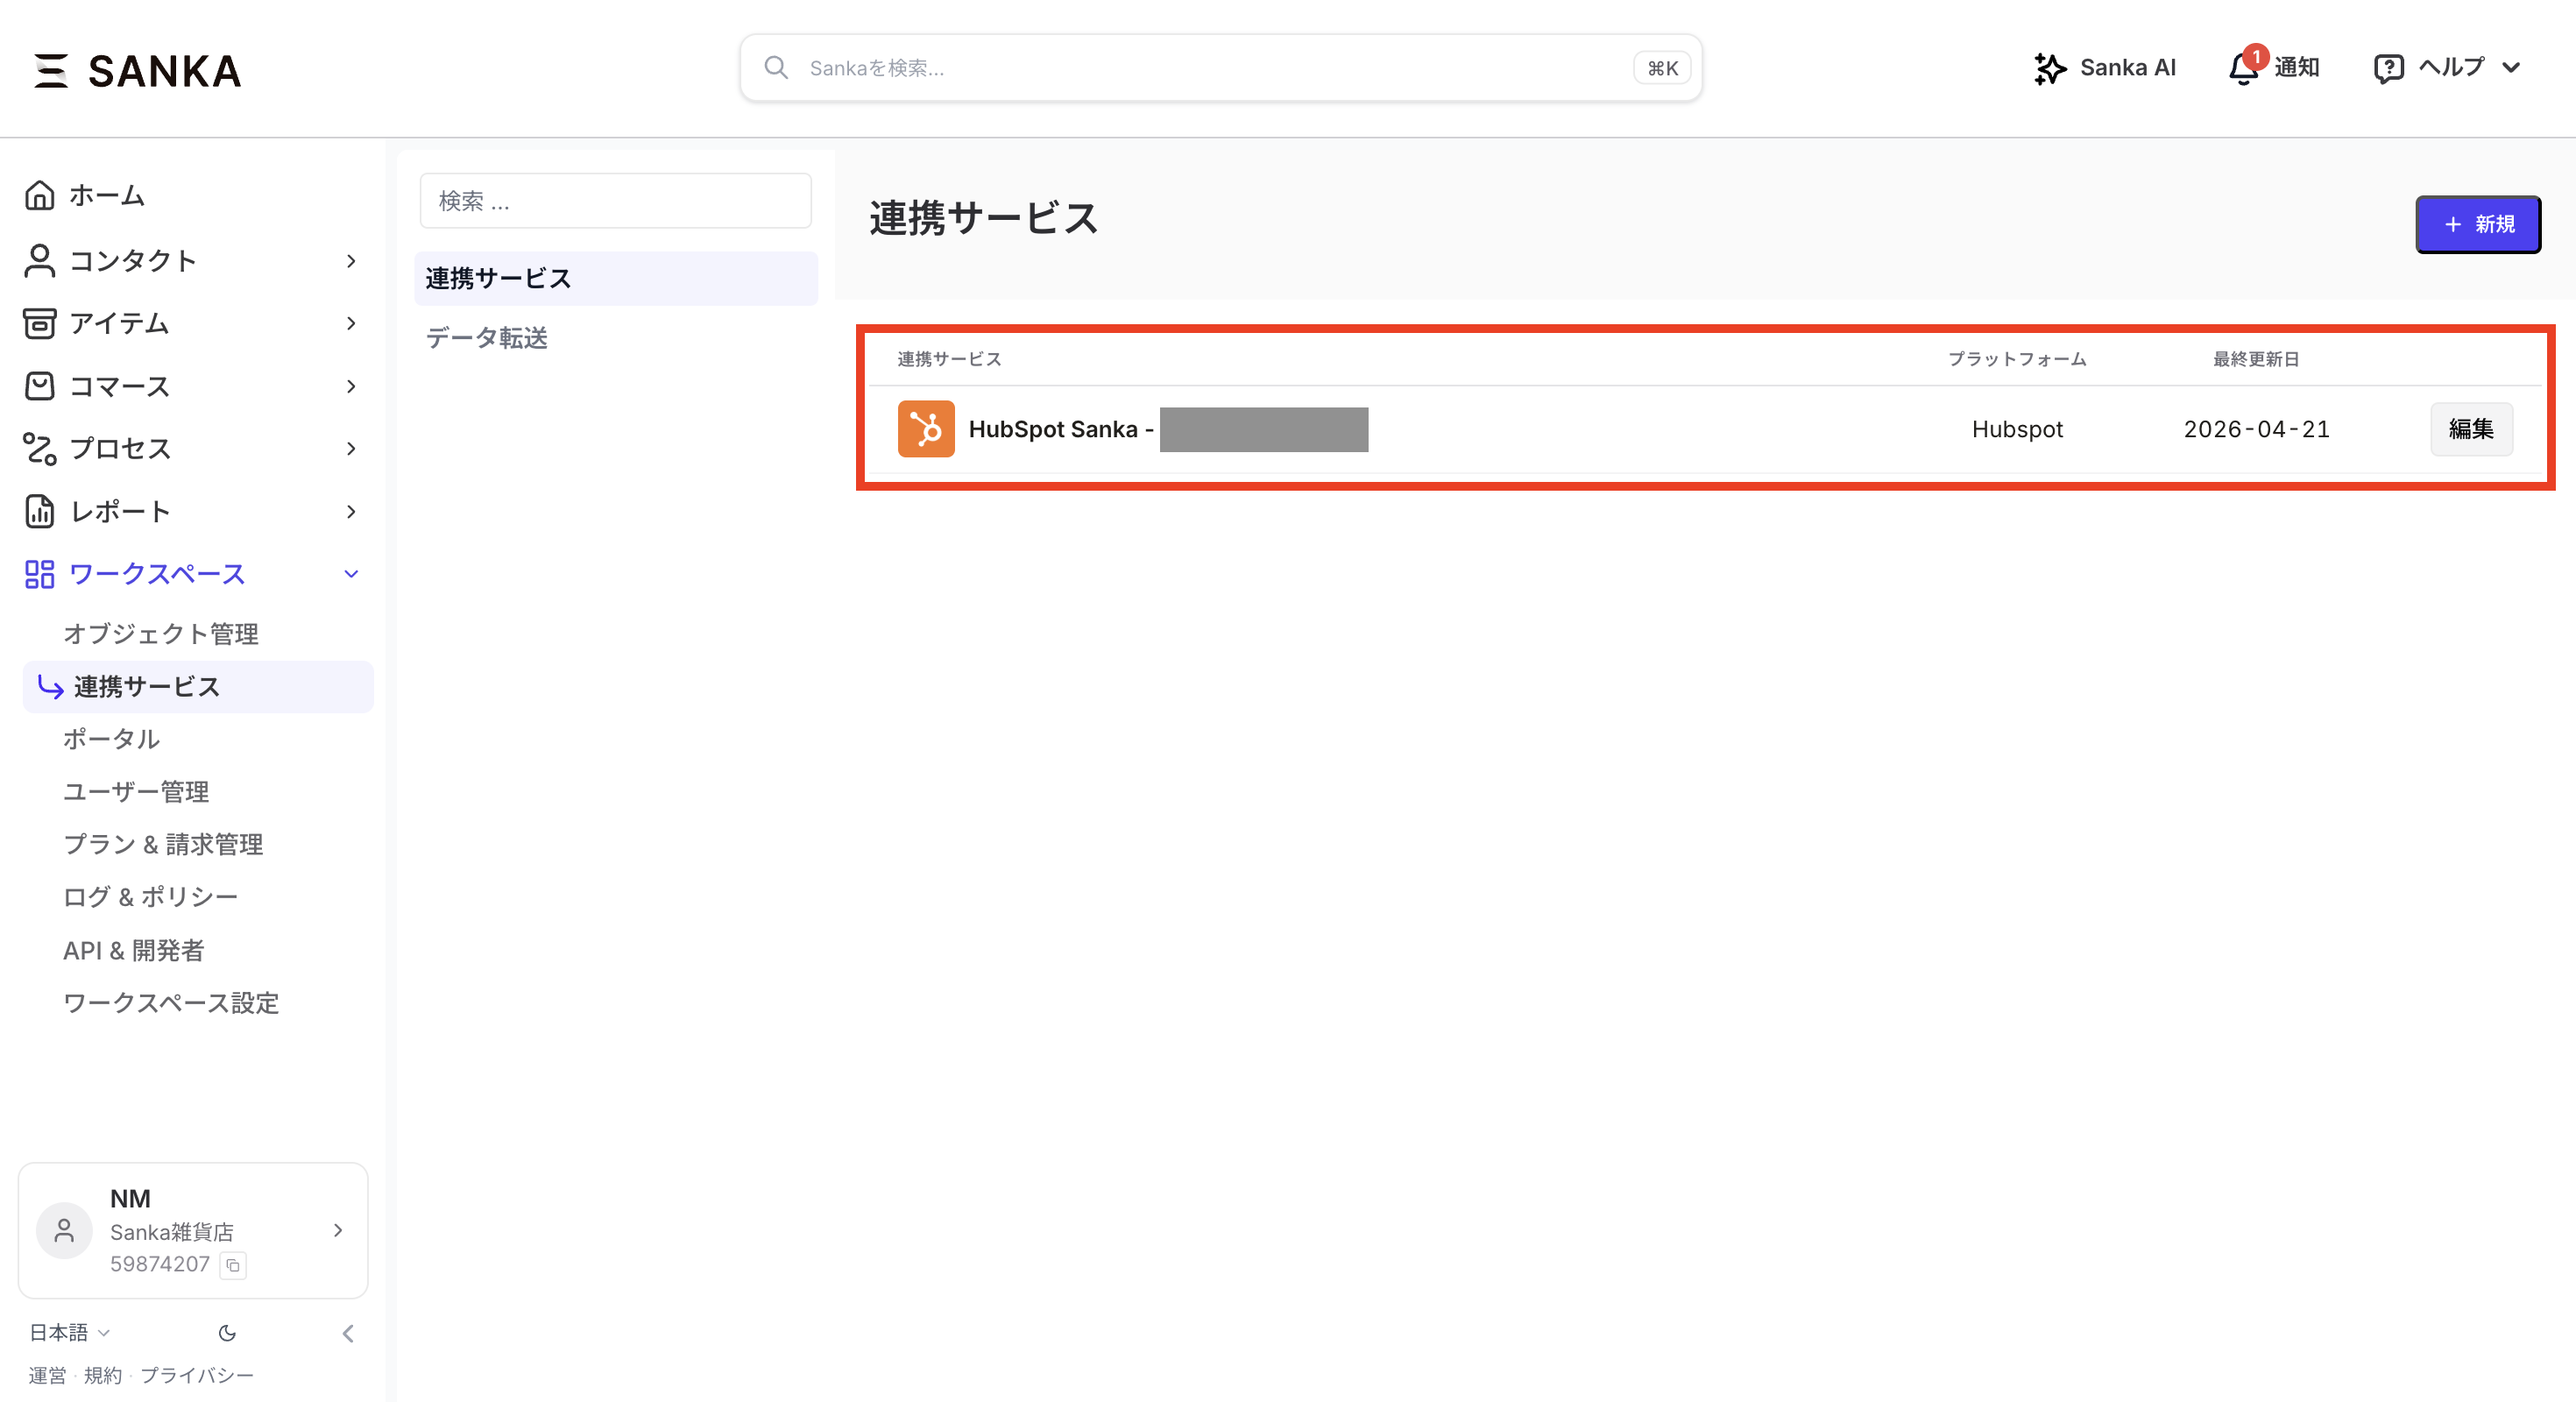
 ⑦ You will be redirected back to the Sanka integrations page. Once HubSpot appears in the integrations list, the connection is complete.
Import data from HubSpot
Once the HubSpot integration is complete, you can bring HubSpot deals into Sanka as orders and flow them into billing, subscriptions, and other back-office workflows. For the full walkthrough, see How to import HubSpot data into Sanka.Connect HubSpot deals to quoting and CPQ
After connecting HubSpot, see HubSpot deals to quoting and CPQ if you want to create quotes, route approvals, convert orders, and continue into billing from HubSpot deals.How to open Sanka from inside HubSpot
For teams who find it tedious to switch back and forth between HubSpot and Sanka, here's how to open Sanka from inside HubSpot. This assumes you've already completed the HubSpot integration described earlier in this article.-
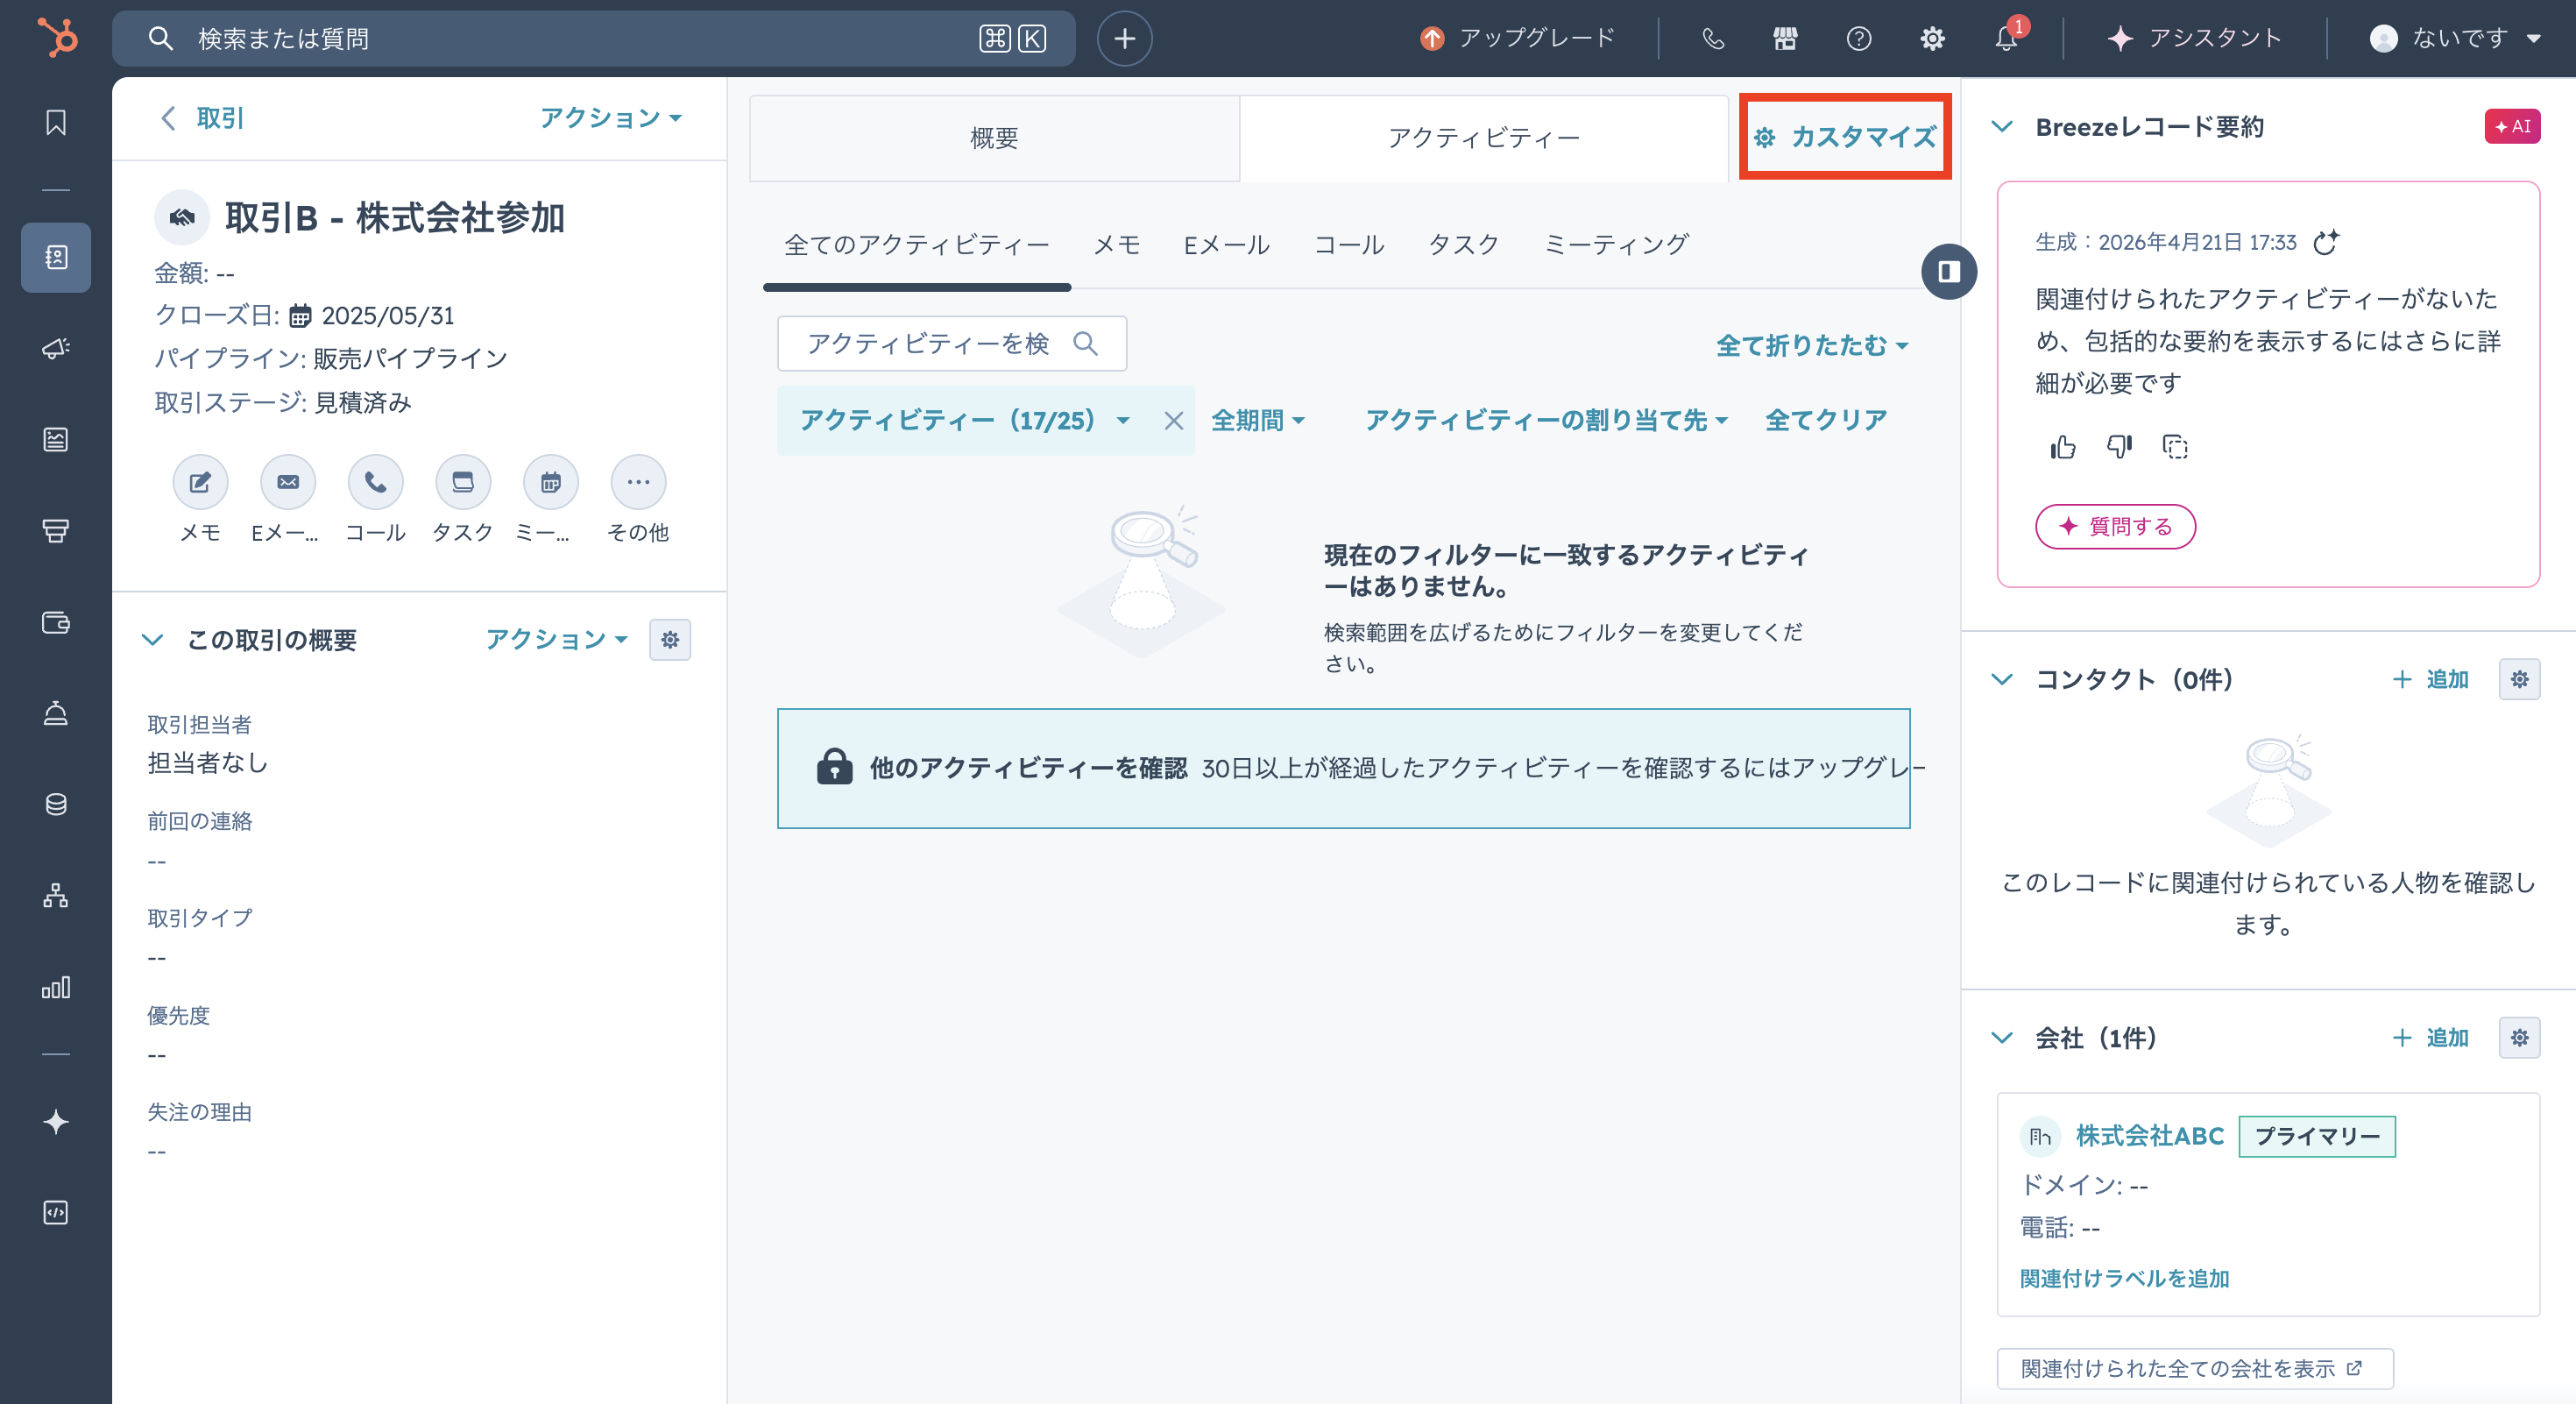
Open any Deal, Company, or Contact record in HubSpot. Click Customize at the top center.
-
Select the view you want to add Sanka to.
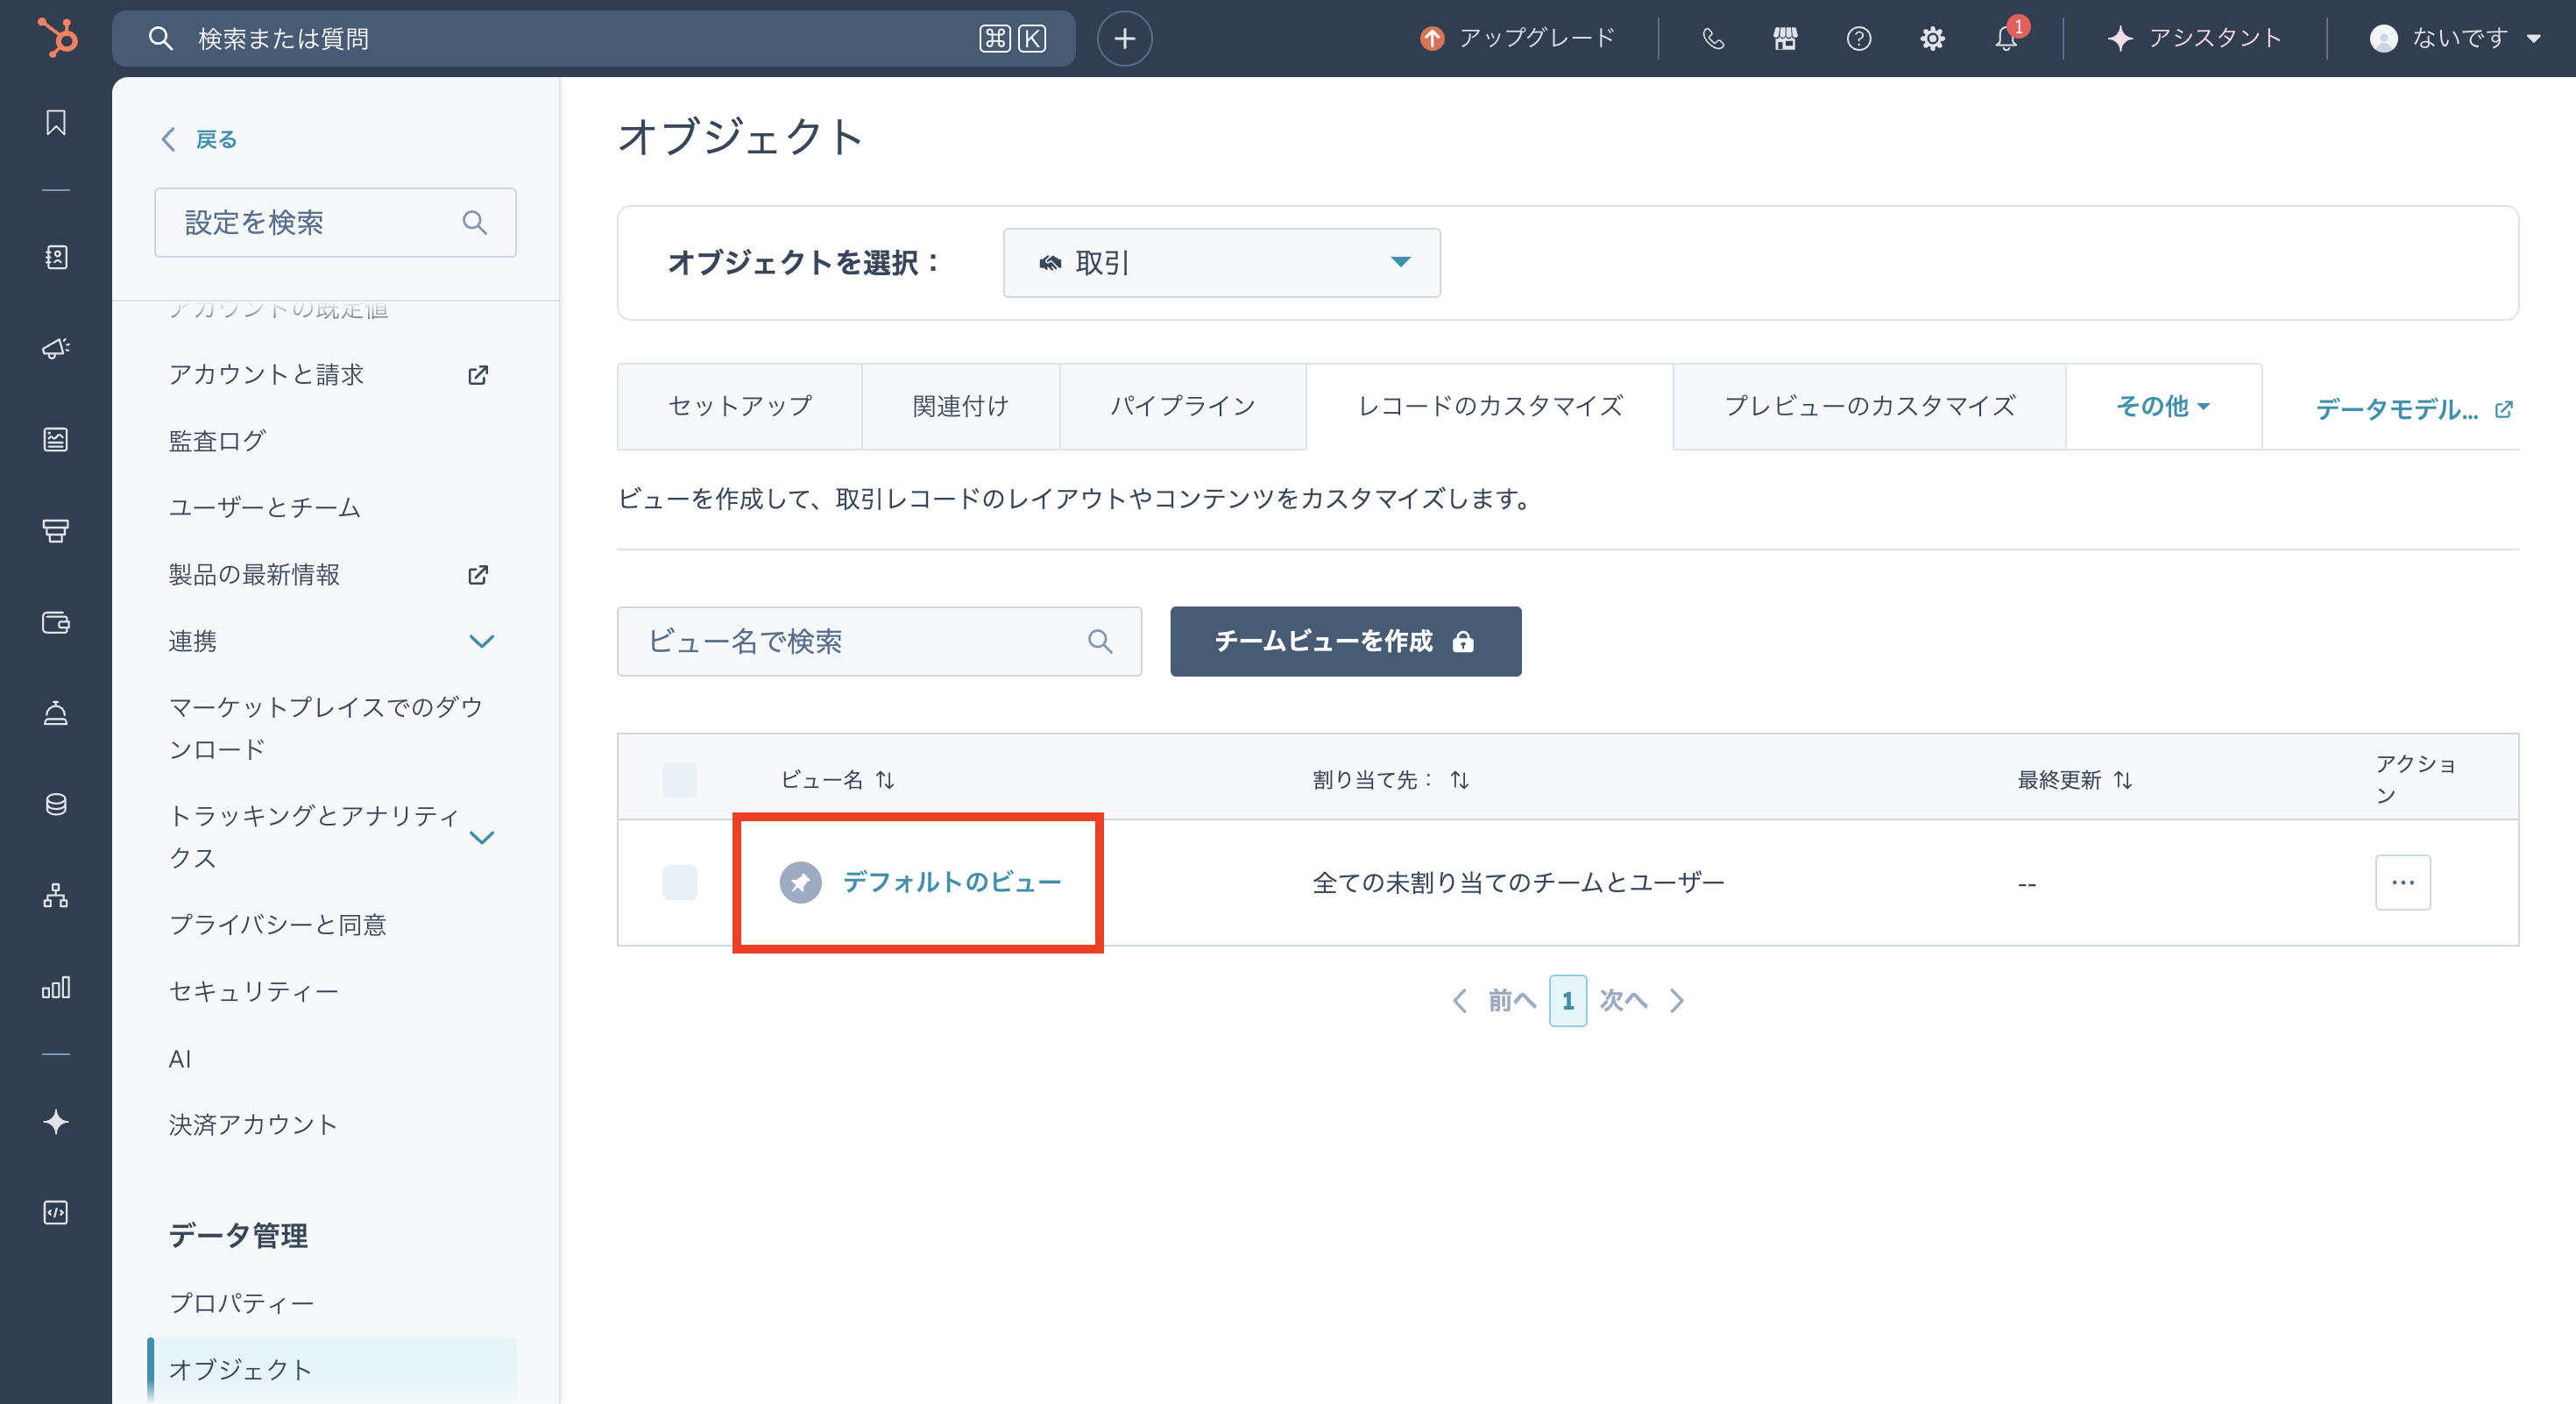
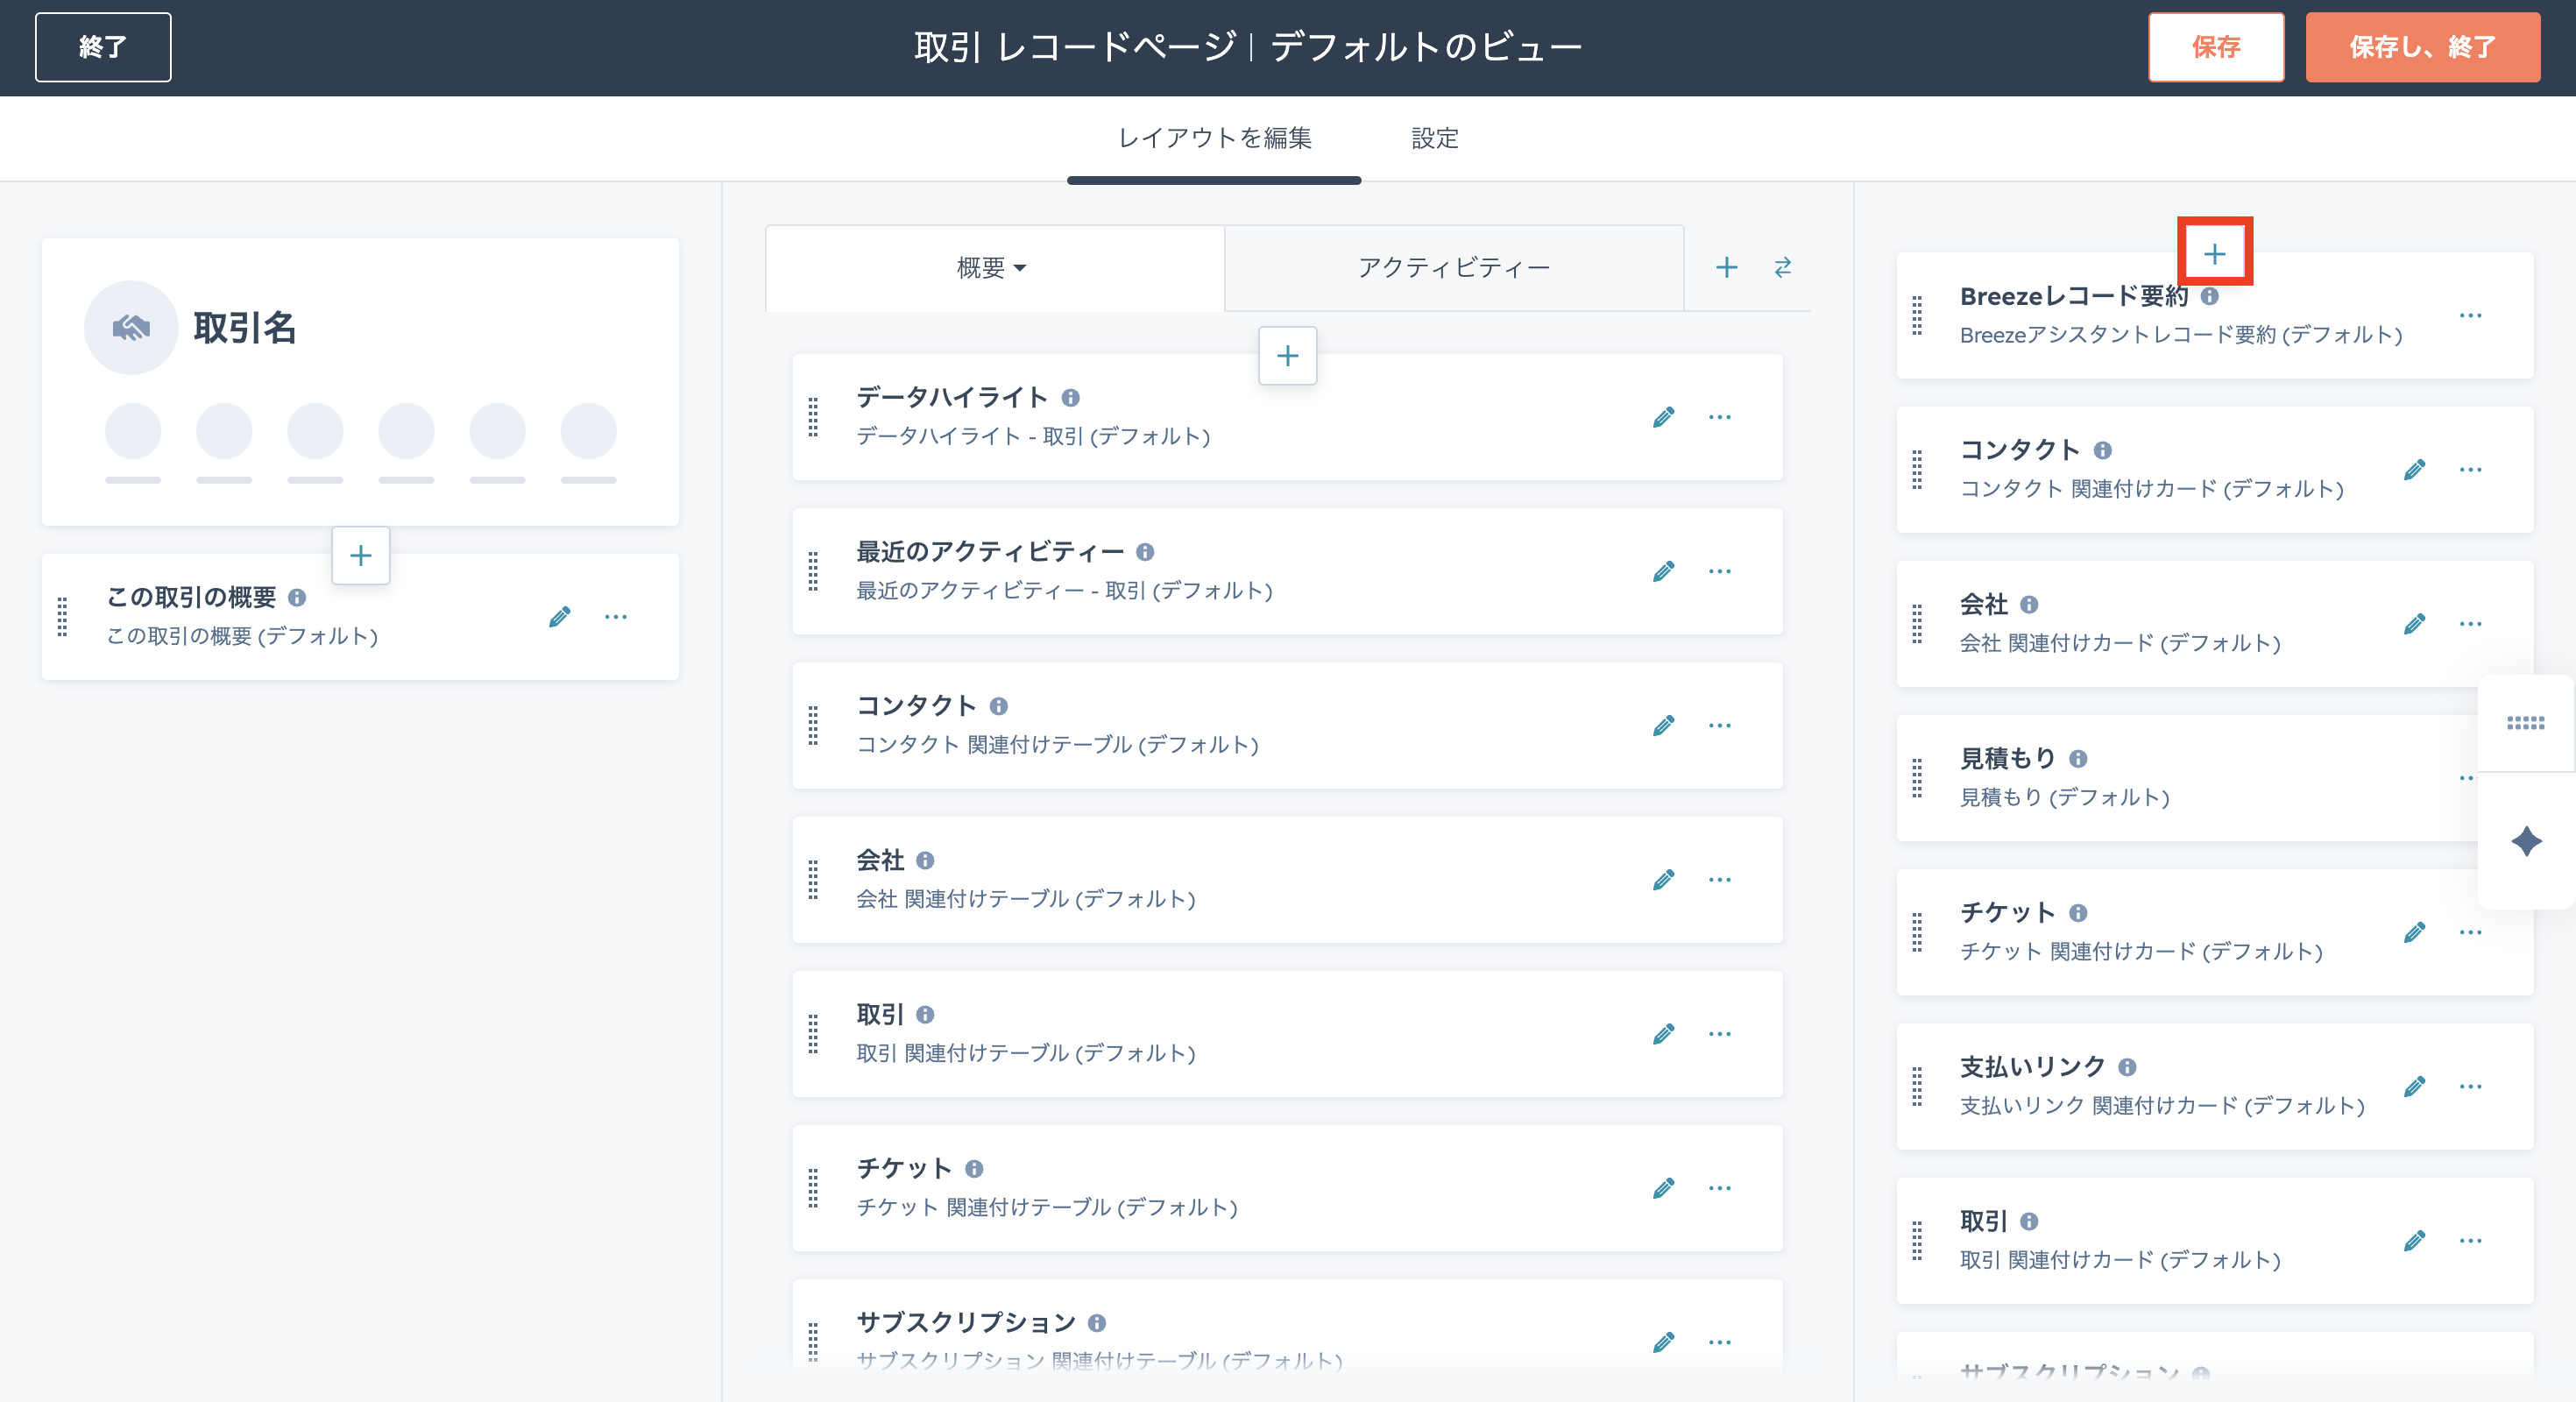
- Click the plus button on the middle or right column of the layout, whichever you want to add Sanka to. In this example we add it to the right column.
-
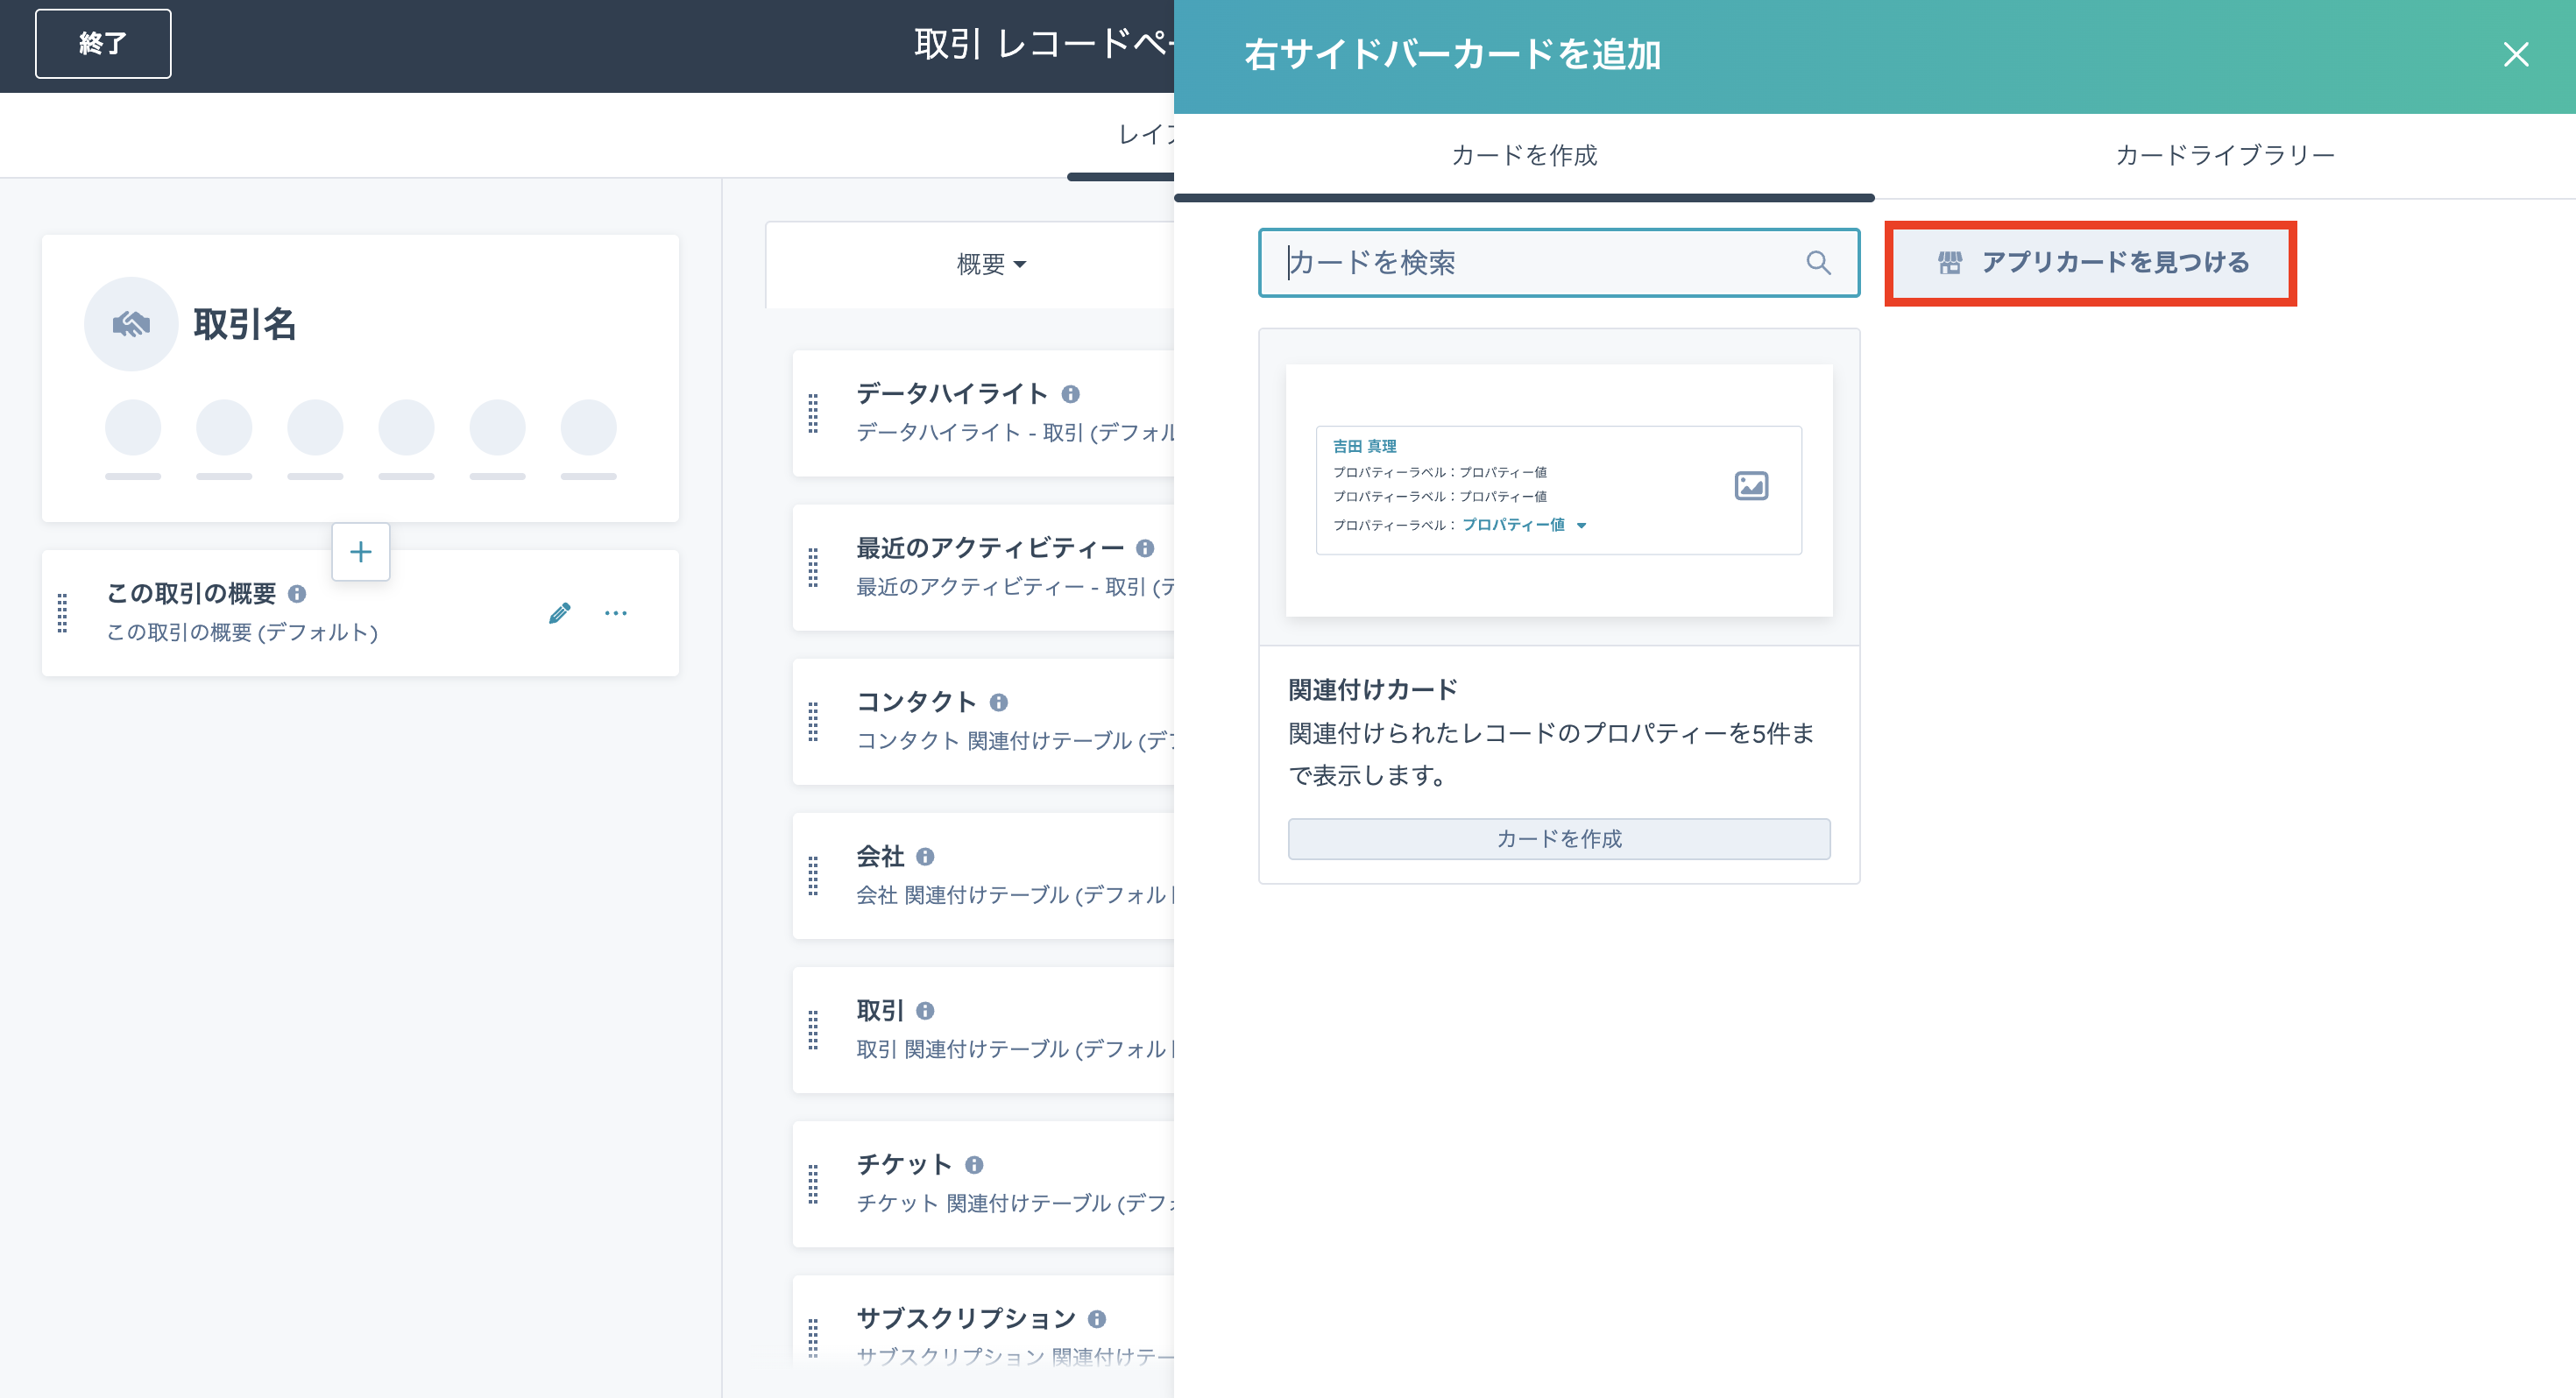
On the Create card screen, click Find app cards.
-
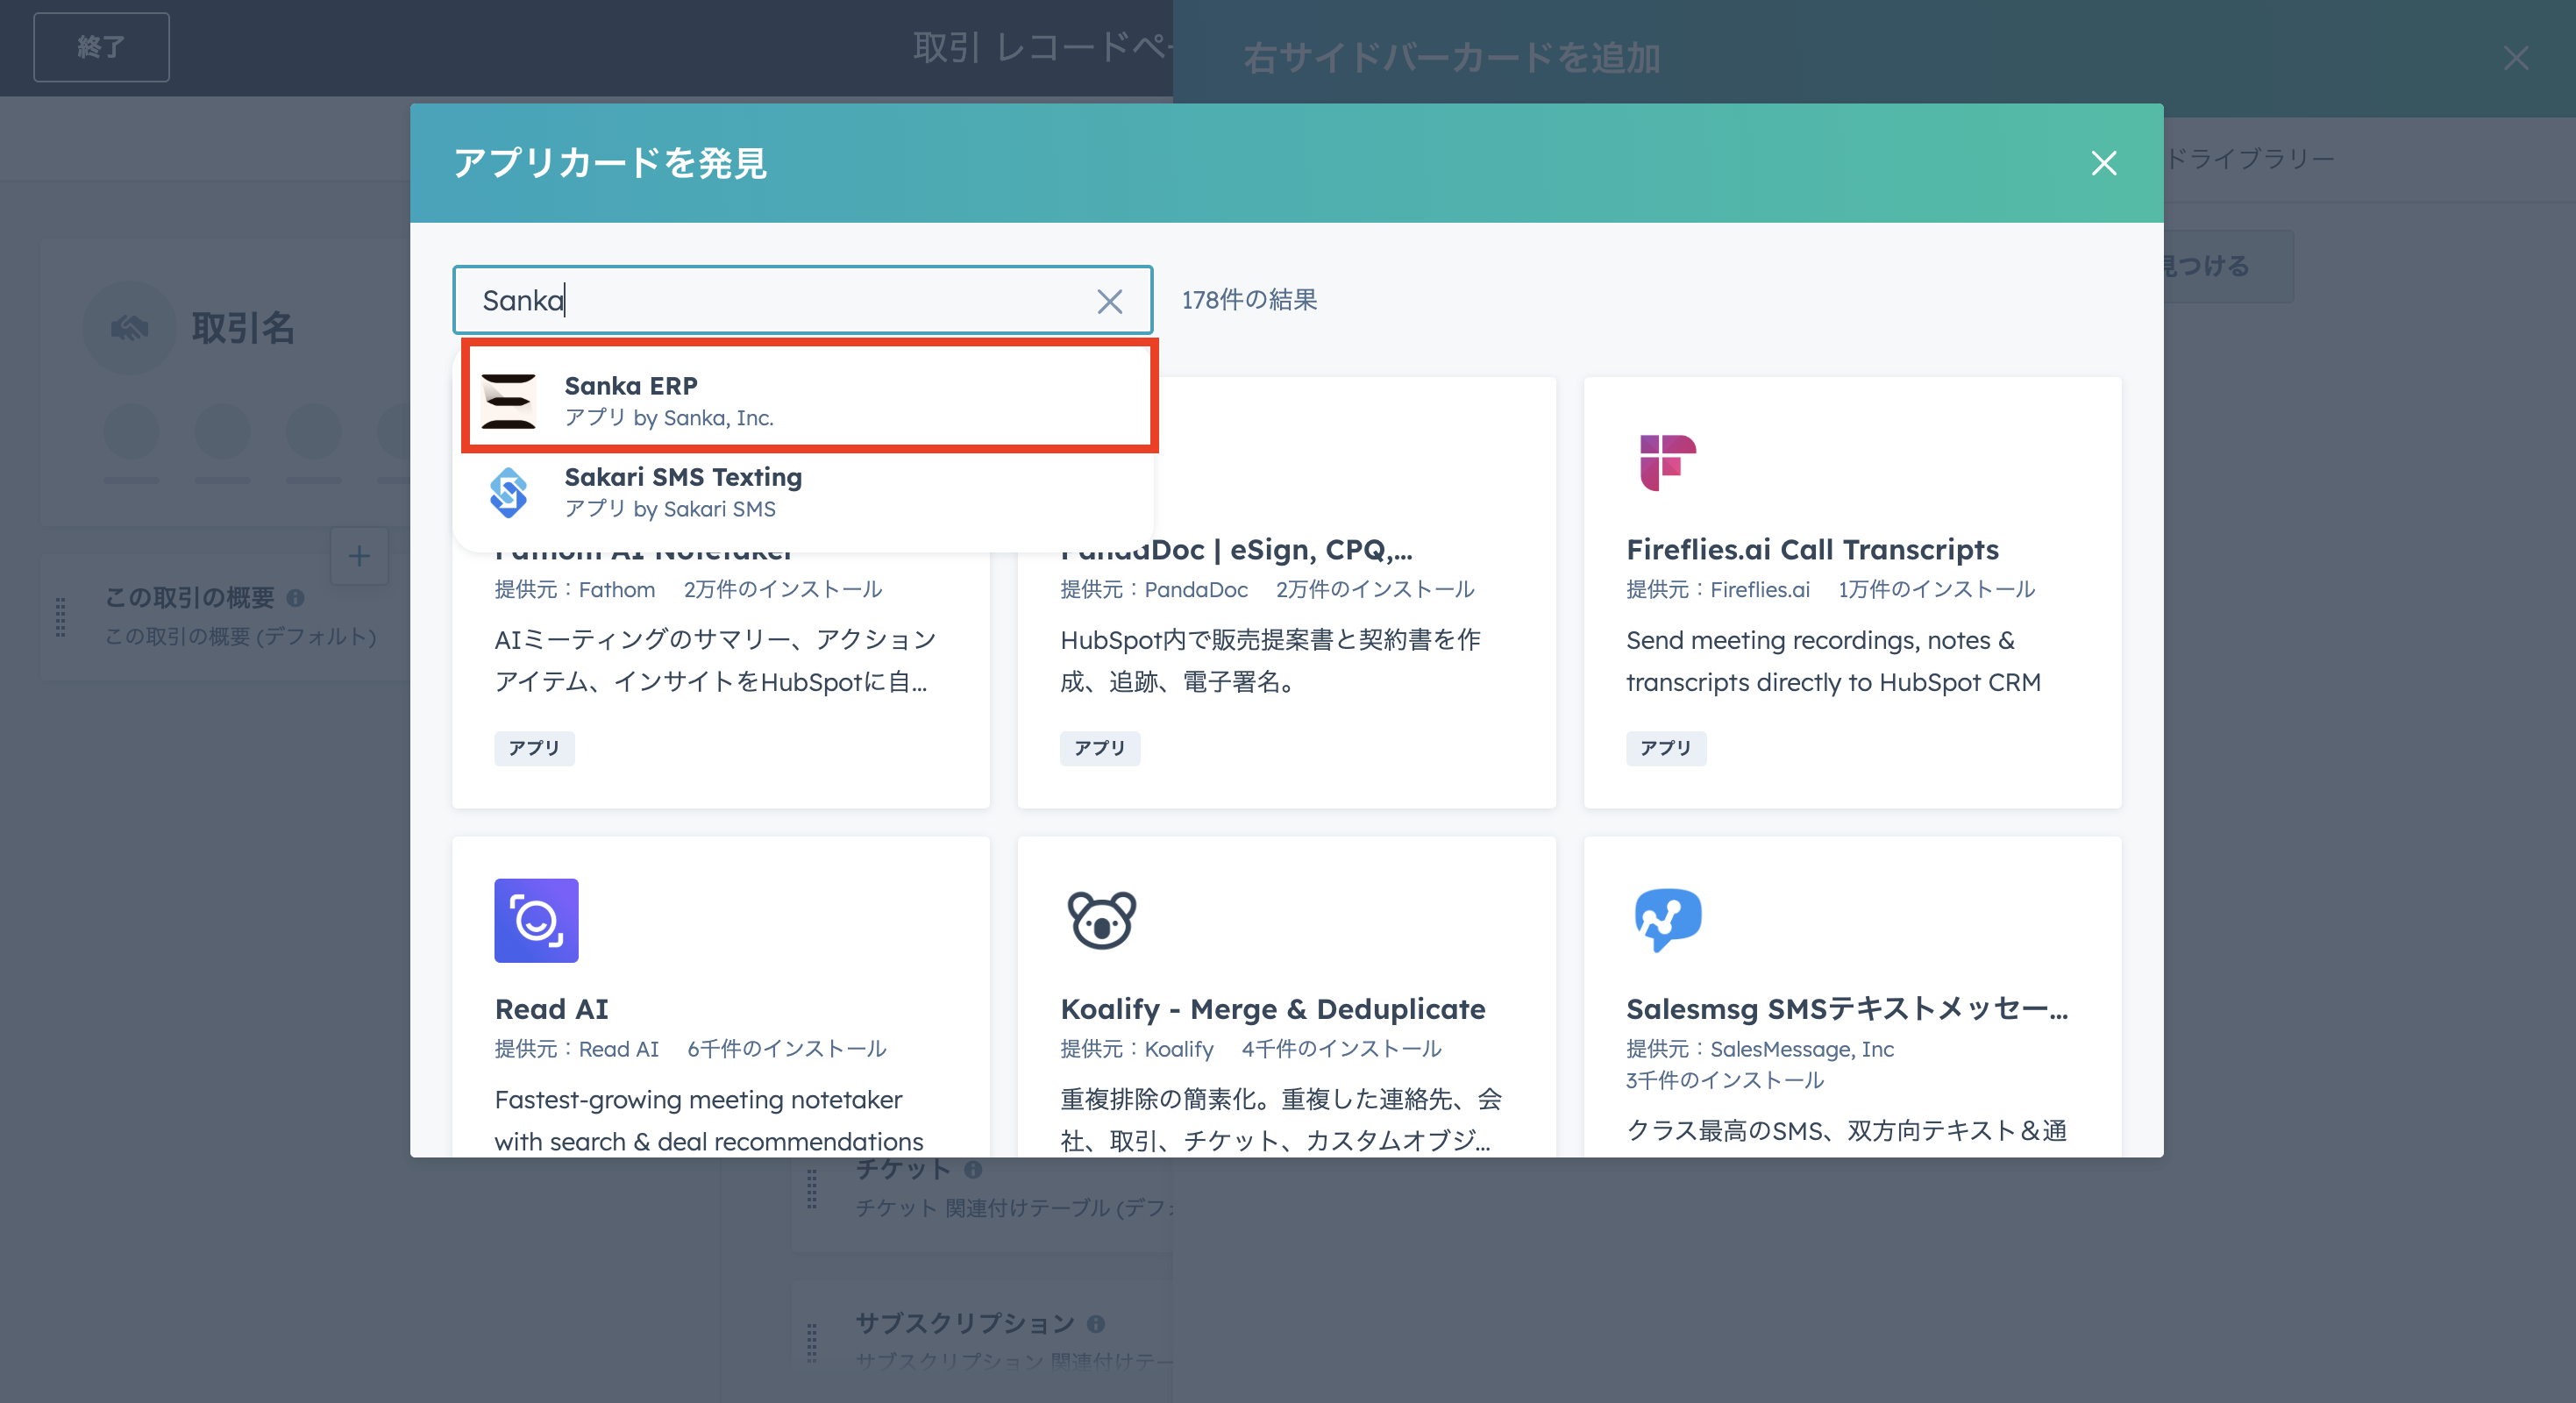
On the Discover app cards screen, search for "Sanka".
-
The Sanka ERP overview is displayed. Click the Manage button on the left.
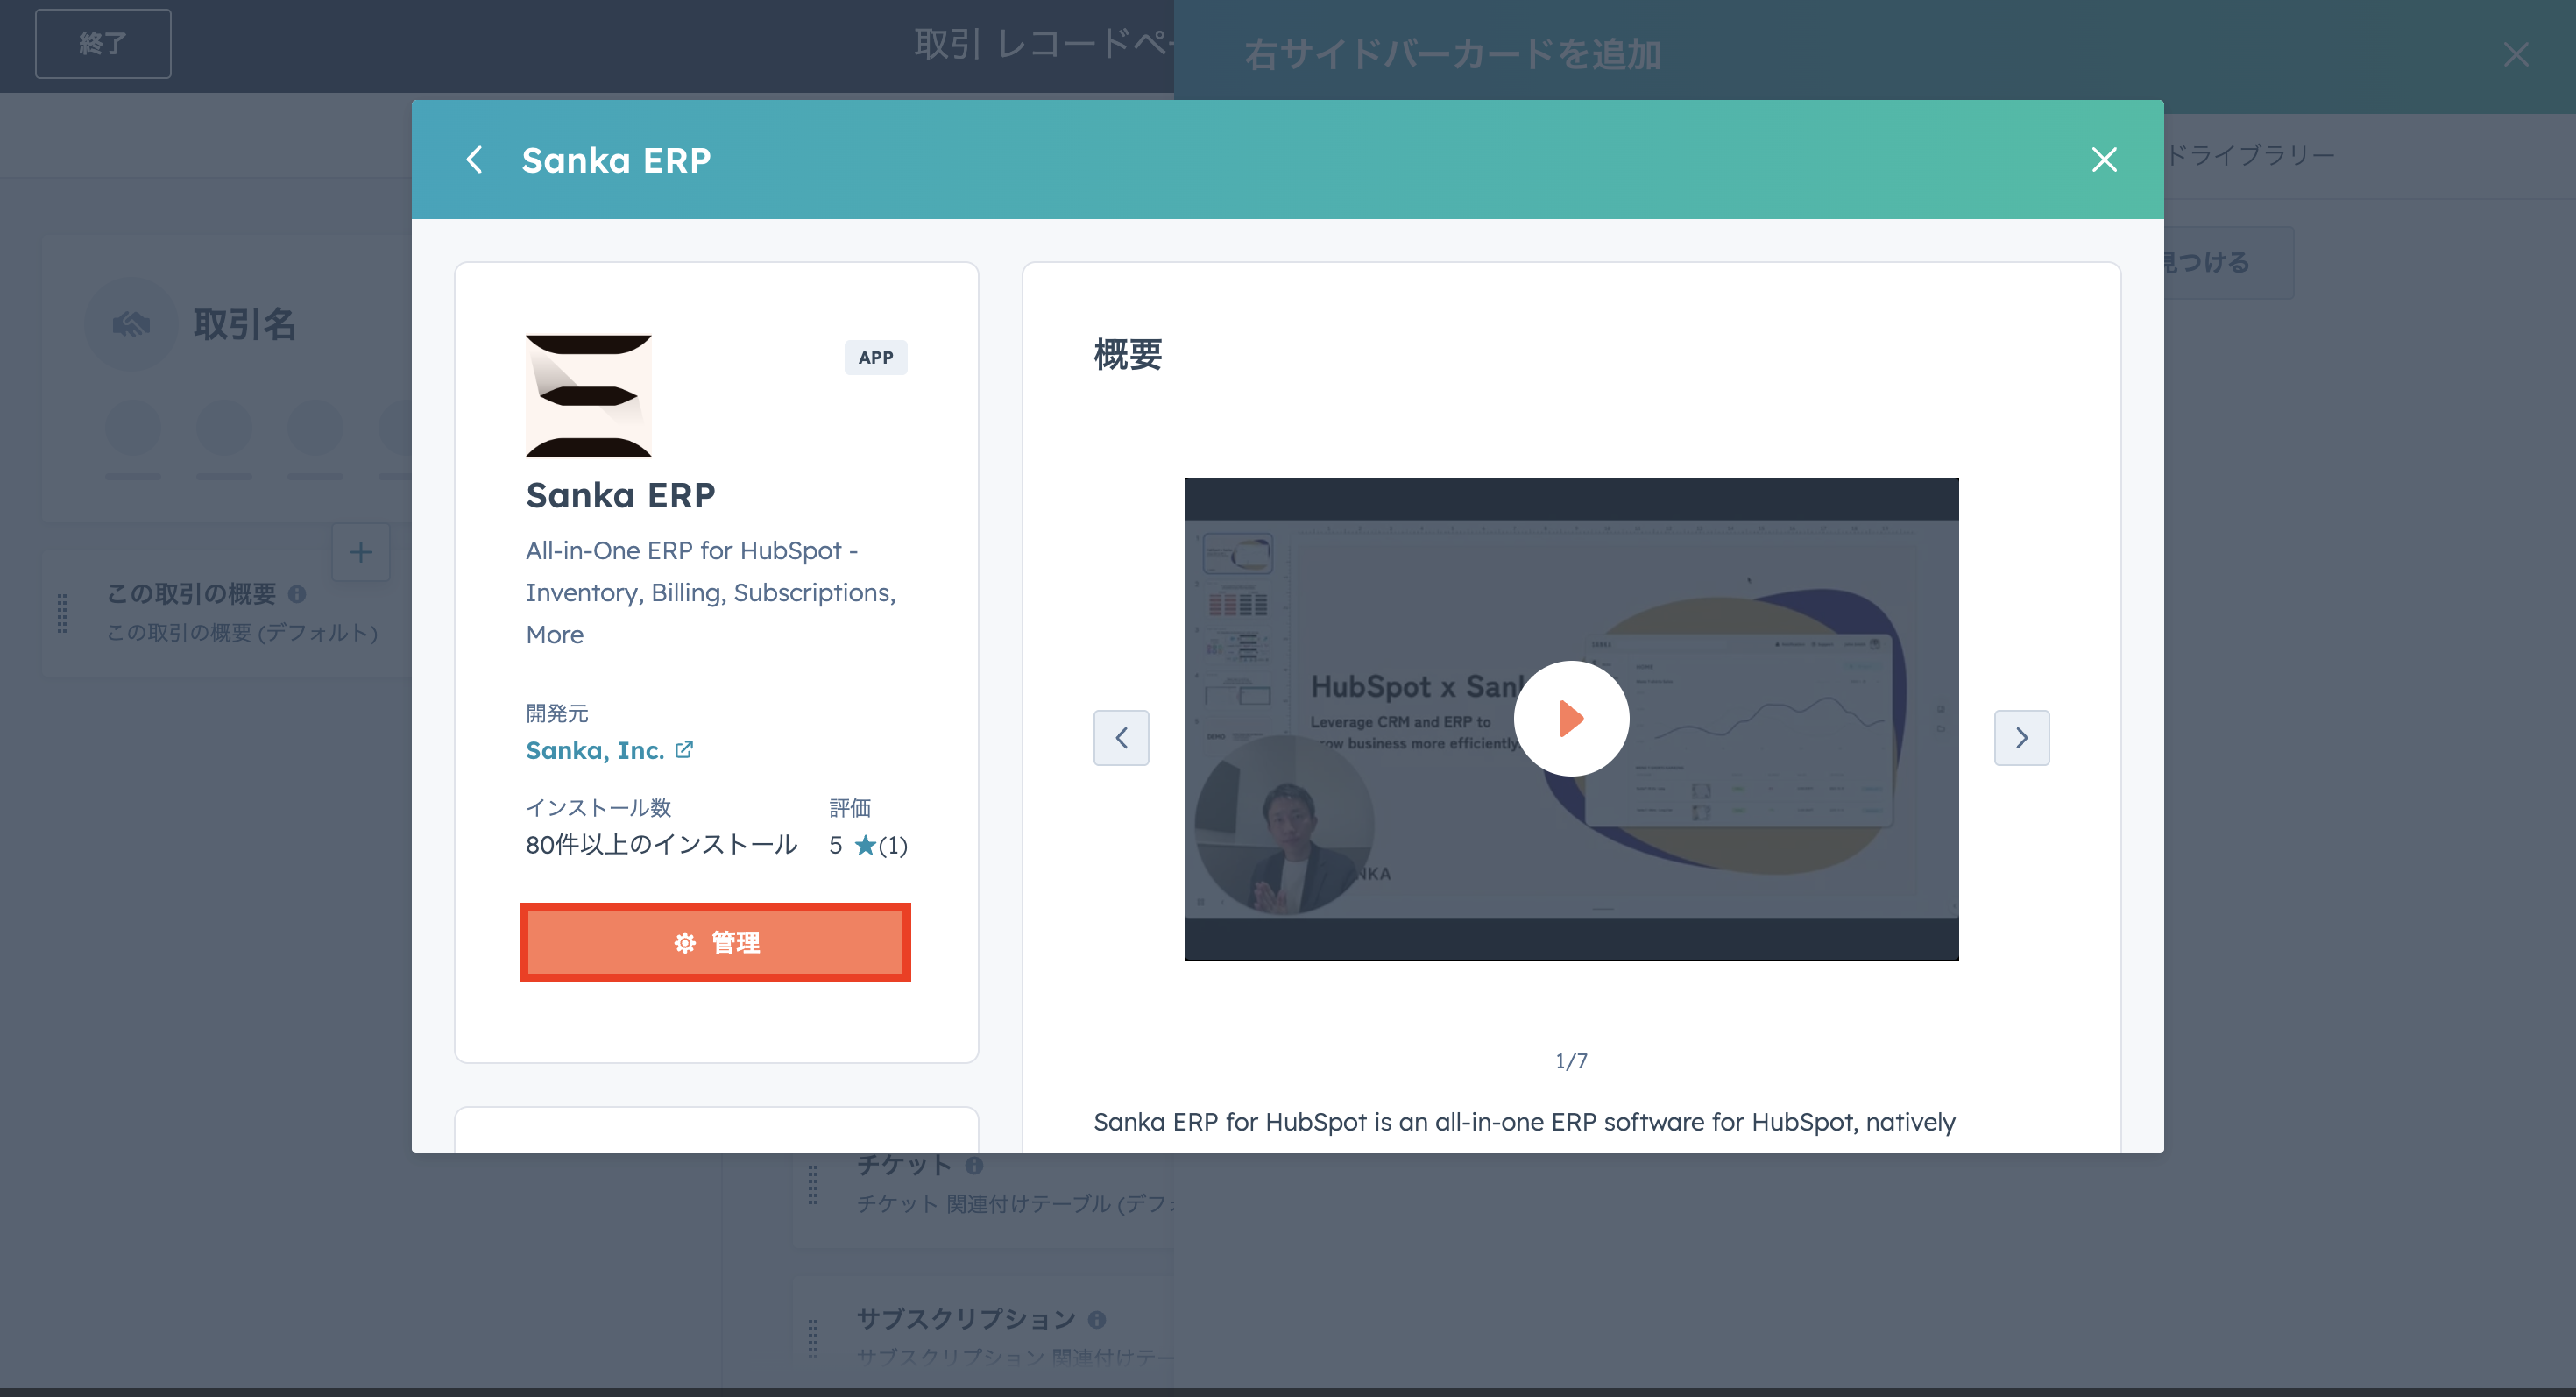
-
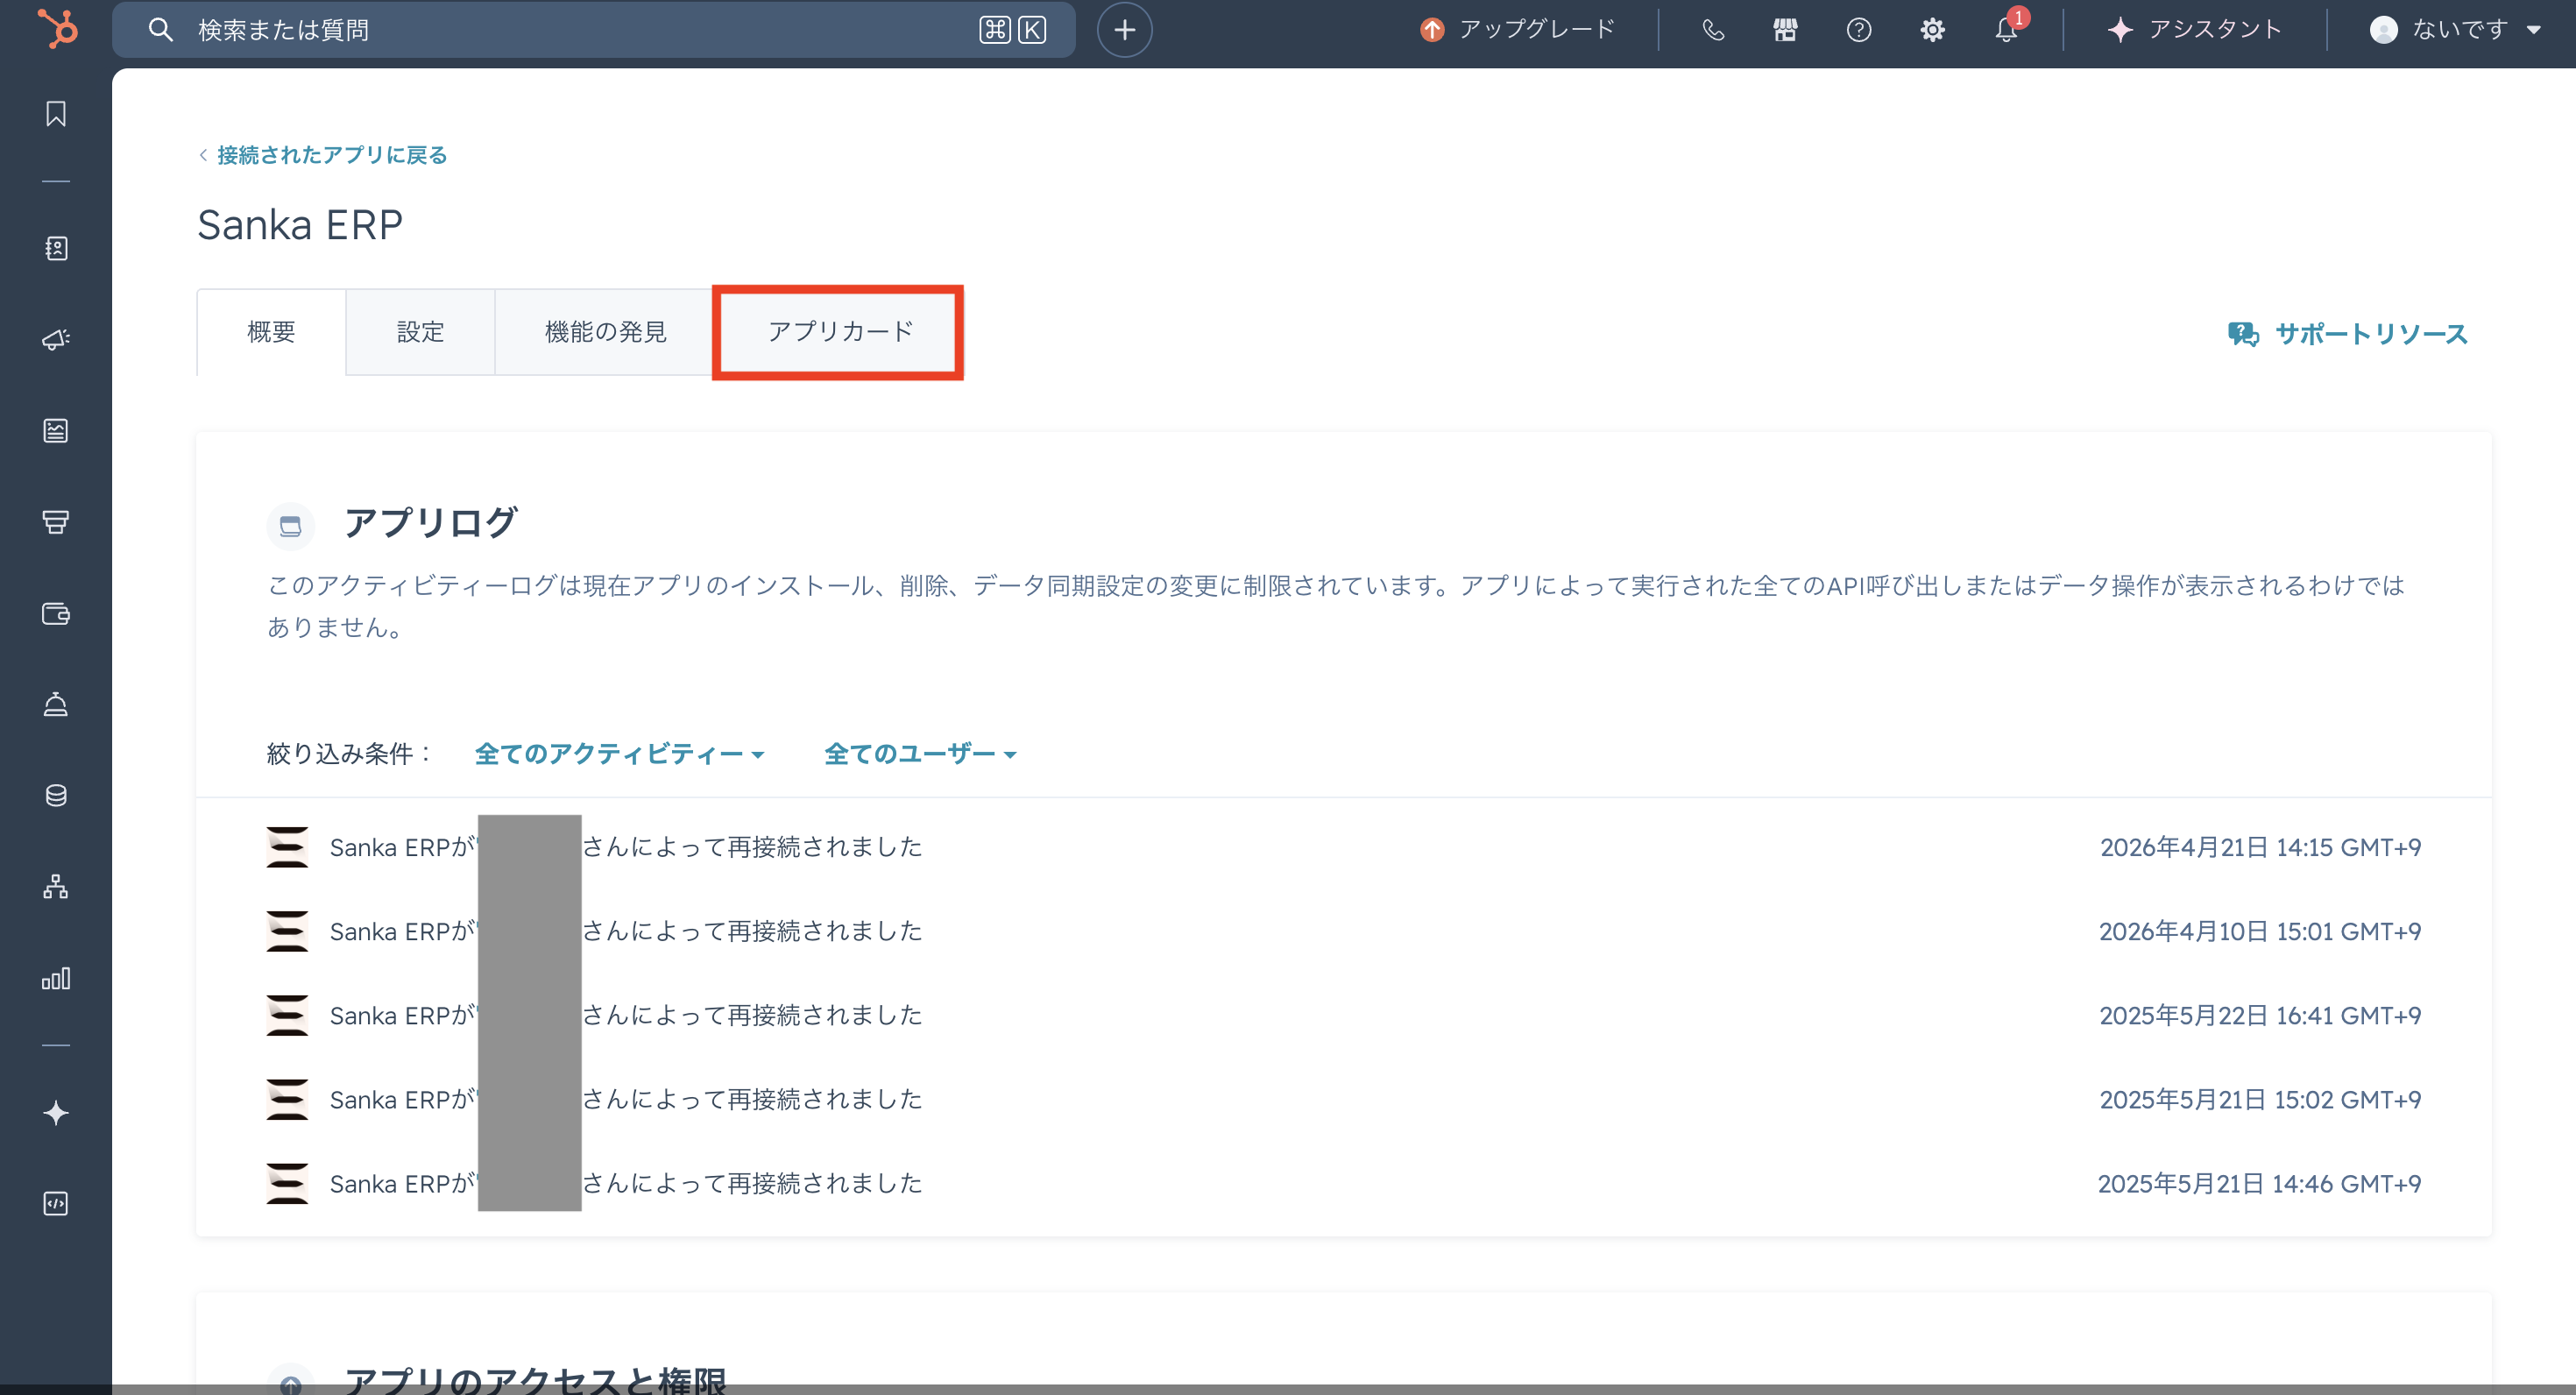
The Sanka ERP details page opens. In the top task bar, select App cards.
-
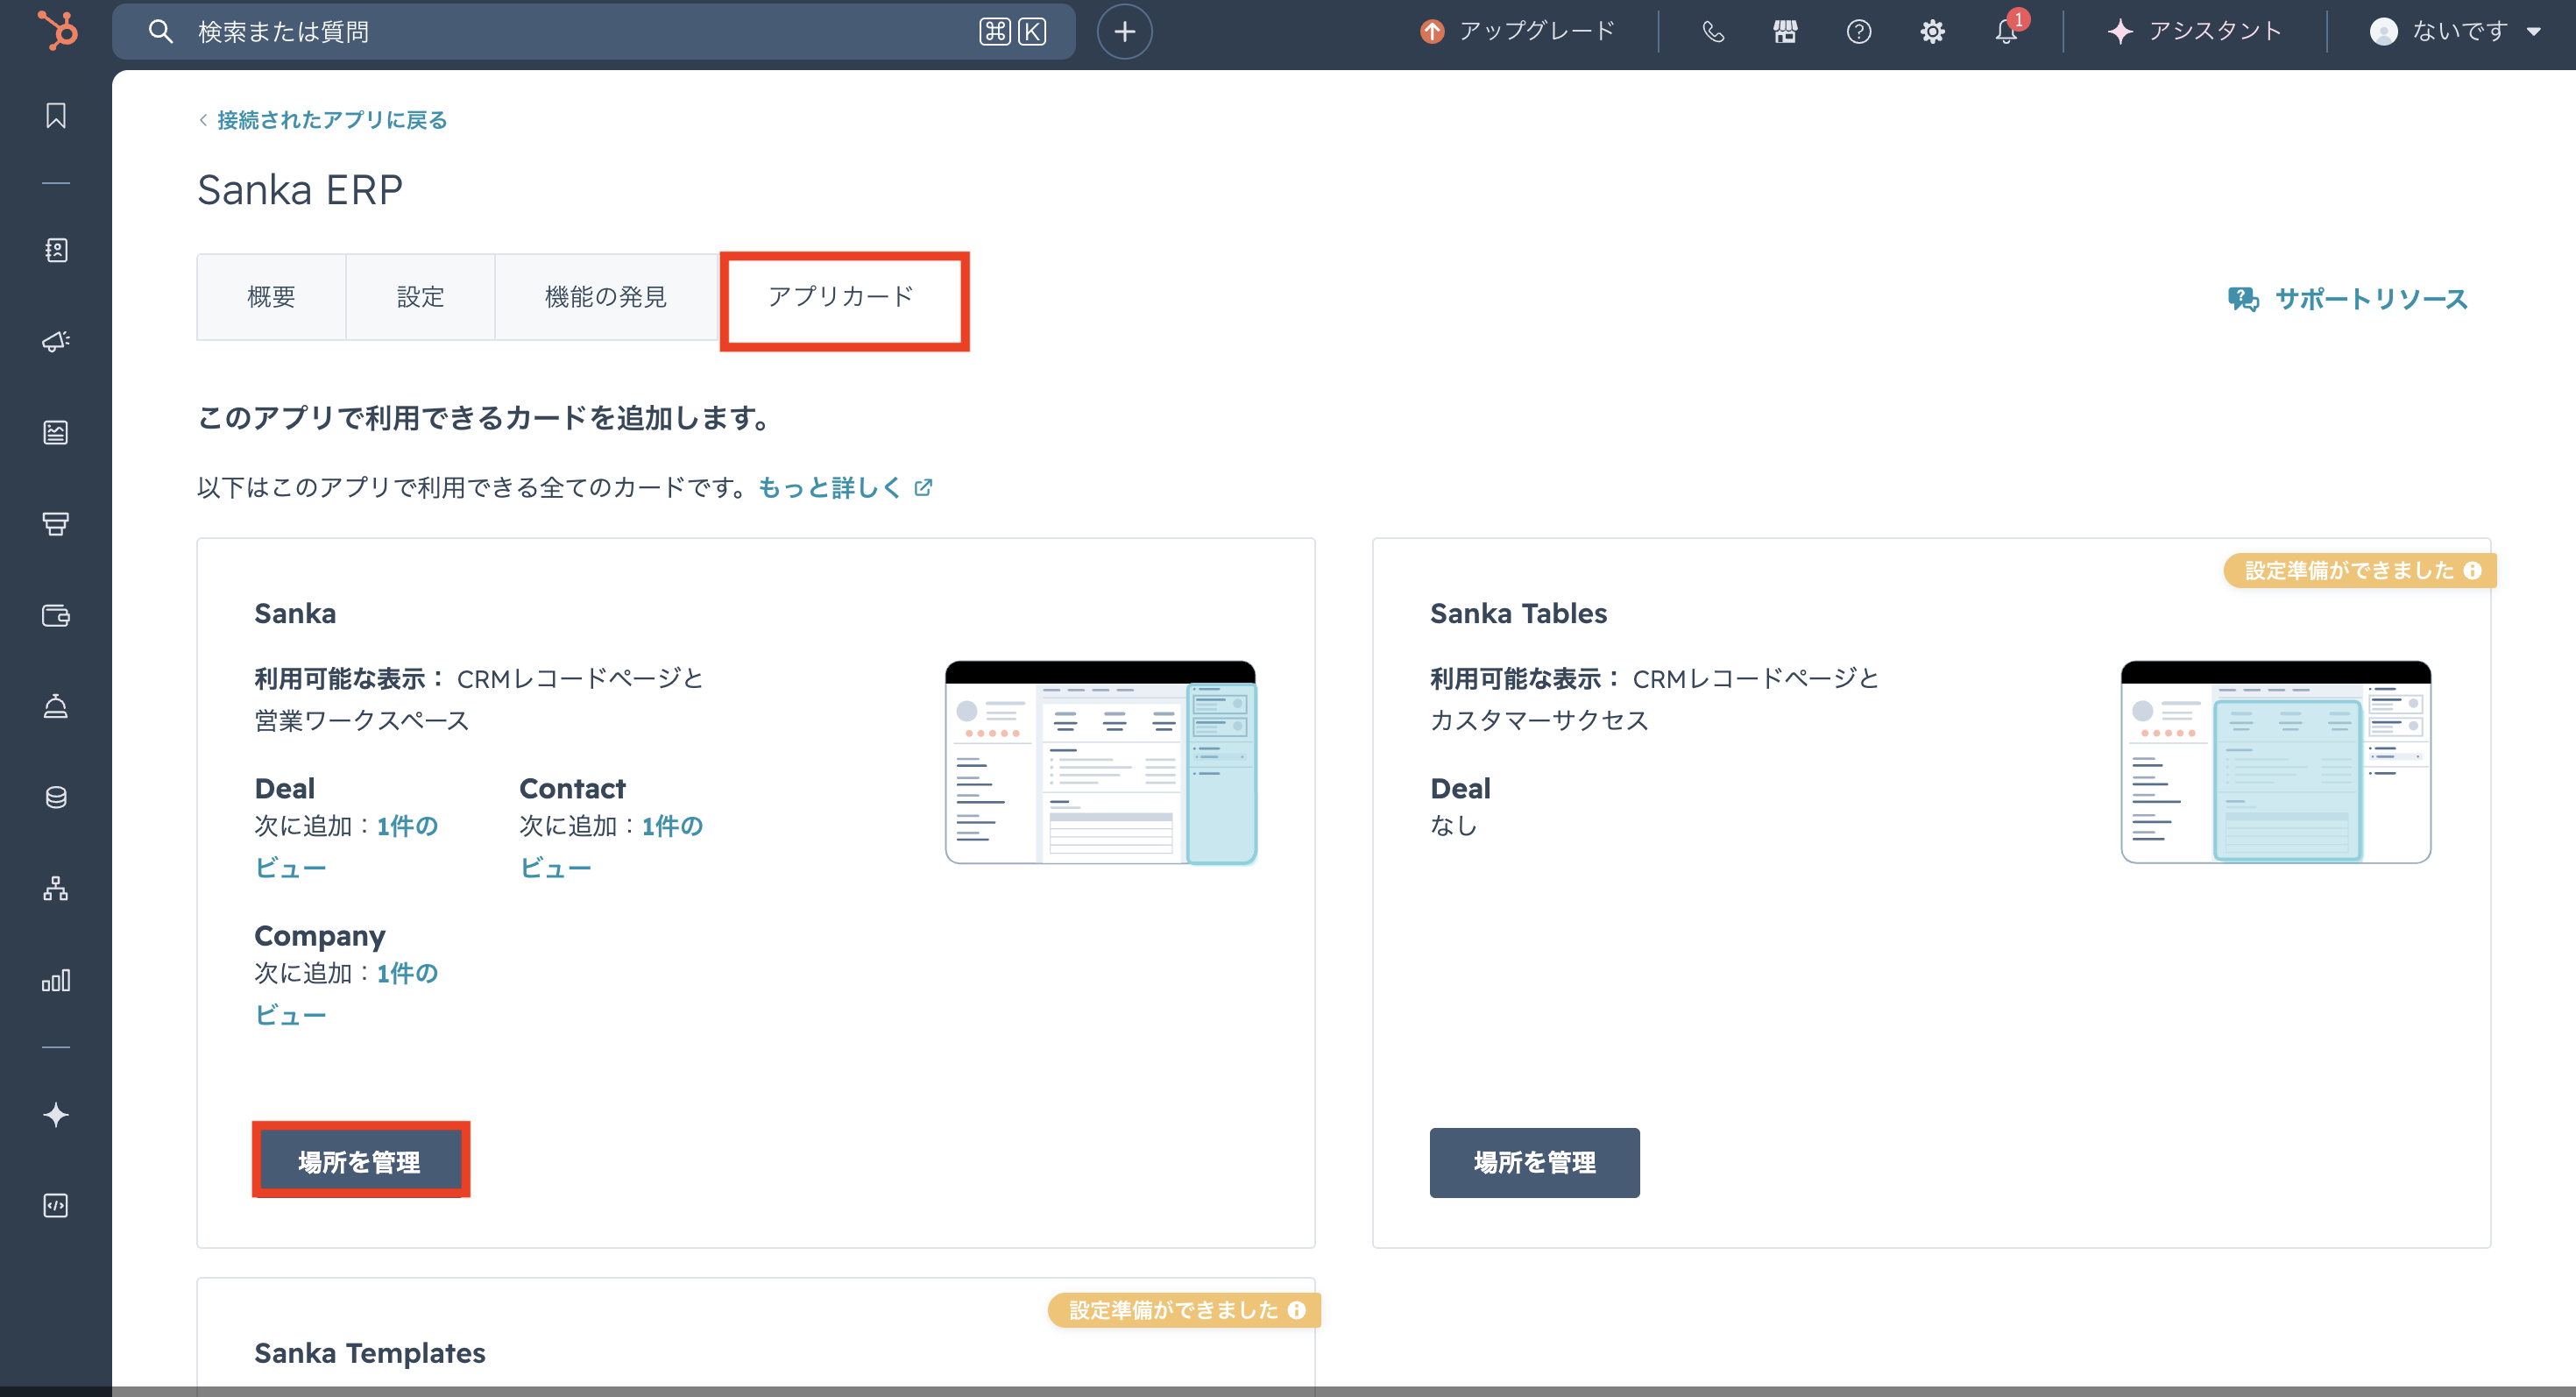
In the app card section, click Manage Sanka locations.
-
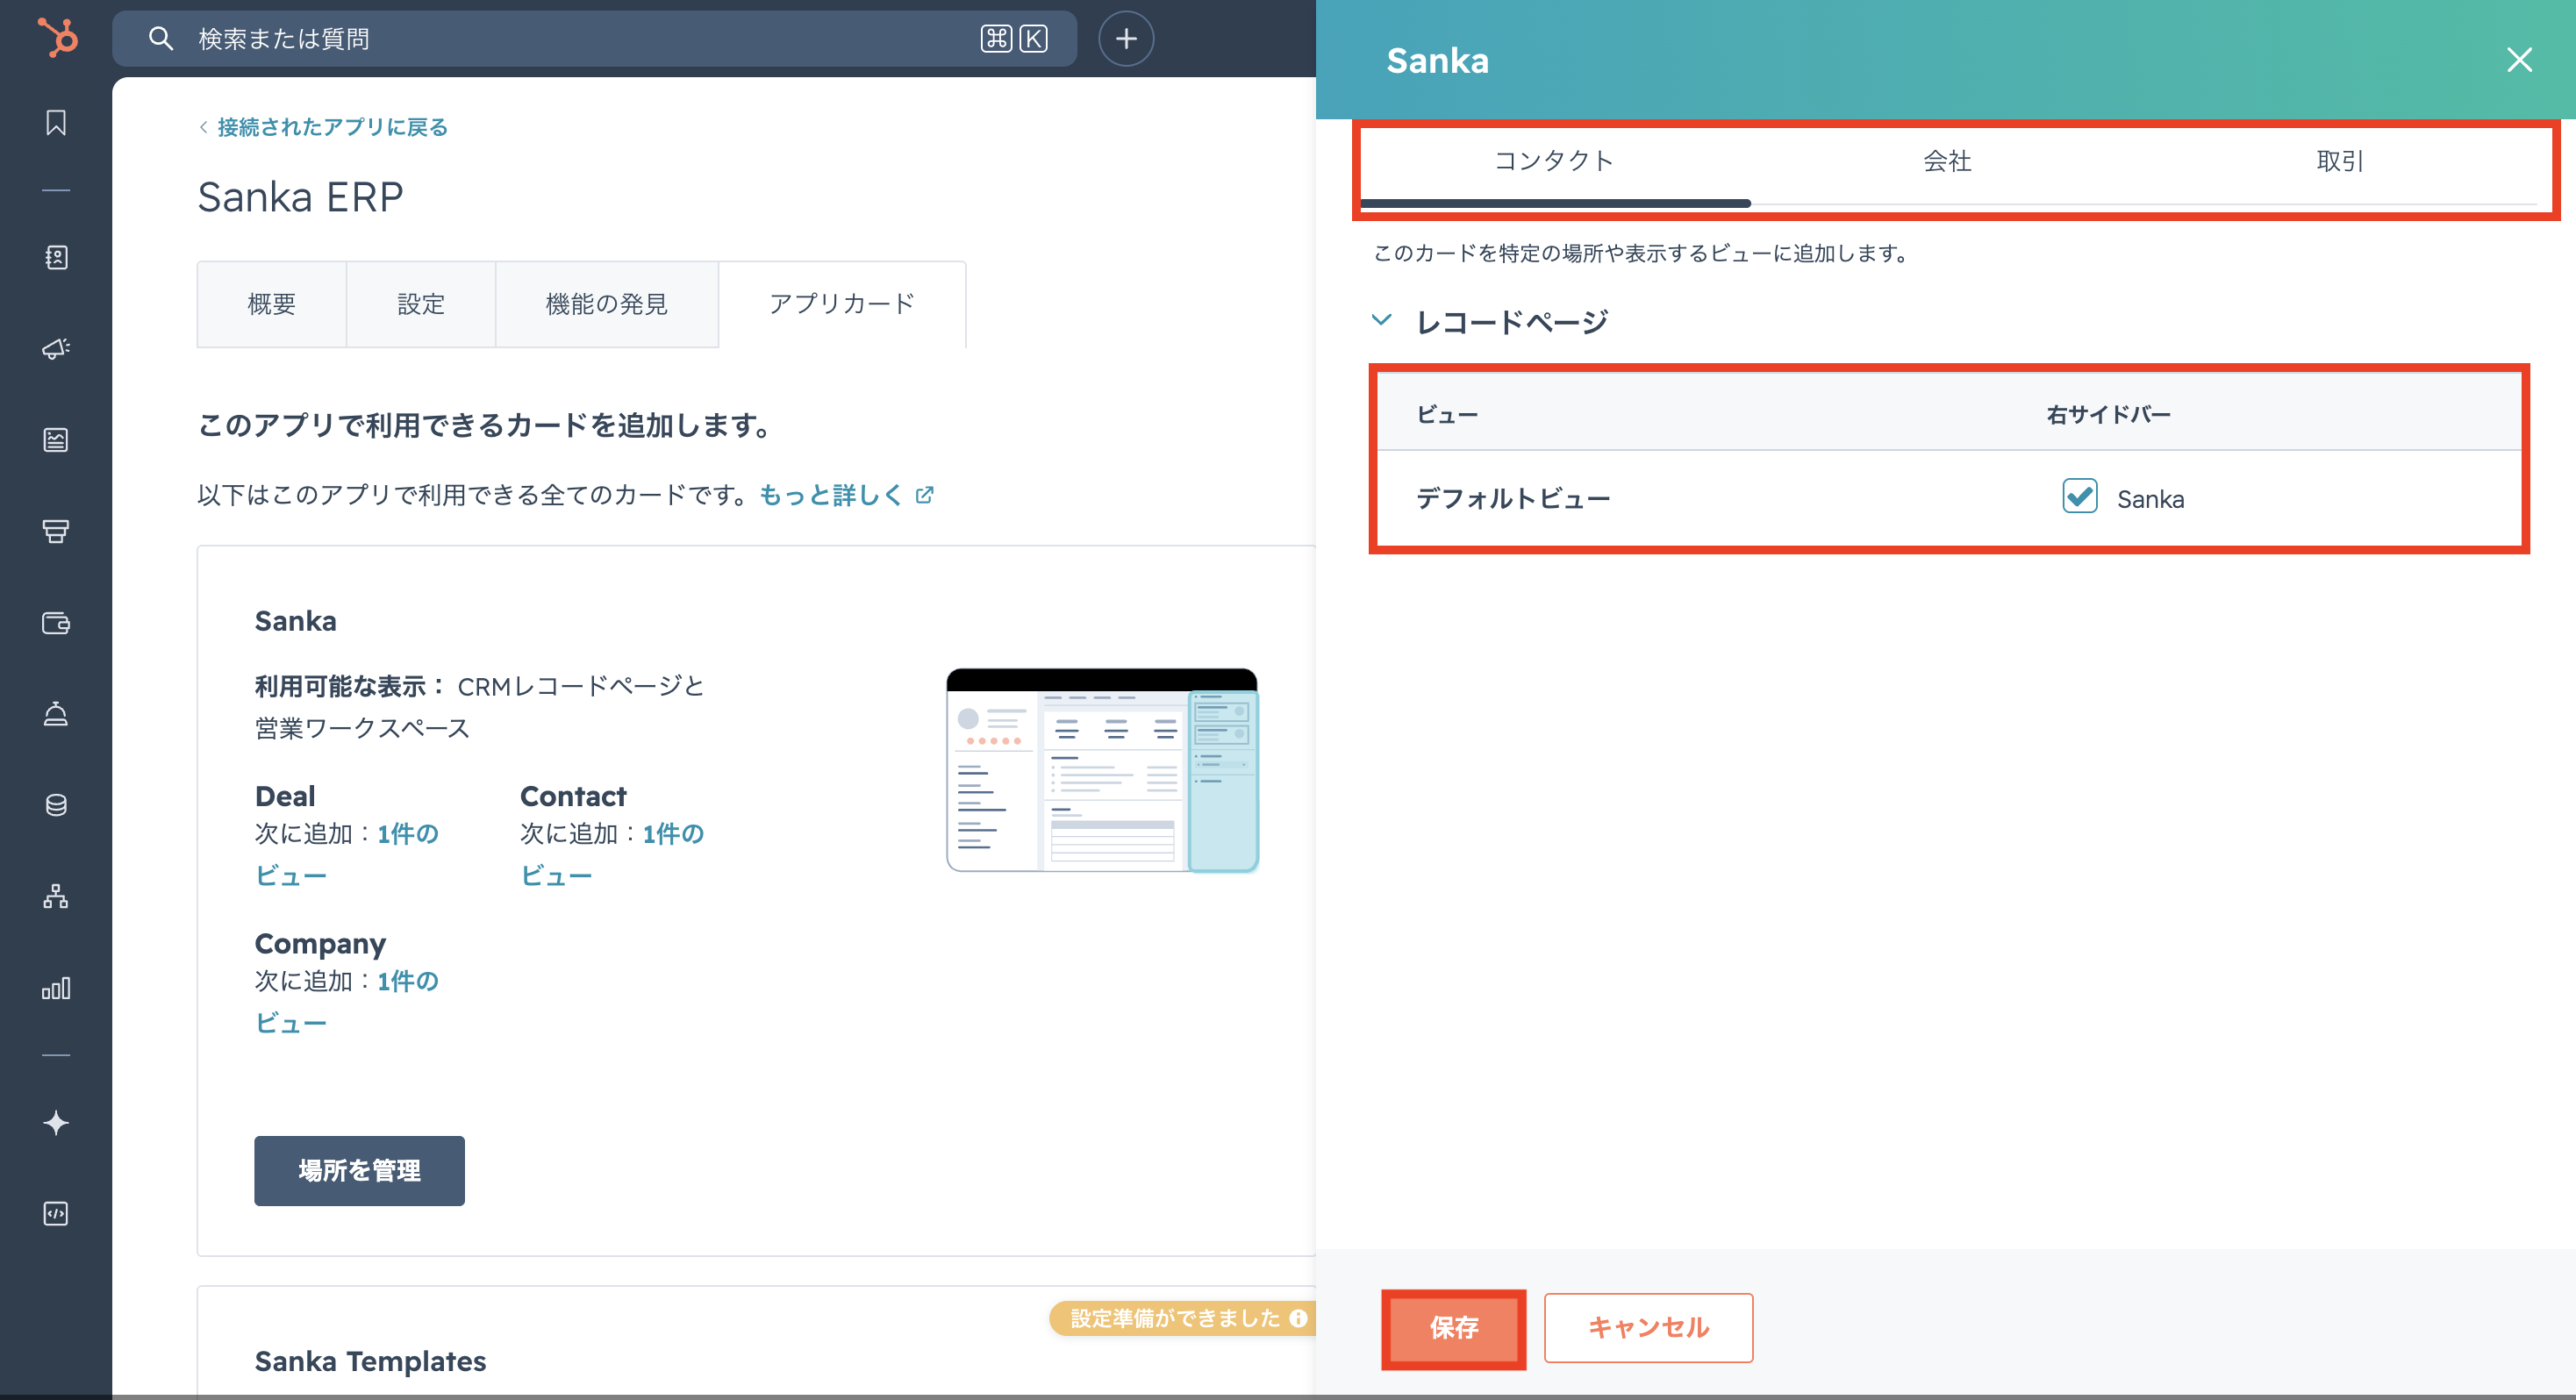
In the record page settings, check the right sidebar box for the relevant view.
There are tabs for Contact, Company, and Deal — configure each one. Click Save after checking the box.
-
A Sanka panel has been added to the view. Click Open Sanka in a new tab to open your Sanka workspace.
Troubleshooting
HubSpot is connected but records are missing
Confirm that the expected object is enabled for sync or import, the field mapping includes required fields, and the HubSpot user has permission to read the object and properties. For one-time imports, review the import status and any error file before rerunning the import.A field did not update
Check the sync direction, mapped property, field type, required-field rules, and whether another Sanka workflow or manual edit changed the value after the sync. If the HubSpot property is not visible to the connected user, it may not appear during mapping.Duplicate records were created
Review the matching rule used for company, contact, deal, or order creation. Duplicates often happen when email, domain, external record ID, or another matching field is missing or inconsistent. Merge or clean the source records before rerunning a broad sync.A quote, order, subscription, or invoice was not created
Check whether the conversion action or workflow is enabled, whether the HubSpot deal met the required stage or conditions, and whether all required Sanka fields were available. Treat this as an expected configuration issue until the mapping, action history, and workflow history show that the step should have run.The Sanka app card is not visible in HubSpot
Confirm the HubSpot app card was added to the correct object page and view, then check the Contact, Company, and Deal tabs separately. Also confirm the user has access to the HubSpot view and the Sanka workspace.Checkpoints
Use Sanka records, action history, workflow history, and audit logs to confirm the HubSpot flow before replying to a customer or asking AI to make a code change.Review HubSpot integration activity
Logs
Search logsAll actionsAll dates
ID / ActionDateTarget / ItemChangeActor
3Reviewed HubSpot mapping2026/05/10 10:00HubSpot deal syncChecked deal amount, owner, company, and source recordClaude integration
2Imported deal to order2026/05/10 10:15Green Salon Group orderCreated draft order from HubSpot deal after mapping reviewSanka integration
1Checked downstream workflow2026/05/10 10:20Invoice creation workflowConfirmed workflow conditions before creating invoice draftSanka user
A safe review should include the HubSpot source record, the Sanka record, field mapping, sync direction, related actions or workflows, and the downstream quote, order, subscription, or invoice if one was expected.
Related guides
- Integrations overview
- How to import HubSpot data into Sanka
- HubSpot deals to quoting and CPQ
- HubSpot deals to orders and subscriptions
- Action overview
- Workflow overview
