Understand workflow basics, trigger types, action steps, expected behavior, troubleshooting, and safe AI checkpoints.
Last updated: June 4, 2026
Workflows automate operations in Sanka.For example, you can configure workflows to allocate inventory when an order is created, notify a team member when stock is low, or create an invoice after approval. A workflow combines a trigger with one or more actions.The workflow gallery includes reusable templates that you can copy into your workspace.Before enabling a workflow that changes records, sends messages, exports data, or syncs with an integration, review the trigger, conditions, actions, and expected result.
Sample prompt
/sanka Review this Sanka workflow before I enable or run it. Summarize the trigger, target object, conditions, actions, records that may be created or updated, approval steps, customer-facing sends, integration syncs, duplicate-run risks, and the history or records I should check after it runs. Do not enable or run the workflow yet.
Workflow object
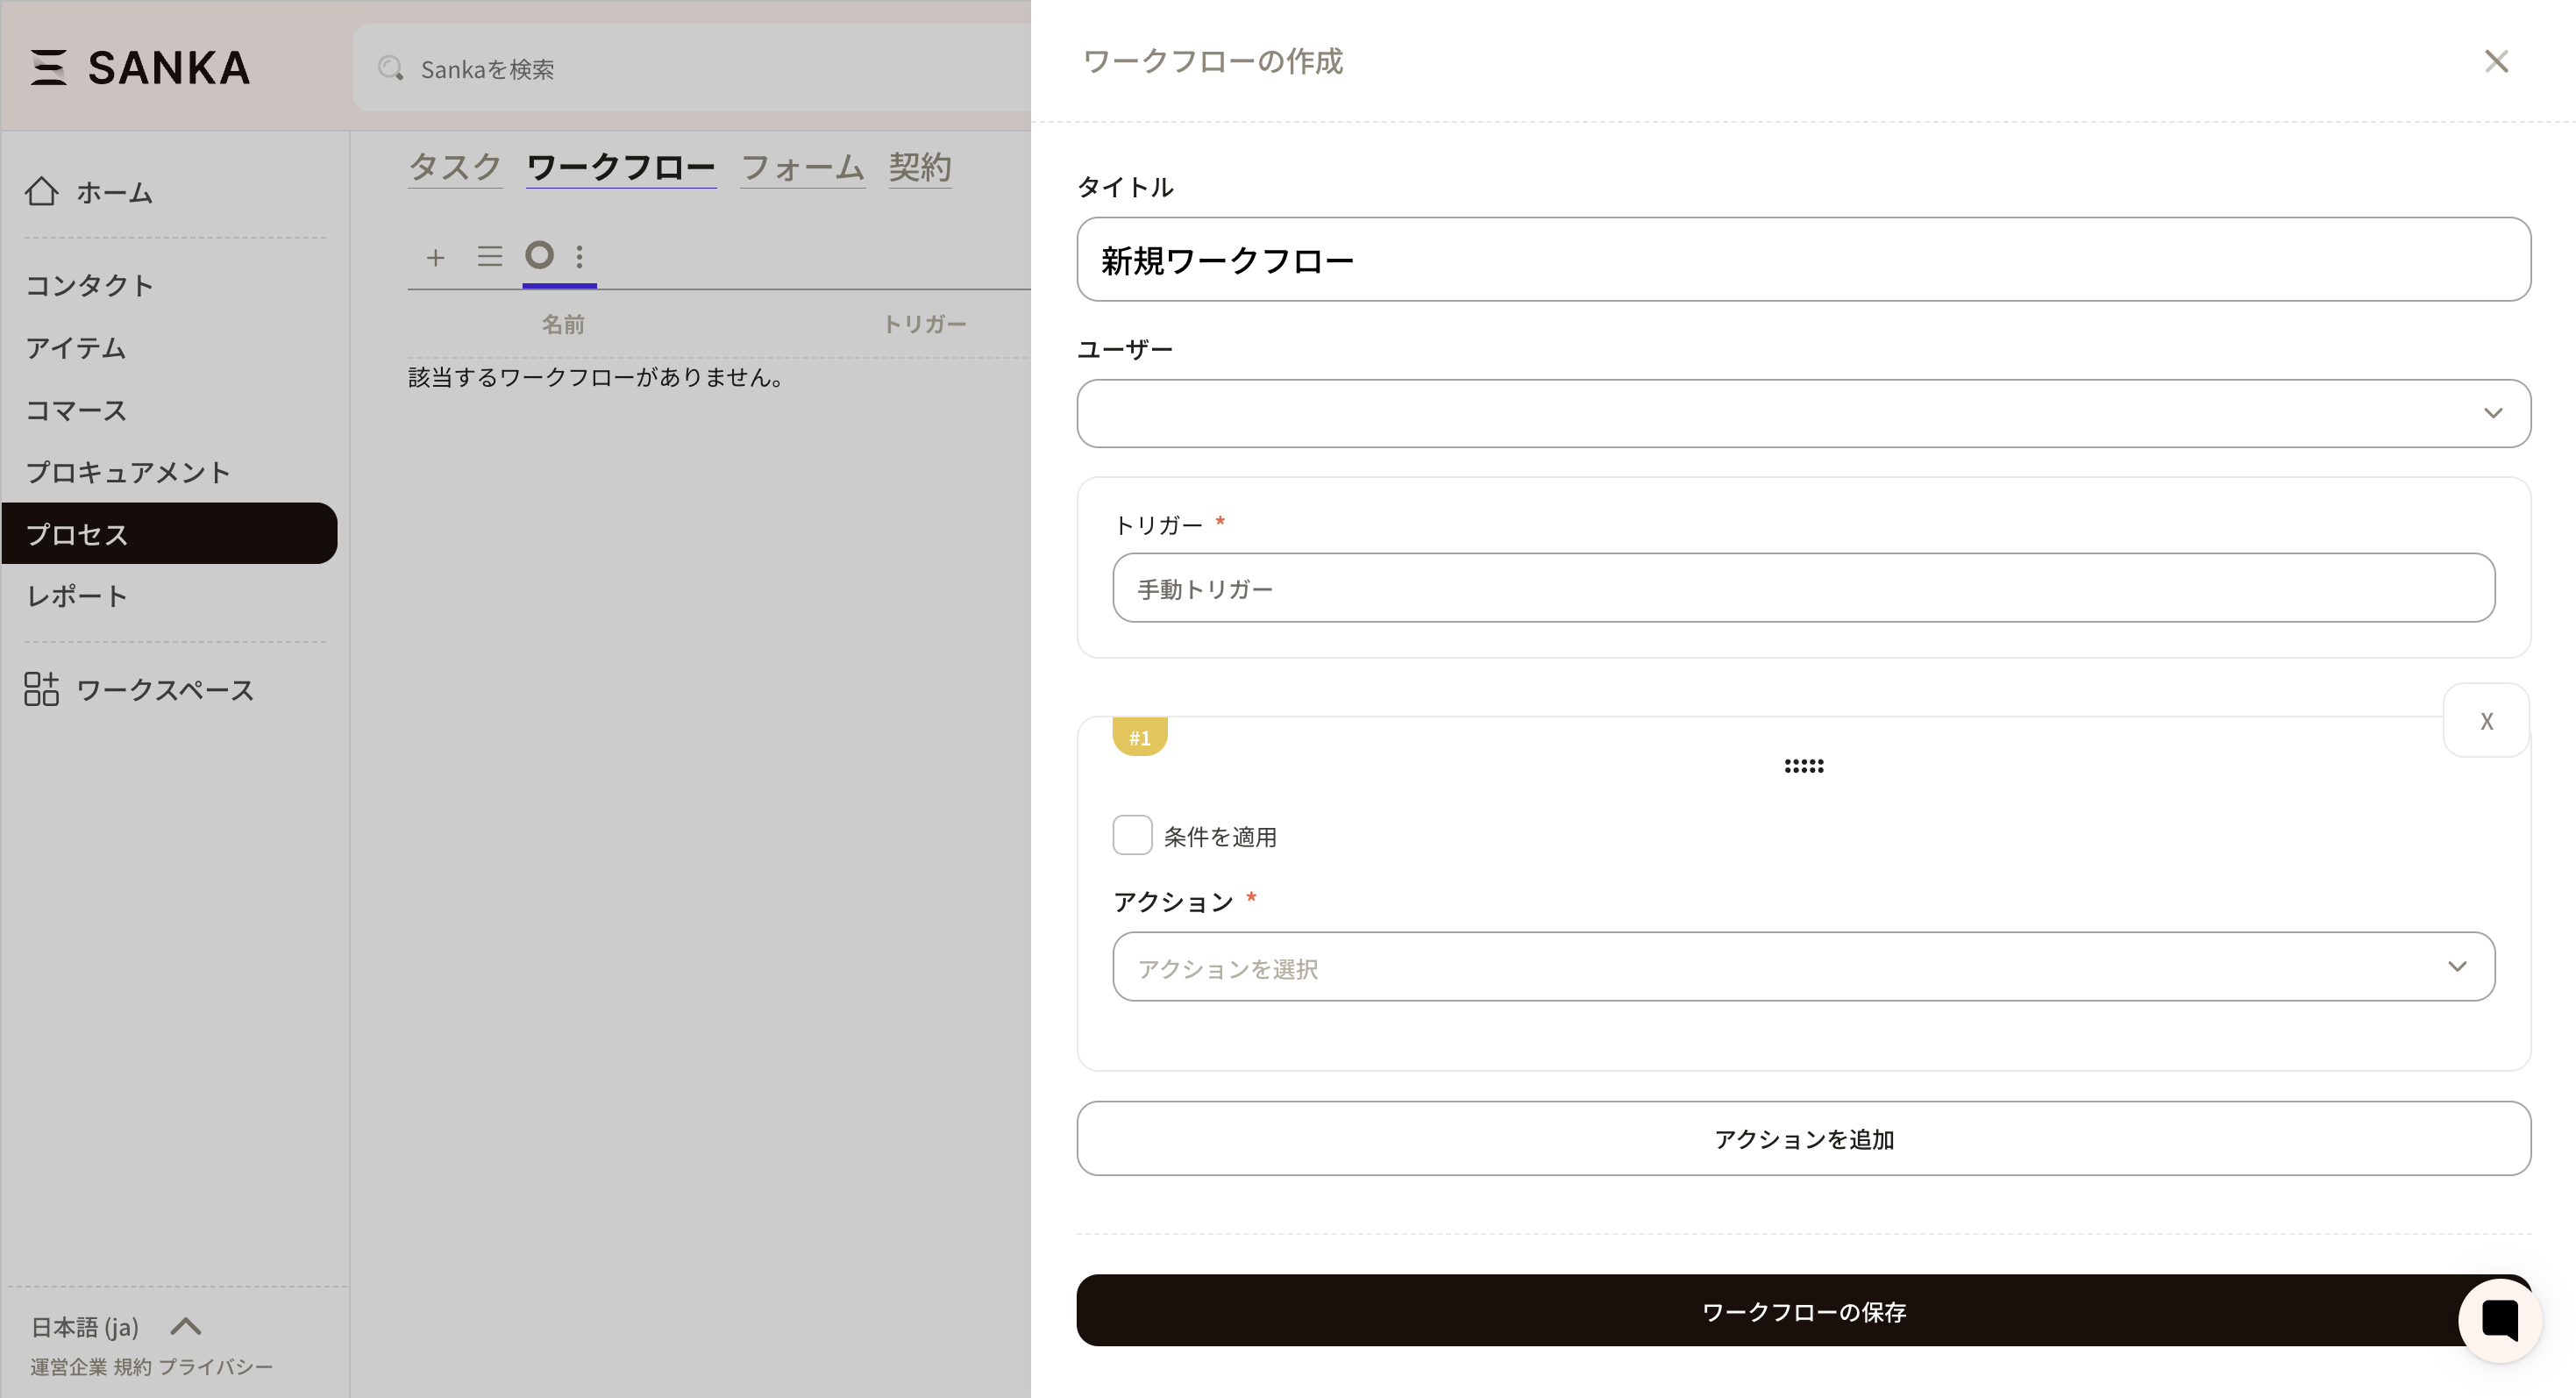
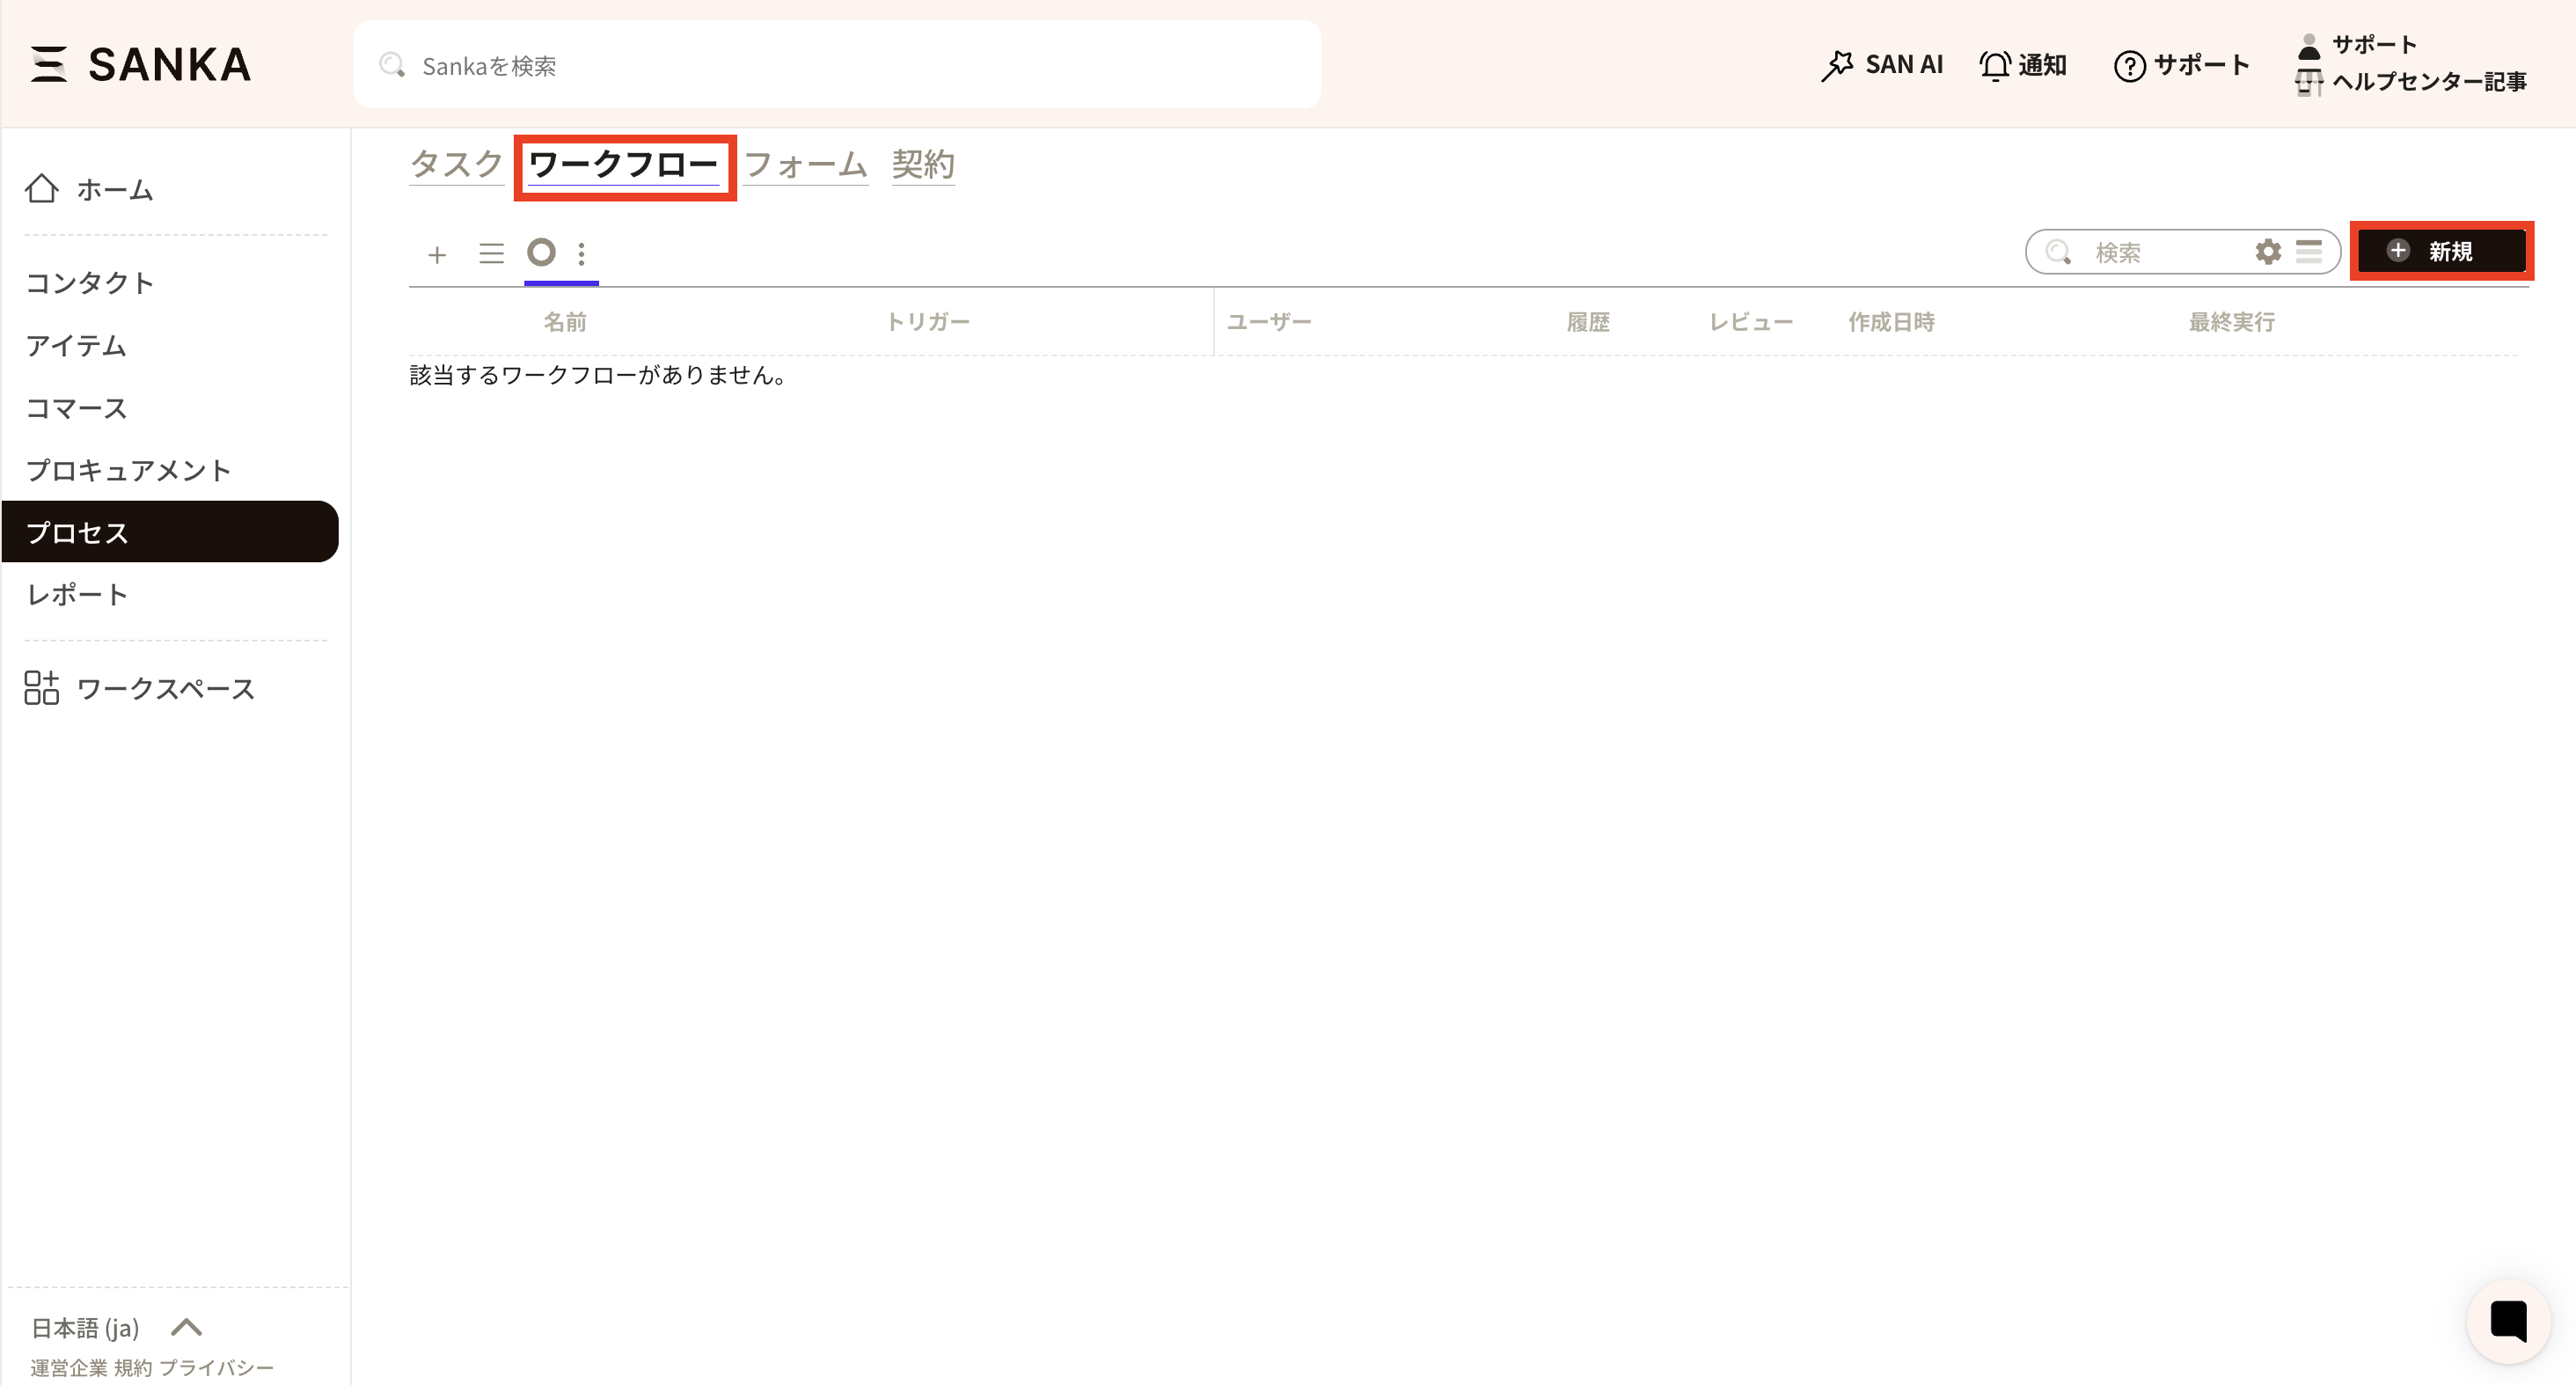
Create and edit workflows from the workflow object. Use the new button to create a workflow.On the workflow creation screen, set the title, owner, trigger, conditions, and actions.
What is a trigger?
A trigger starts a workflow run. Choose based on how you want the workflow to begin.
Type
Best for
Example
Event trigger
Reacting to record creation or updates
Allocate inventory when an order status becomes confirmed
Time trigger
Running on a schedule
Notify about open tasks every morning at 9:00
Manual trigger
Running only when needed
Run a month-end batch once
The setup flow is usually the same: create a workflow, choose a trigger, add conditions if needed, add actions, then enable the workflow.
Event trigger
Use an event trigger when a workflow should run after a record is created or updated.
Common uses
Allocate inventory after an order is confirmed
Create an invoice after approval
Notify an owner when a record changes
Apply the same rule automatically to reduce manual mistakes
Setup tips
Select the event trigger type and choose the target object.
Choose which change should start the workflow, such as create or update.
Add specific conditions to reduce unnecessary runs, such as only when status is confirmed.
Time trigger
Use a time trigger to run a workflow daily, weekly, monthly, or on another schedule.
Common uses
Closing work
Regular notifications
Finding records close to their due date
Batch processing that should run at regular intervals
Setup tips
After choosing the schedule, confirm the workspace time zone.
If many records are involved, filter the target records to reduce load and duplicate work.
Manual trigger
Use a manual trigger when a user should decide exactly when the workflow runs.
Common uses
Month-end batch work
One-off operations
Initial verification after setup
Work where a person should decide the timing
Setup tips
Define who is allowed to run the workflow to prevent unintended execution.
Test with a small amount of data before using it broadly.
Action types
Actions are the operations that run after the trigger. Common action types include:
Approval action
Create object record
Update object record
Aggregate object records
Import data from integrations
Export data to integrations
Sync data with integrations
AI actions and utilities
Operational tips
Start with strict conditions and expand after verifying the result.
For operations that must not run twice, use conditions or status updates to design a run-once flow.
After a workflow runs, review the workflow history and affected records.
Keep sending, deletion, export, and integration-sync steps behind approval or narrow conditions until the workflow has been tested.
If the workflow creates downstream records, decide how the source record should show that the downstream step is complete.
When using AI to help design workflows, ask for the expected success state and failure handling before enabling the workflow.
Expected behavior
When a workflow runs successfully:
The workflow starts only when its trigger fires and its conditions match
Each action runs in the configured order
Approval steps pause the workflow until an approver responds
Created or updated records appear in the target object unless they are archived or filtered out
Notifications, emails, documents, exports, or integration syncs are recorded in the relevant history or result view
The workflow history shows whether the run completed, stopped, failed, or is waiting for approval
A workflow does not run just because a matching record exists. It must be enabled and the trigger event, schedule, or manual run must occur. A workflow also does not bypass required fields, permissions, module availability, or action-specific validation.
Troubleshooting
The workflow did not run
Check whether the workflow is enabled, whether the trigger event or schedule occurred, whether the workspace time zone is correct, and whether the record matched the conditions at the time of the trigger.
The workflow ran too many times
Review the trigger and conditions. For update-based workflows, make sure the workflow does not update a field that immediately satisfies the same trigger again. Add a status, flag, or condition to mark records that have already been processed.
A downstream record was not created
Check the action result, required fields, object permissions, related records, templates, and whether a previous step stopped the workflow. If the action depends on a customer, item, location, approval, or mapping, confirm it existed when the workflow ran.
The workflow is waiting for approval
Confirm the approver, approval status, required approval fields, and notification settings. If multiple approvers are configured, check whether the workflow requires all approvers or only one approver before continuing.
A customer-facing email or document was sent unexpectedly
Check the action history and message history before rerunning or editing the workflow. Then review recipient fields, templates, send timing, and the conditions that allowed the action to run.
AI cannot tell whether this is a bug
Ask AI to compare the trigger, conditions, workflow history, action history, and affected records. Treat it as a possible bug only after confirming the workflow was enabled, the trigger occurred, the record matched conditions, required fields were present, and the user had the needed permissions.
Checkpoints
Use workflow history, action history, record history, and audit logs to confirm exactly what ran and what changed.
2Workflow run completed2026/05/10 09:15Green Salon Group orderCreated inventory transaction and task after order confirmationSanka workflow
1Checked downstream records2026/05/10 09:22Inventory transactionVerified item, quantity, location, and source order associationSanka user
Workflow review should include the trigger record, each action result, any approval step, and the downstream records created or updated by the workflow.
 On the workflow creation screen, set the title, owner, trigger, conditions, and actions.