Process to create Bills in Sanka:
Log In to Sanka
1: Navigate to Sanka and sign in to access your dashboard.
2: Ensure that you are in the correct workspace for bill creation and management.
Access the Bills
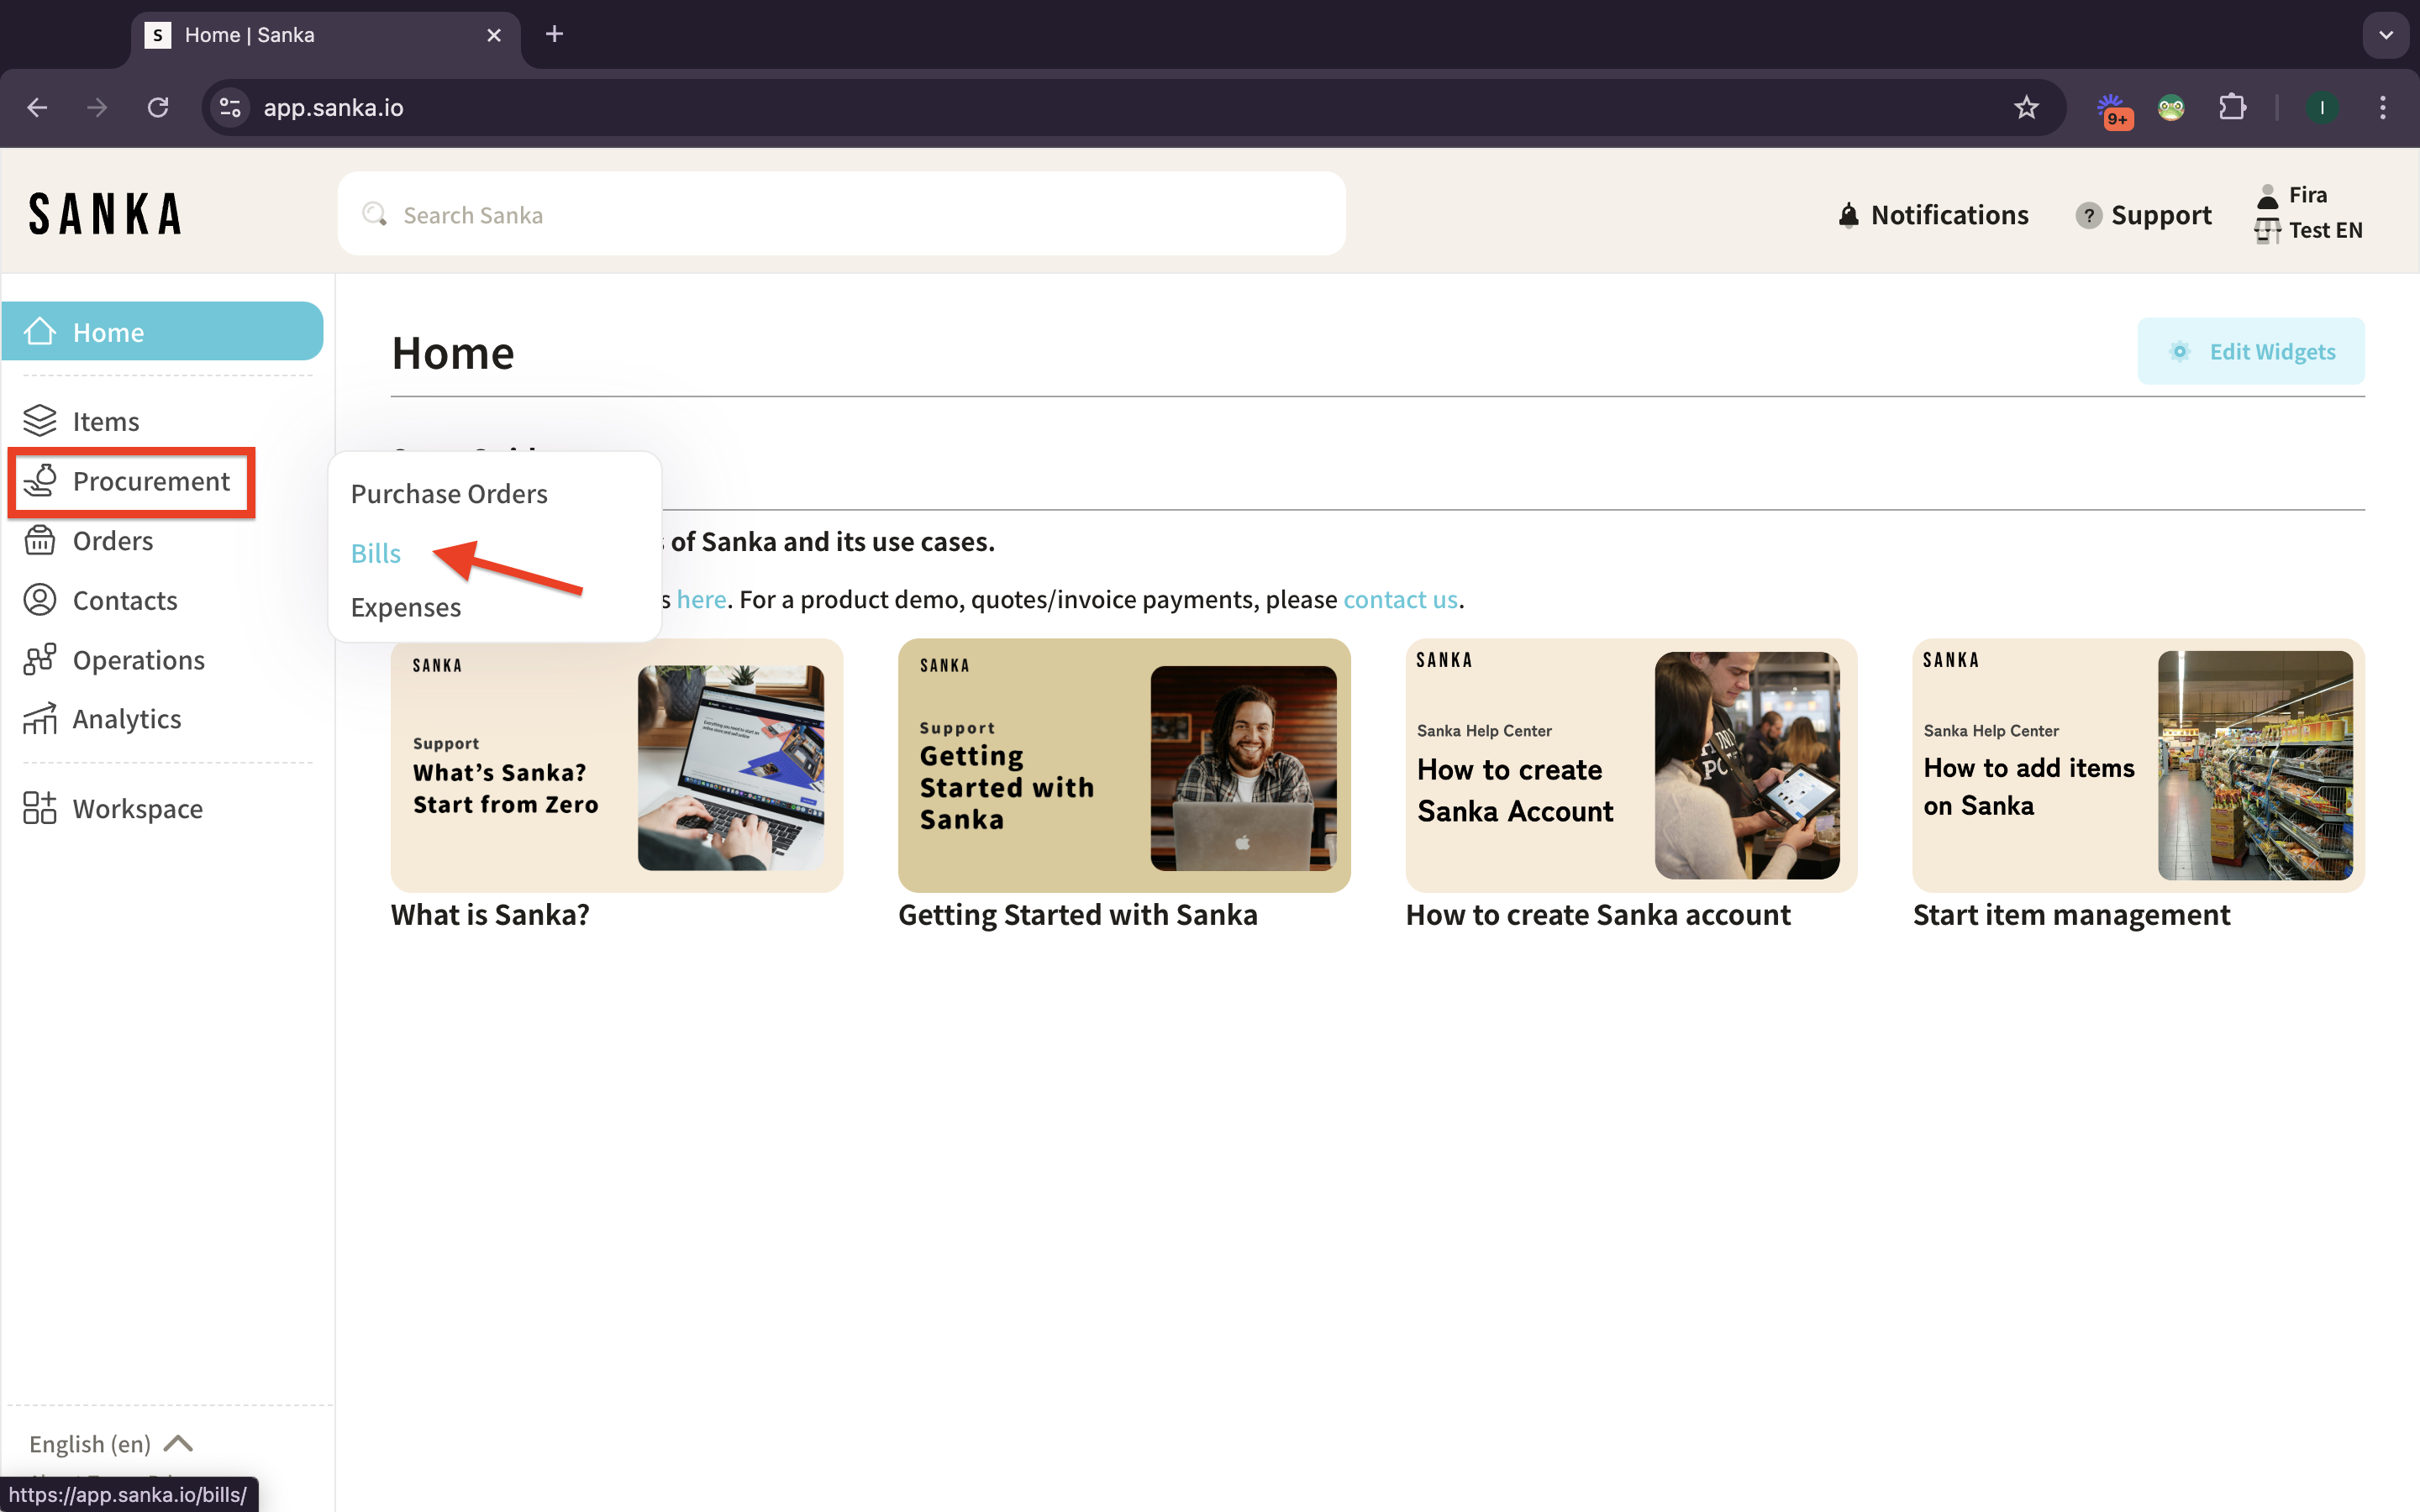
1: From the main dashboard, locate and click on the “Procurement” in the left-hand menu.
2: Select “Bills” to open the bills object page.
Create a new bill
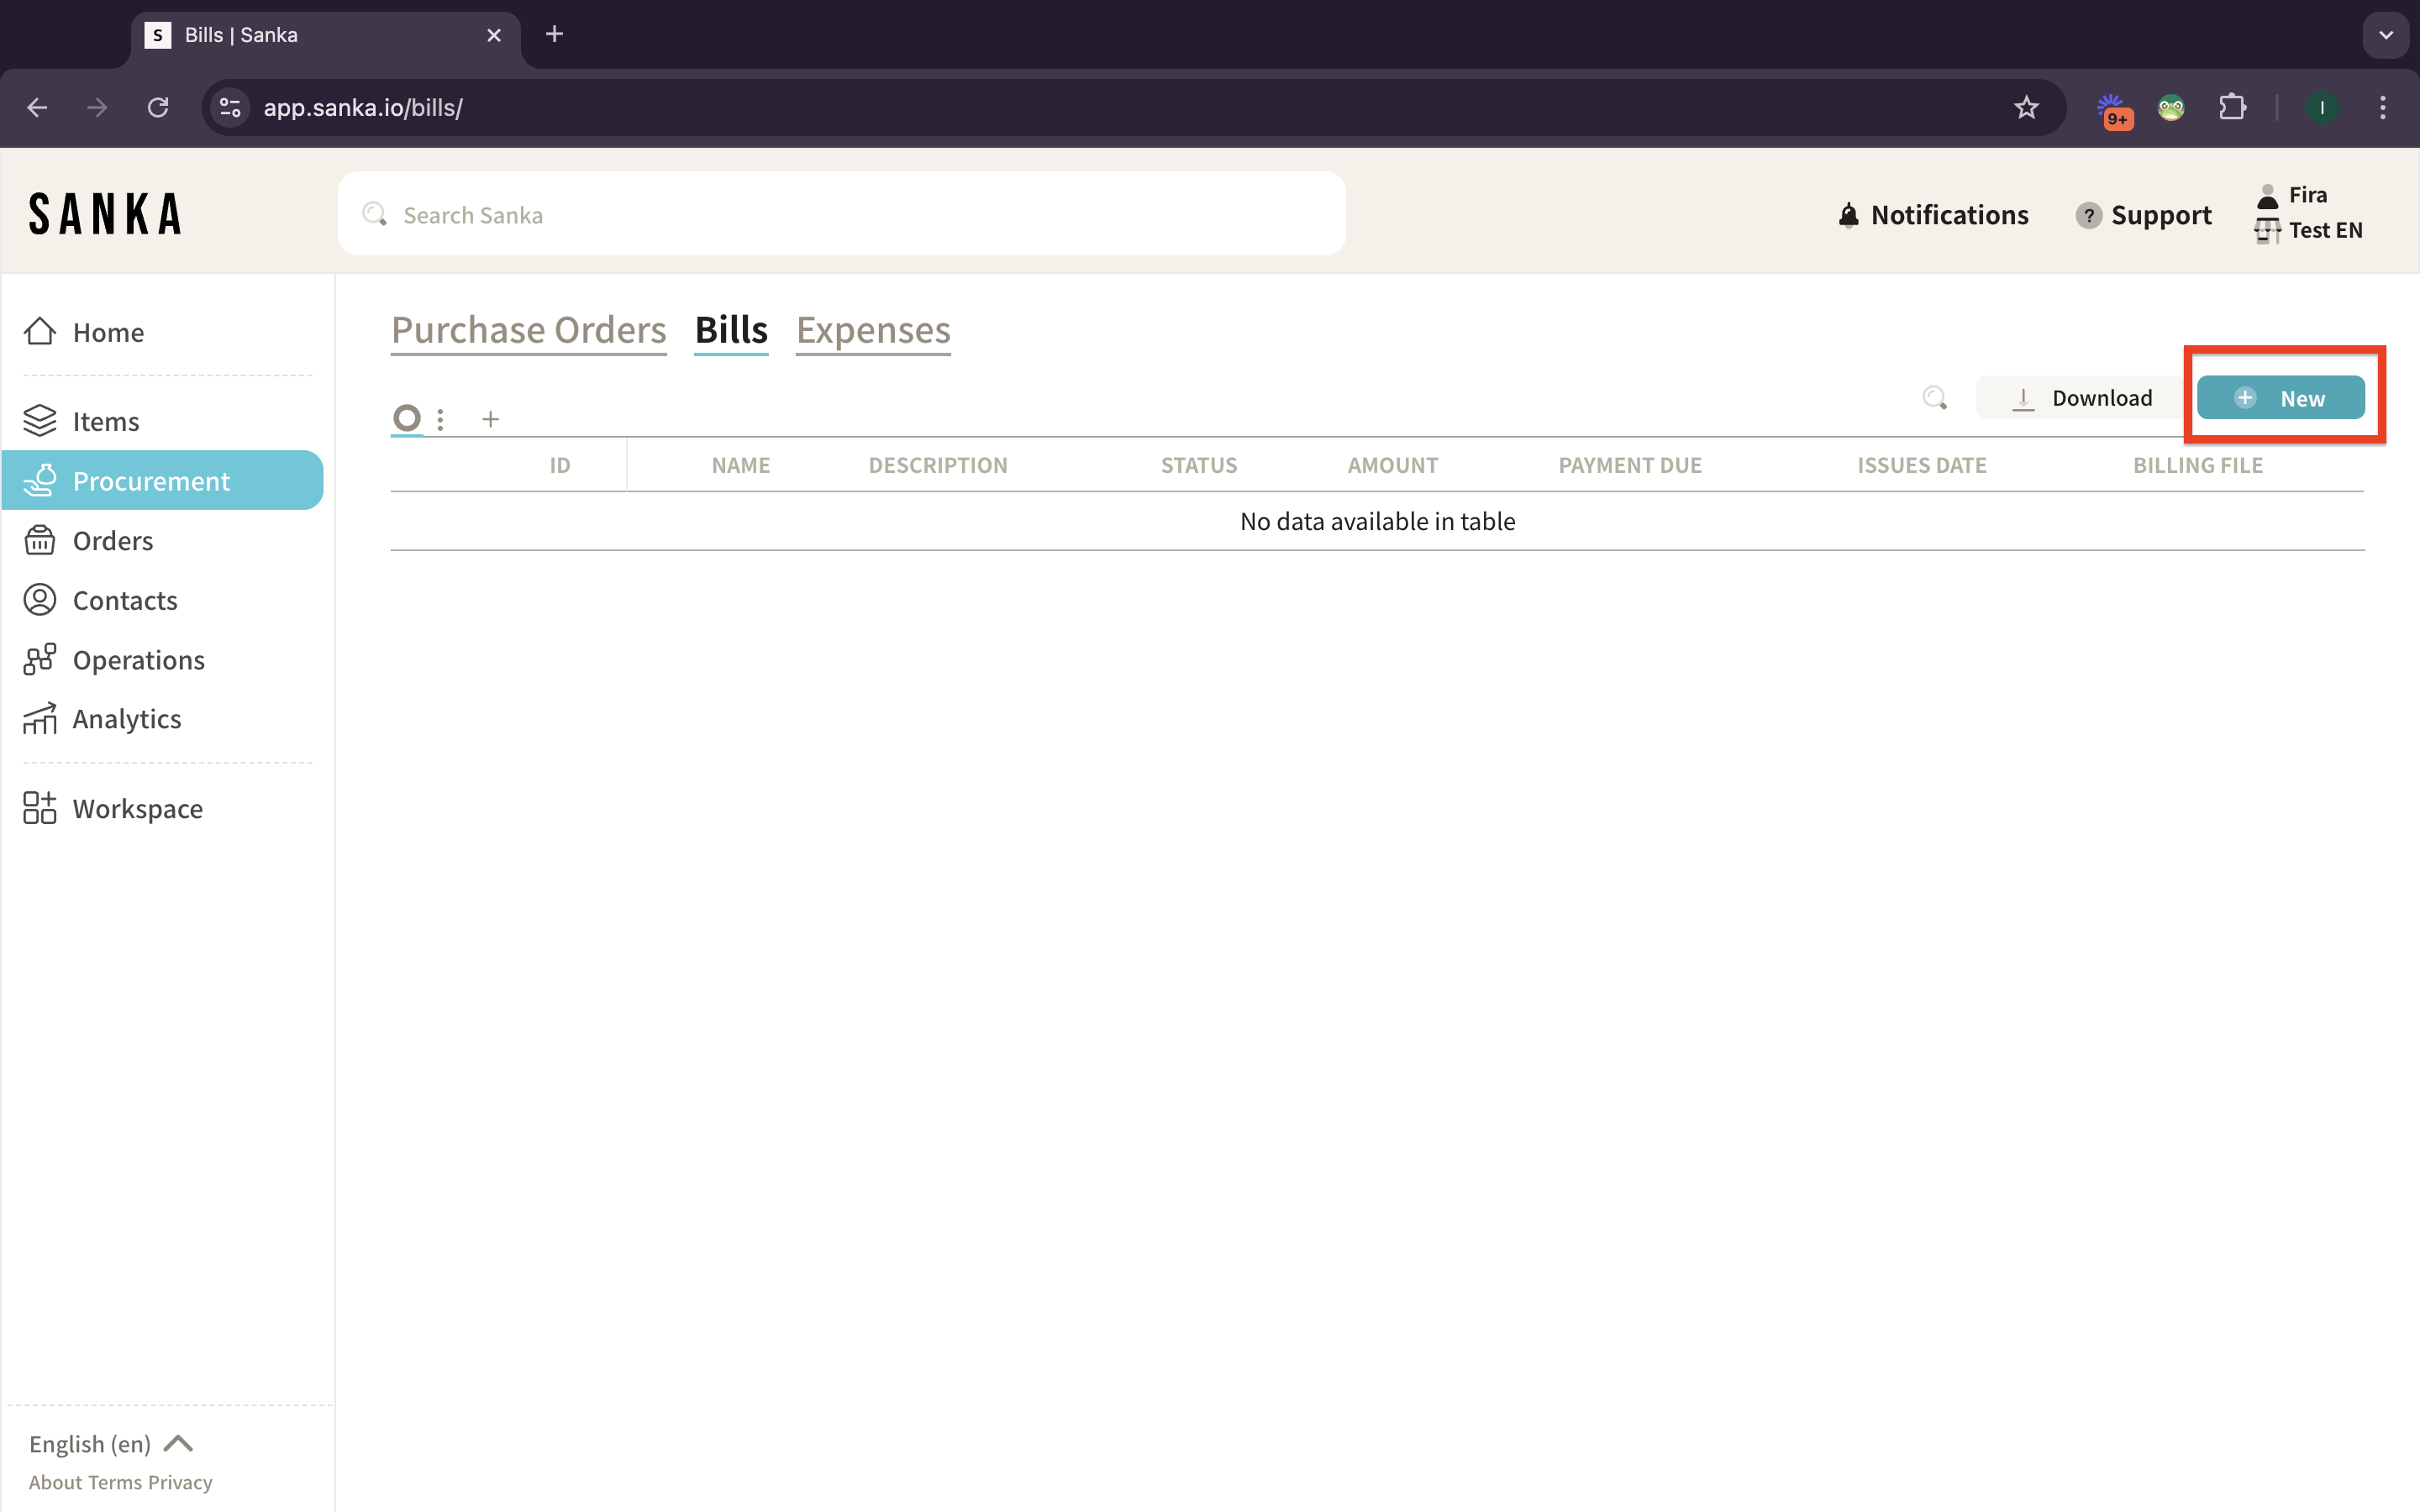
1: Click the “New Bill” button at the top-right of the Bills page.
2: A detail page will appear for you to fill in the following key information:
- Bill Name: An identifier for your bill.
- Description: A summary or specific details of the bill.
- Amount: Record the total amount due as stated in the bill.
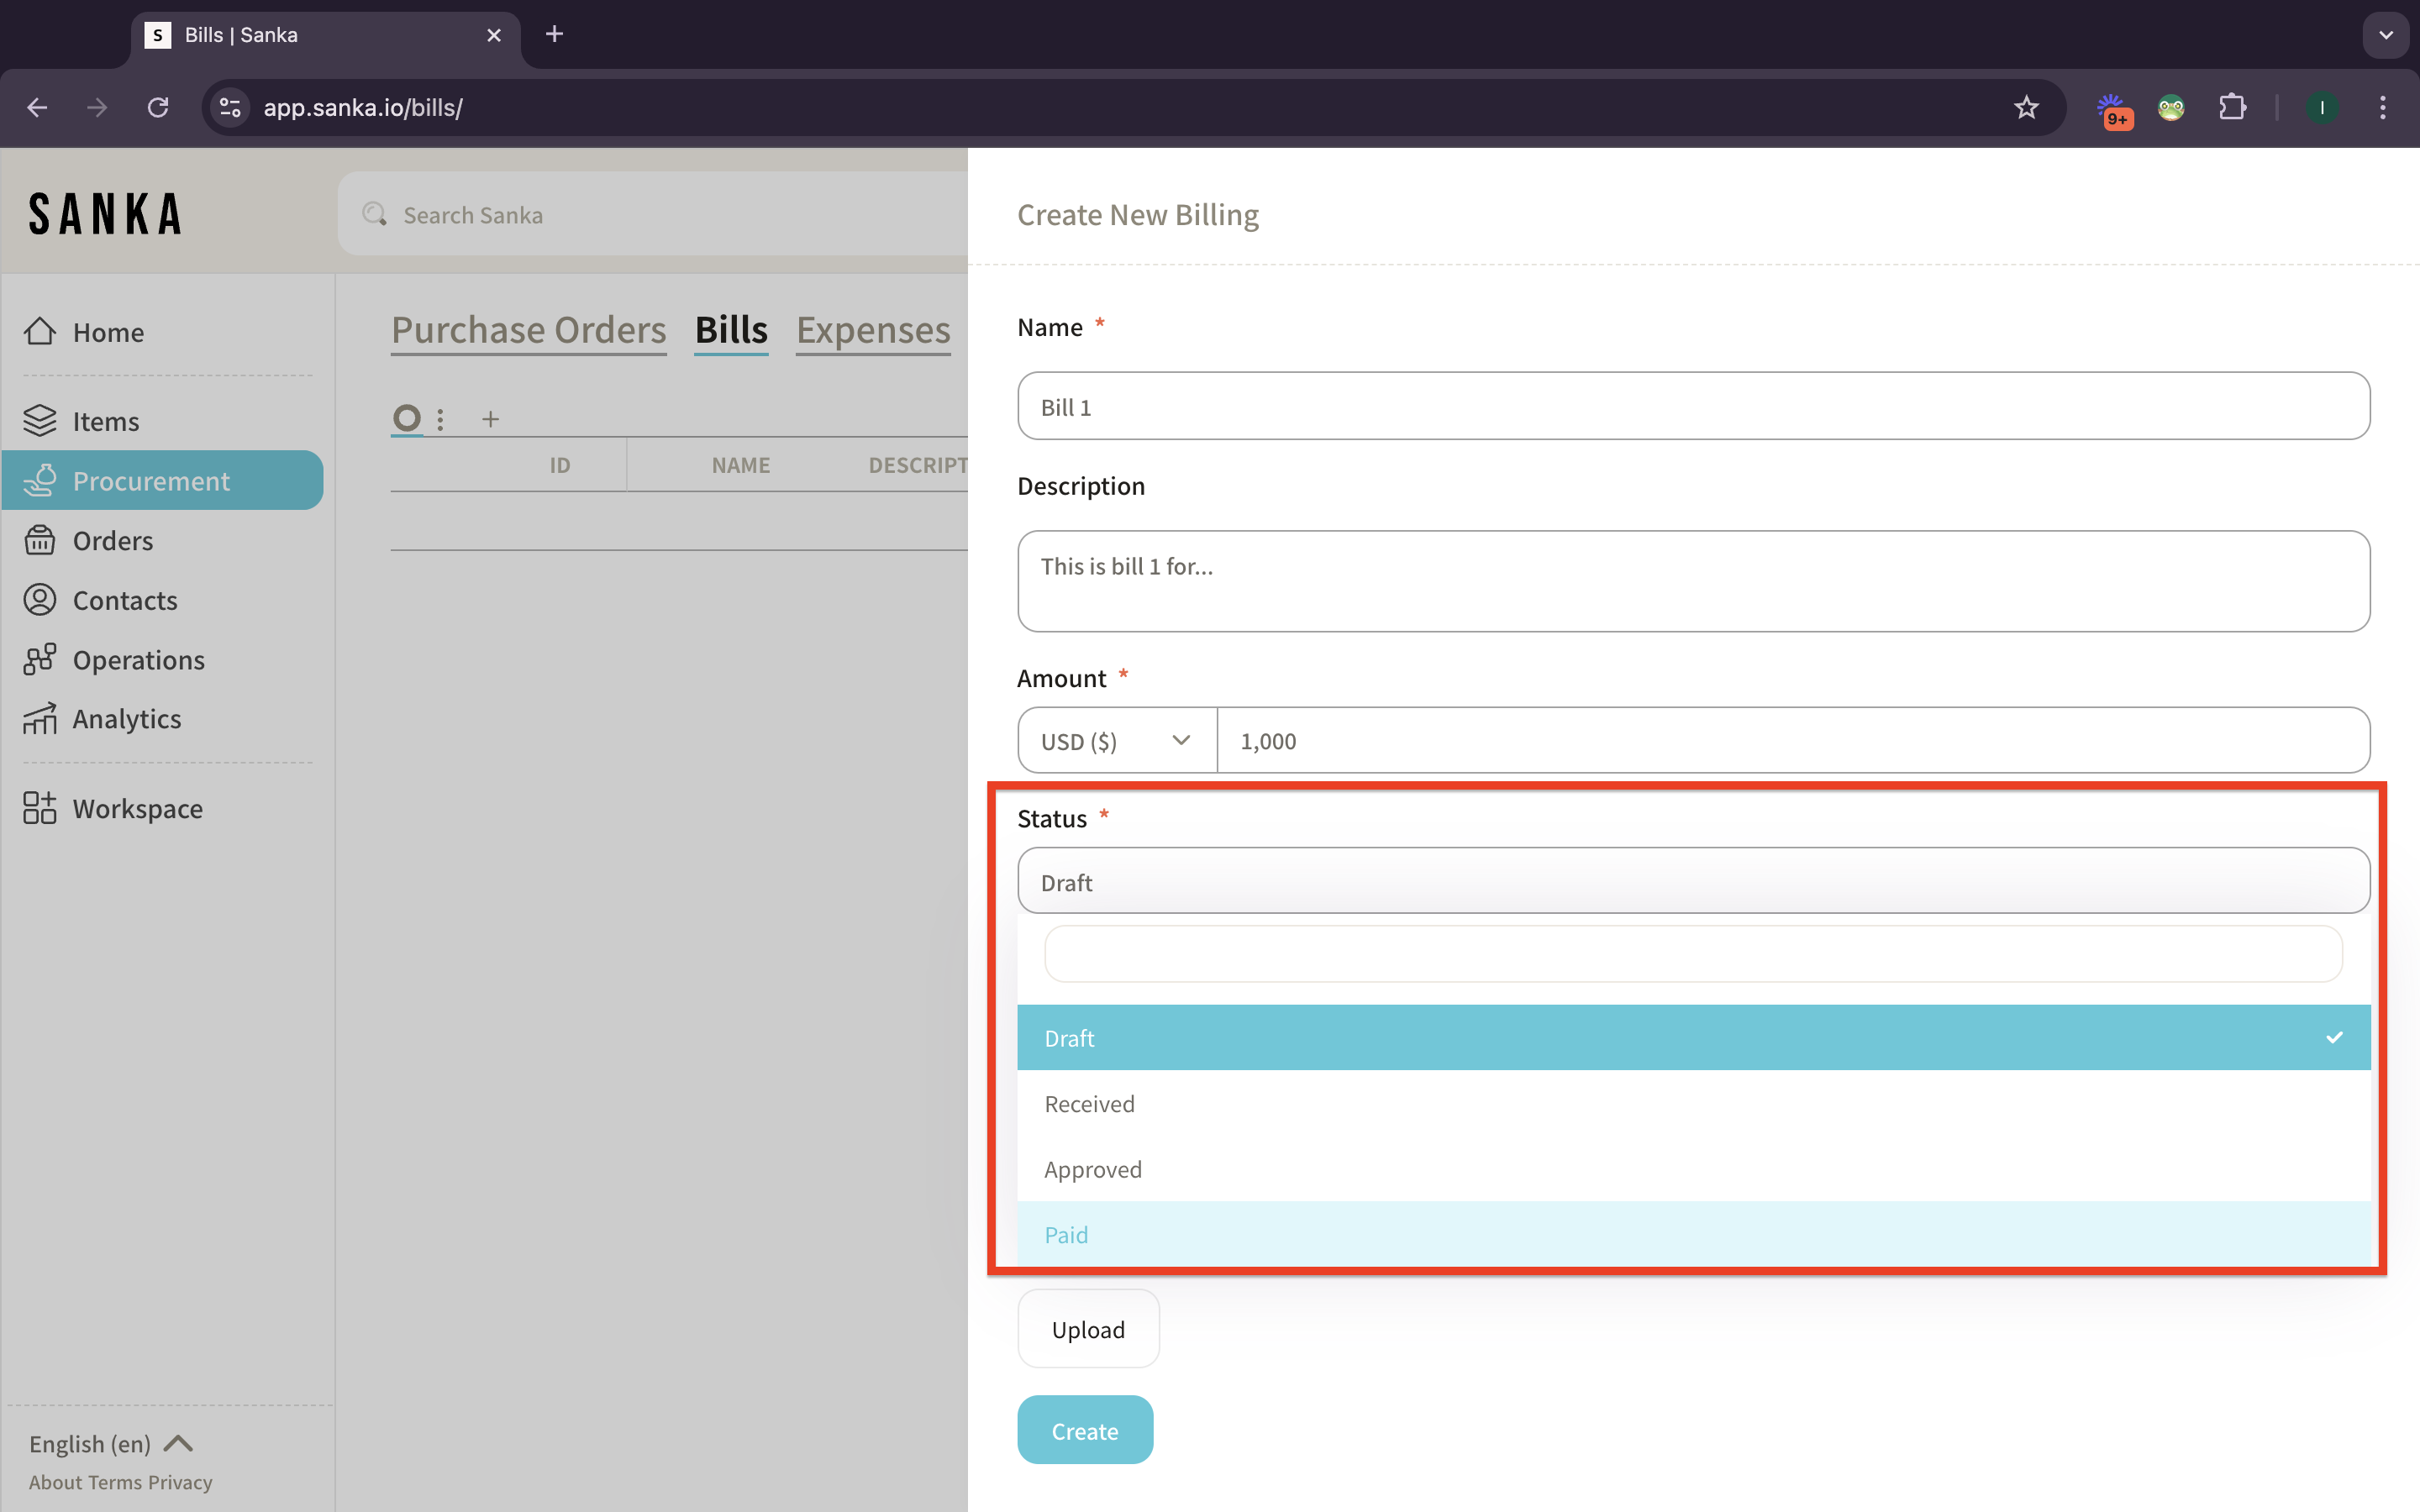
- Category: The status of your bill.
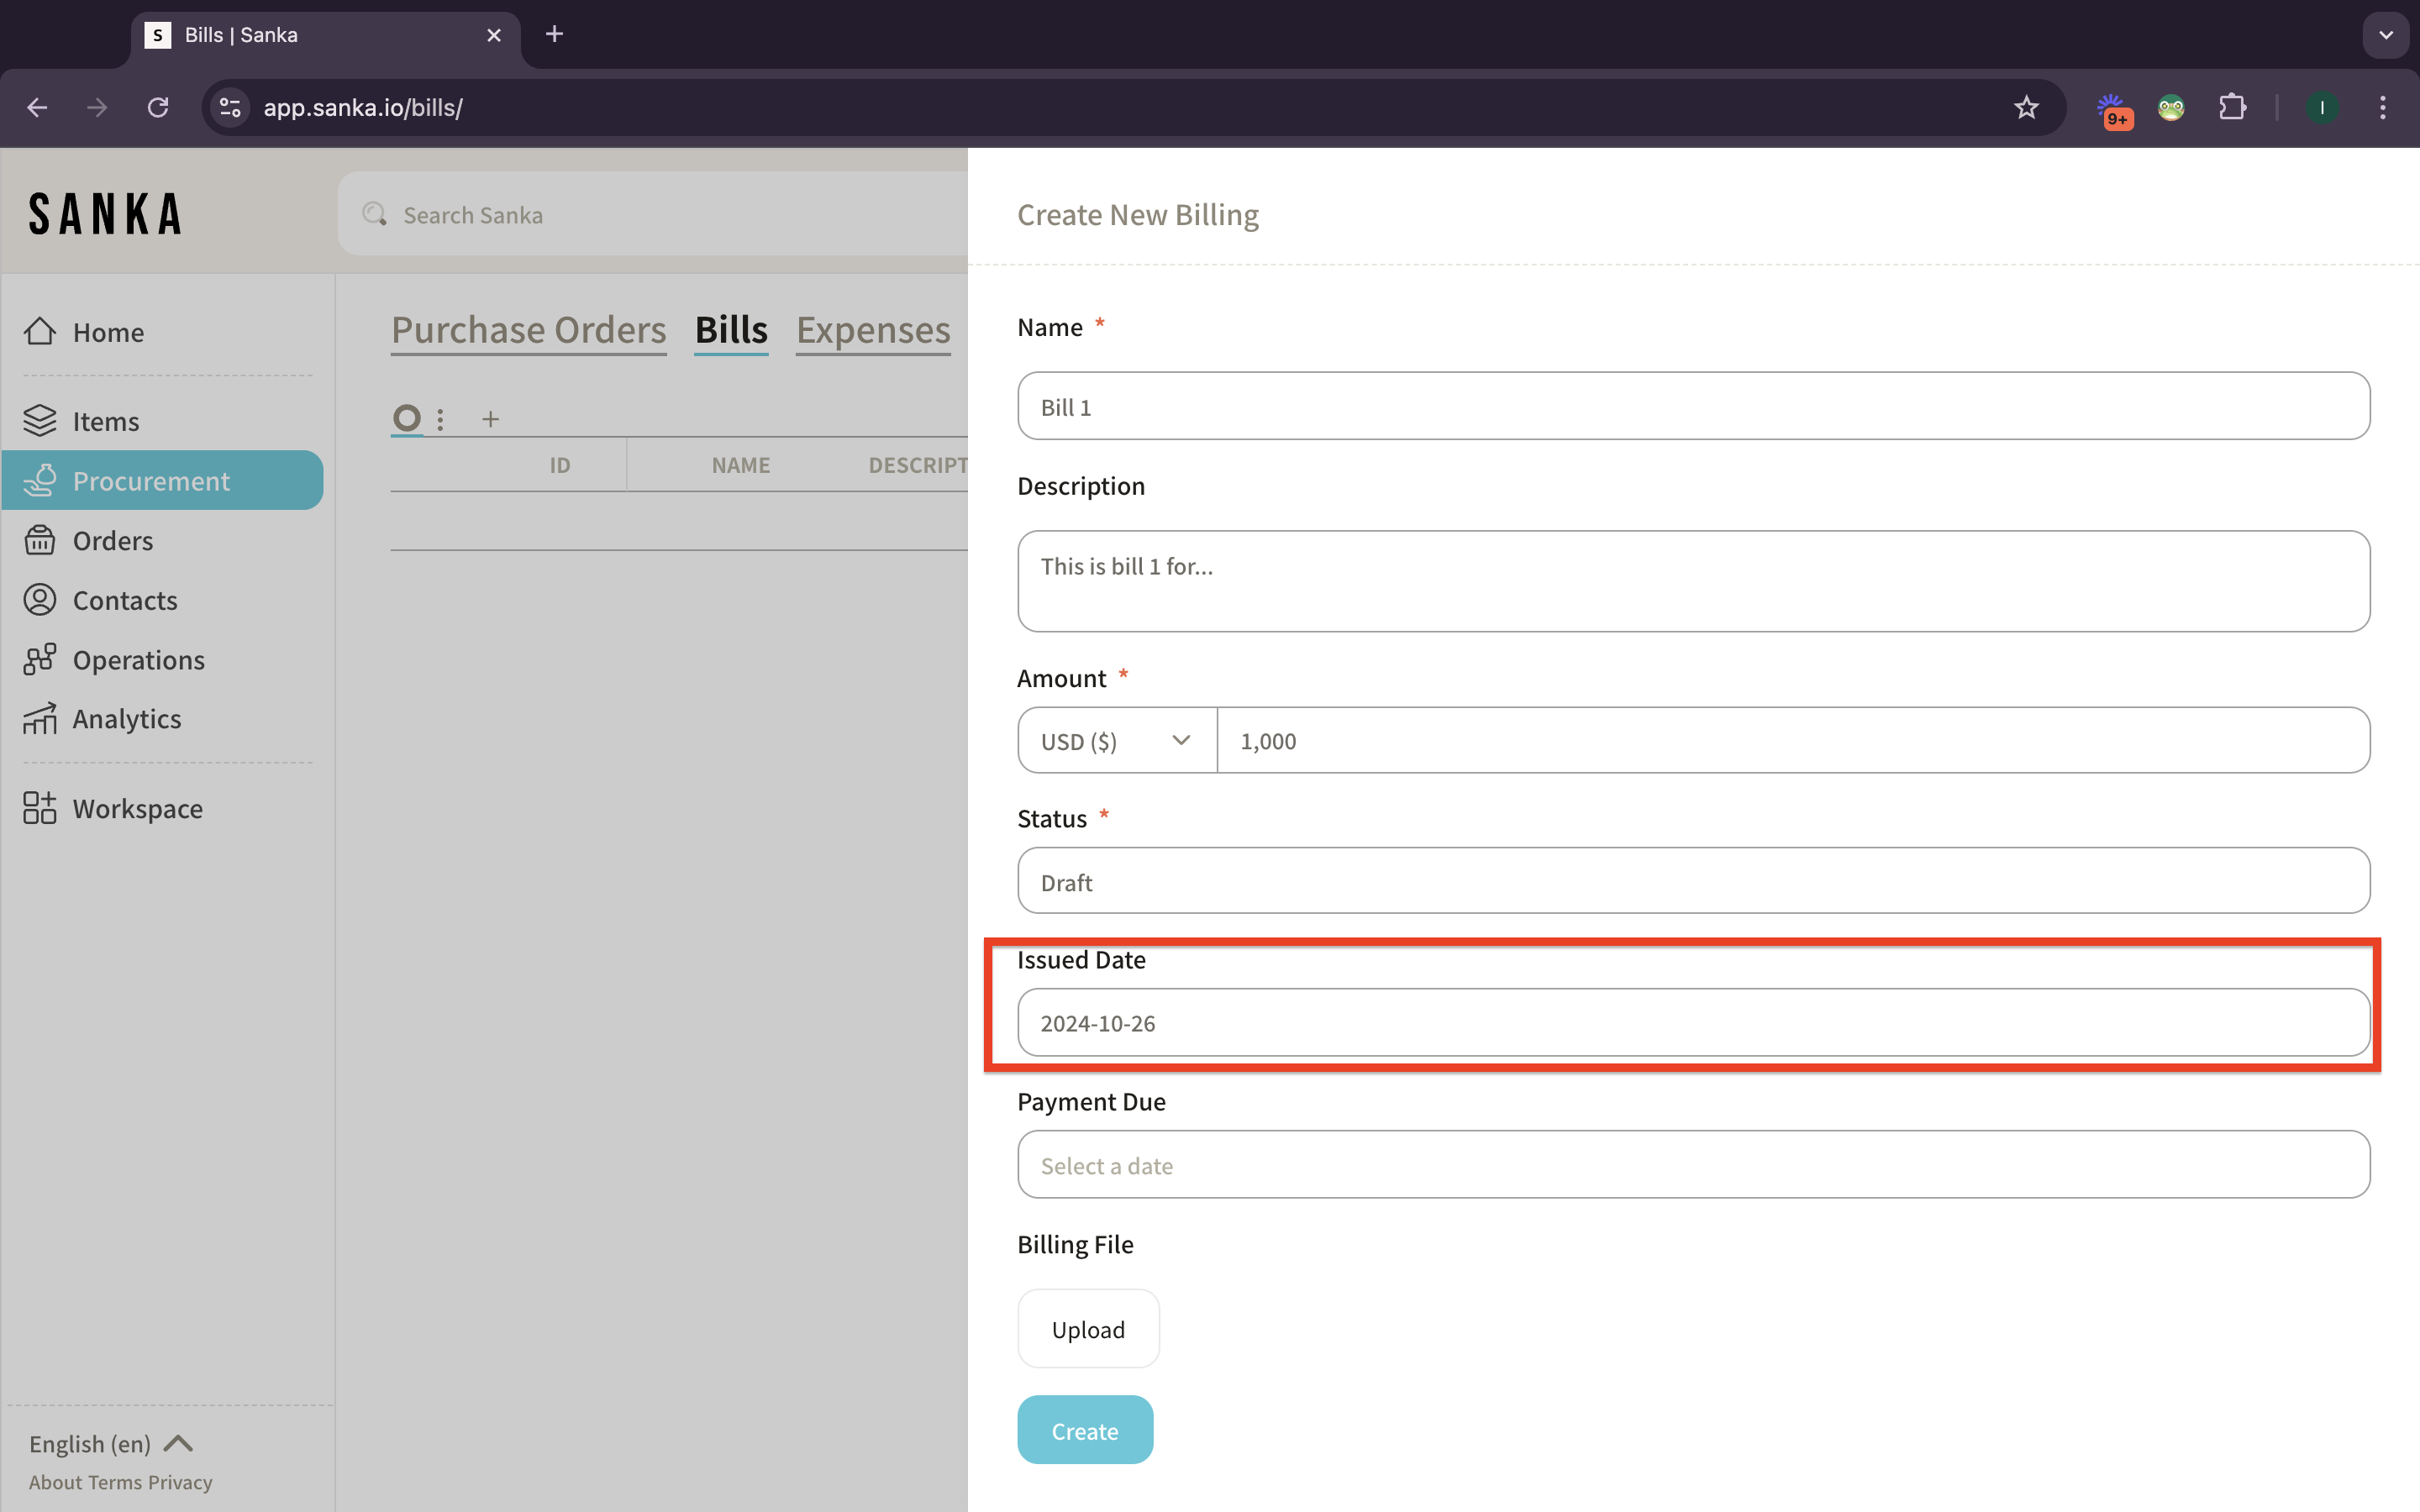
- Issued Date: The date of the bill issued
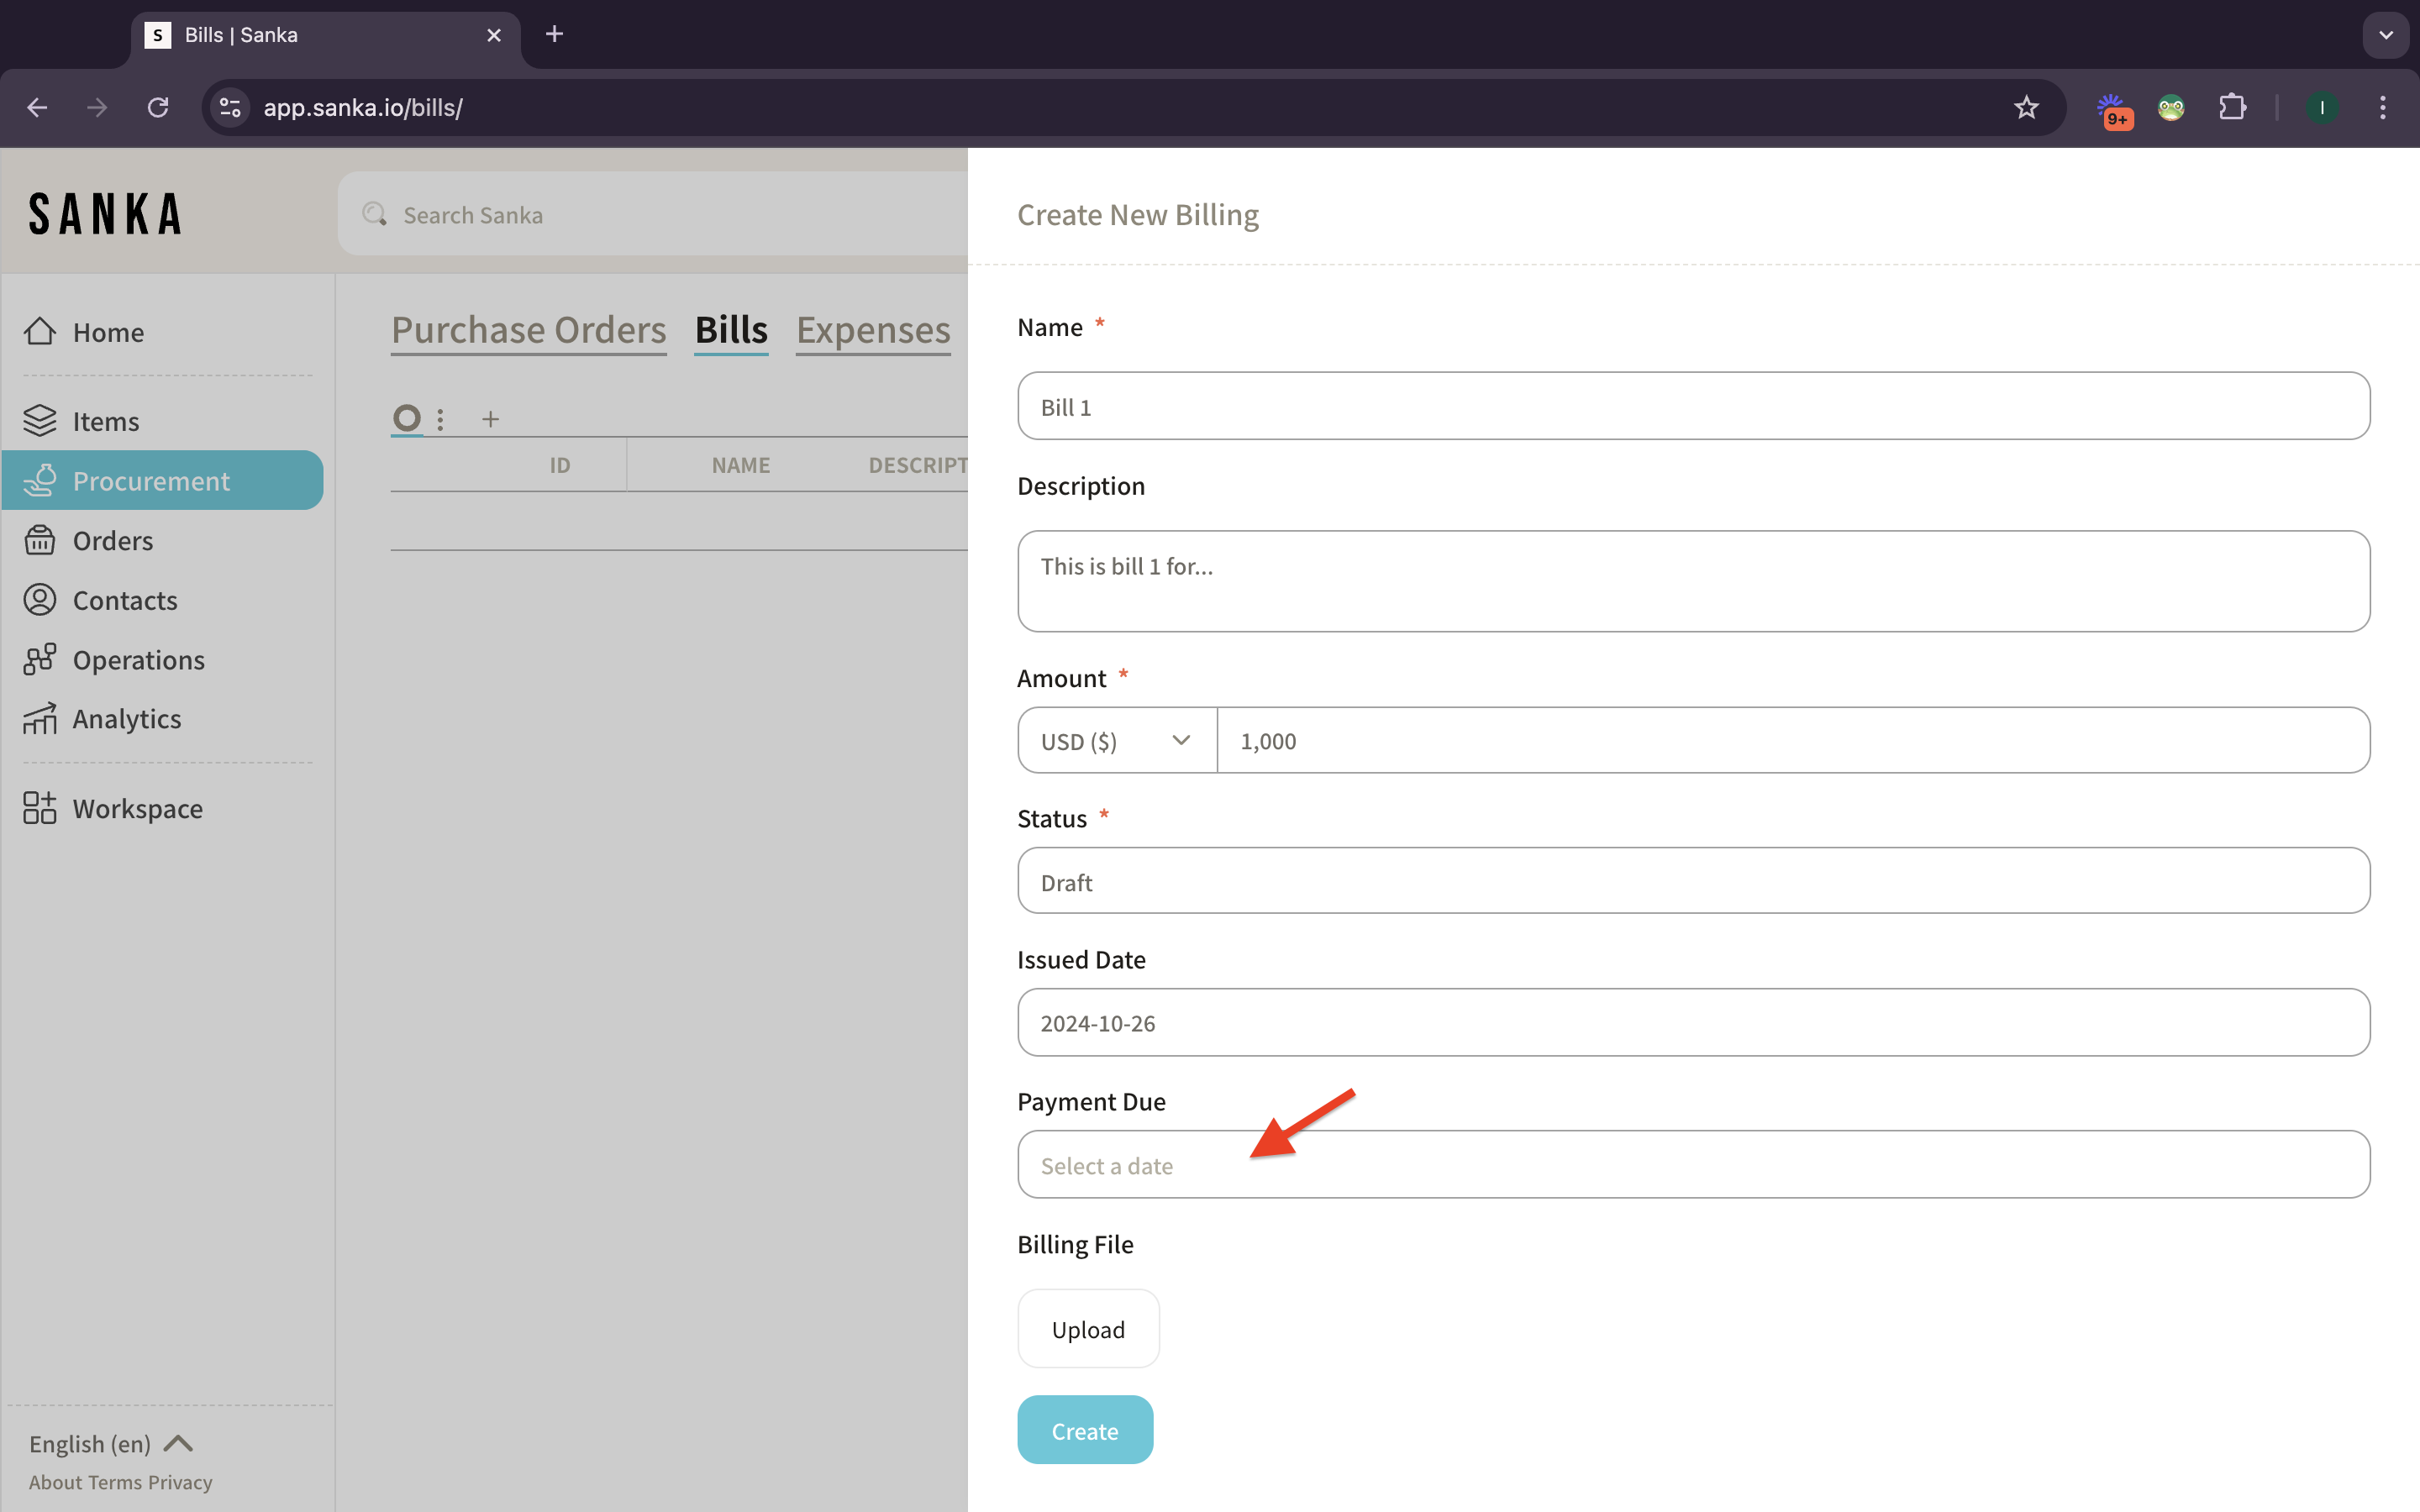
- Payment Due: The last day of the payment should be paid.
- Billing File: A copy of the bill or any related documents for record-keeping and reference.
3: Fill the information of your bill (Name, Description, Amount).
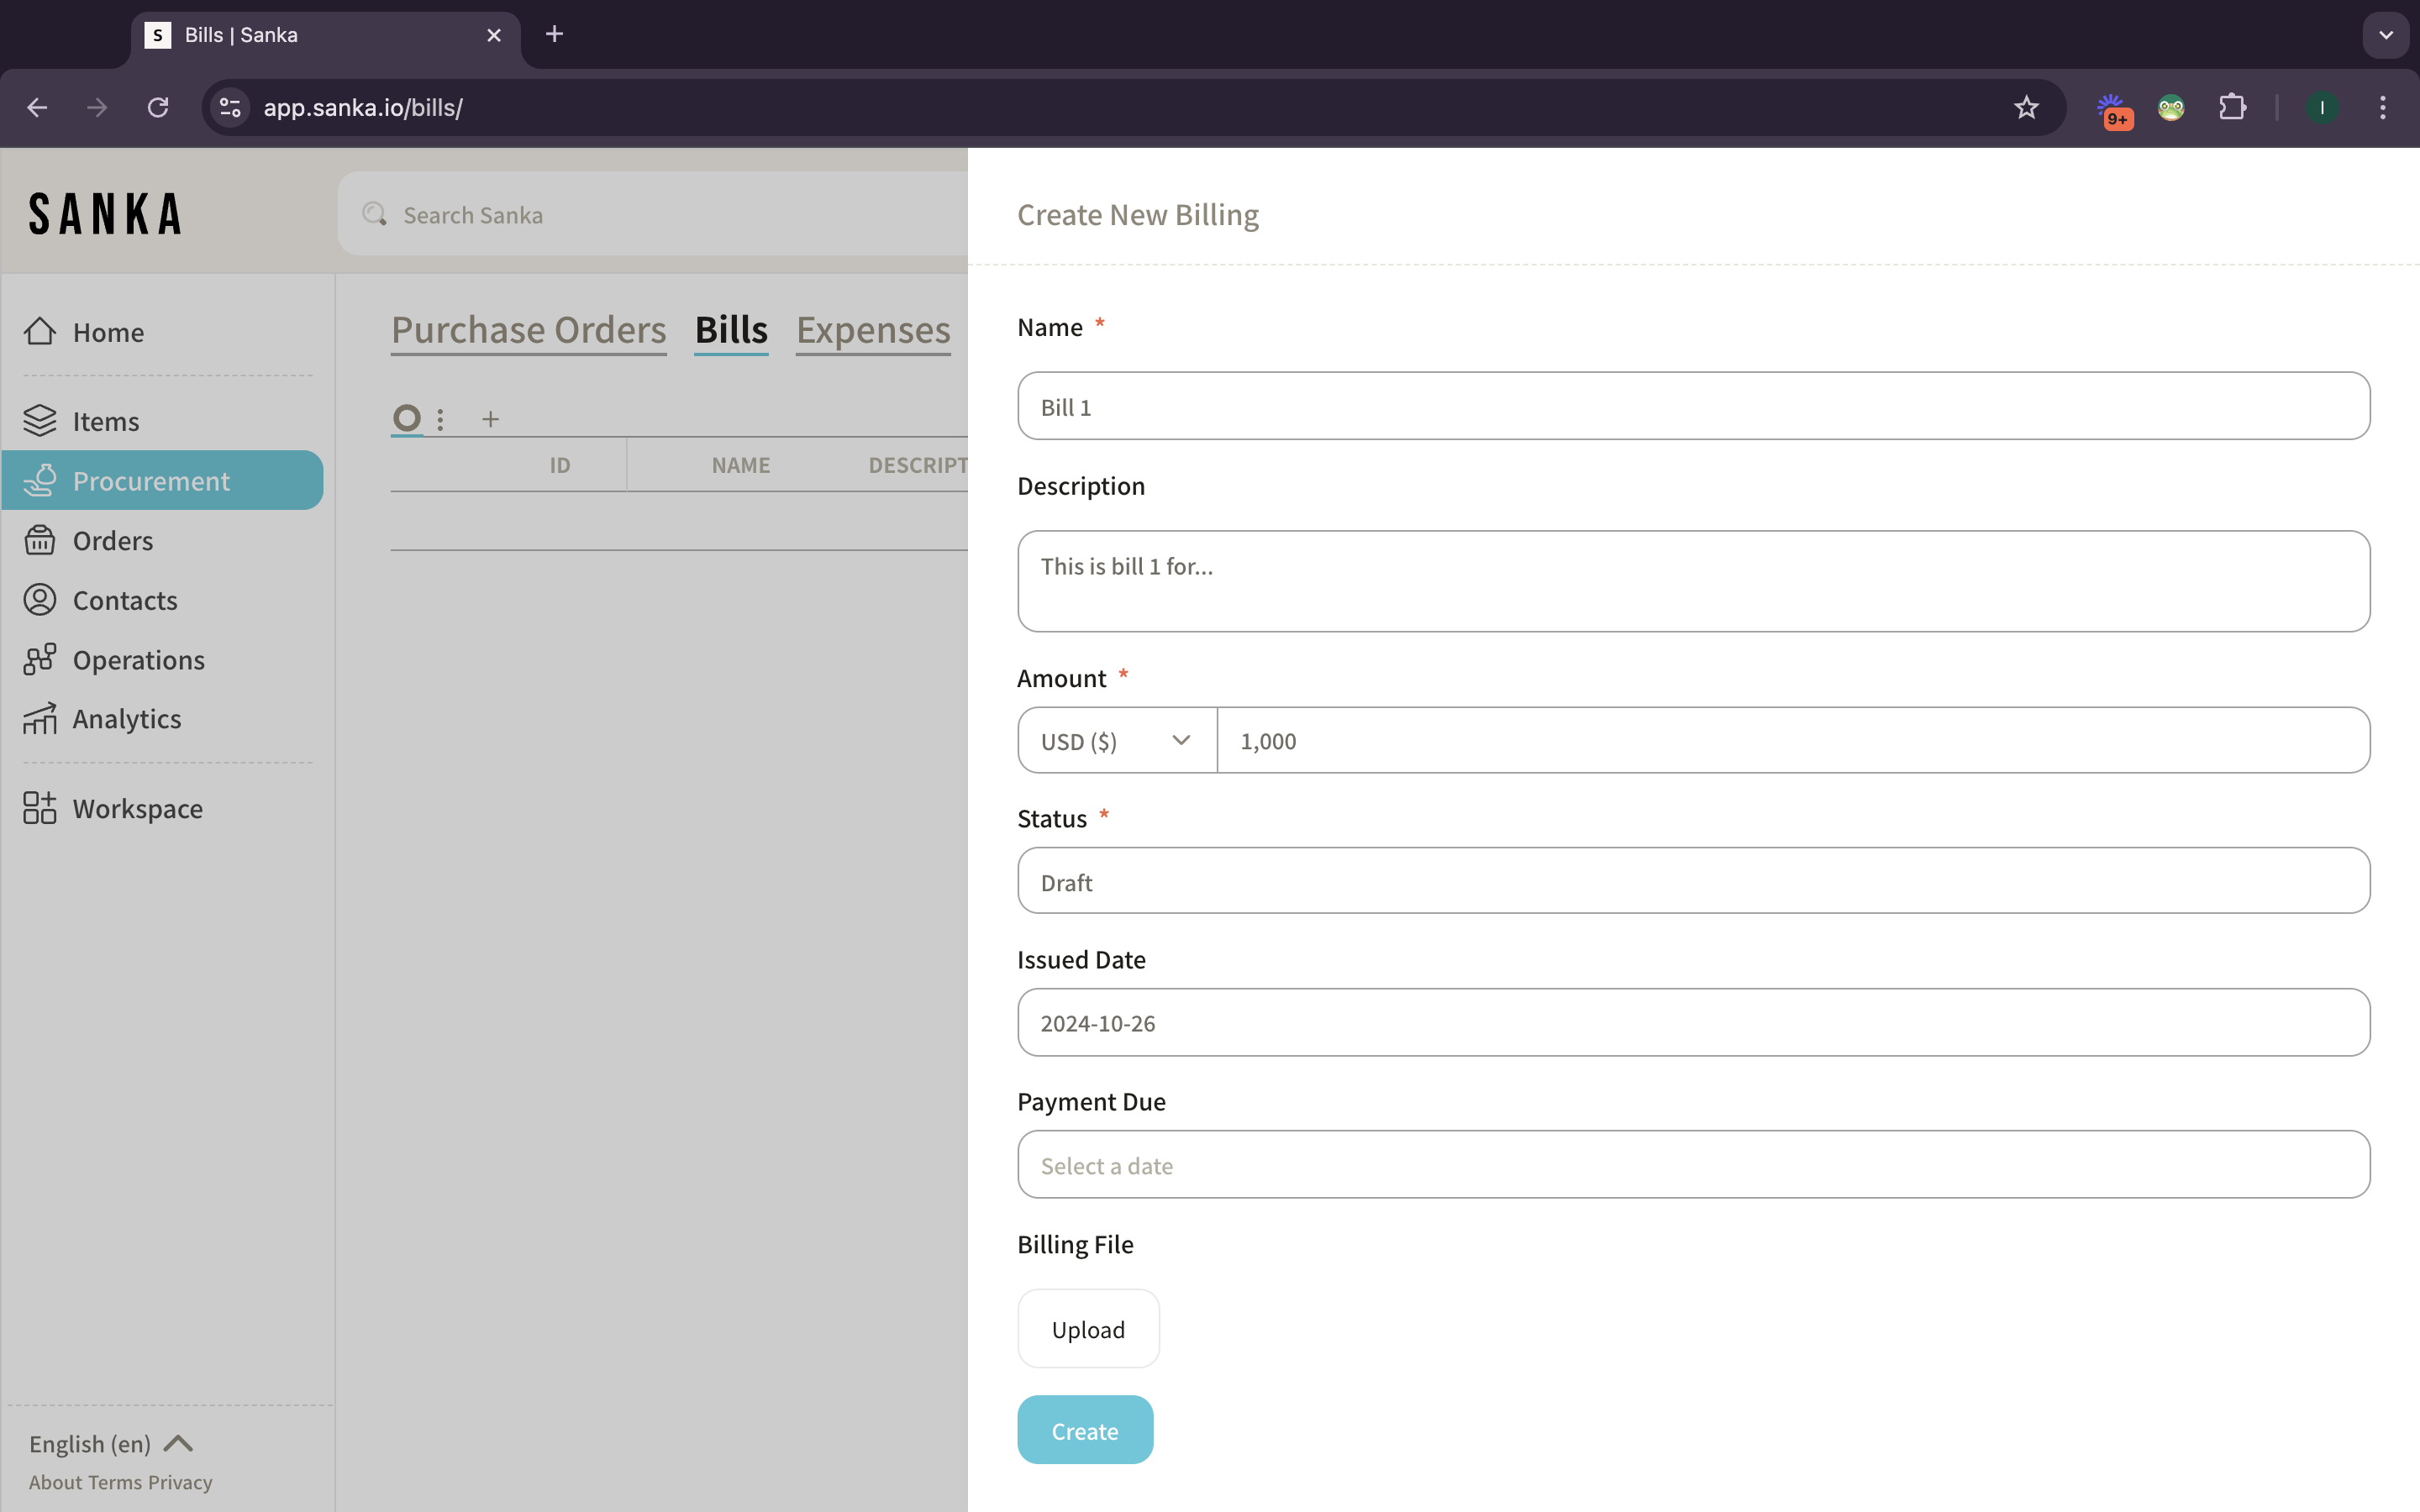
4: Define the bill to a status, such as draft, approved, received, or paid, for easier tracking.
5: The “Issued Date” is set to “Today” by default. You may change if necessary.
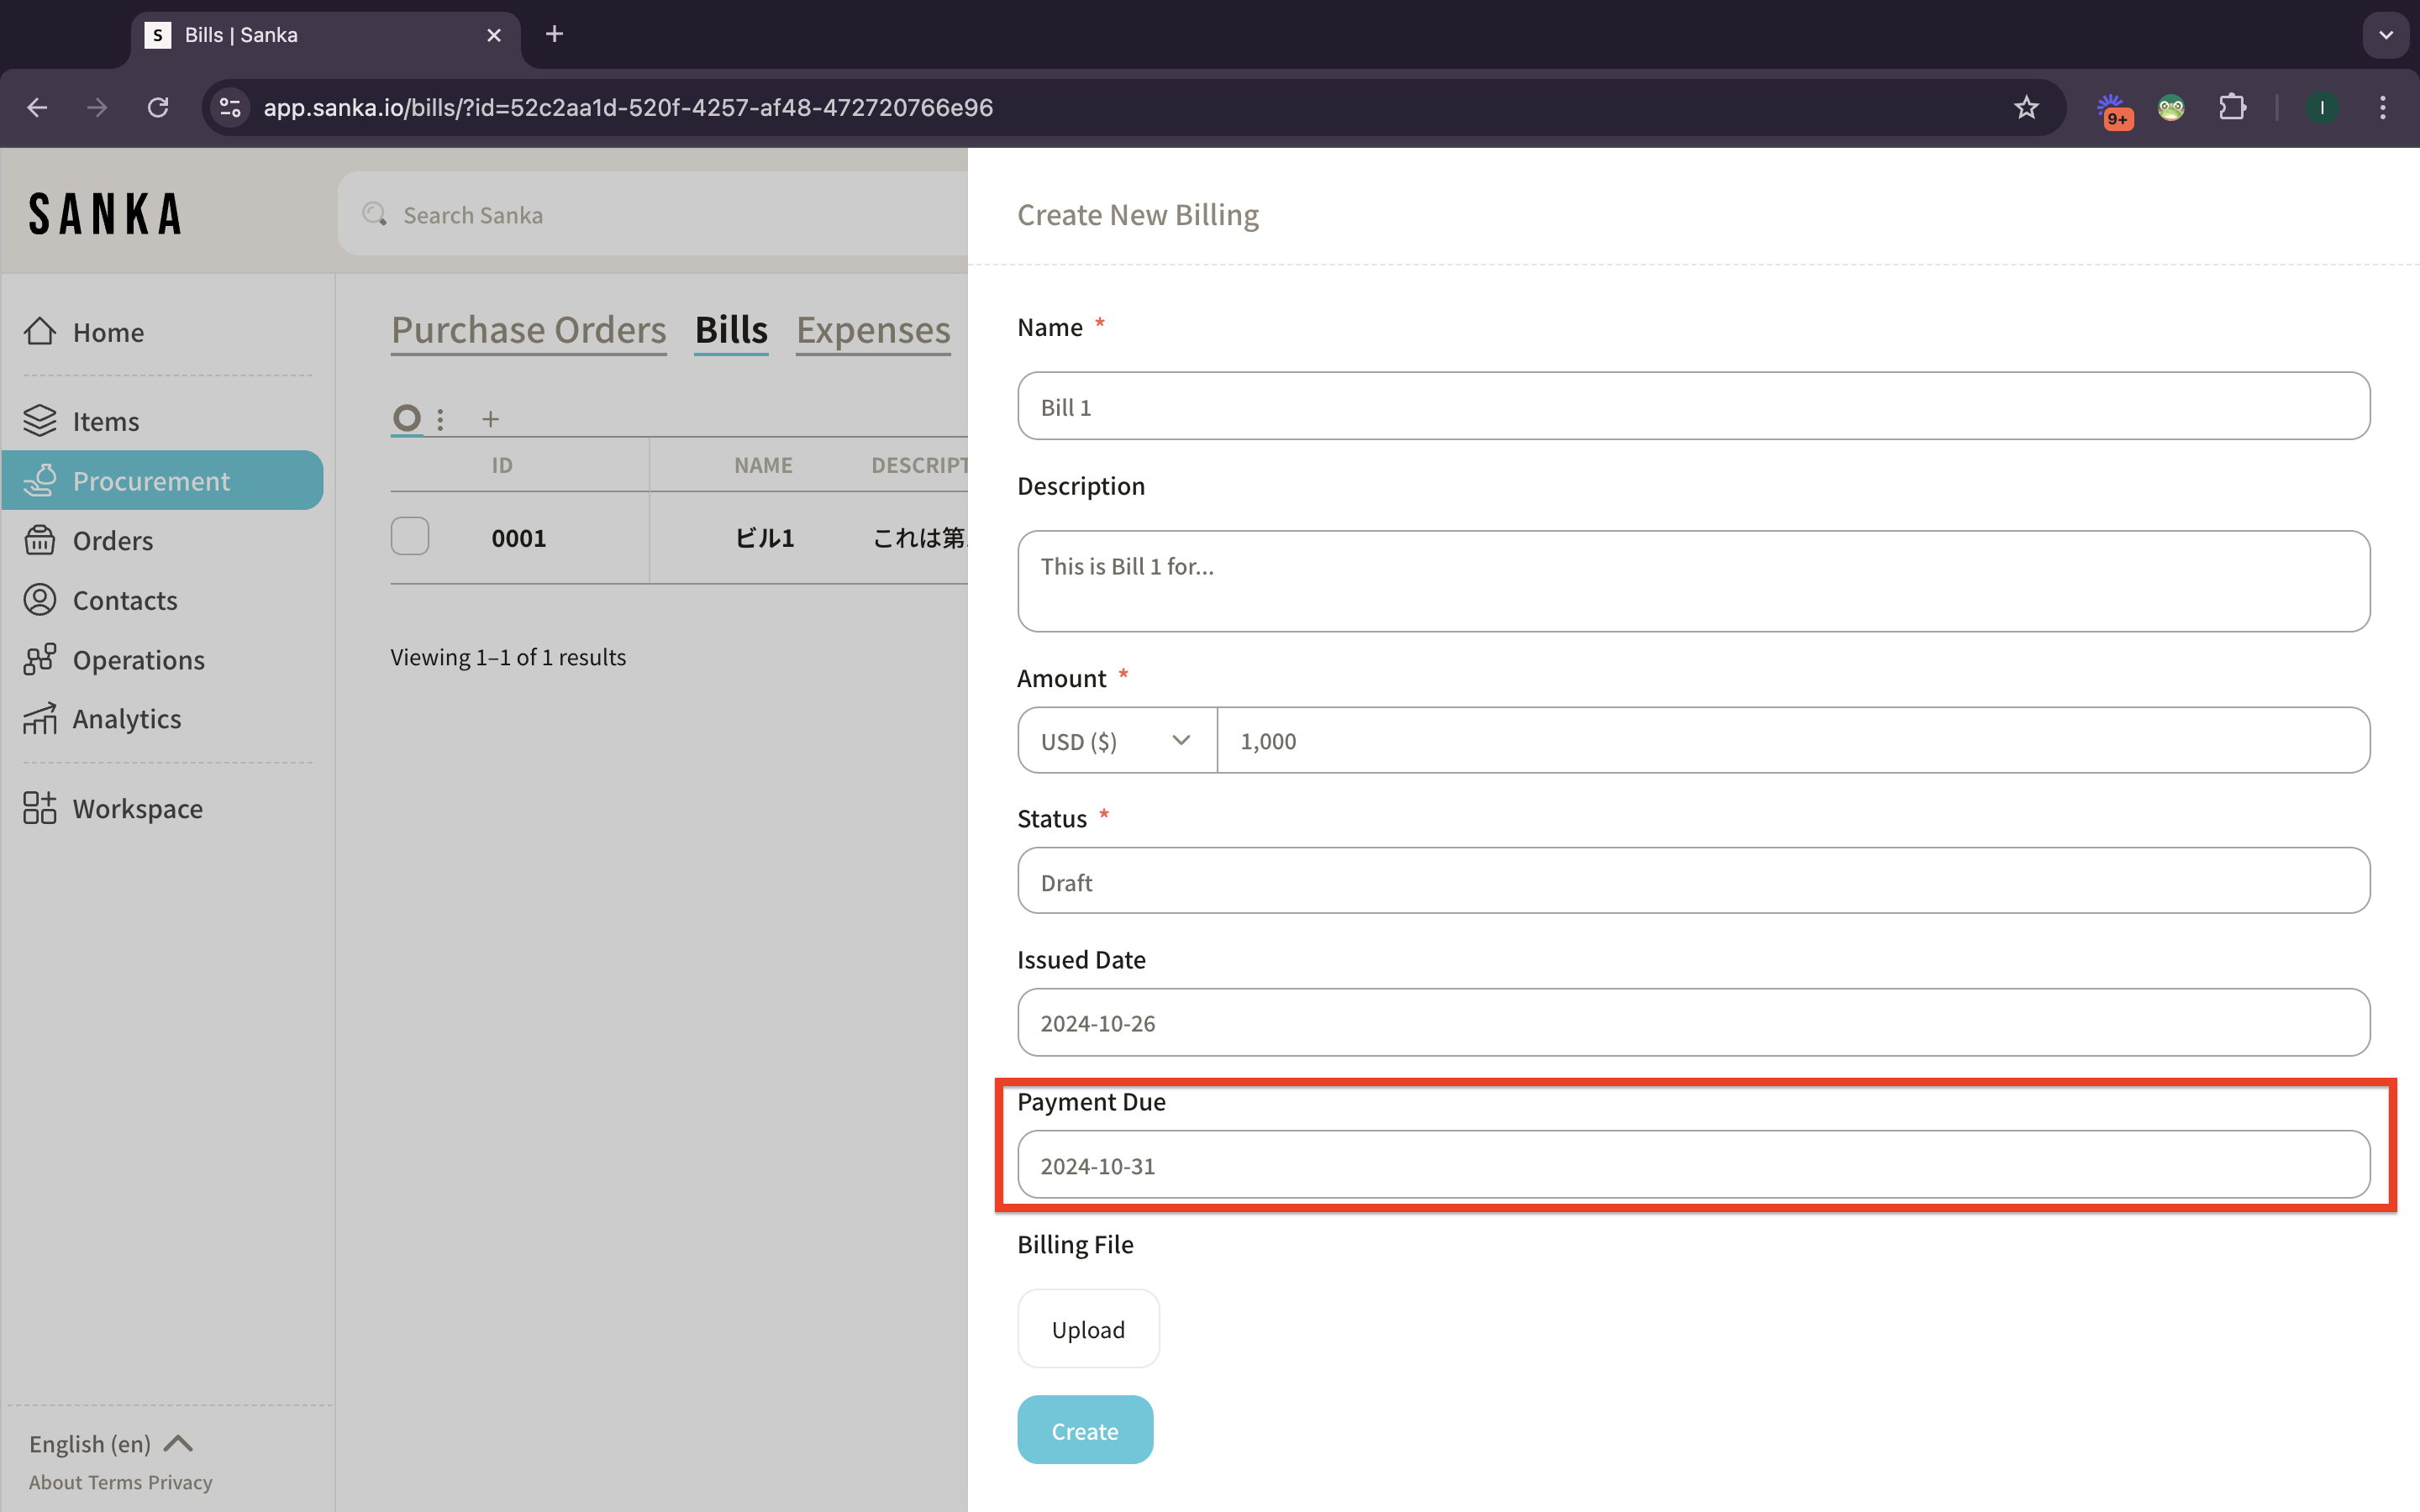
6: Go to “Payment Due” to enter the due date of the bill.
7: A calendar will pop-up and you need to select when payment is due for this bill.
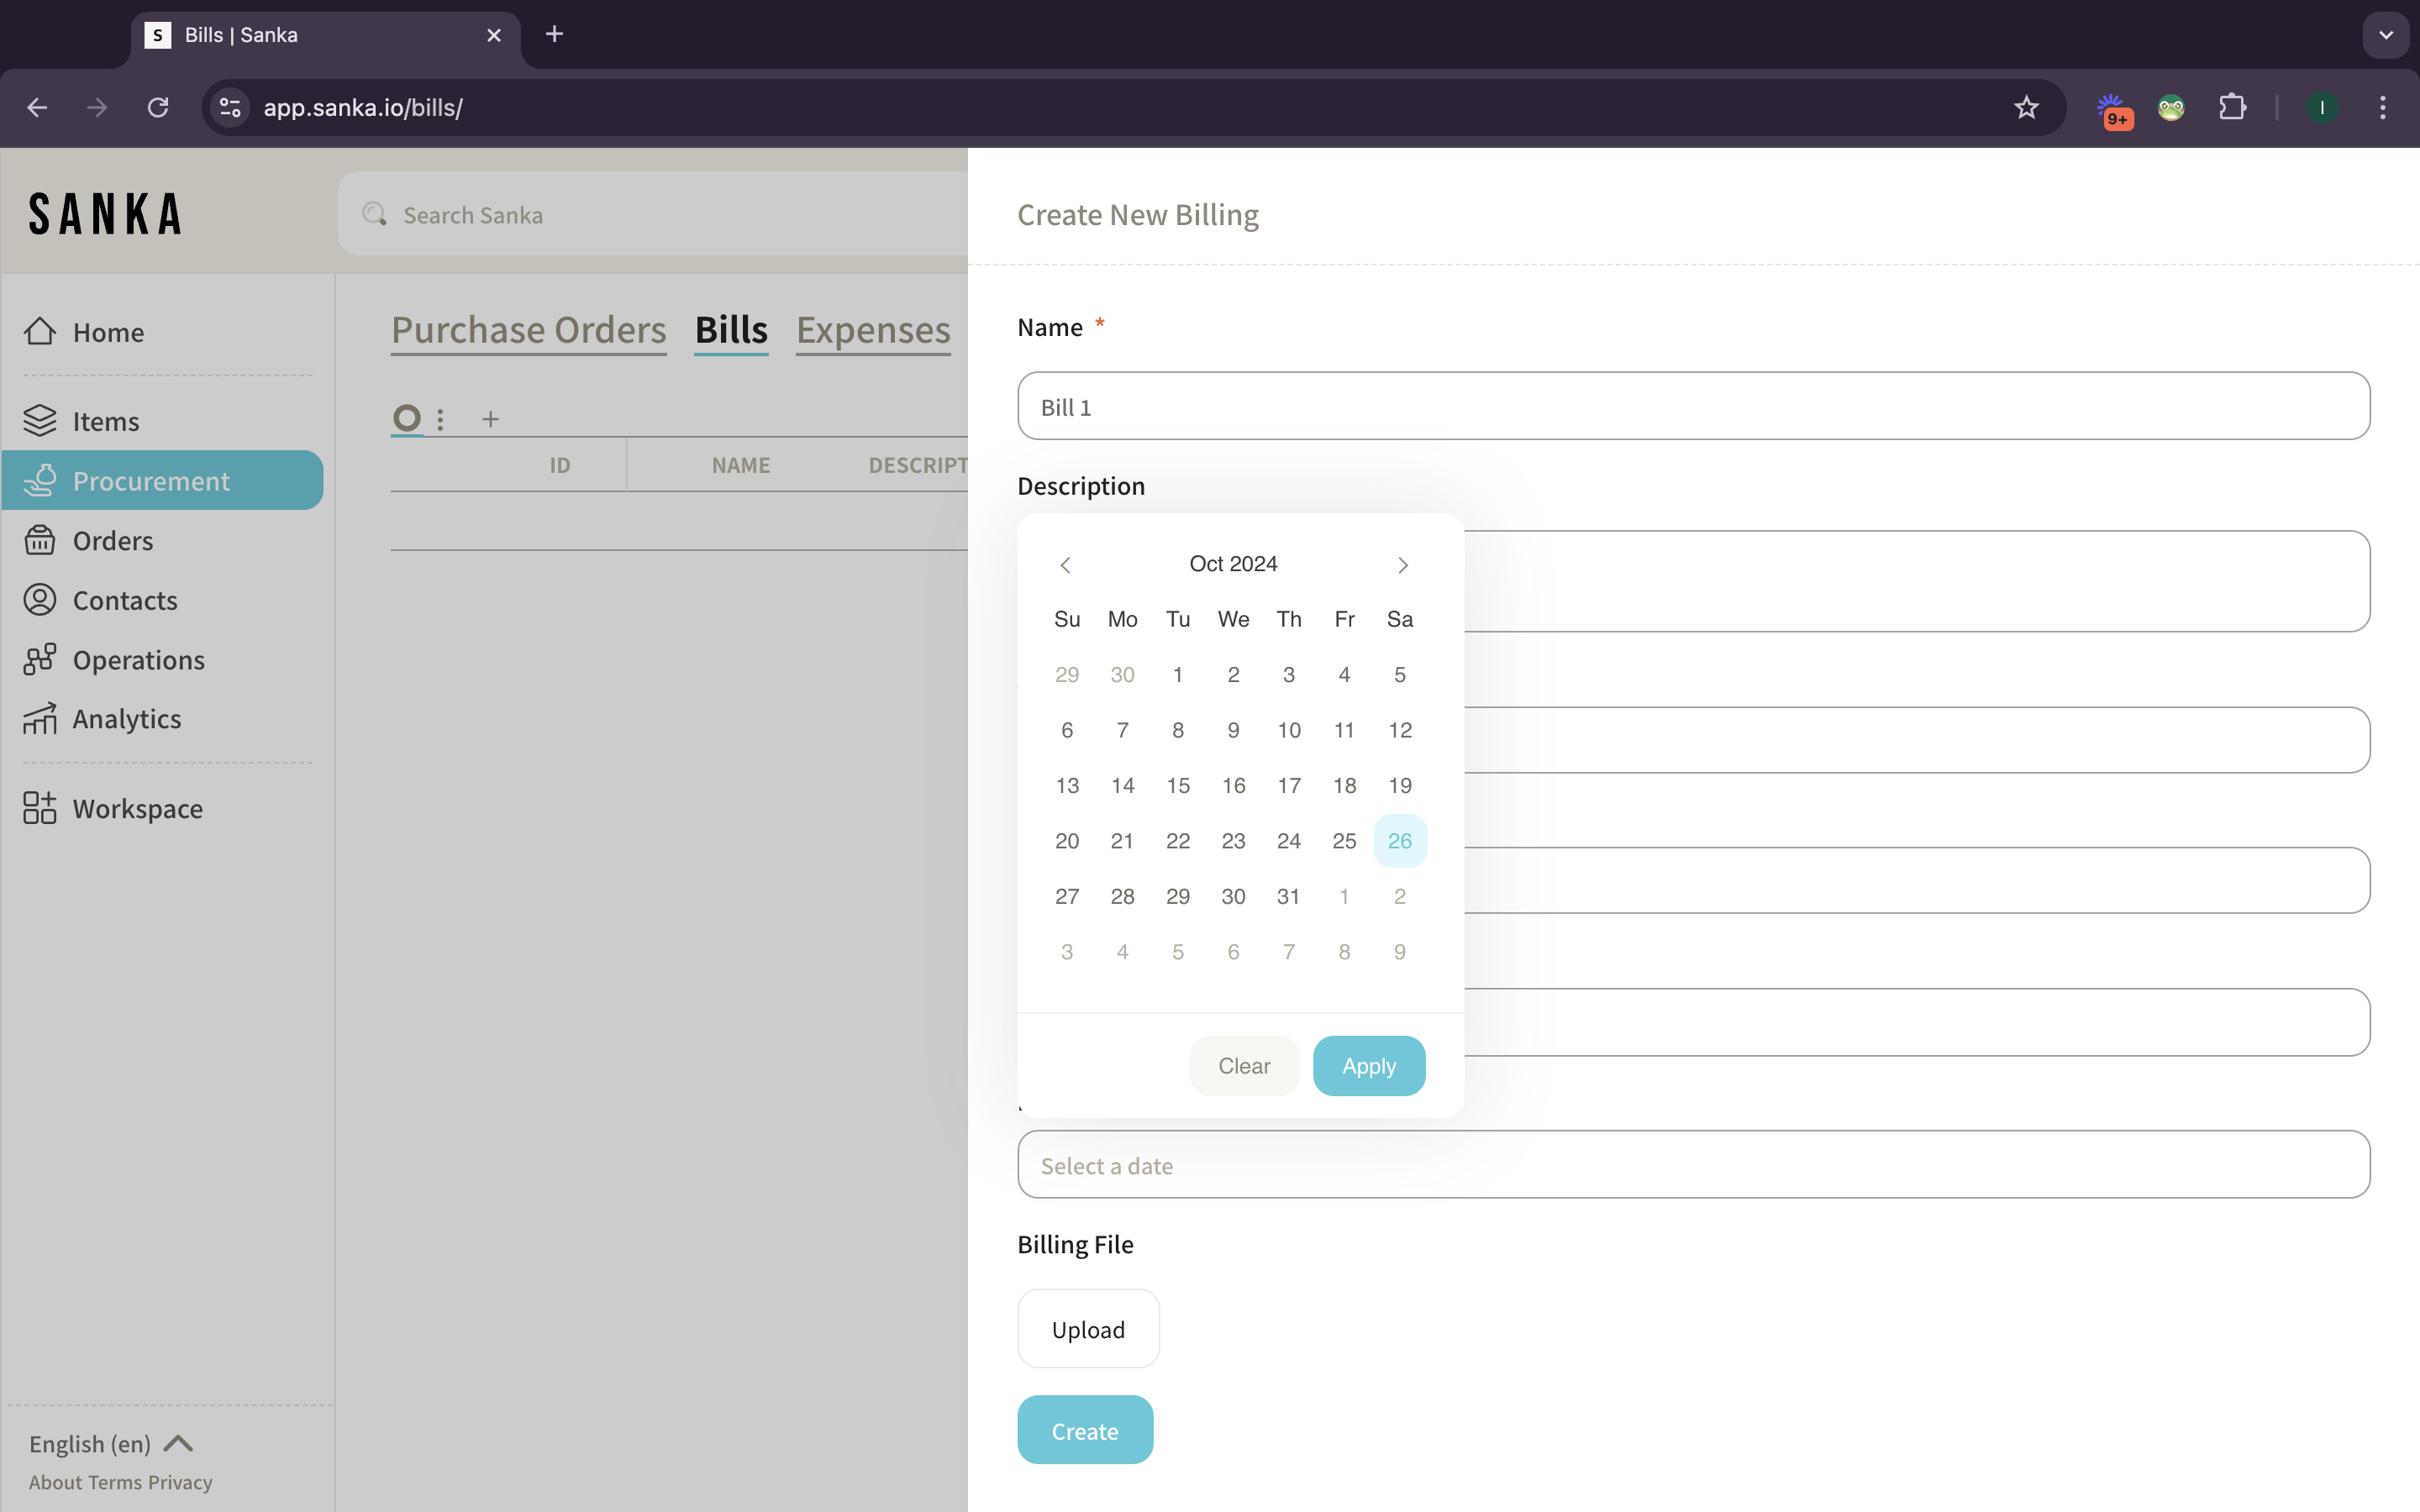
8: Click apply if you’ve done. The date will show up at the selected field.
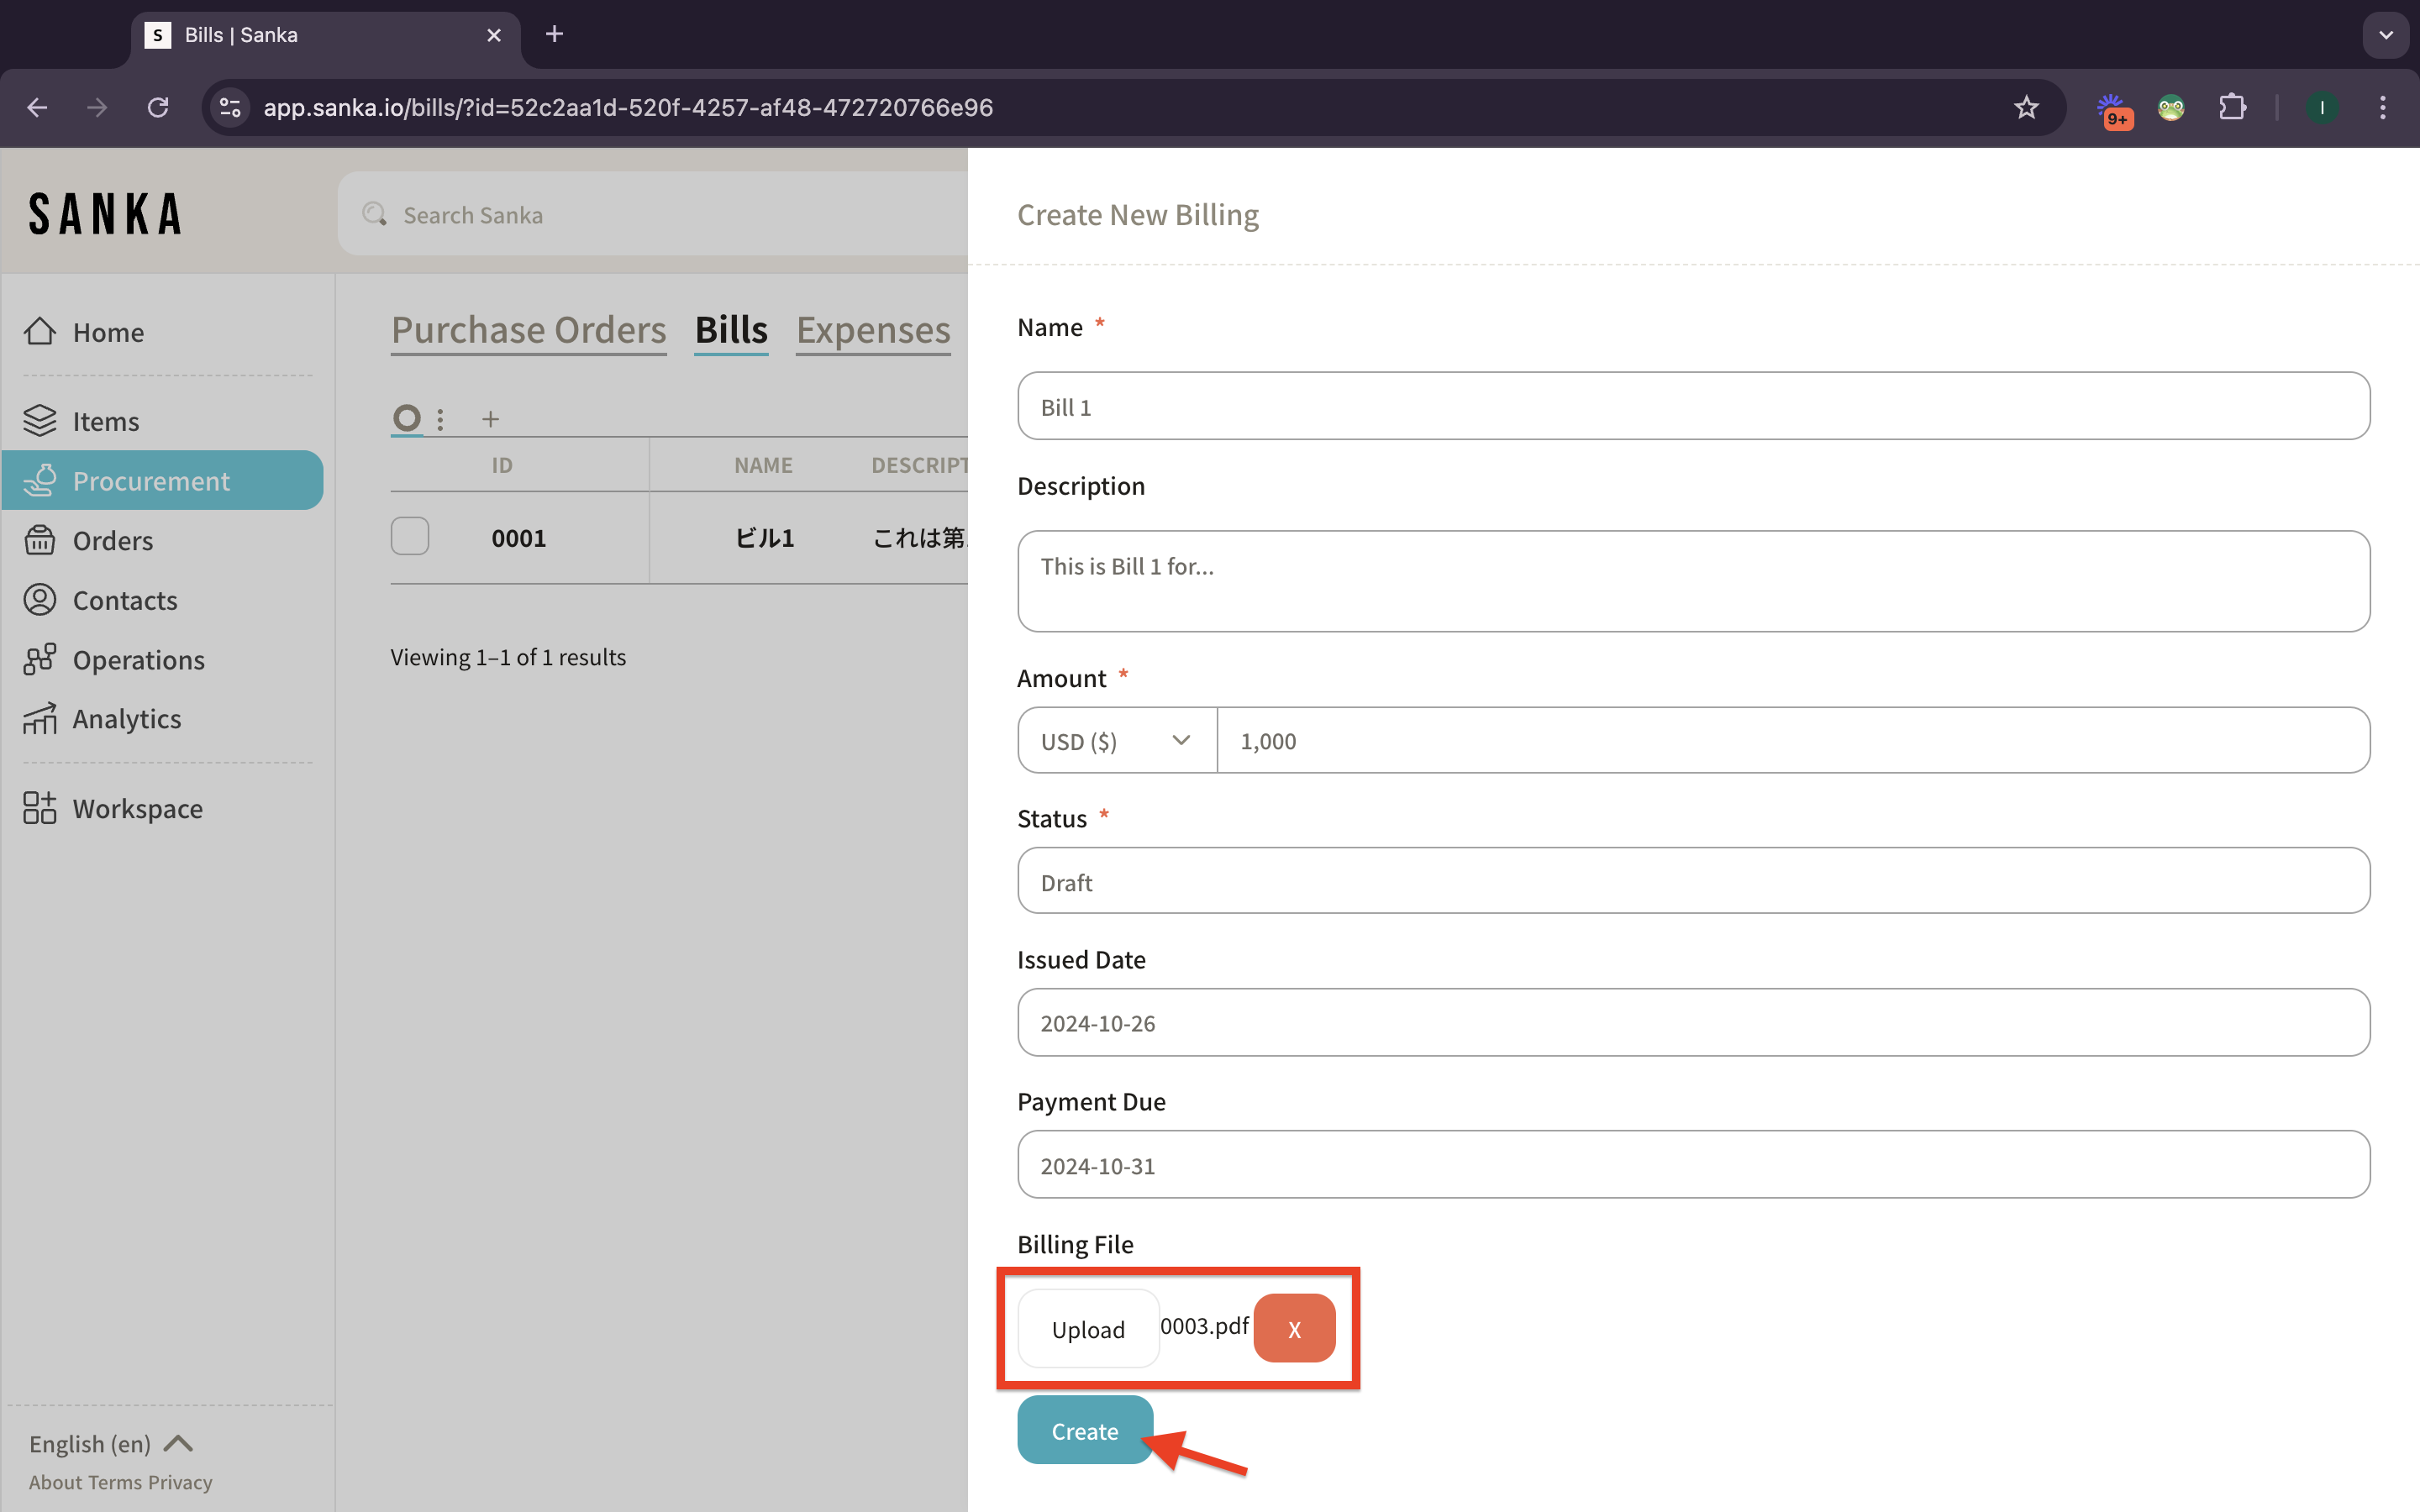
9: Upload a copy of the bill or any related documents for record-keeping and reference. Then click create.
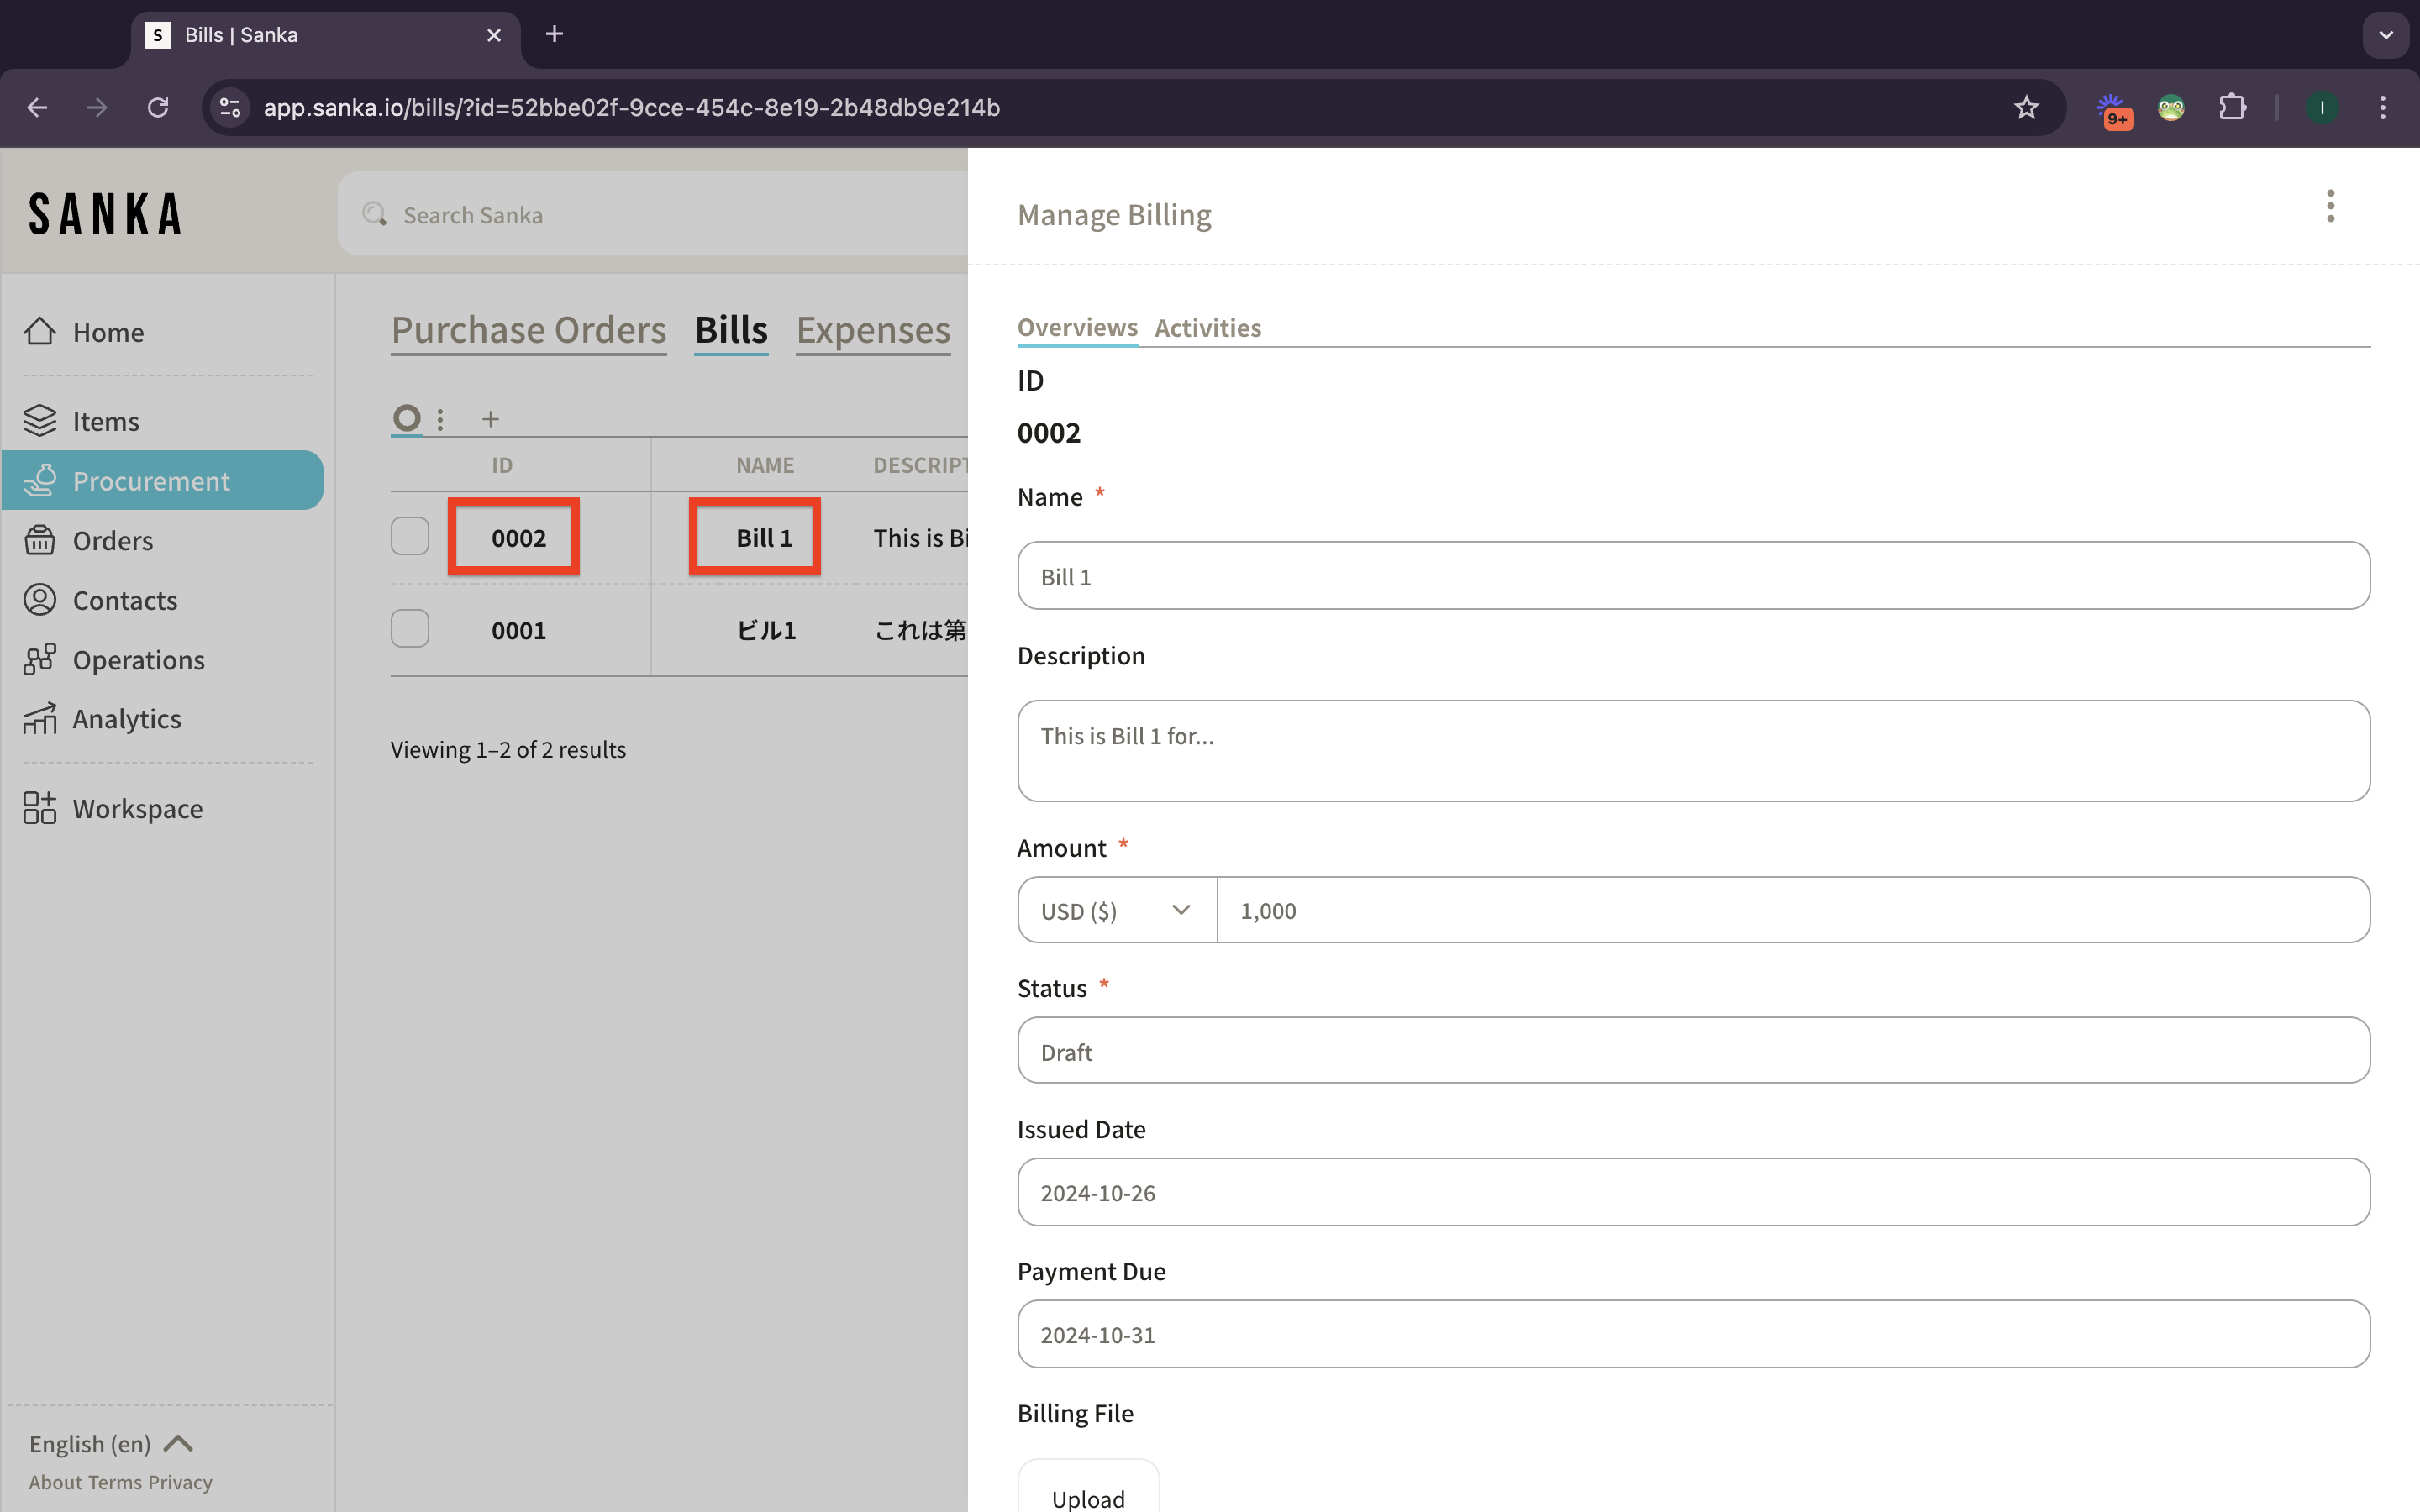
10: The bill you’ve added will show up at the record table.
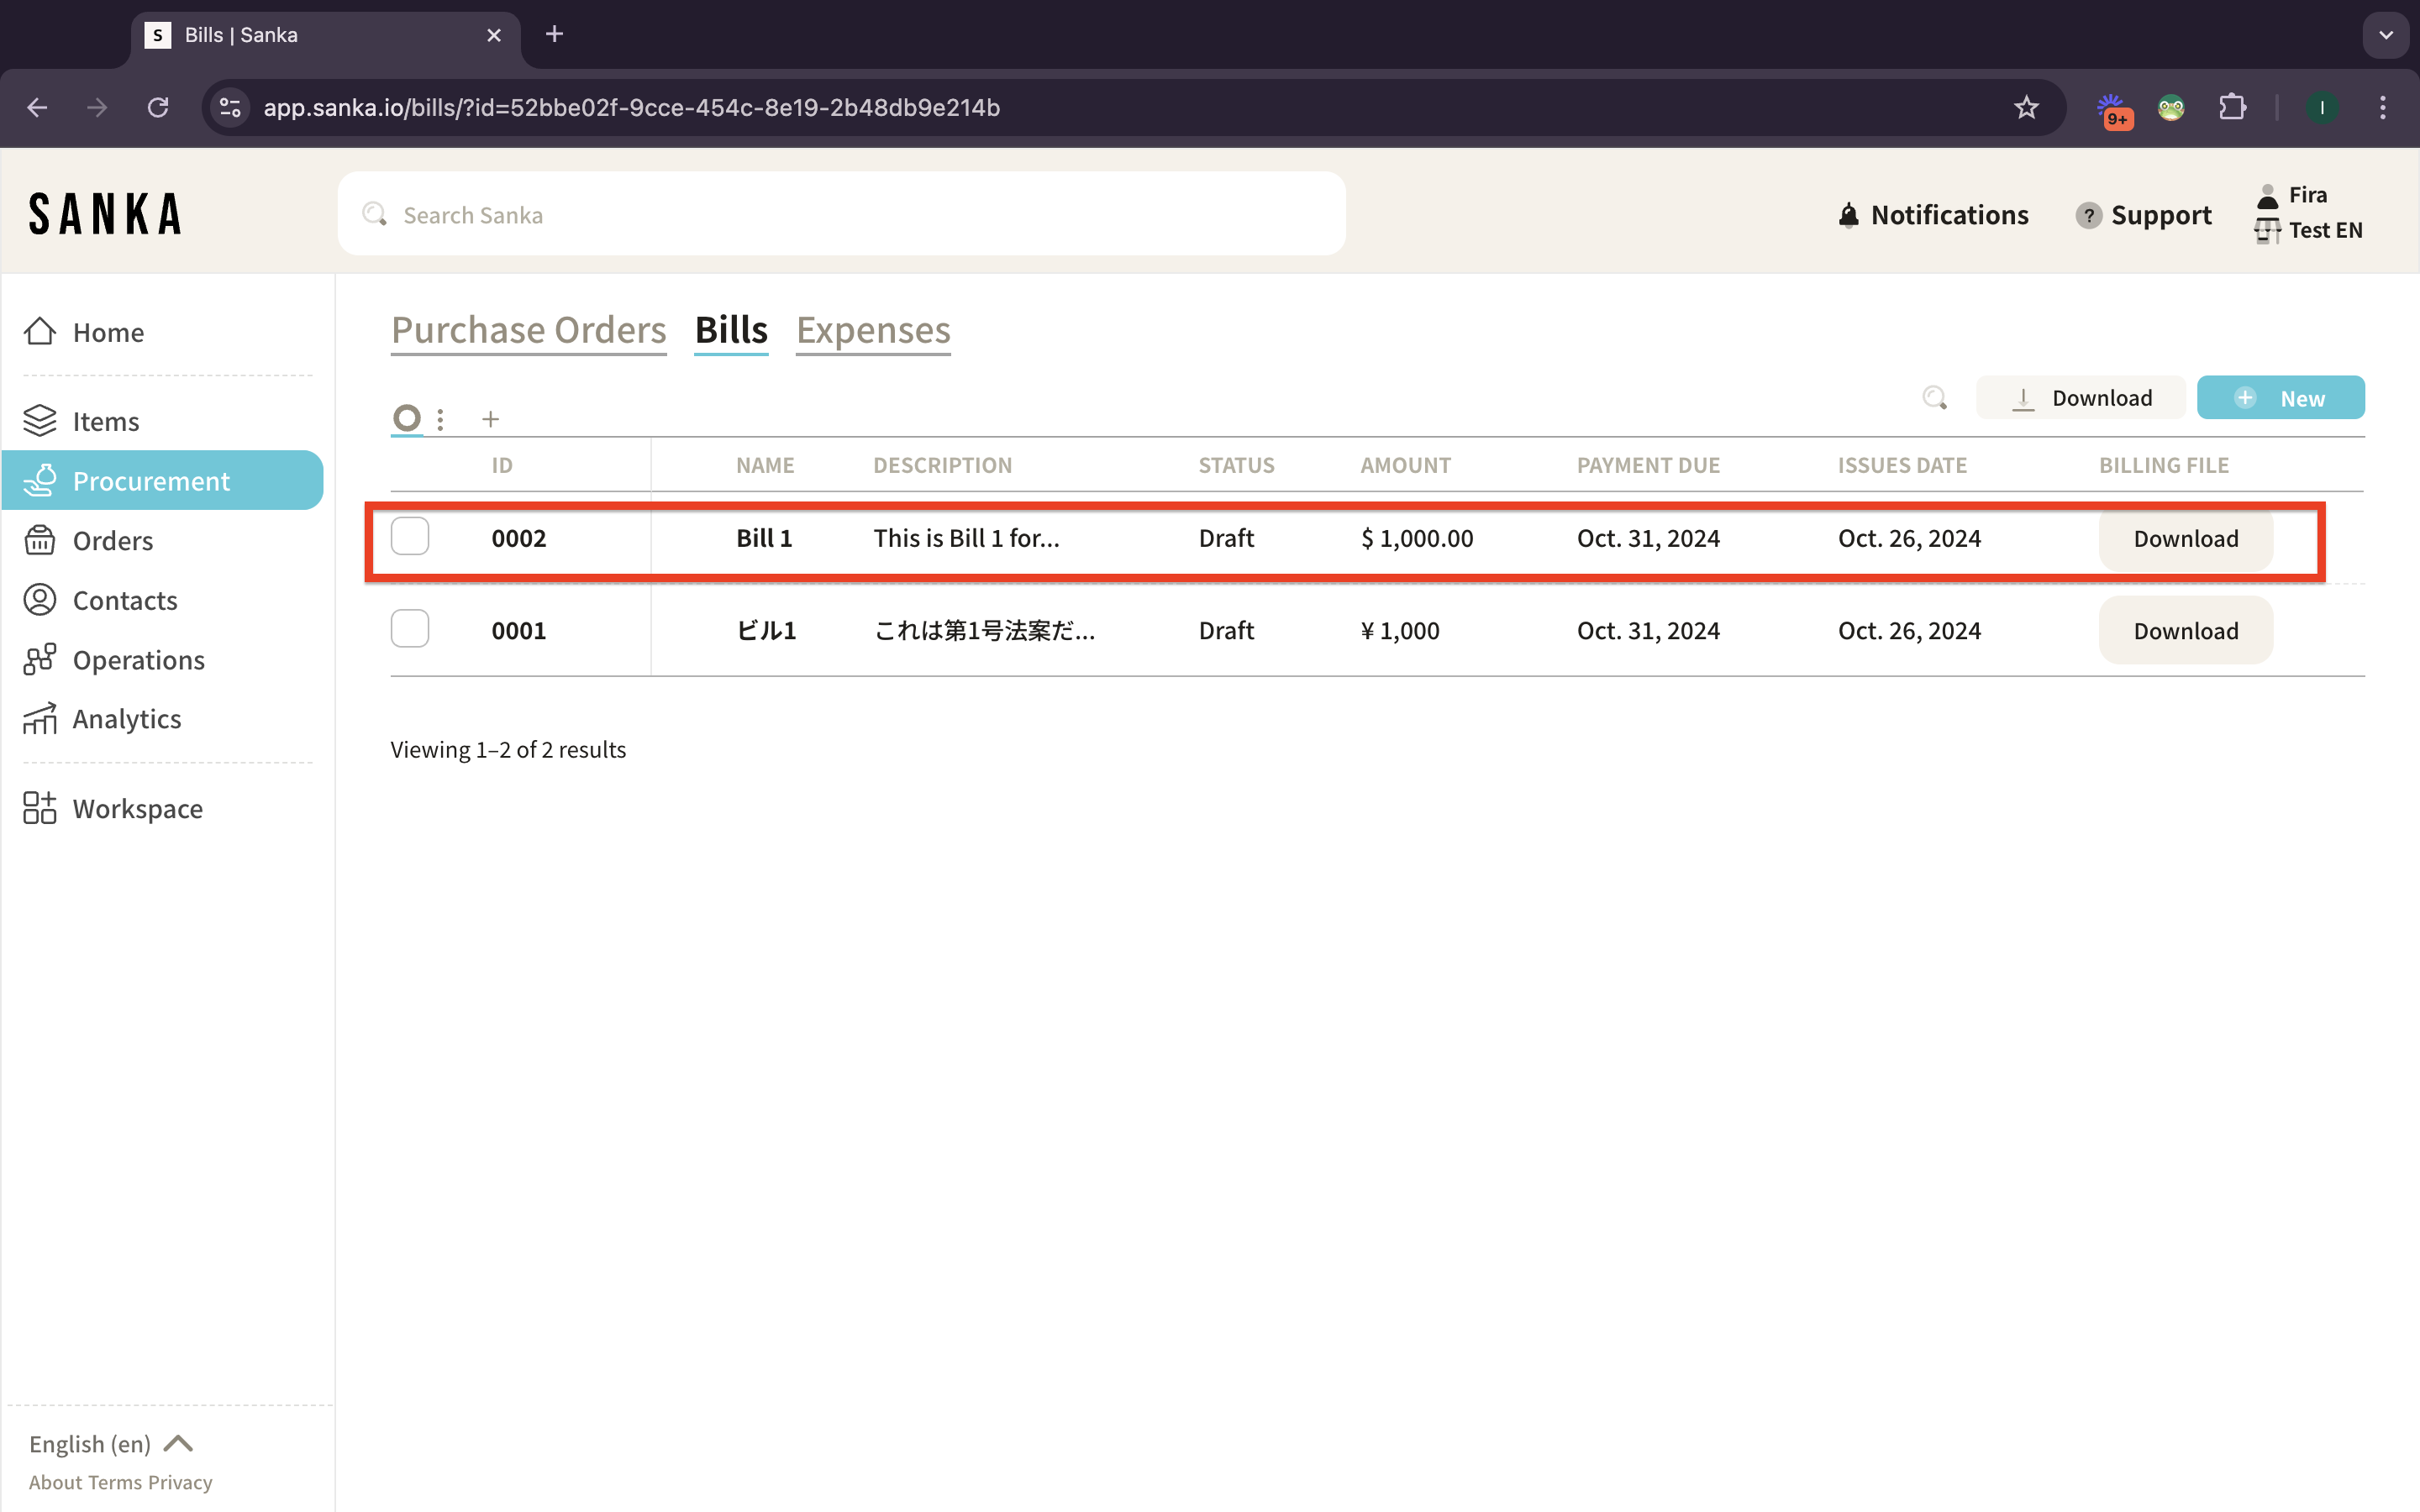
11: To edit or manage bill, click at the “Bills ID” of “Bills Name” and the detailed page will show up on the right side.