Overview:
Adding a company in Sanka helps you manage your business relationships by keeping track of suppliers, partners, or clients in one place.
This guide will walk you through the steps to add a new company in your Sanka workspace and how to manage its details.
Process to Add Company:
Log in to Sanka
1: Log in to Sanka
2: Ensure you are in the correct workspace where you want to add and manage company.

Navigate to the Companies Module
1: Once logged in, locate the “Companies” module on the left-hand menu.
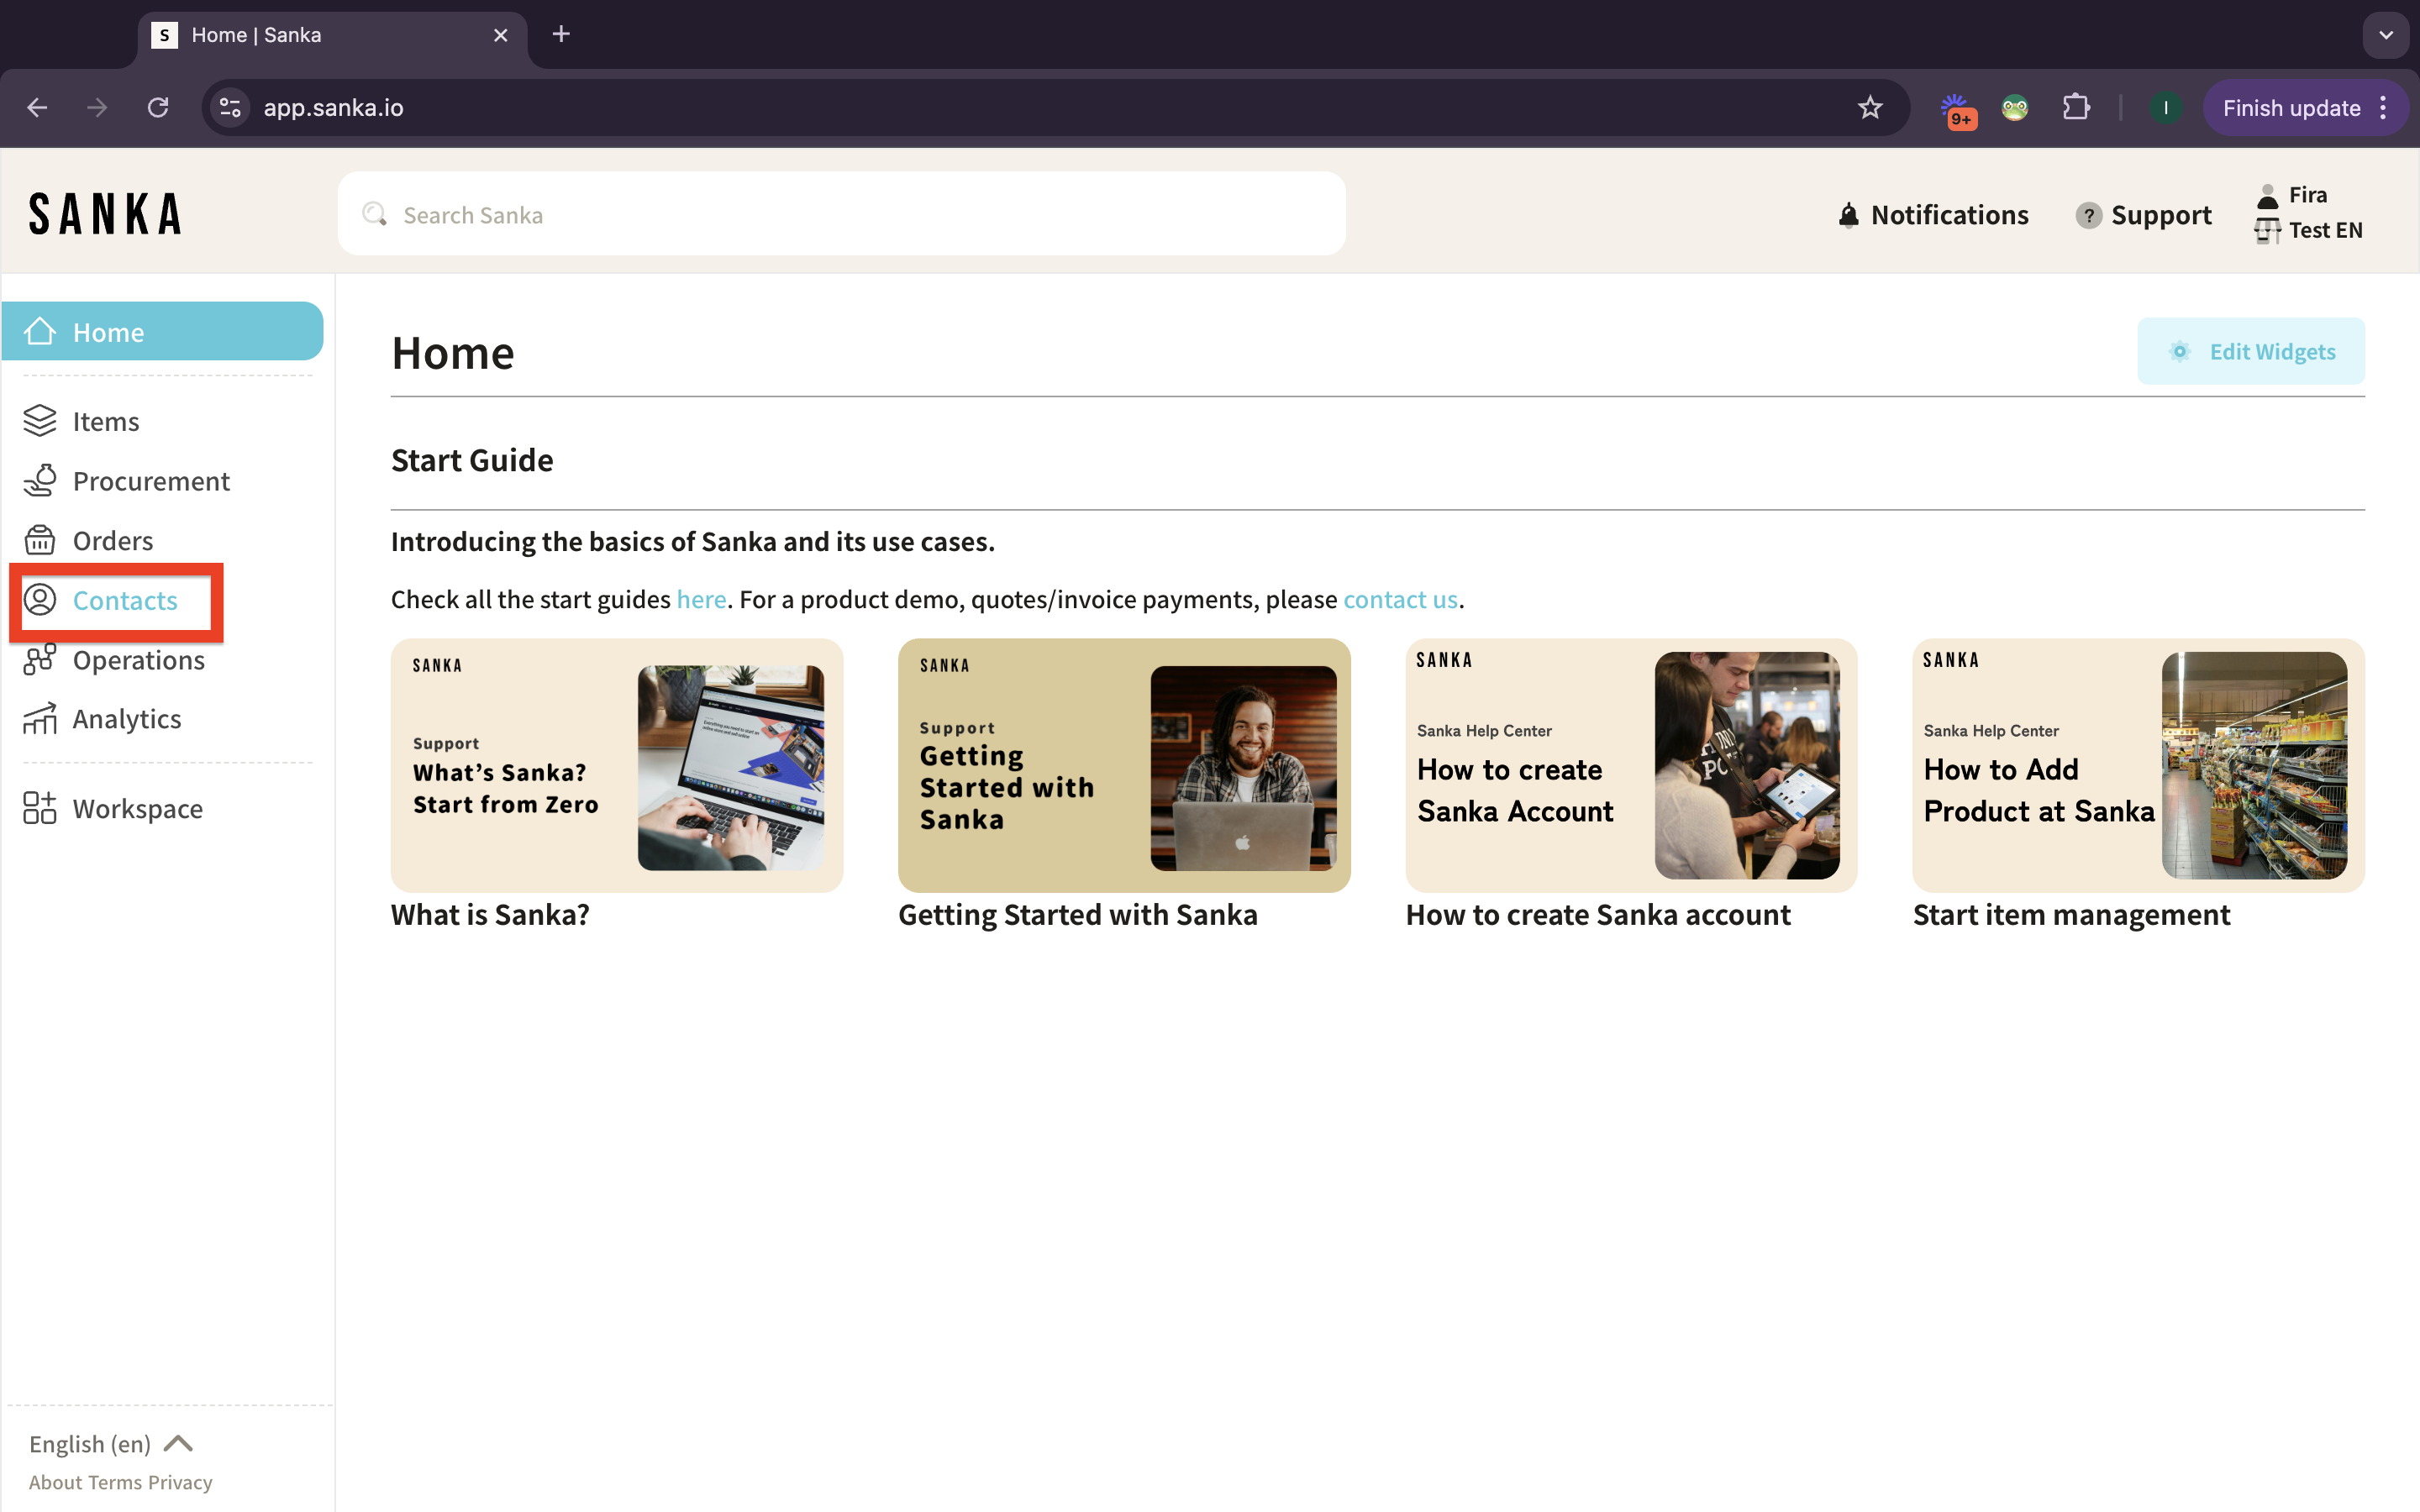
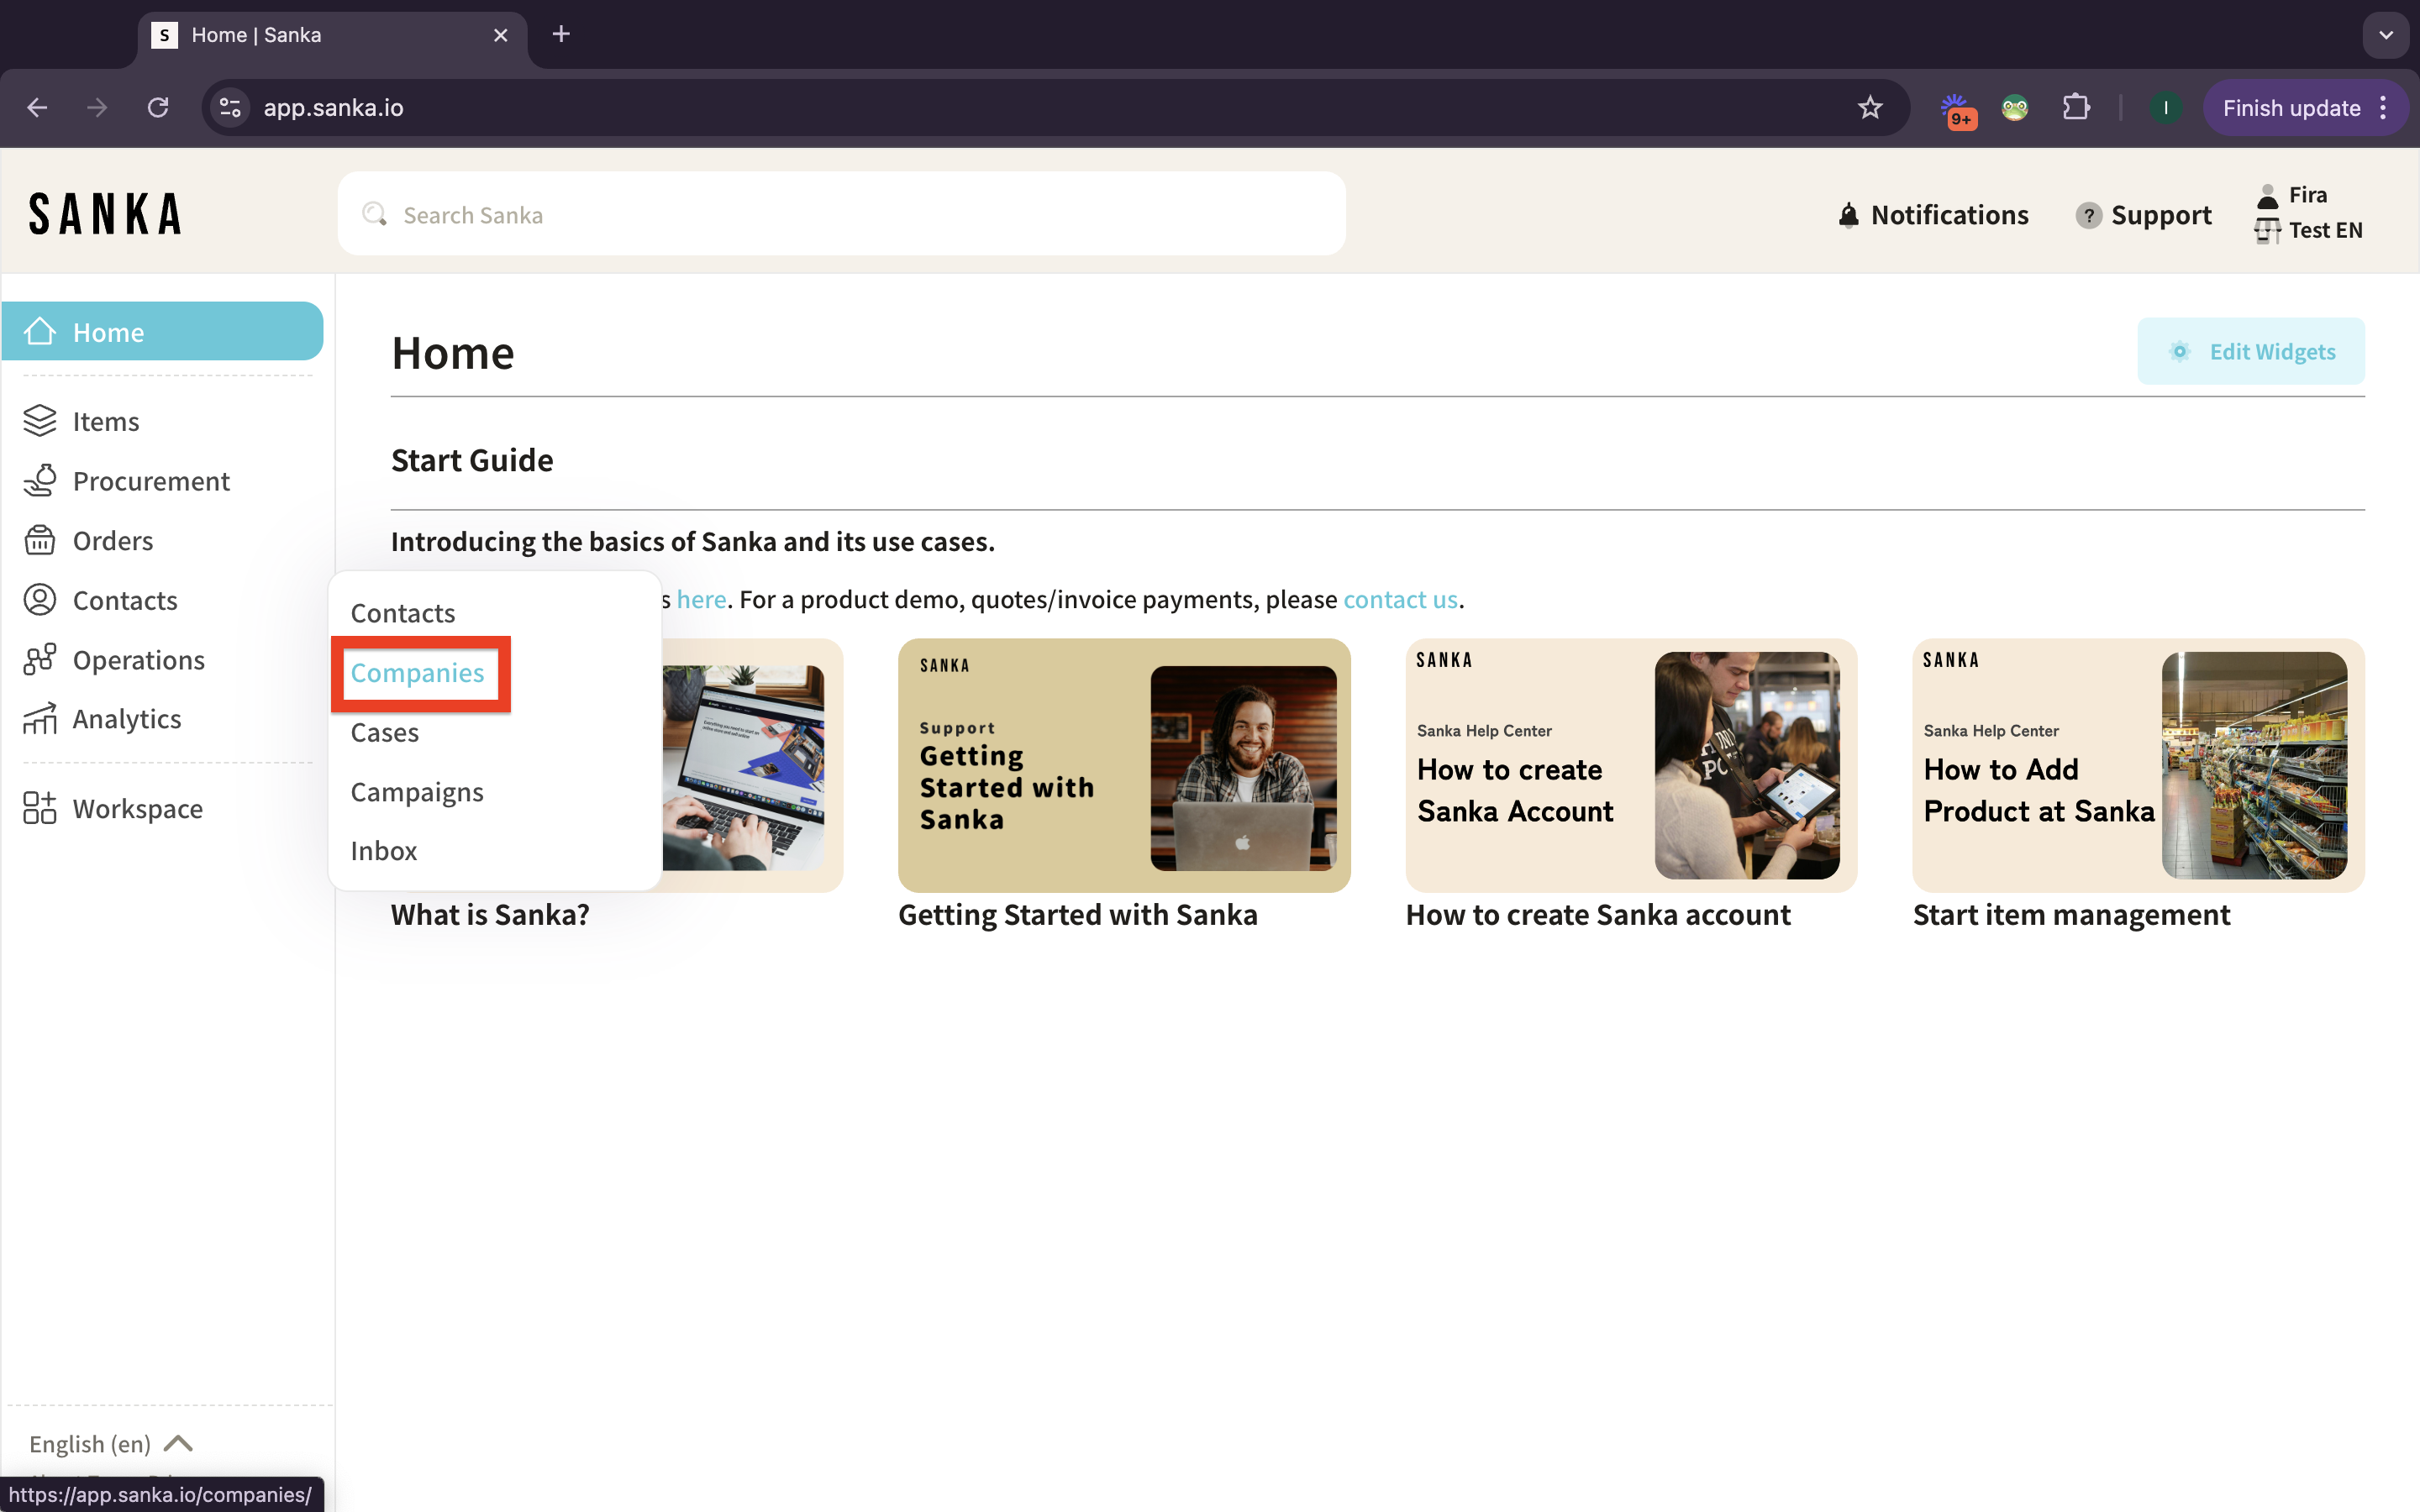
2: Click “Companies” object. This object allows you to create and manage company information for customers, suppliers, and other business associates.
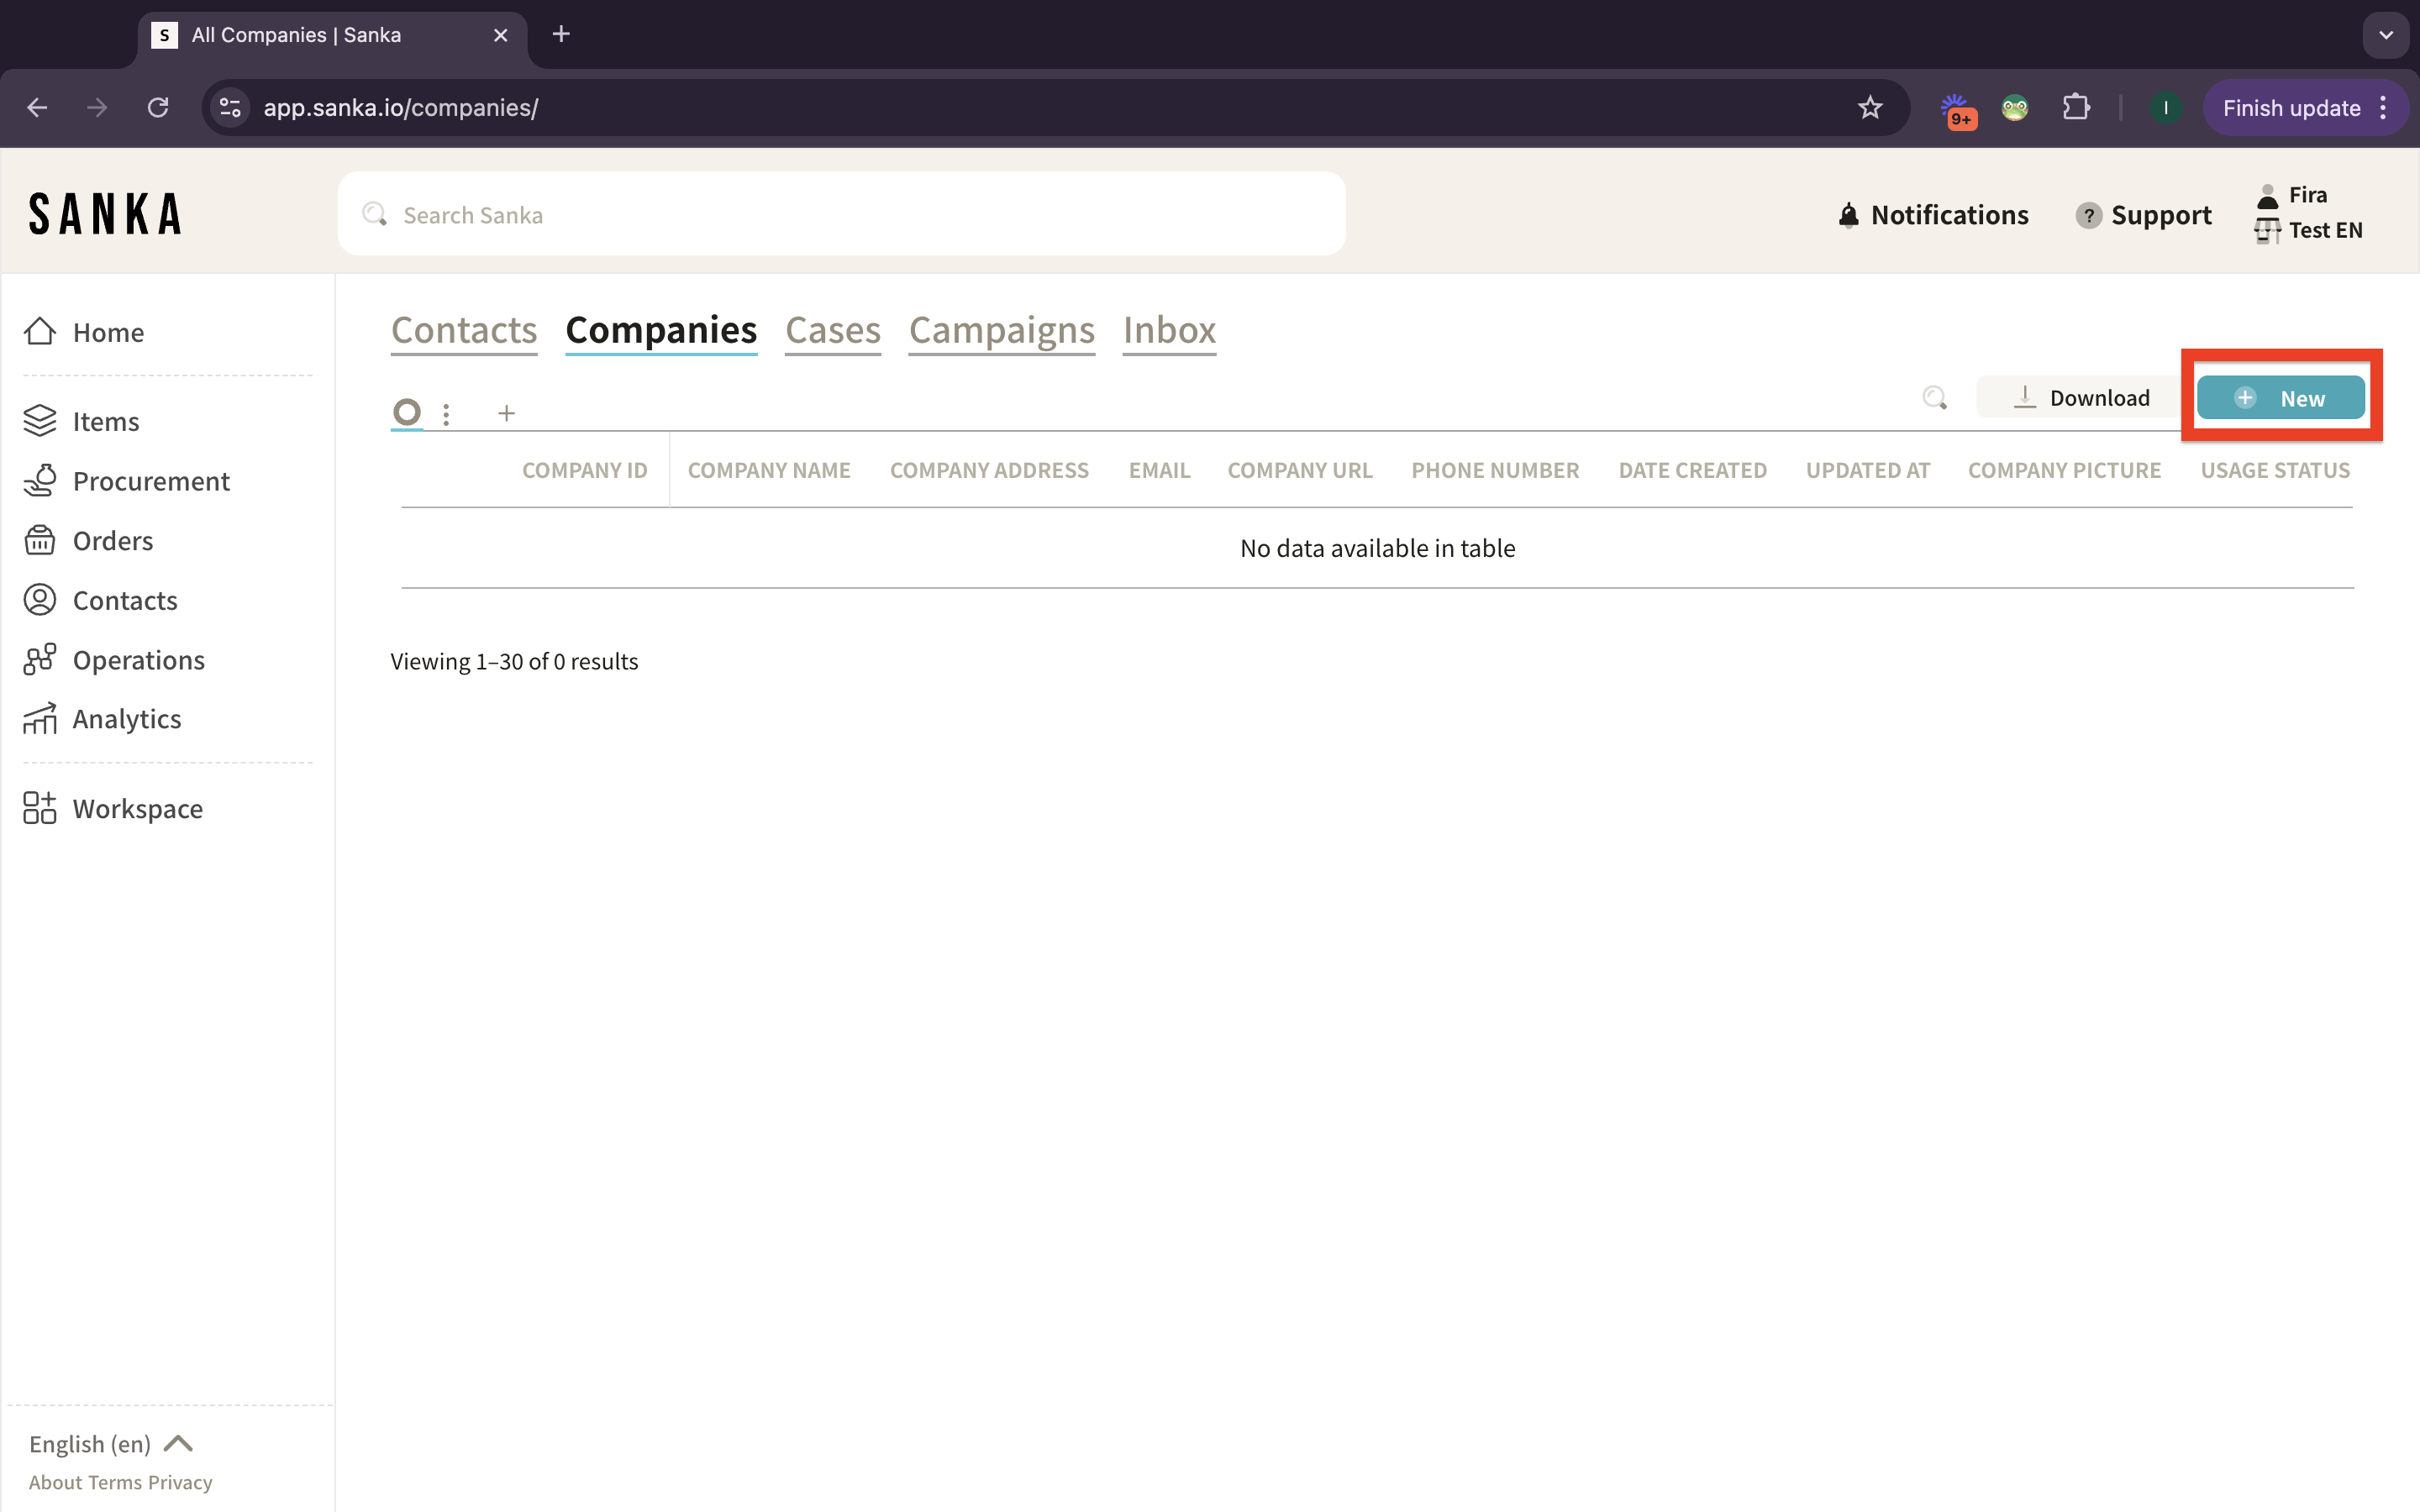
Create New Company
1: In the Companies object, click the “New” button located at the top-right corner of the screen.
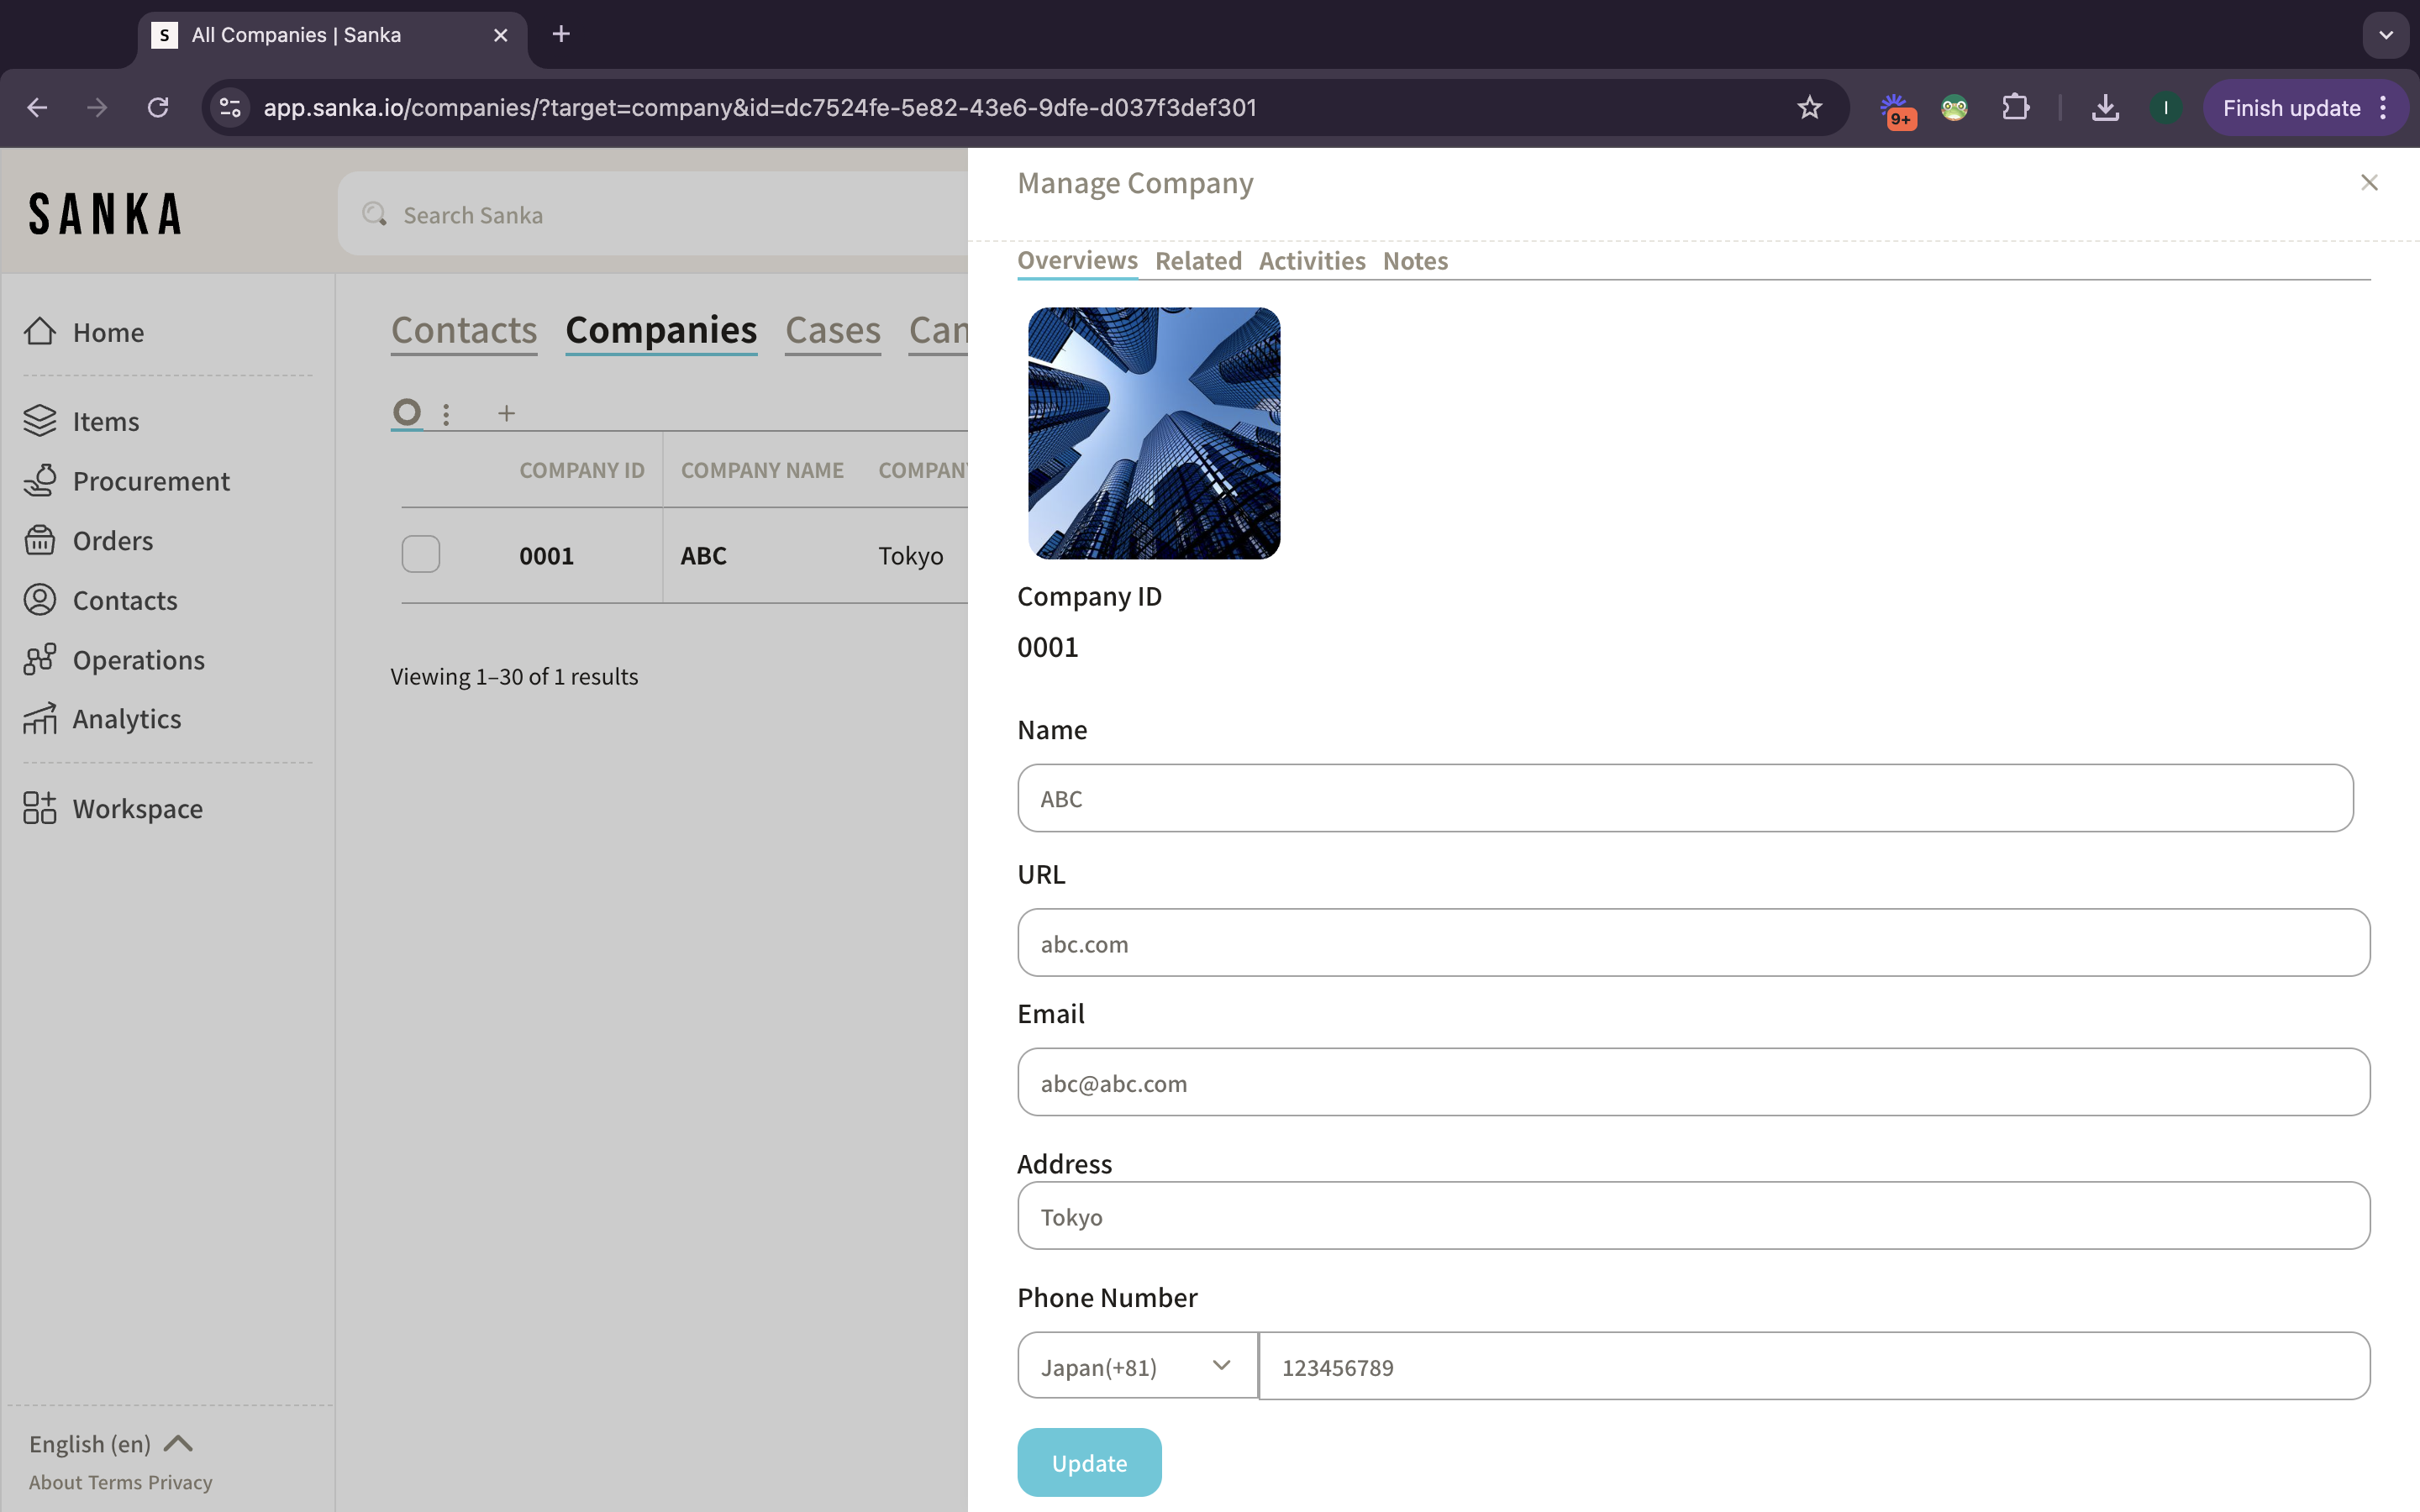
Fill Out Company Information
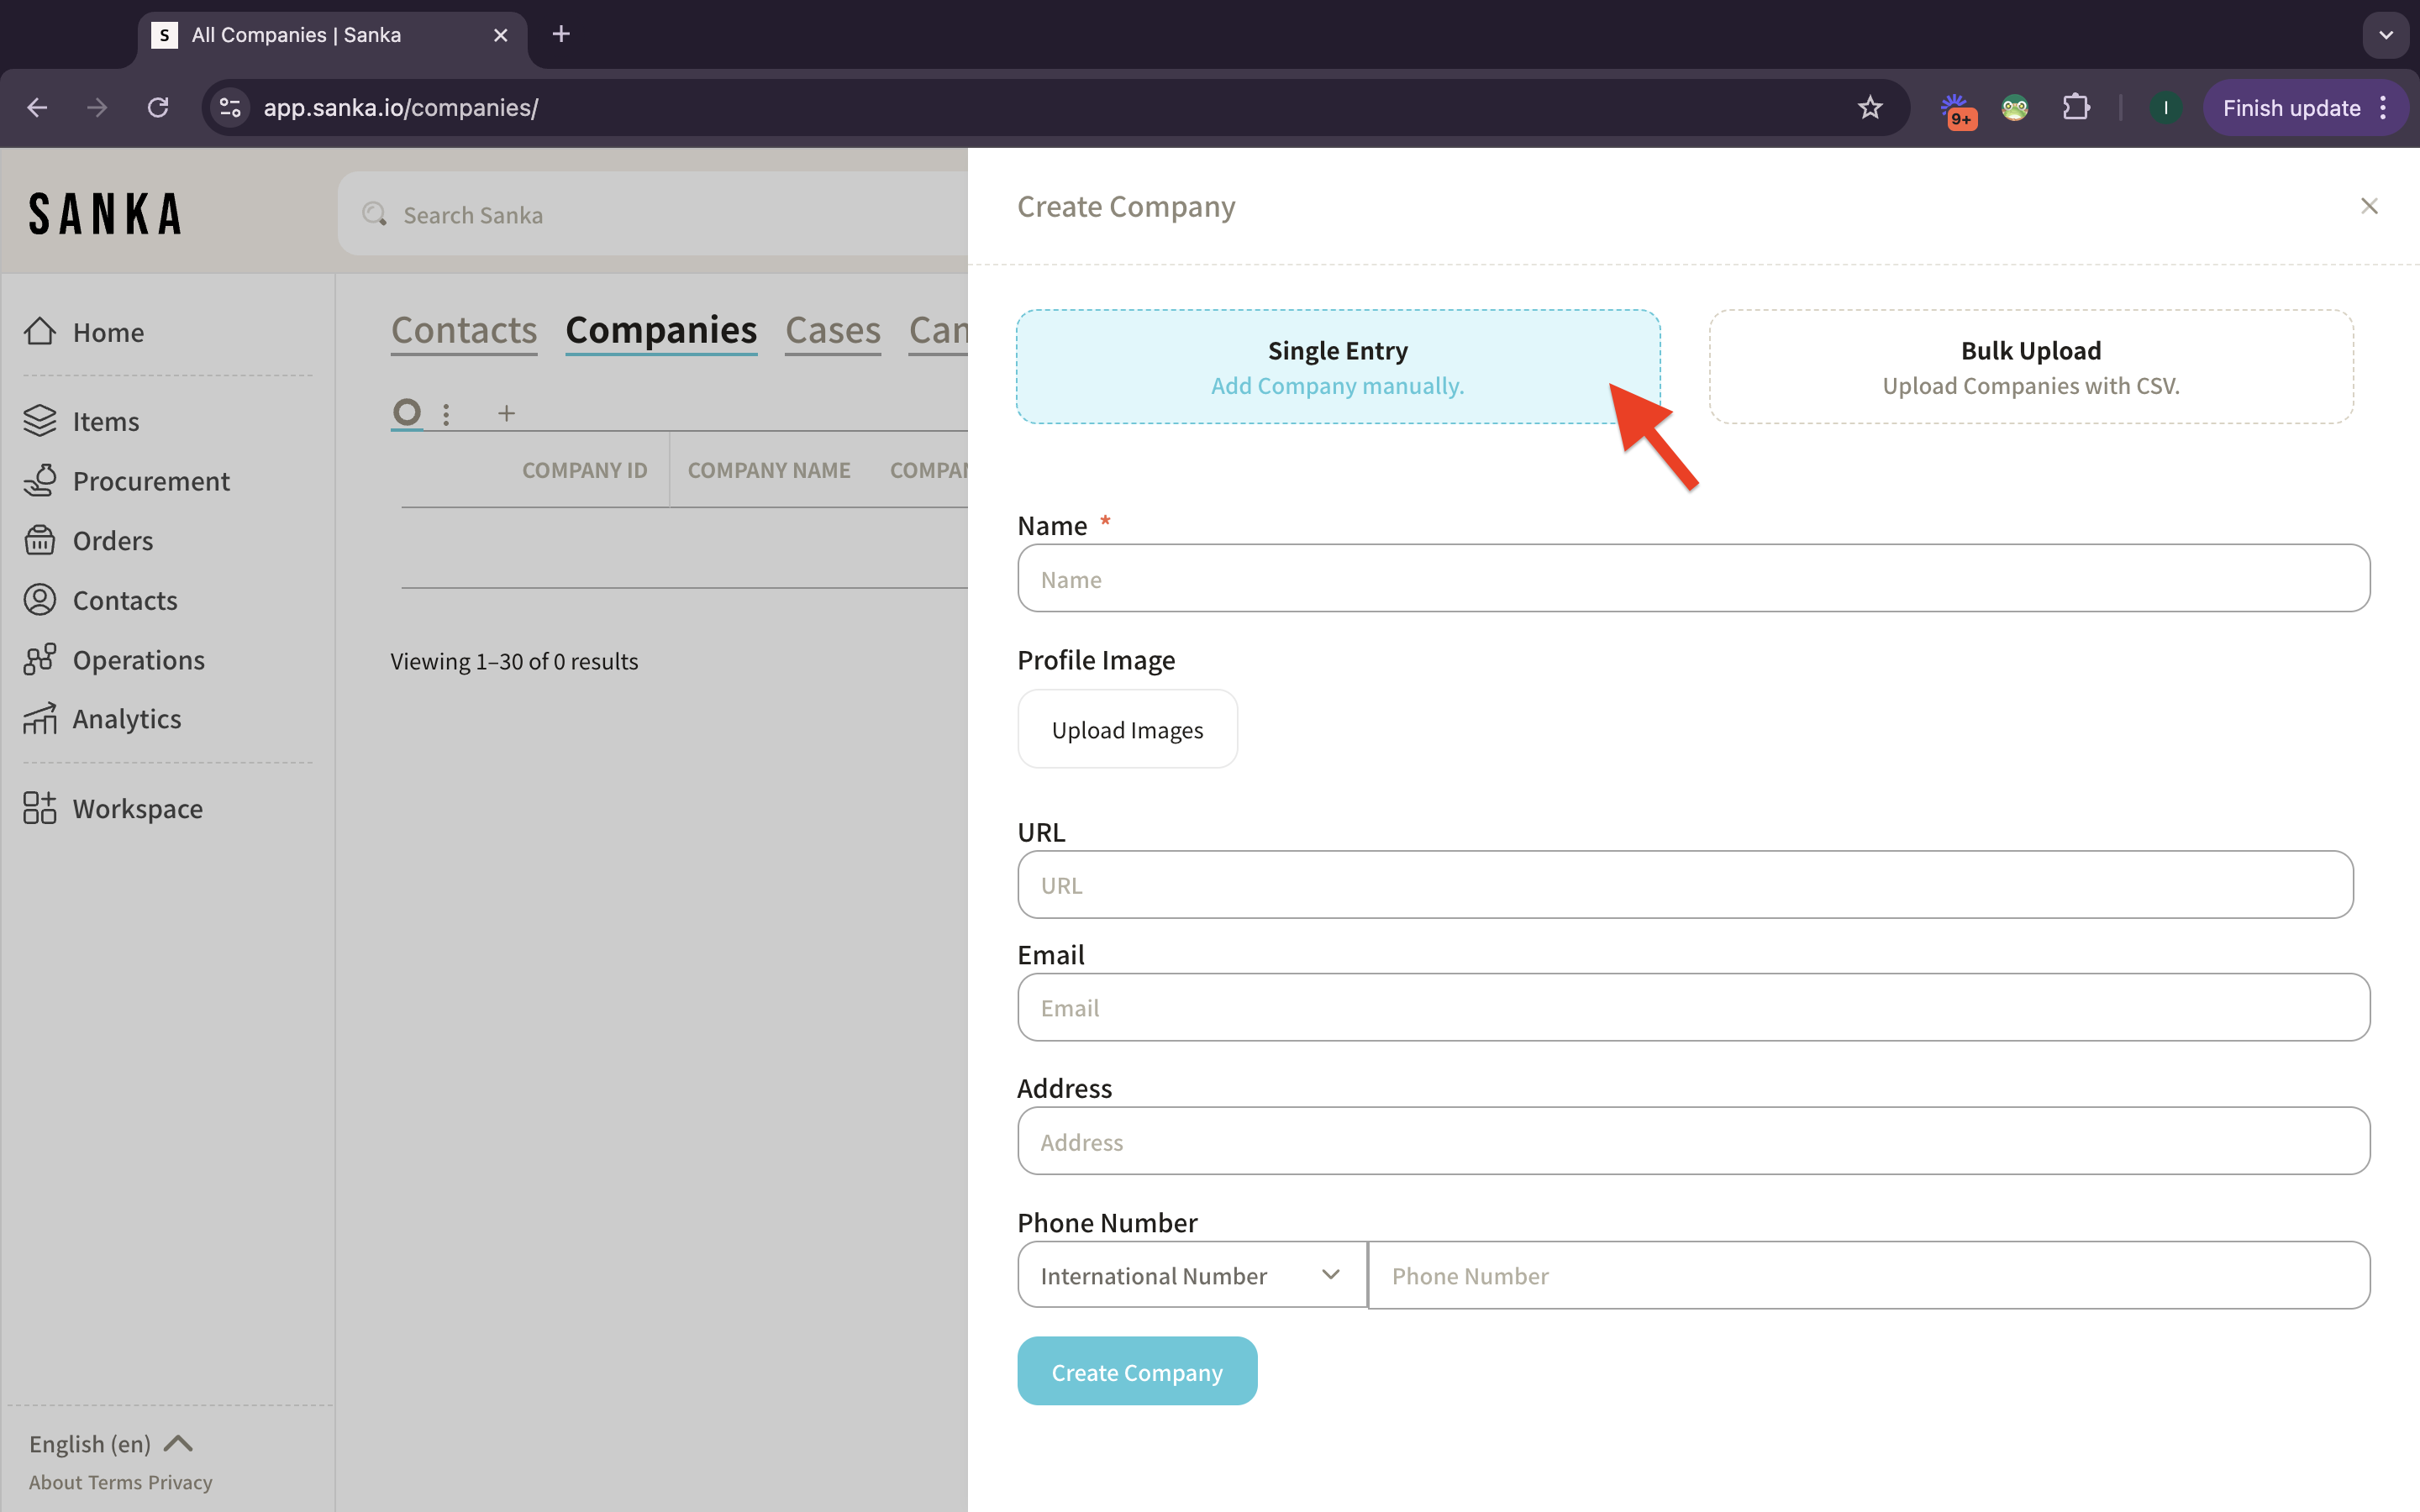
1: Click single entry. A form will appear for you to fill in the company details. Enter the following information:
- Company Name: The official name of the company.
- Profile Image: The official logo or image of the company.
- Company Website: URL of the company’s website.
- Company Address: The company’s physical or mailing address.
- Phone Number: The contact number for business communication.
Save Company
1: After entering all the required information, click the “Create Company” button to store the company.
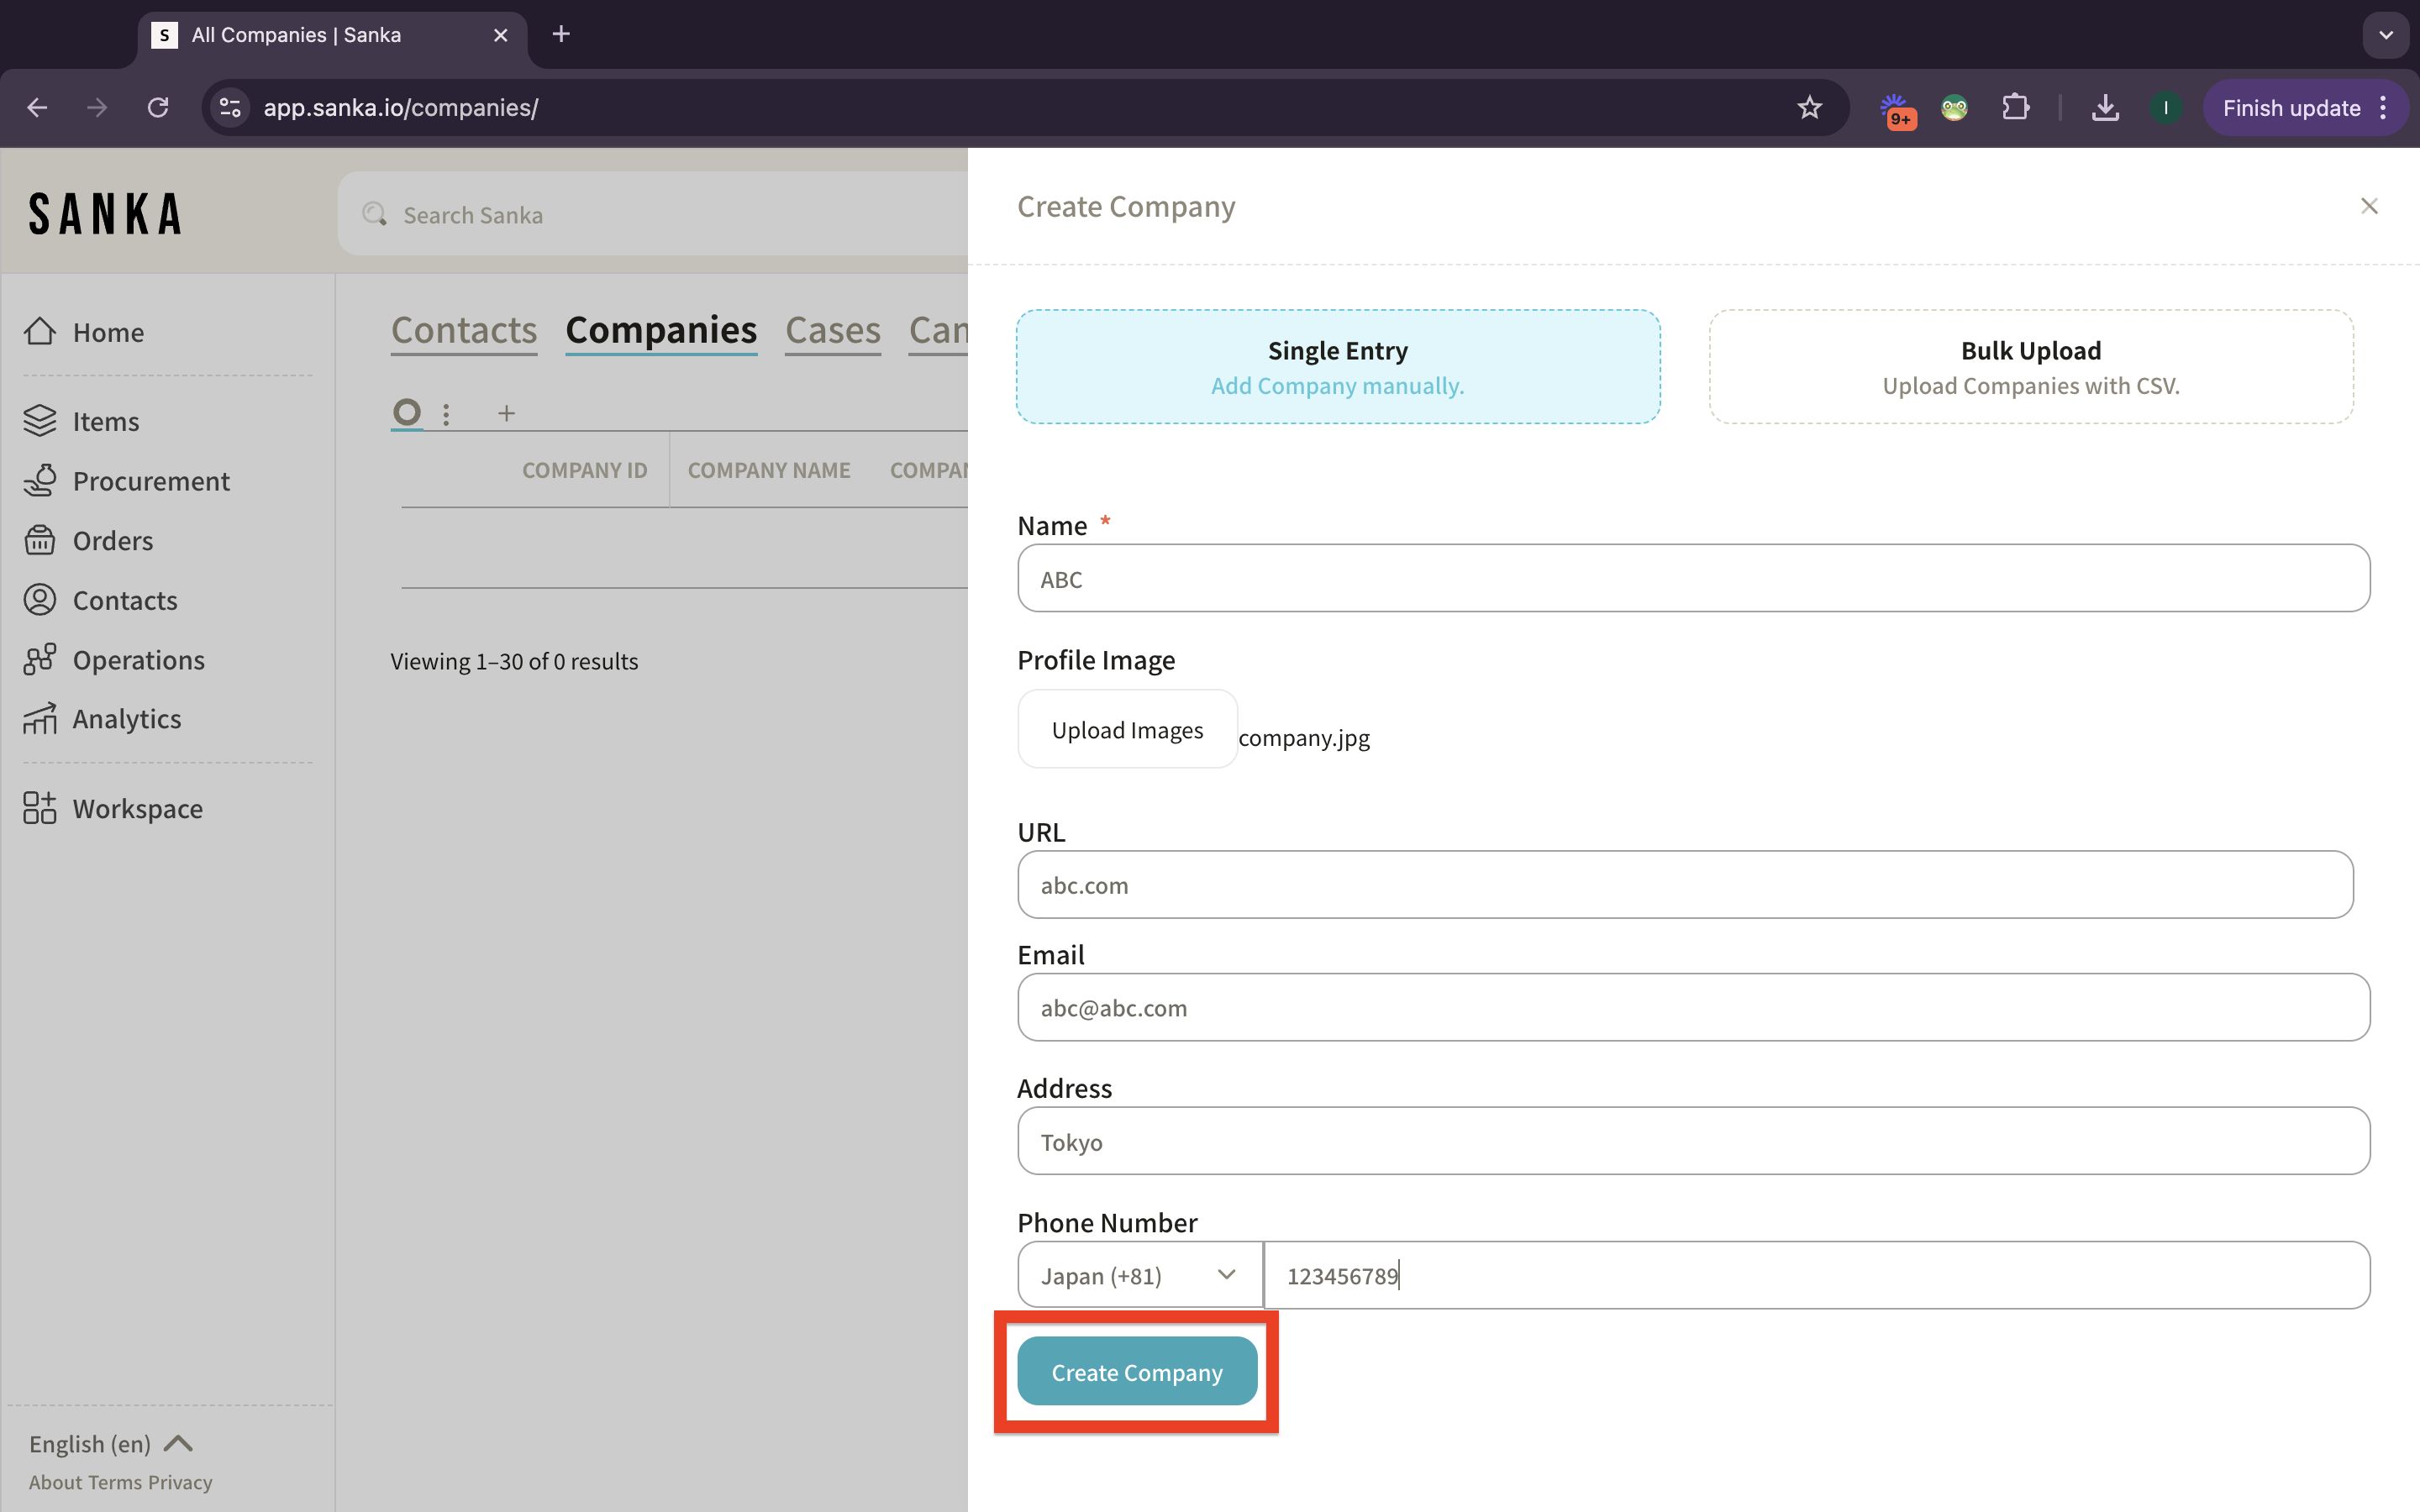
2: The company will now appear in your Companies list, ready to be associated with transactions, inventory tracking, or any other relevant tasks in Sanka.

View and Manage Companies
1: Once the company has been added, you can view detailed information, edit or update the company details by clicking on the company's ID or name.