Property Settings
This guide explains how to manage and create properties.
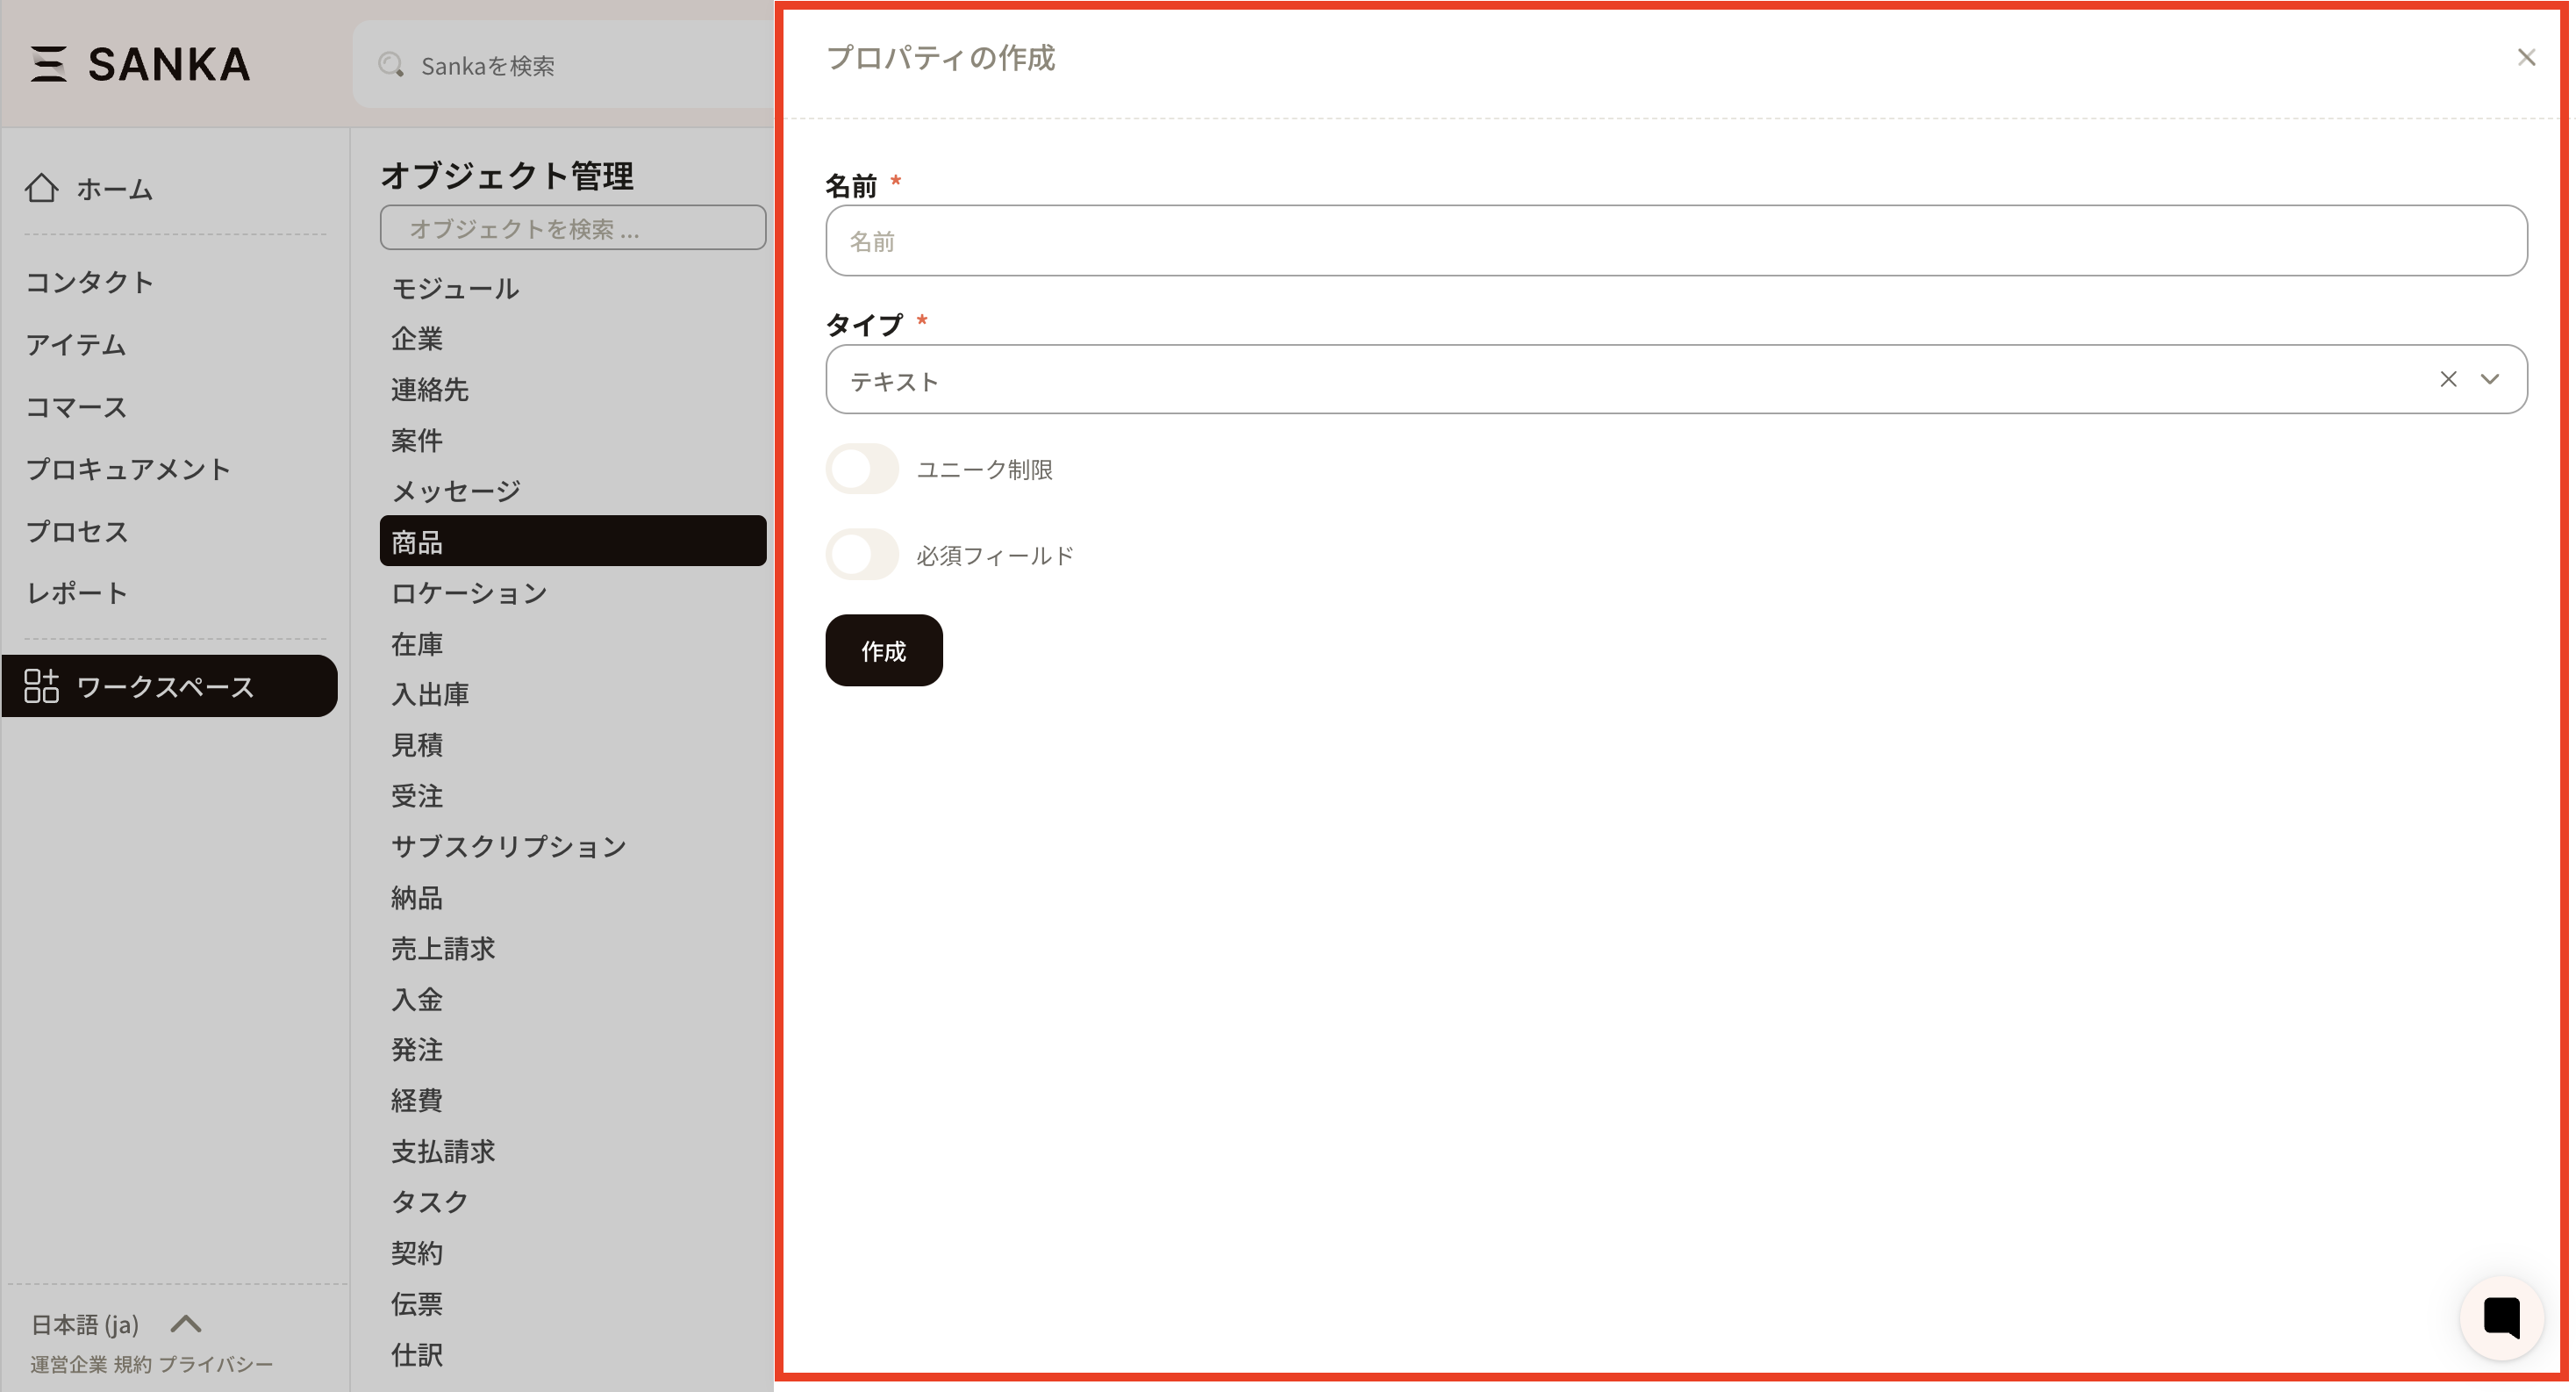
How to create (add) a property
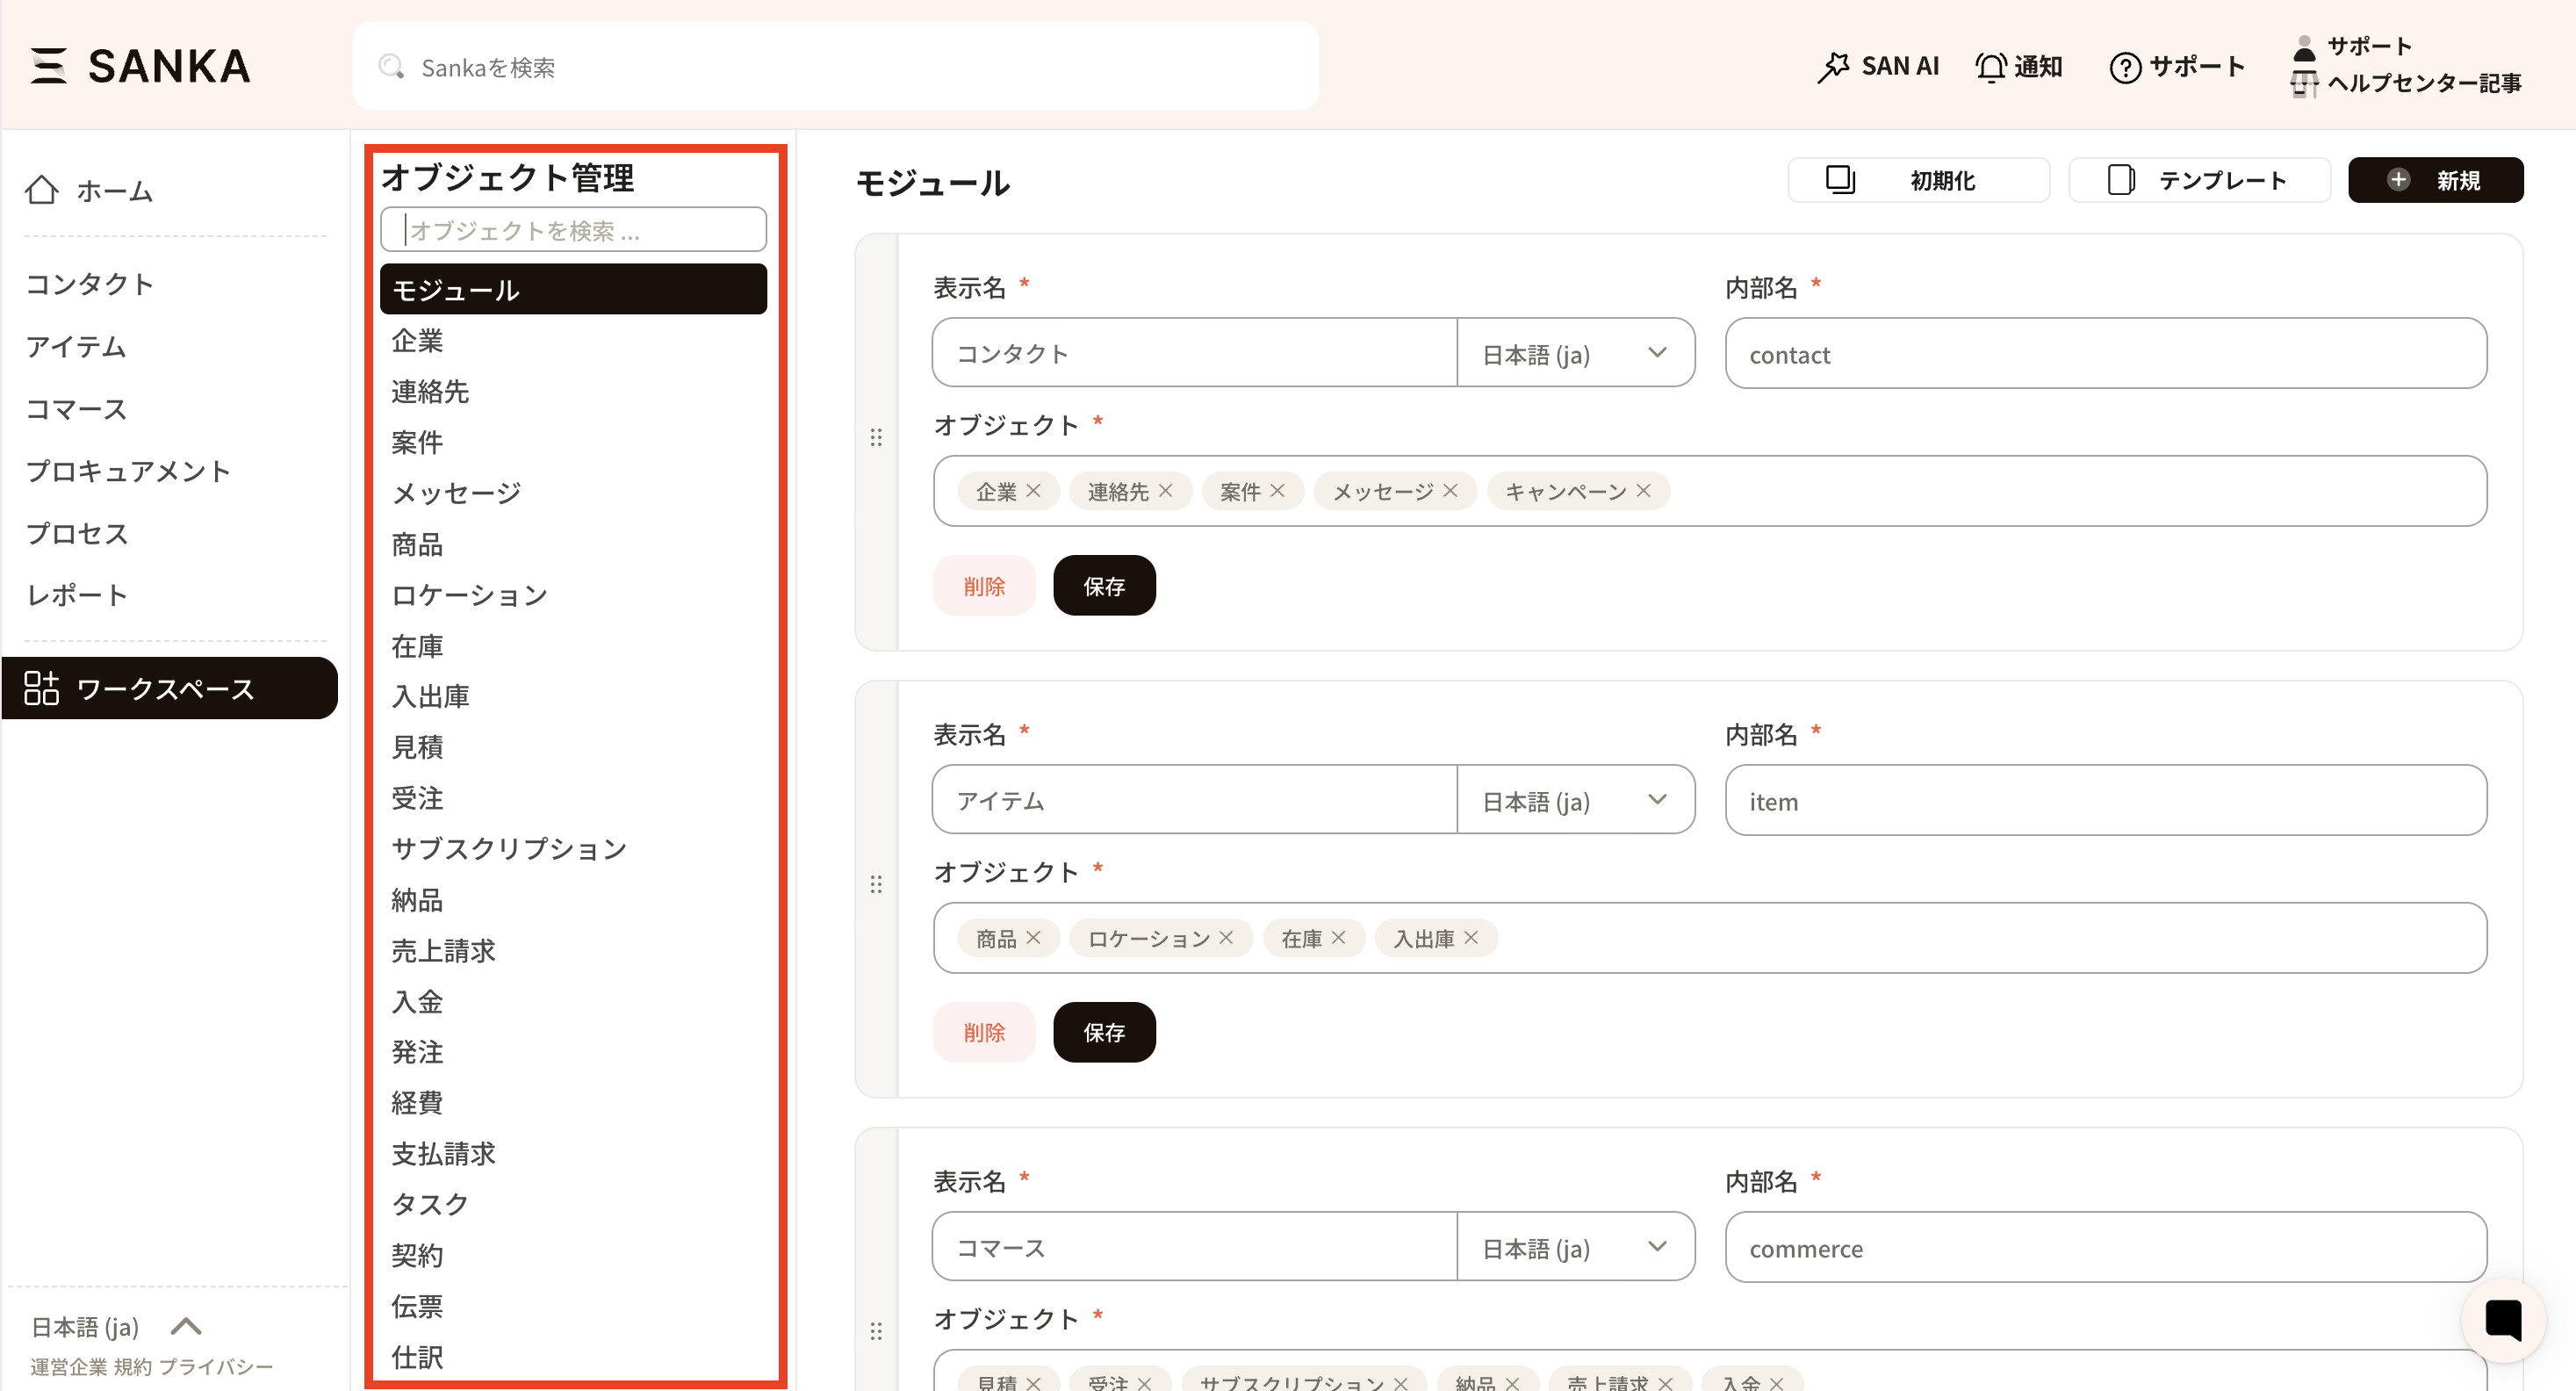
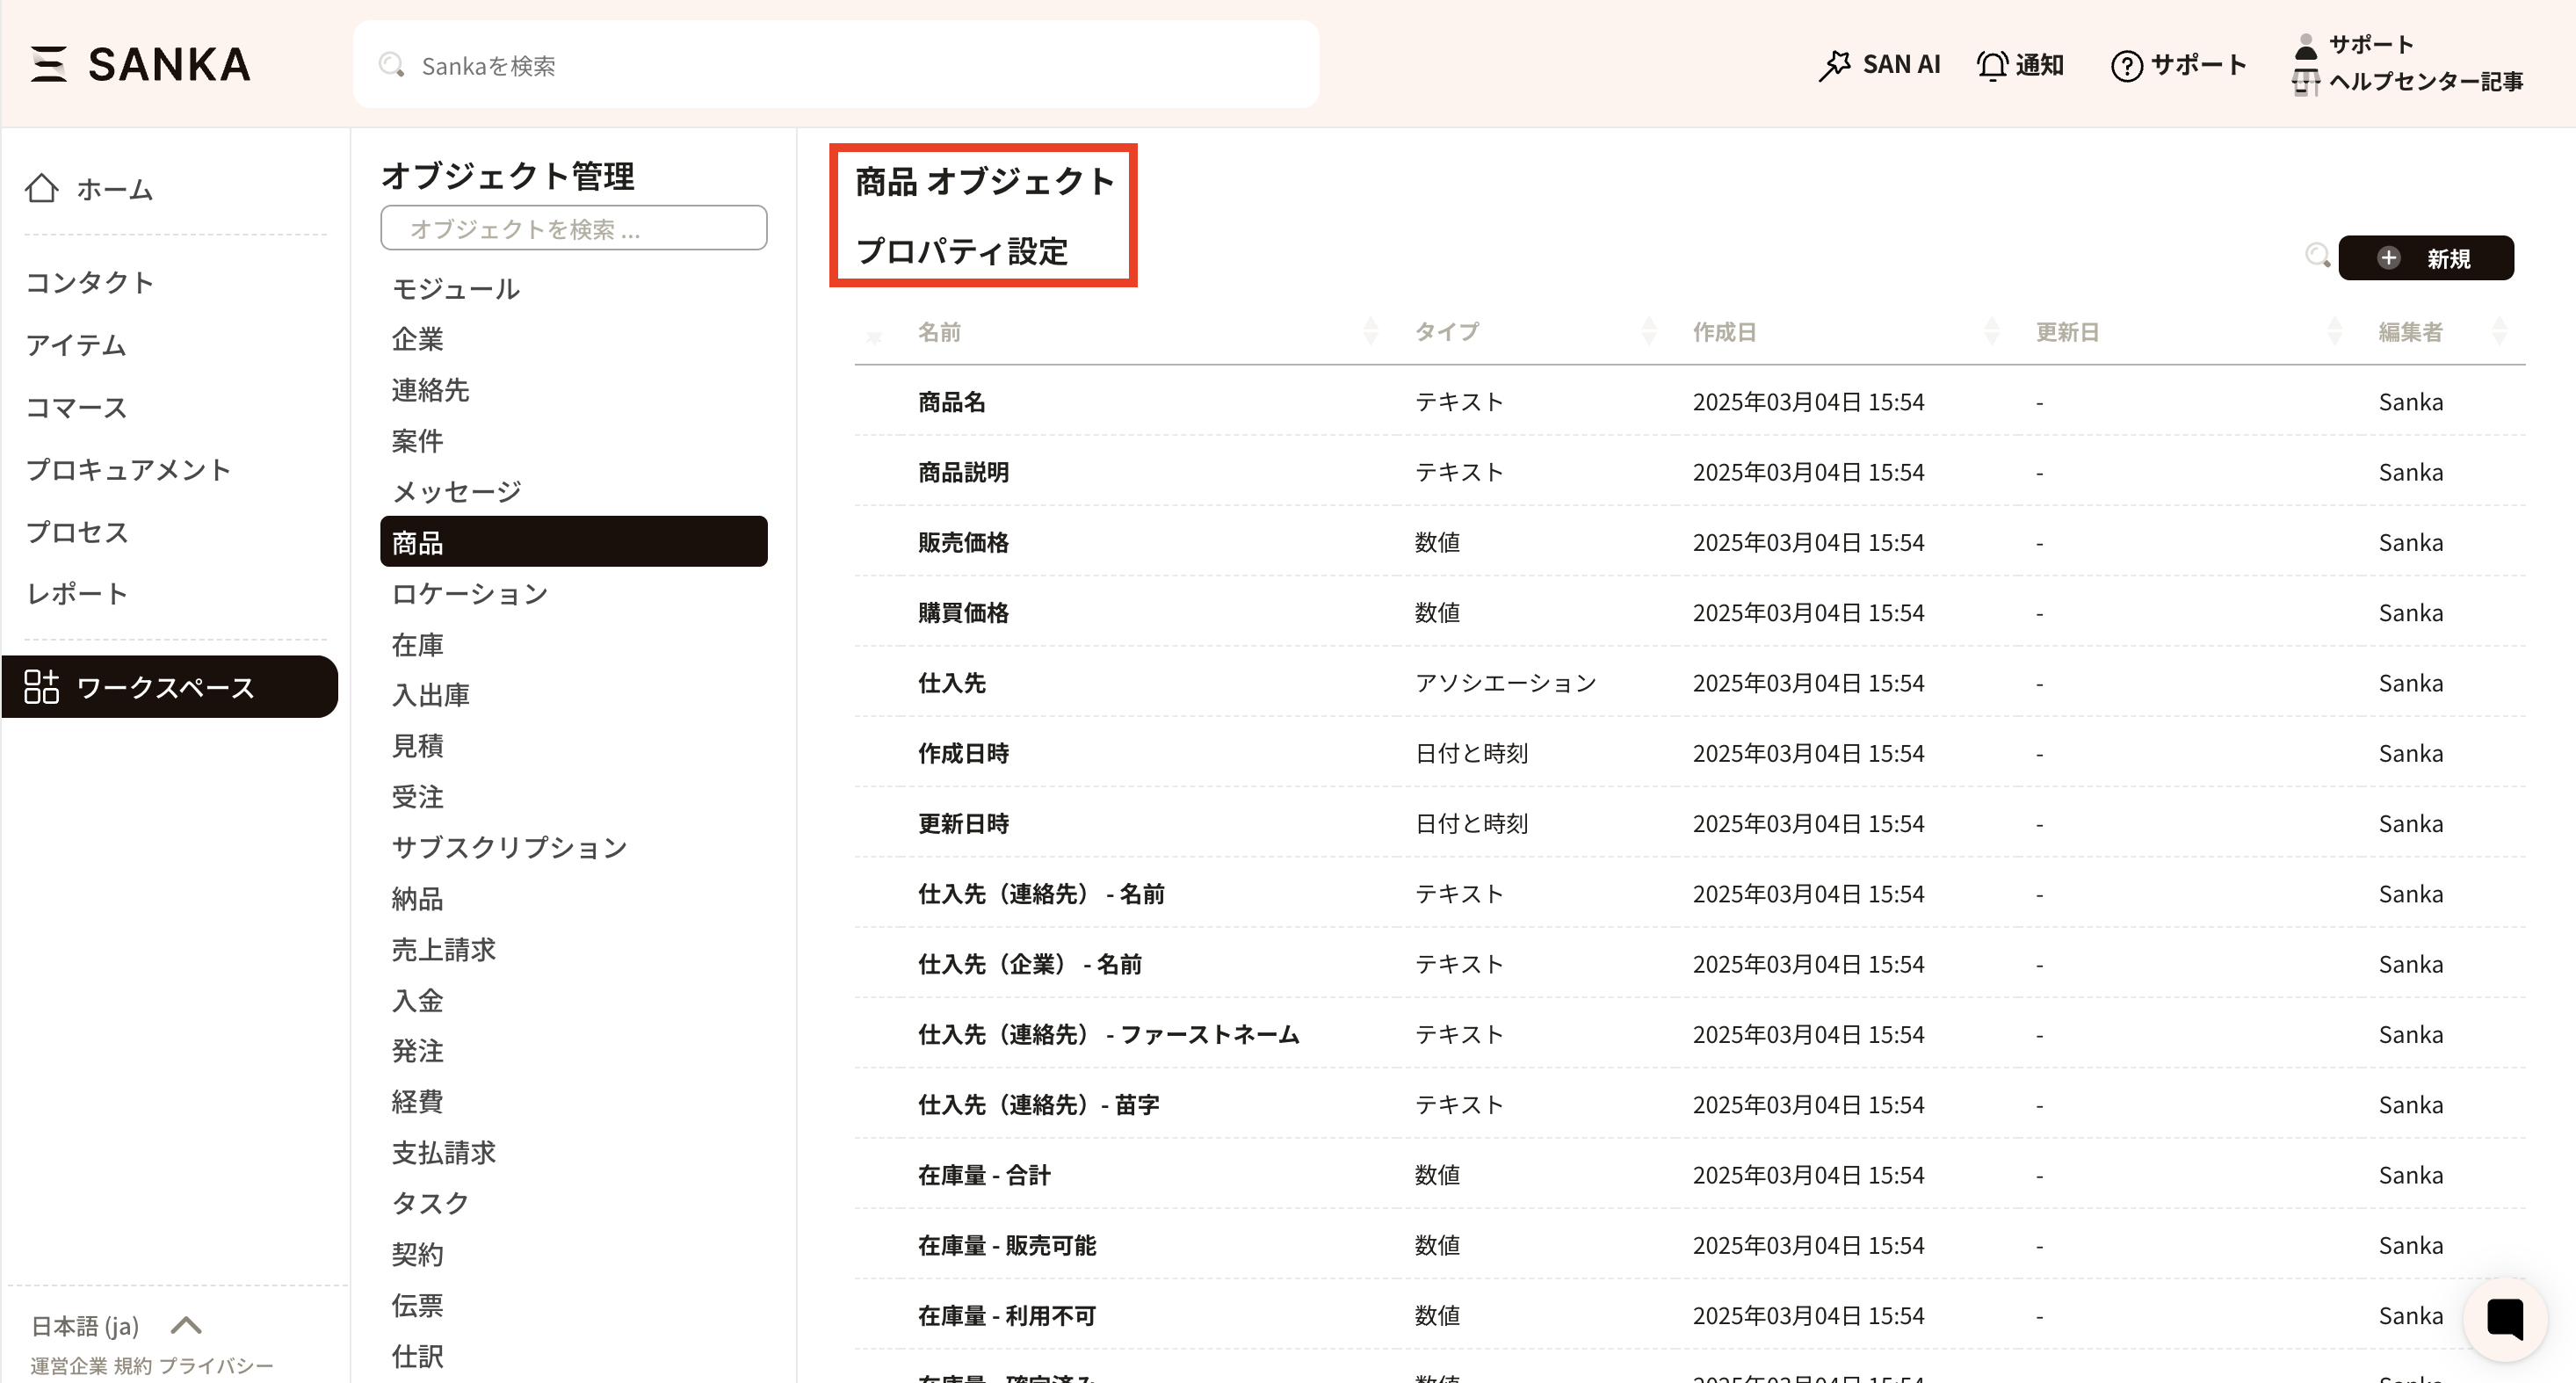
- From the left side of the Sanka screen, open Workspace and select Object Management.

- In Object Management, you will see all objects available in the workspace. Click the object where you want to add a property.
- As an example, we will add a new property to the Item object. Click Item to open the property settings page. You will see the default properties listed.
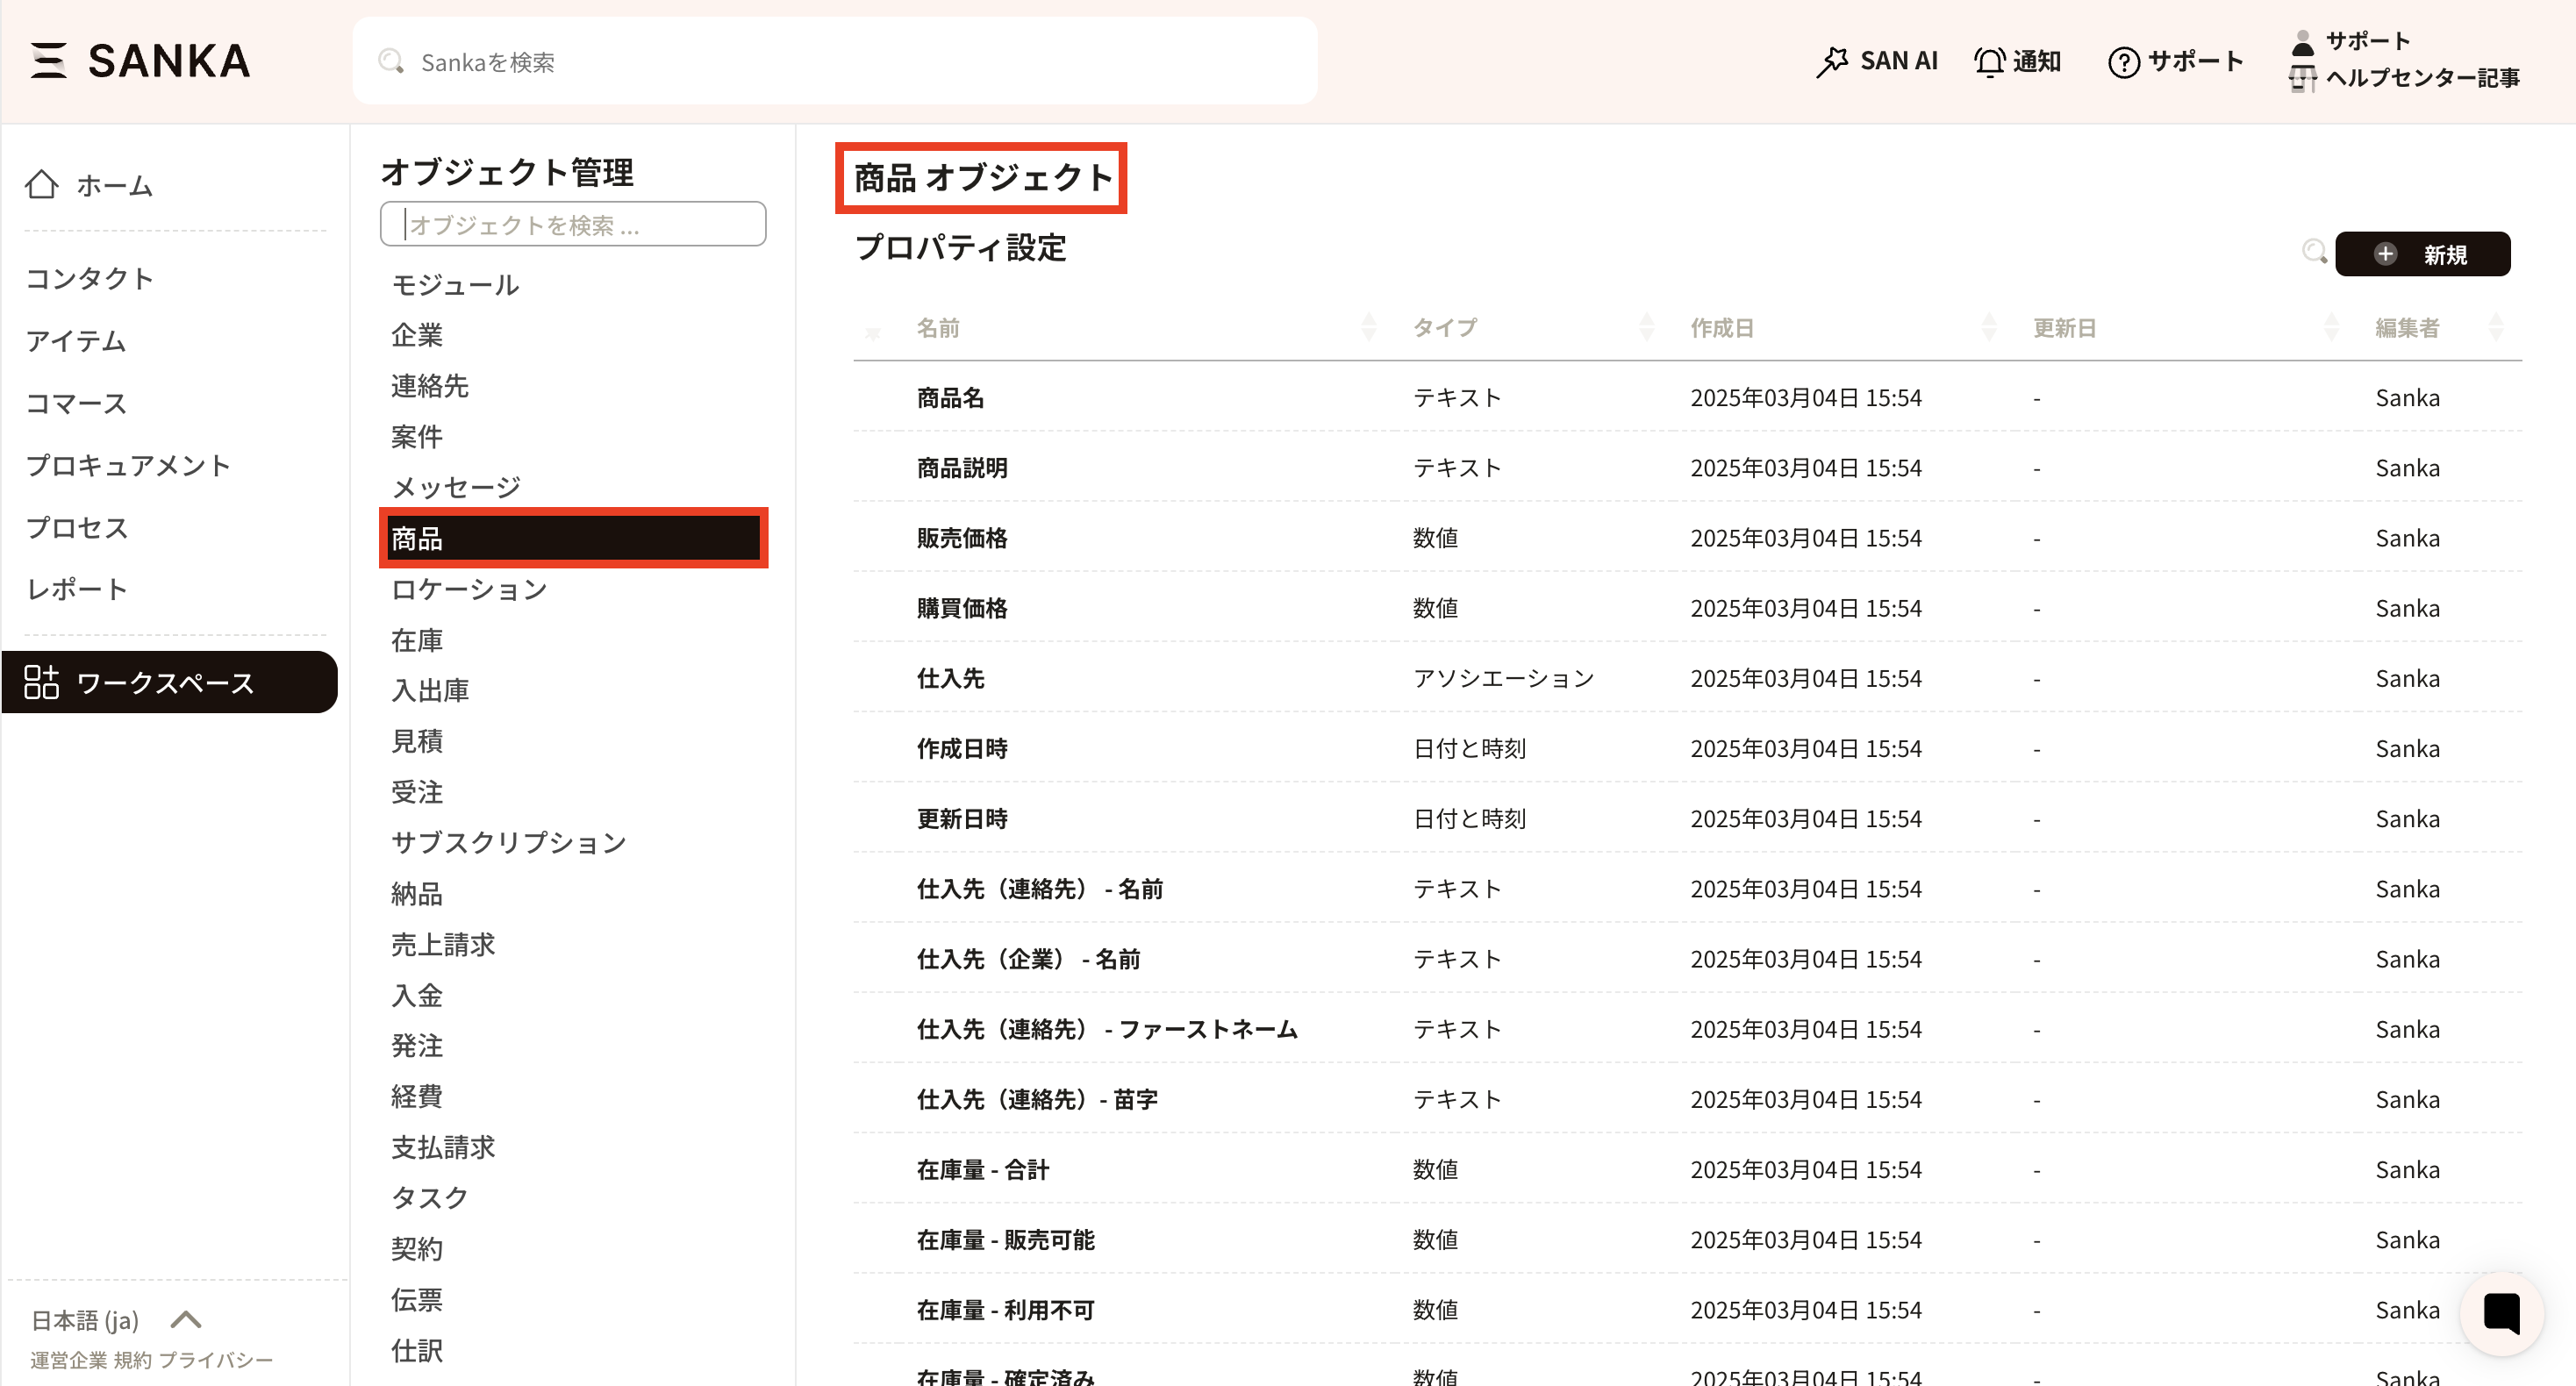
- To add a property, click New on the right side of the property settings.
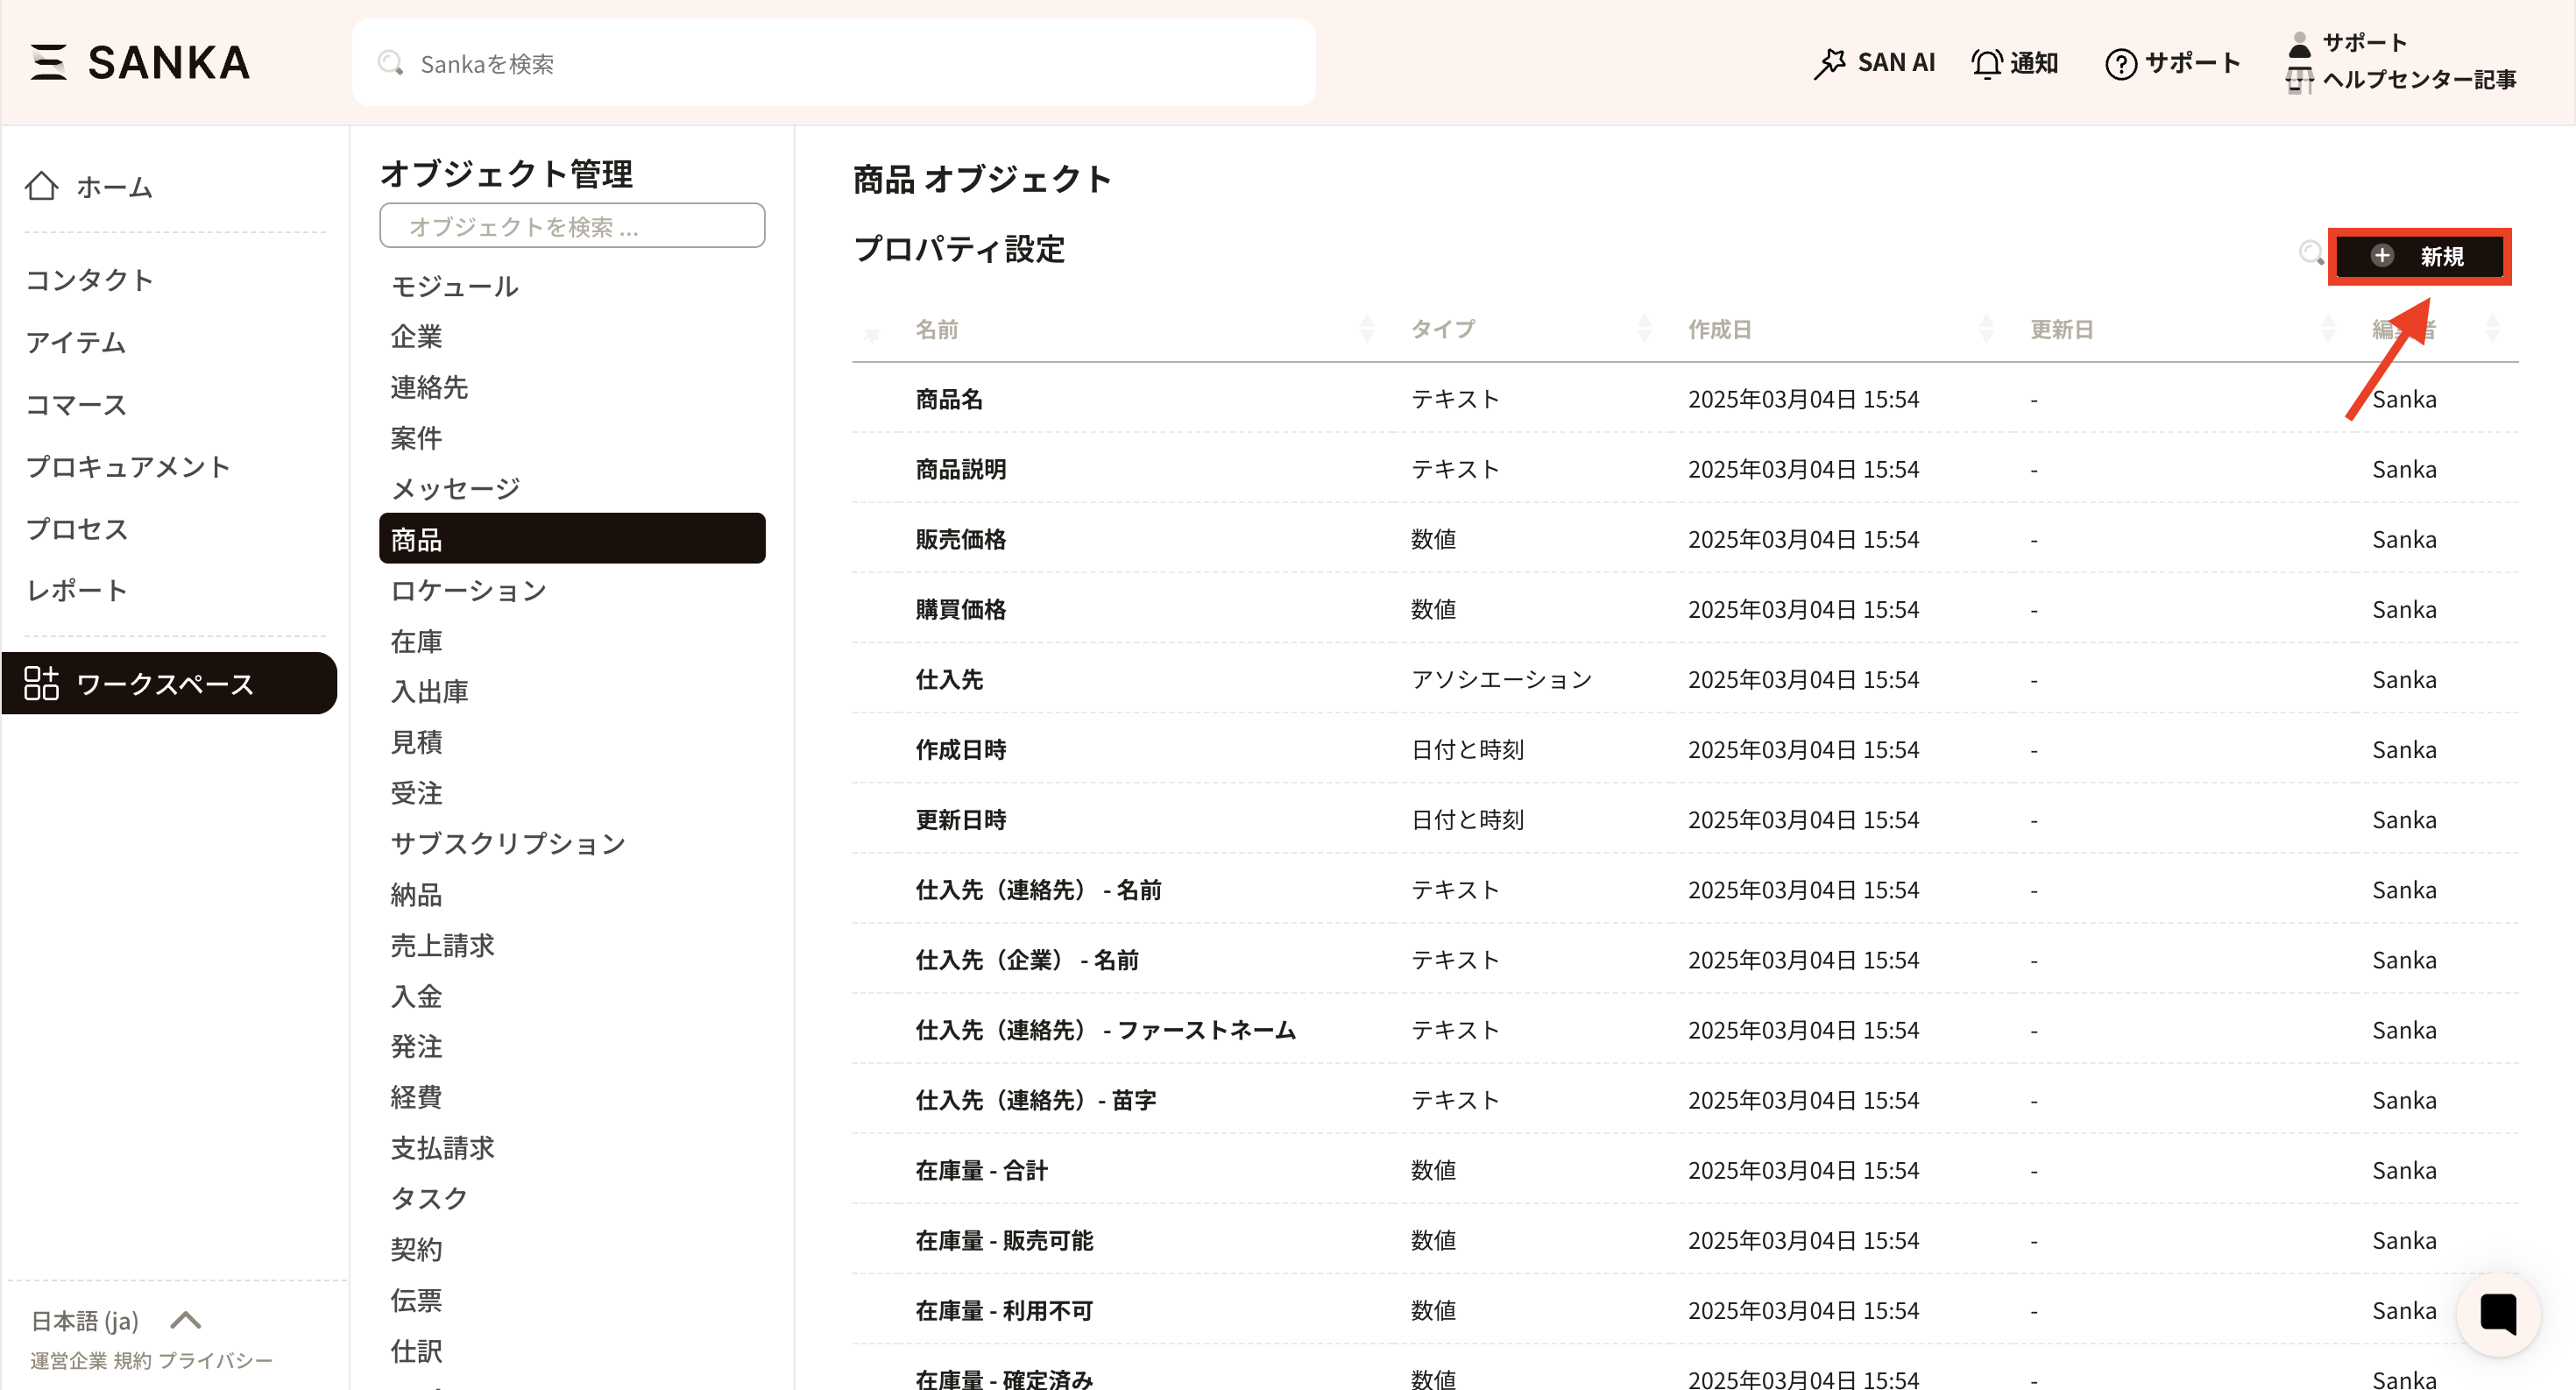
- The property creation screen appears.

- Enter the required details.
- Property name: Use a clear name (for example, SKU, Category).

- Property type: Select the input type. This helps determine the best input format and improves efficiency (text, number, date, options, etc.).

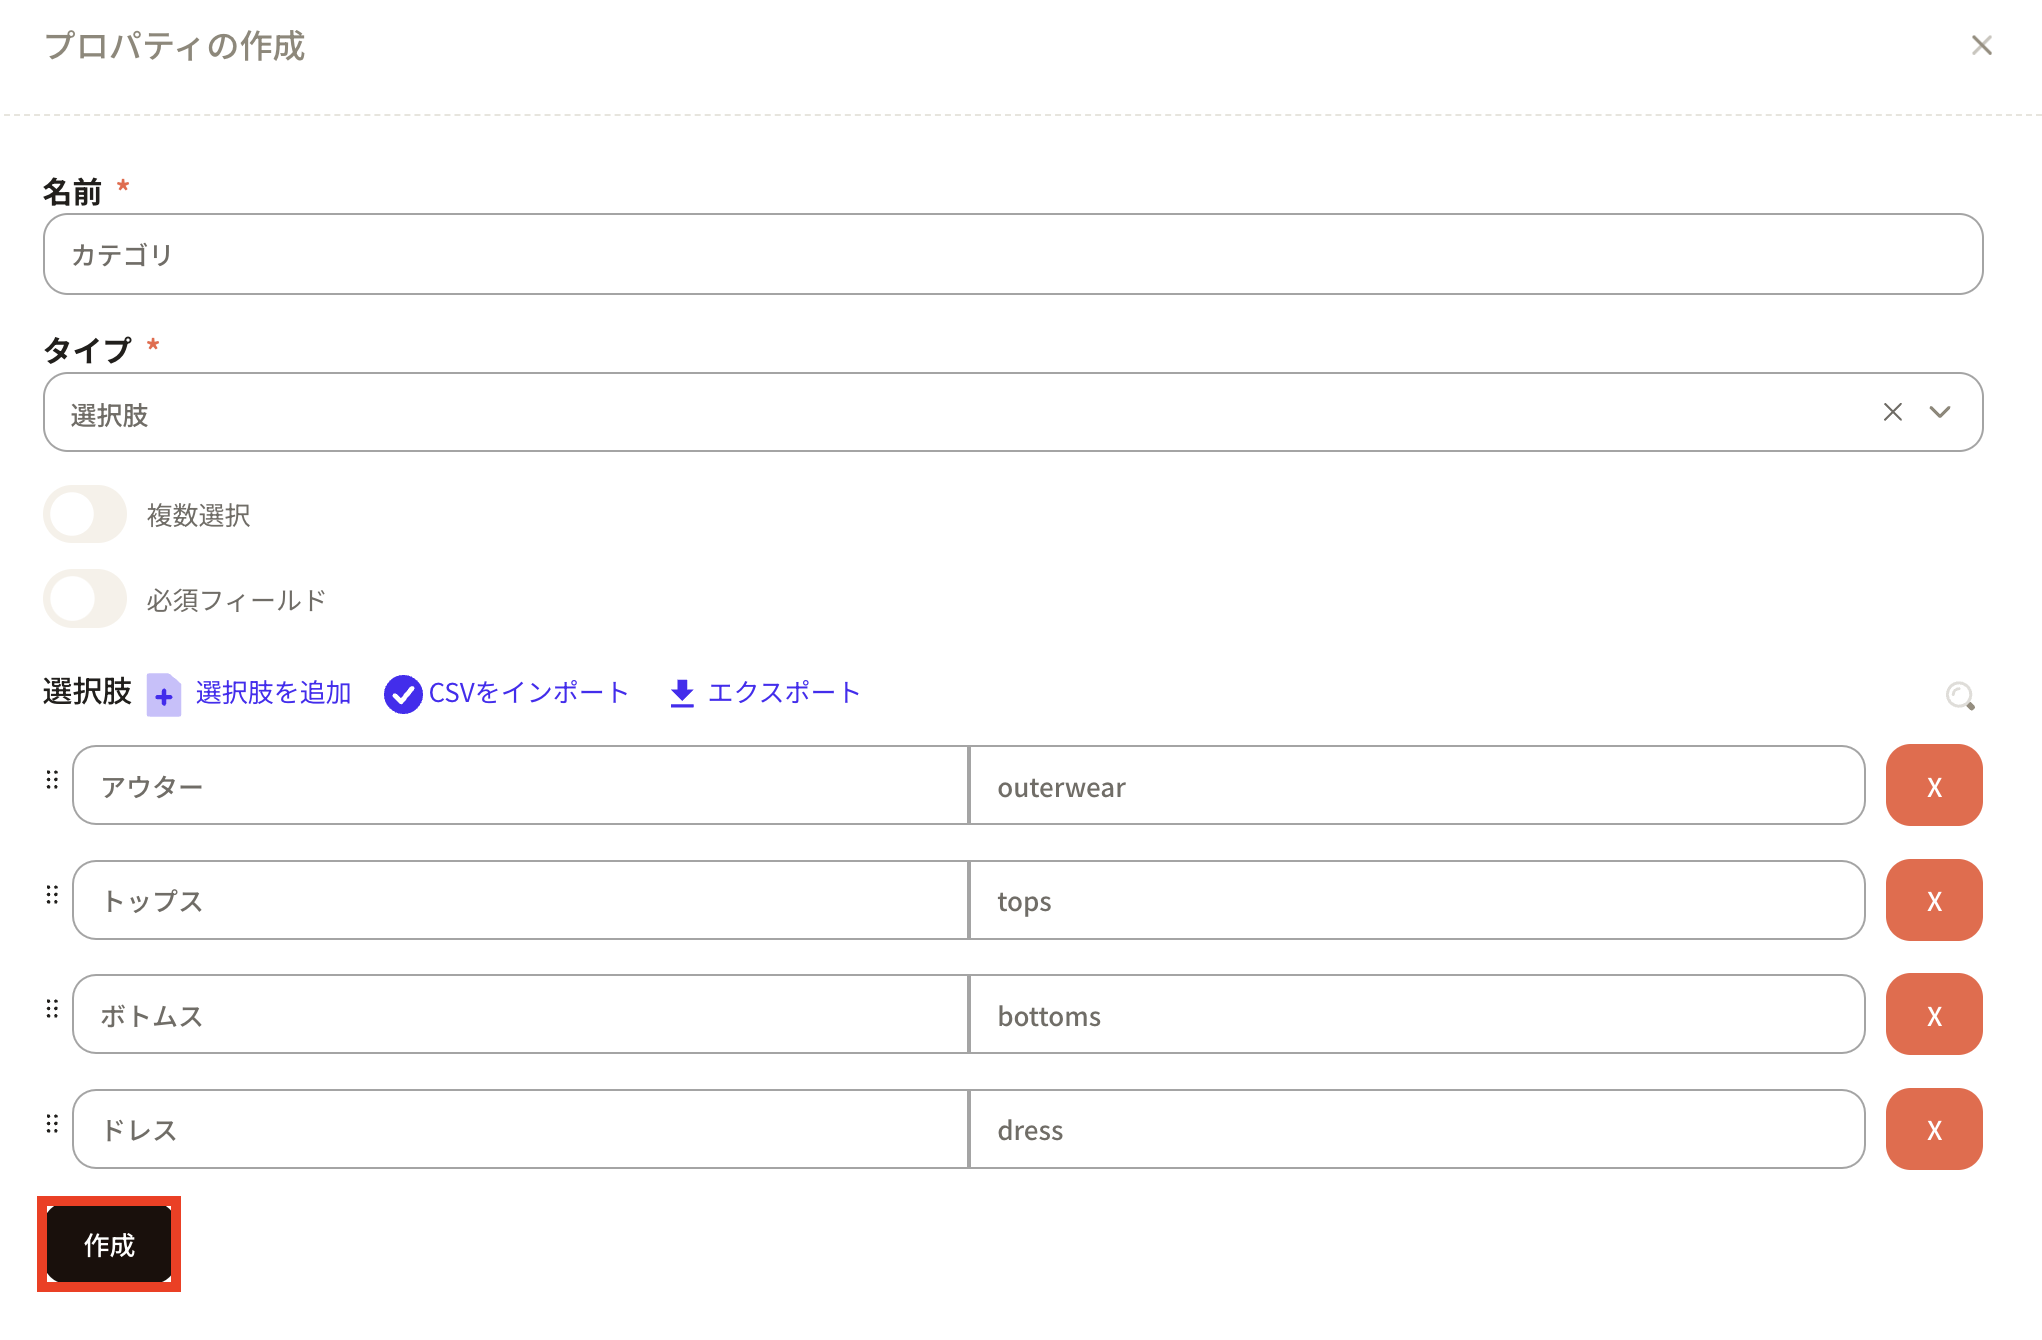
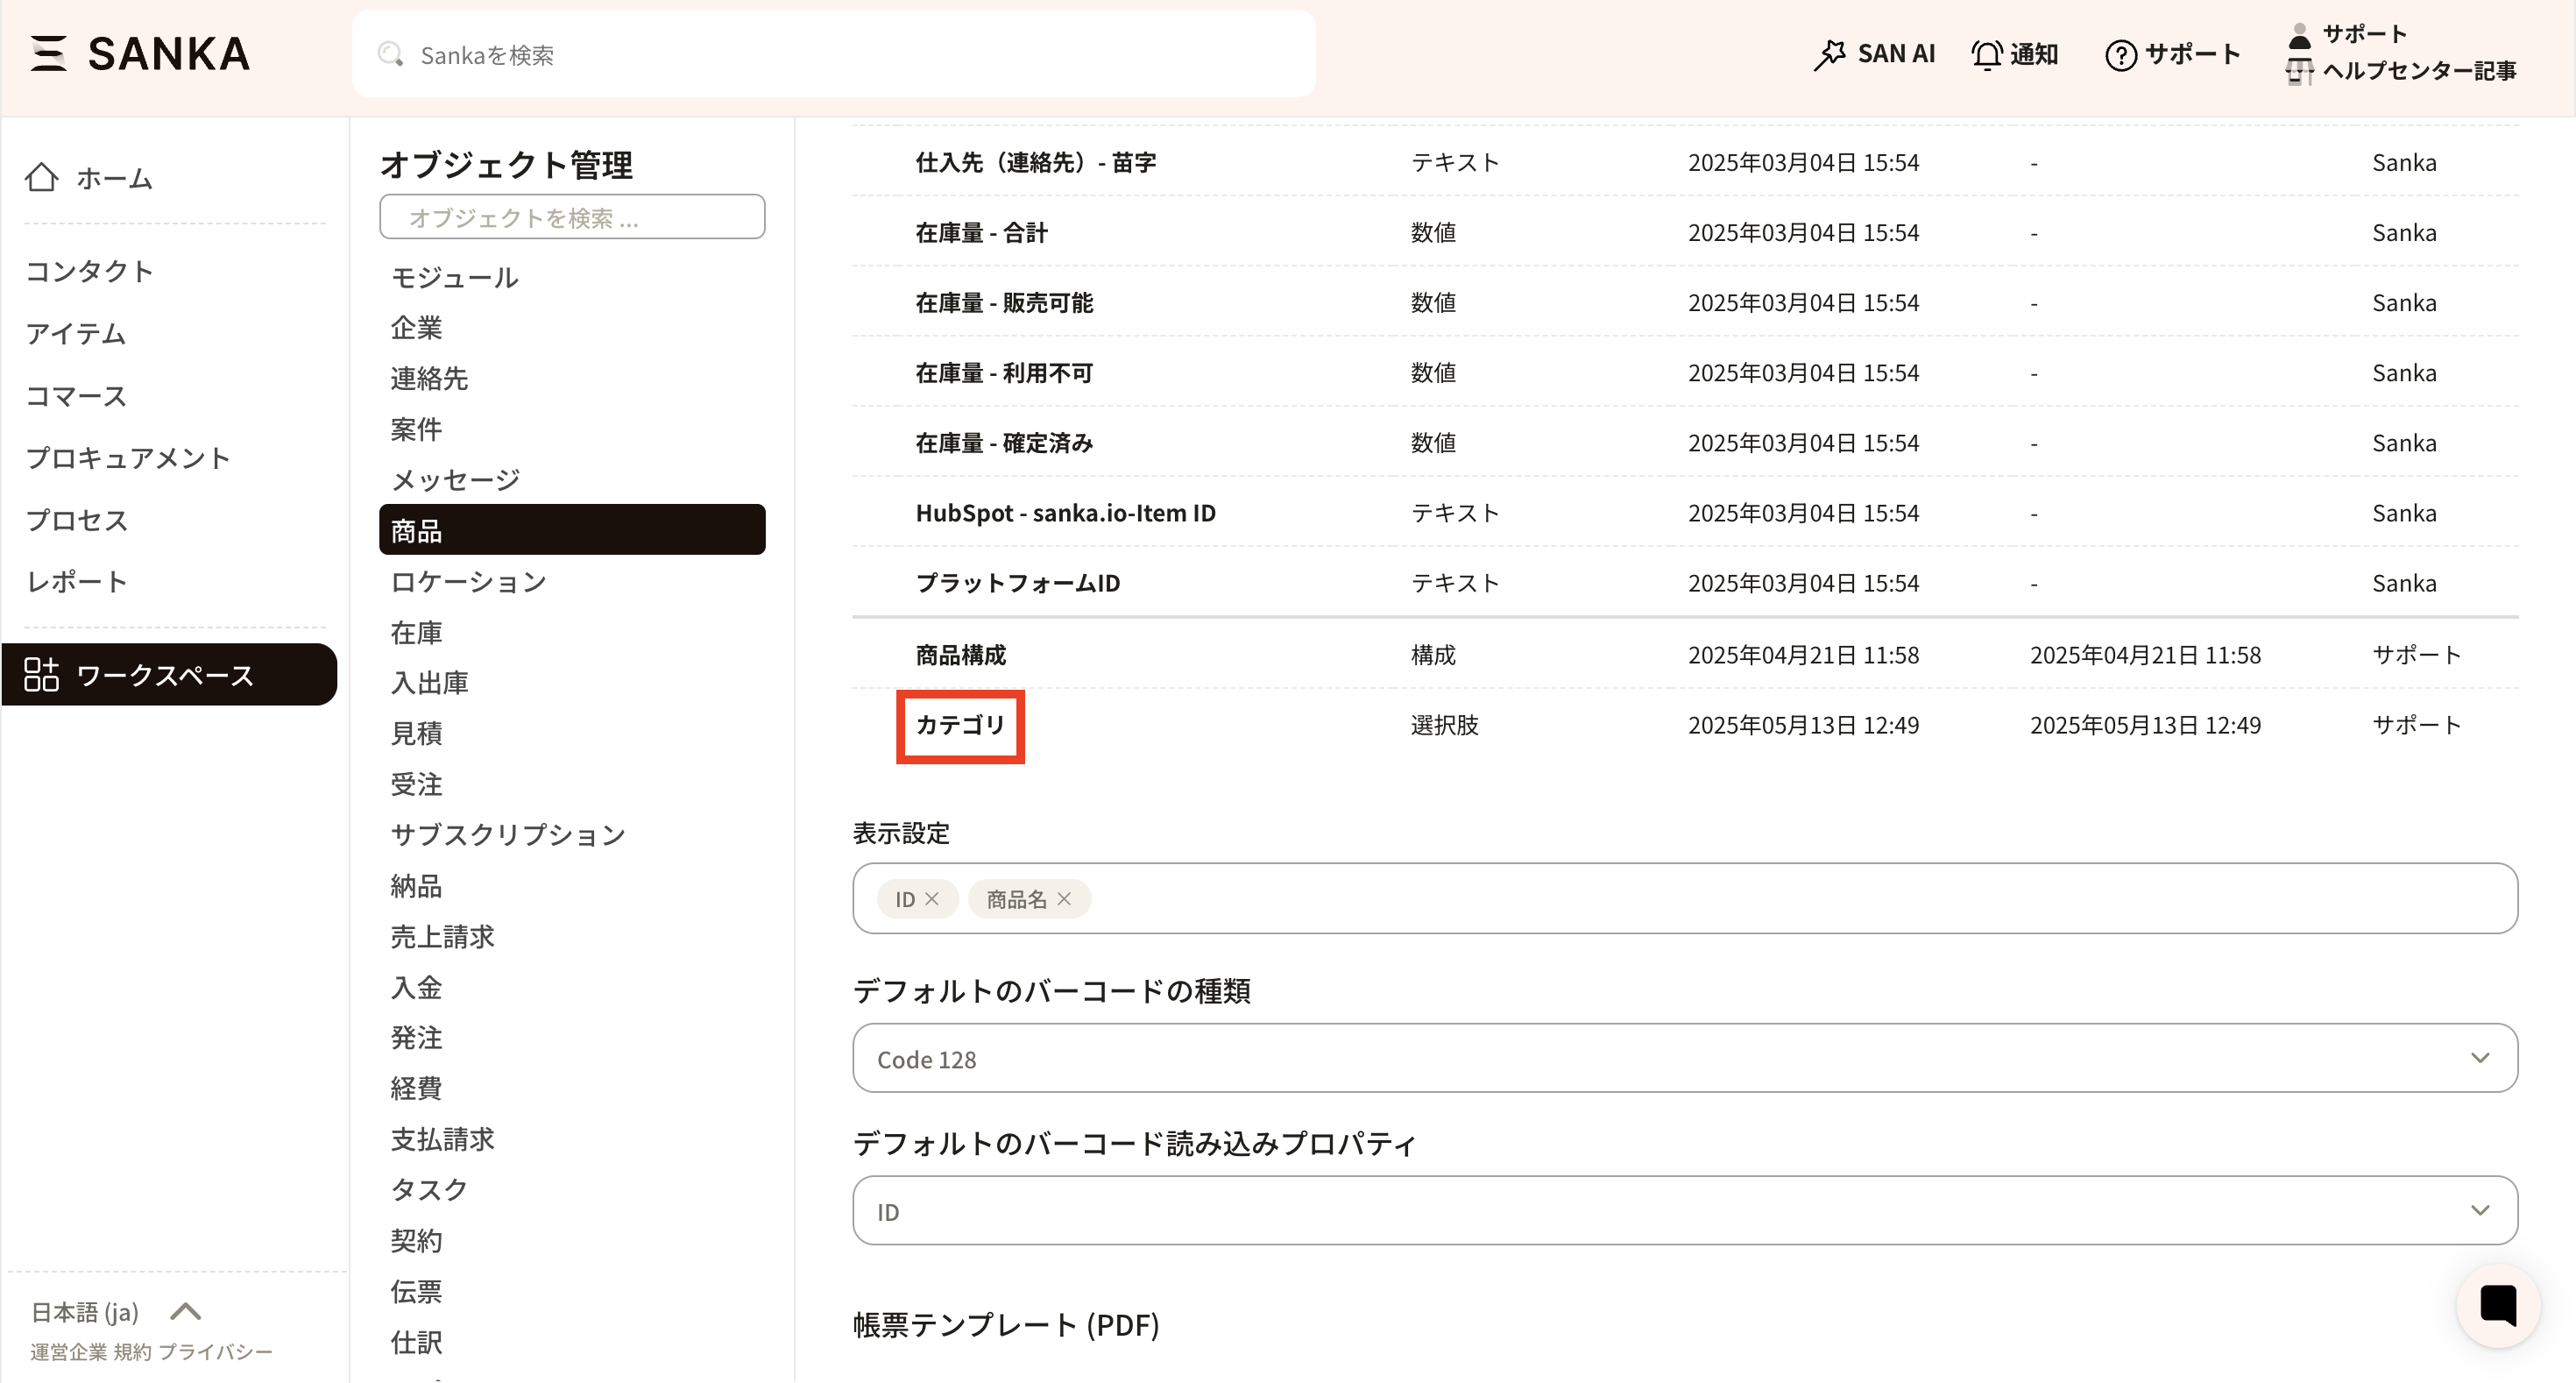
- As an example, add a Category property using options.
- Name: Category

- Type: Options
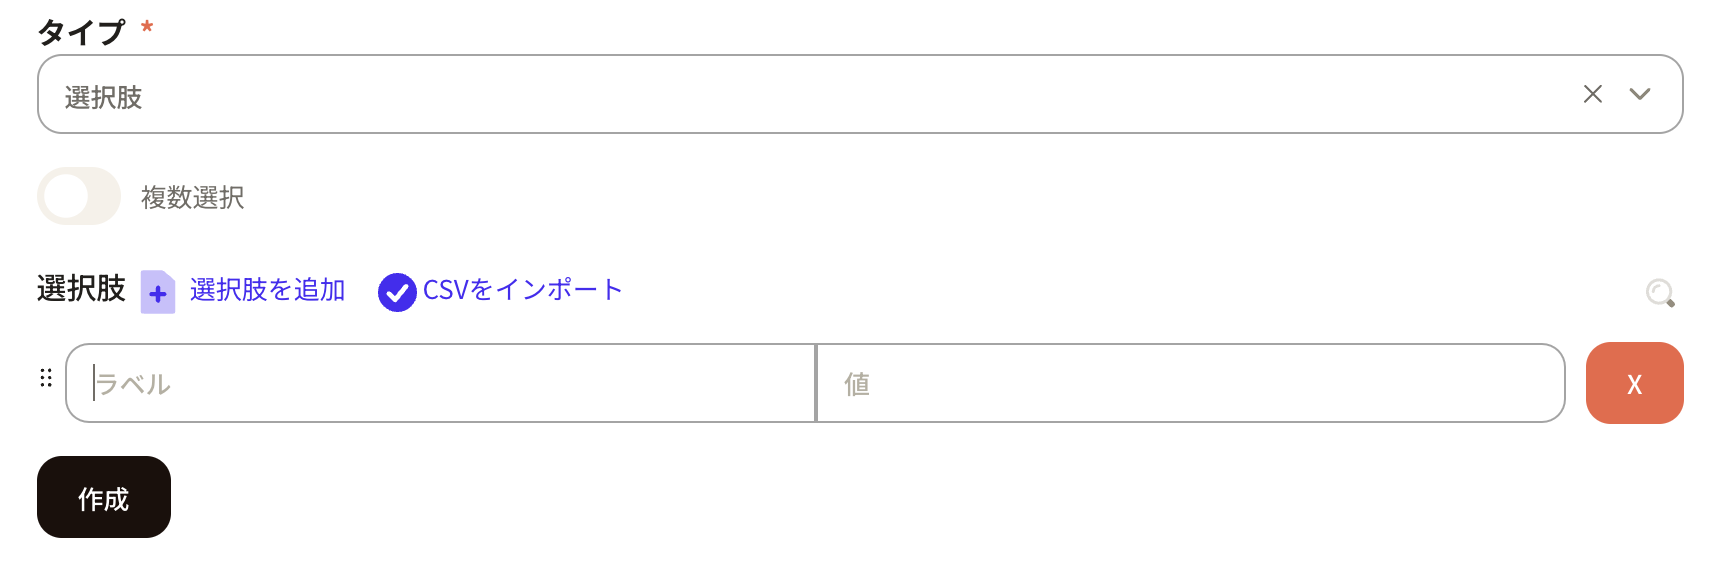 Turn on Multiple options to allow selecting multiple categories in the form.
After entering the required items, click Create to register.
Turn on Multiple options to allow selecting multiple categories in the form.
After entering the required items, click Create to register.
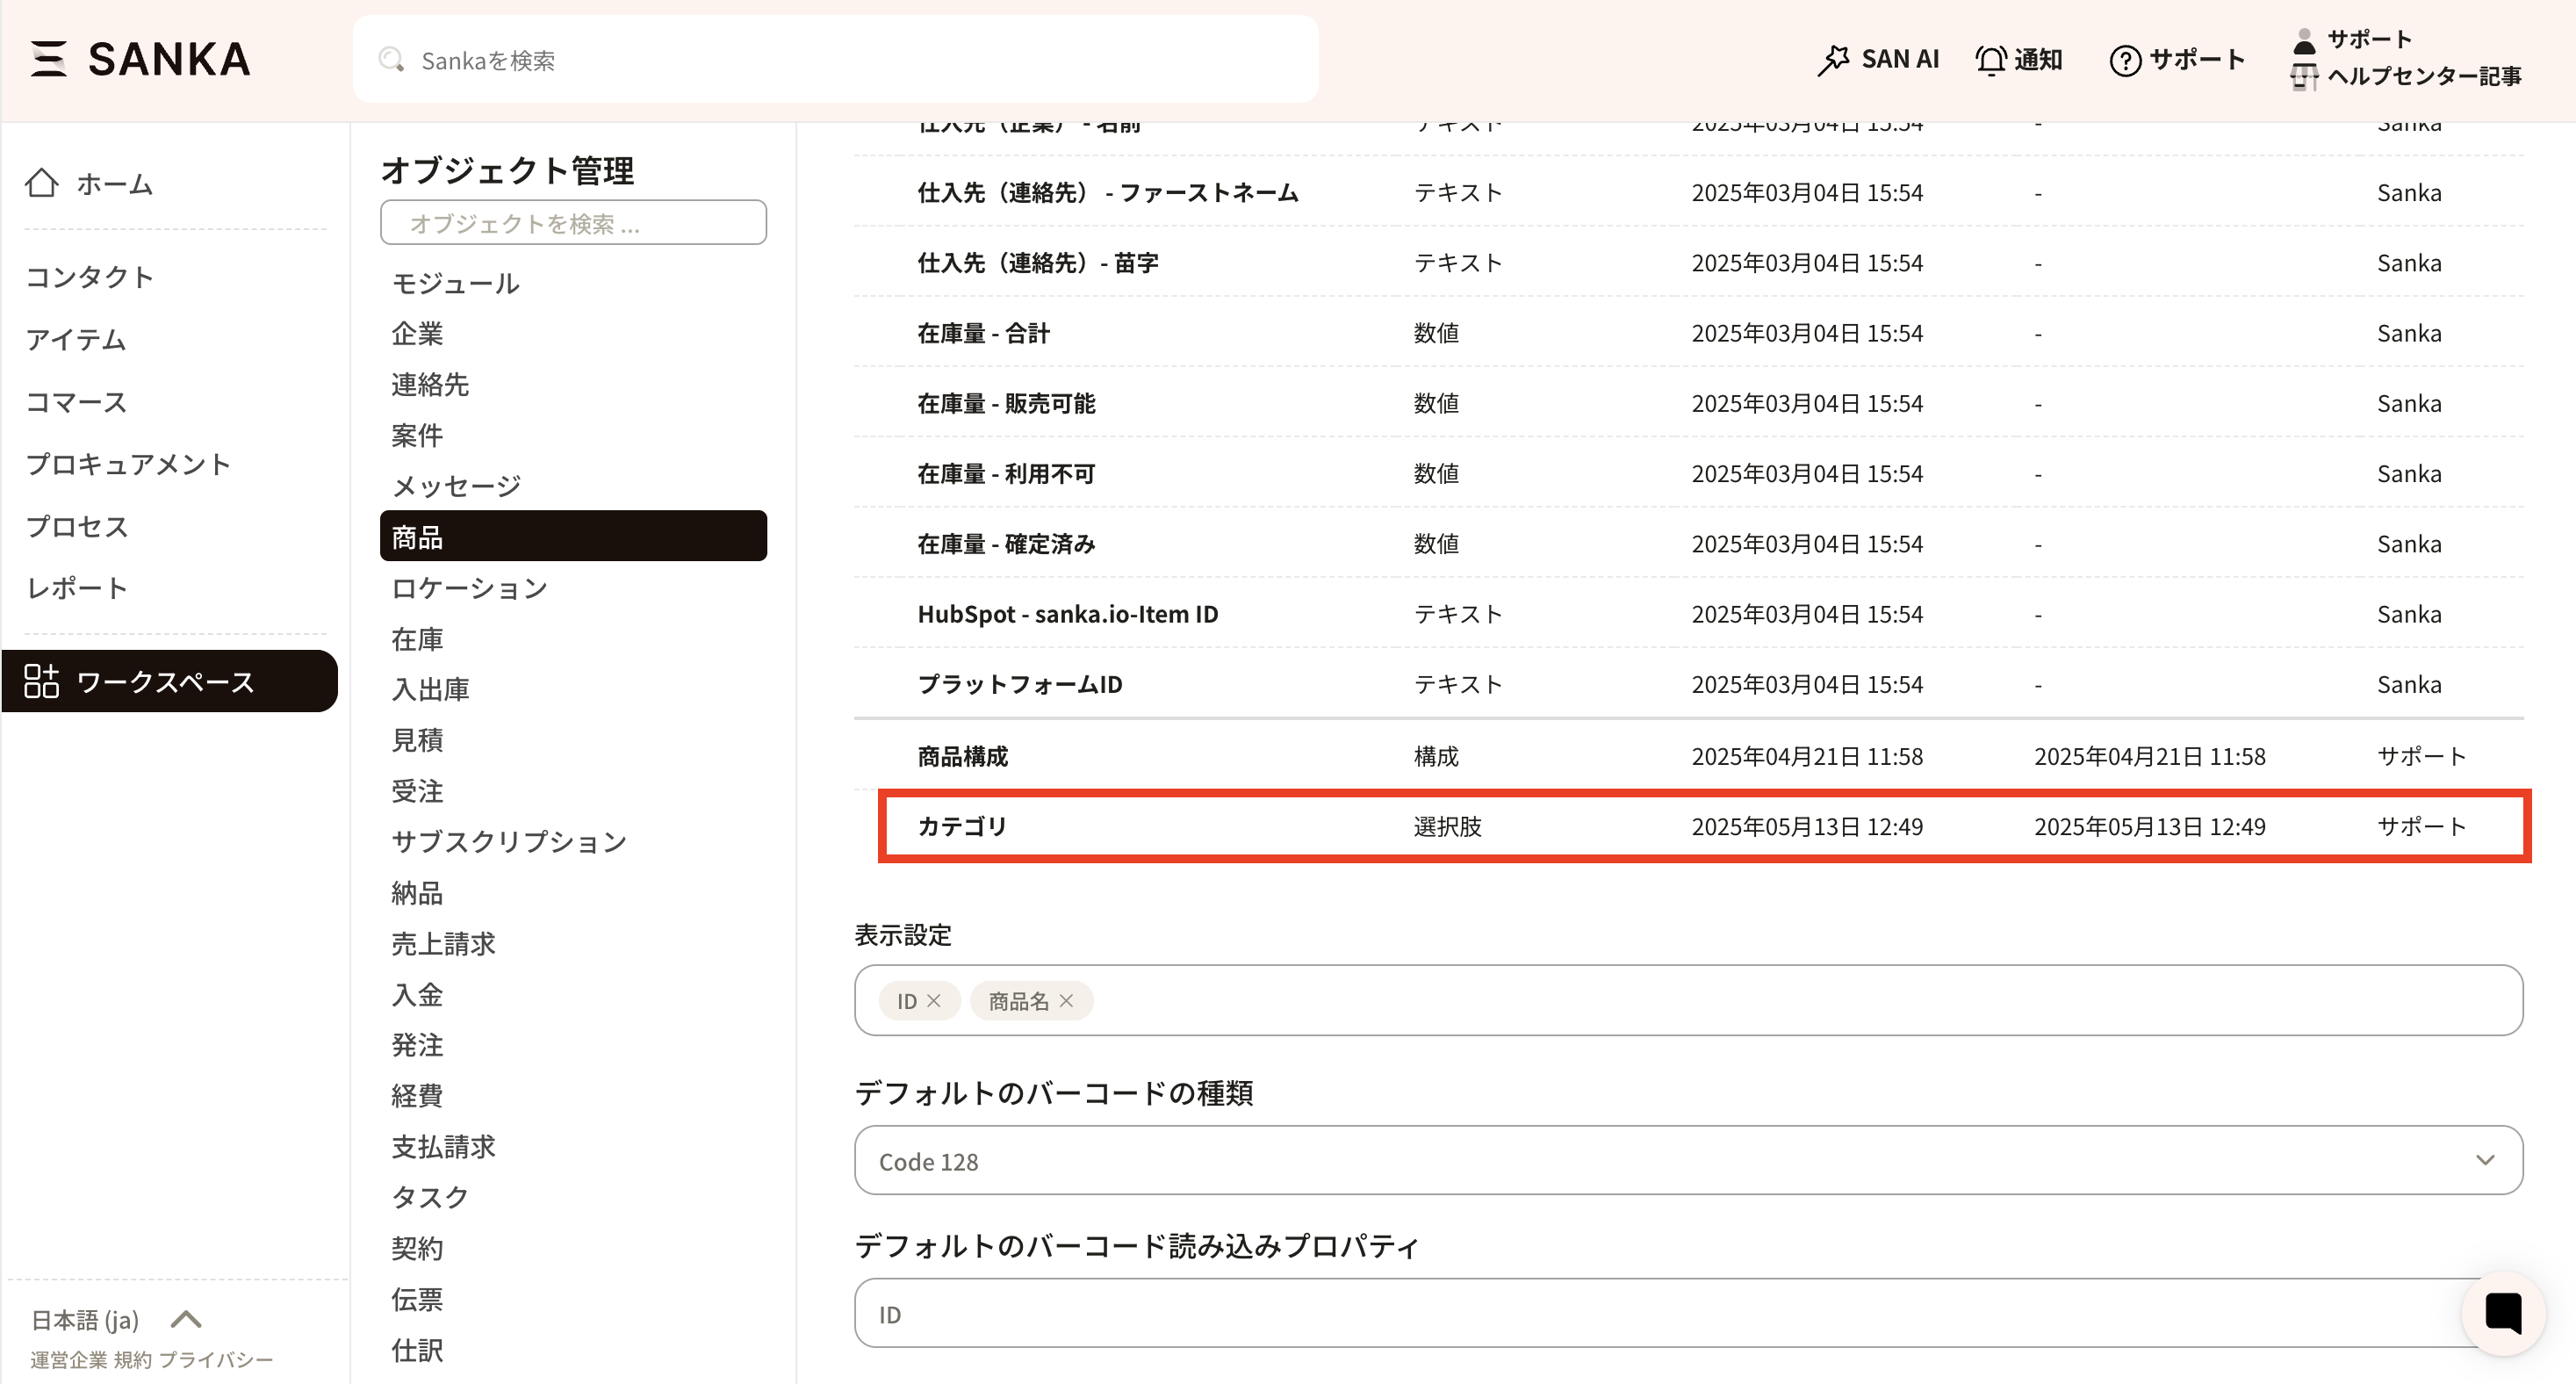
- The new property appears at the bottom of the list after it is created.
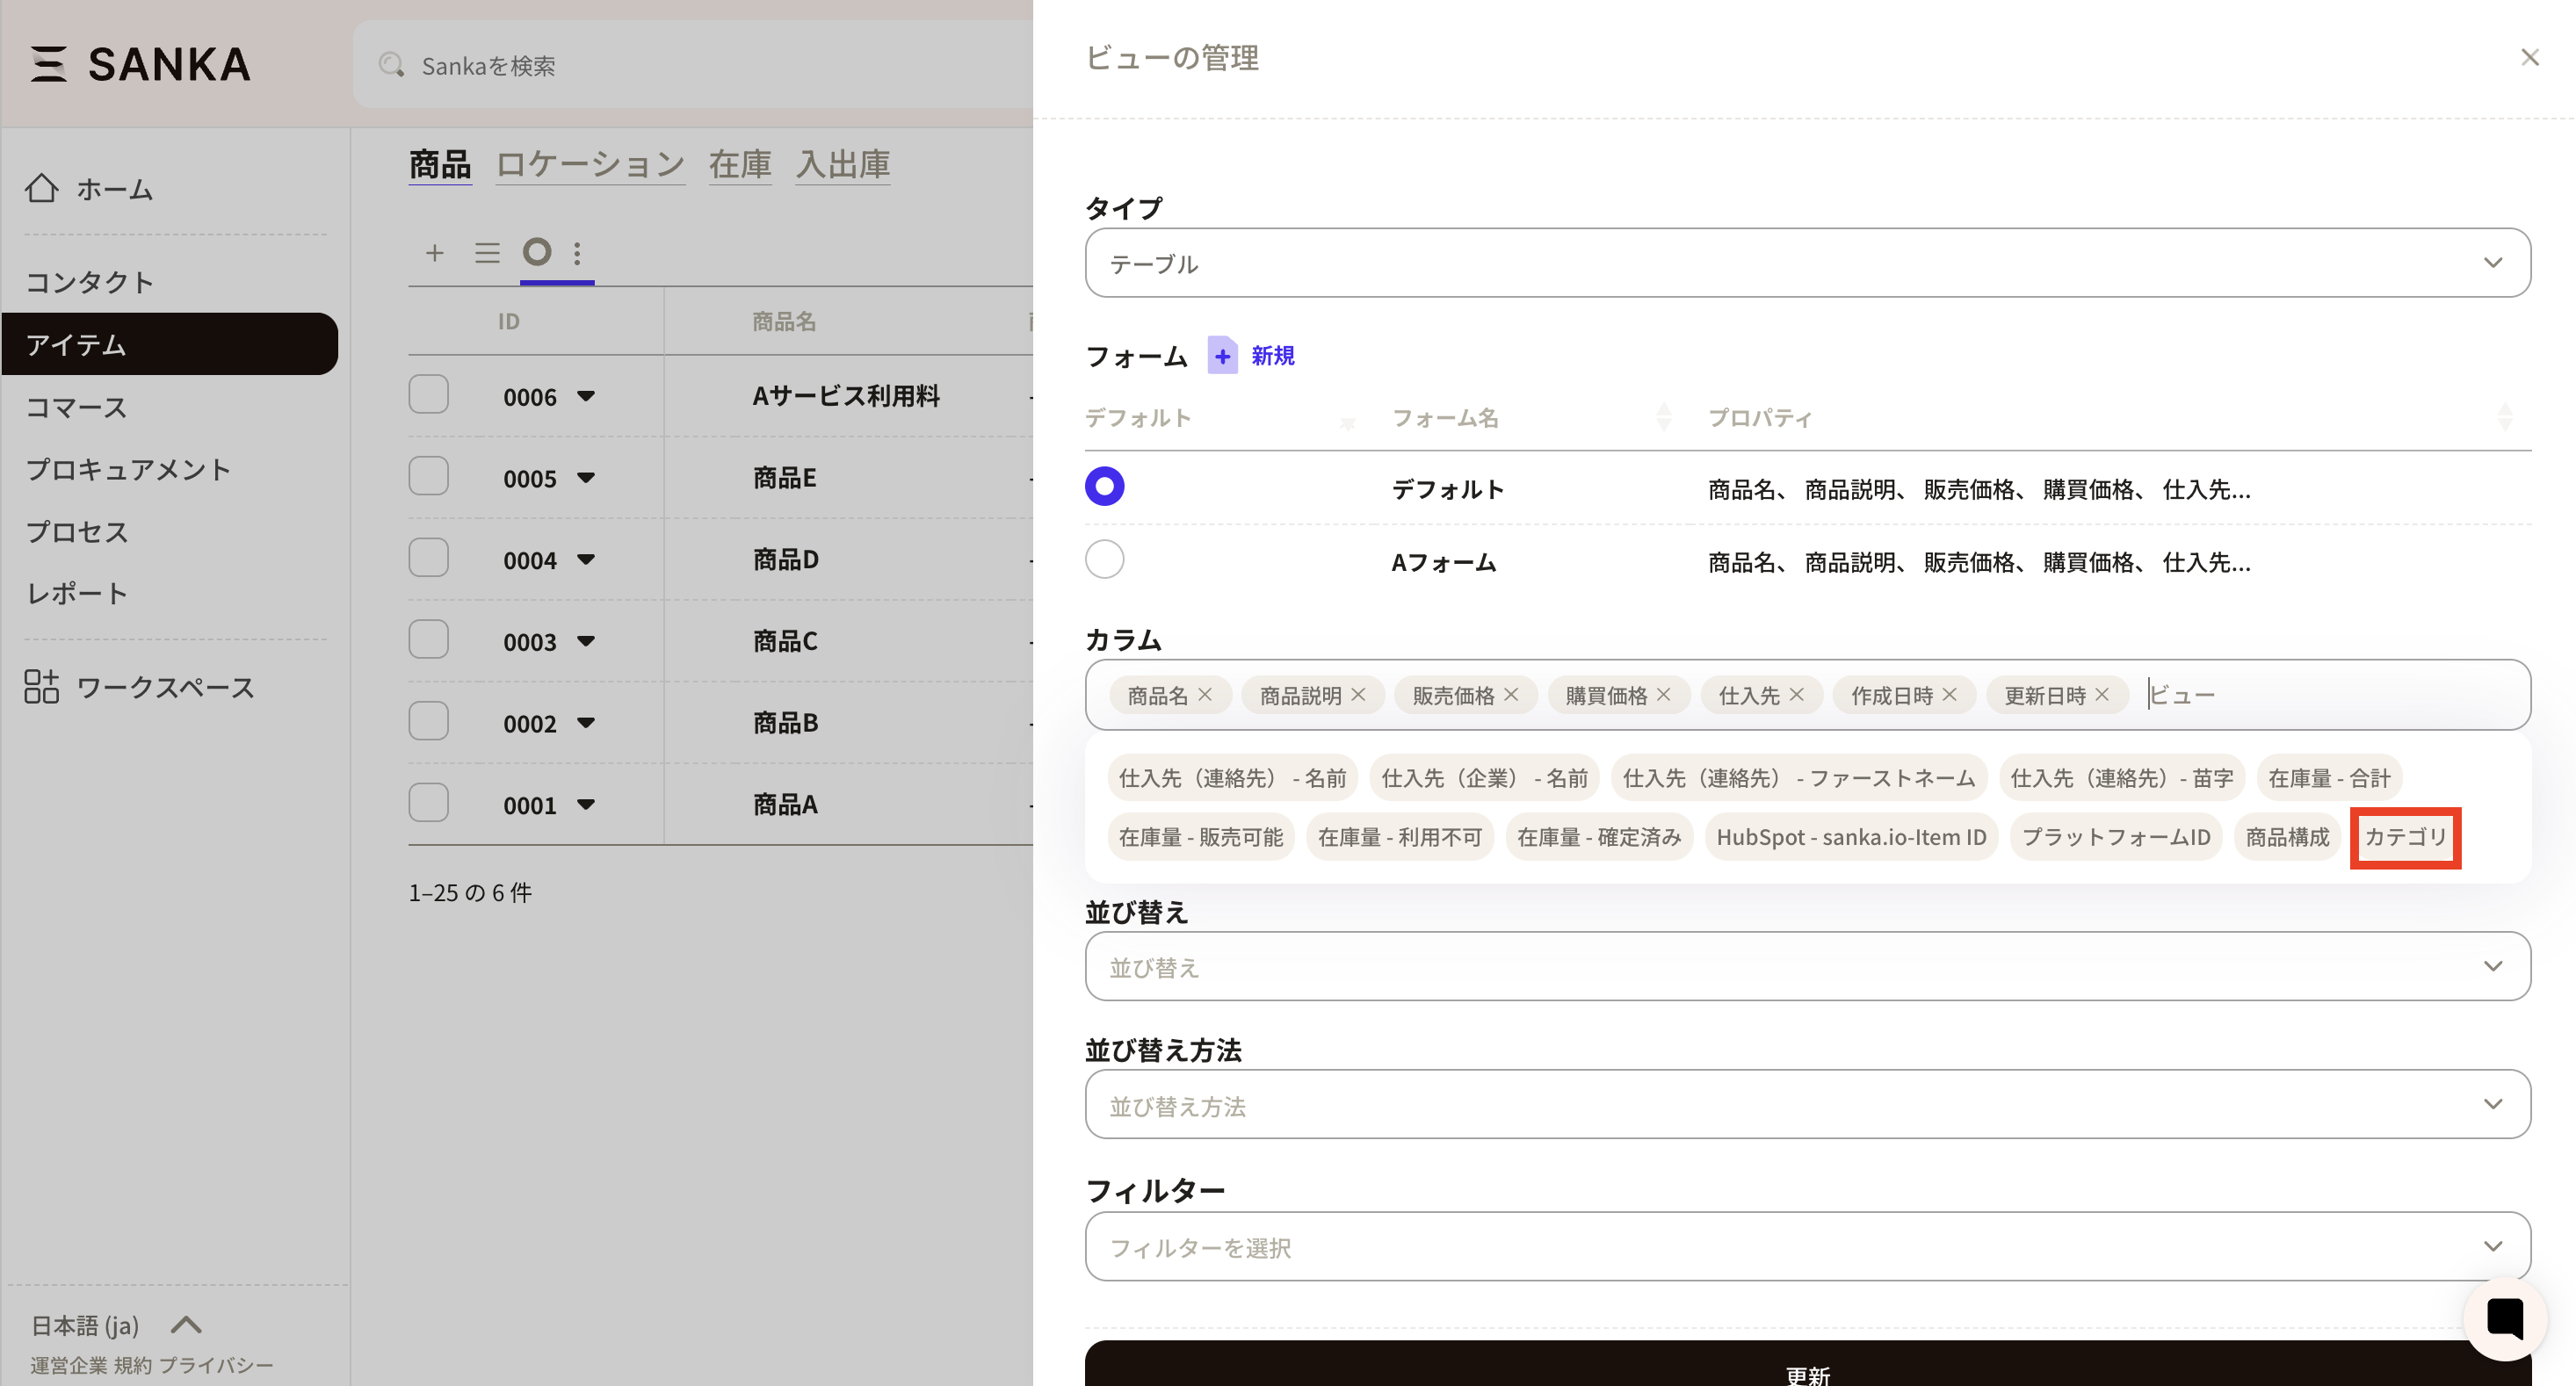
- Next, add the new property to view management so it appears in columns and forms. See the View and Form management guide for details.
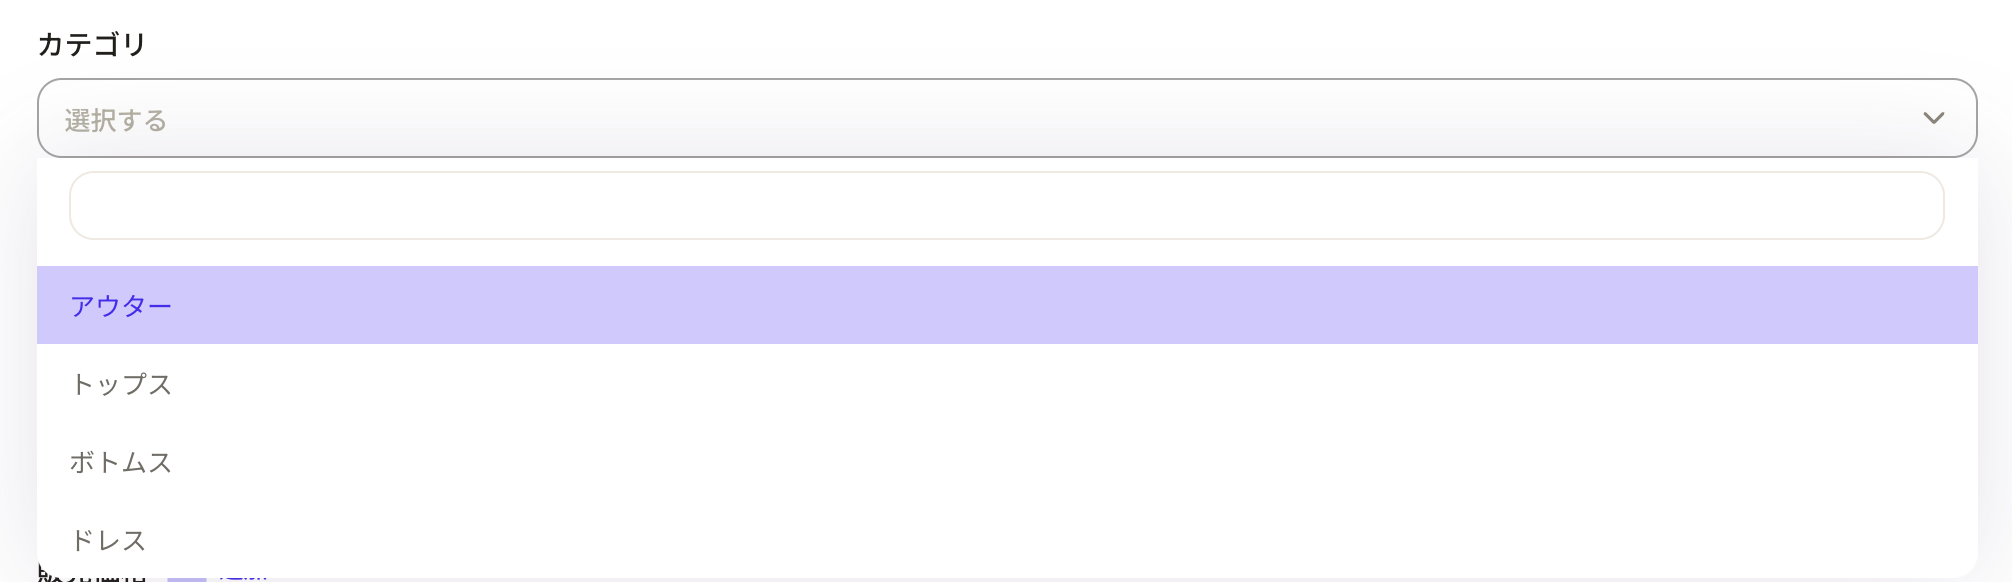
 It will appear in the record creation form like this.
How to edit properties
- Go to Object Management, select the object you want to edit, and click the property name.
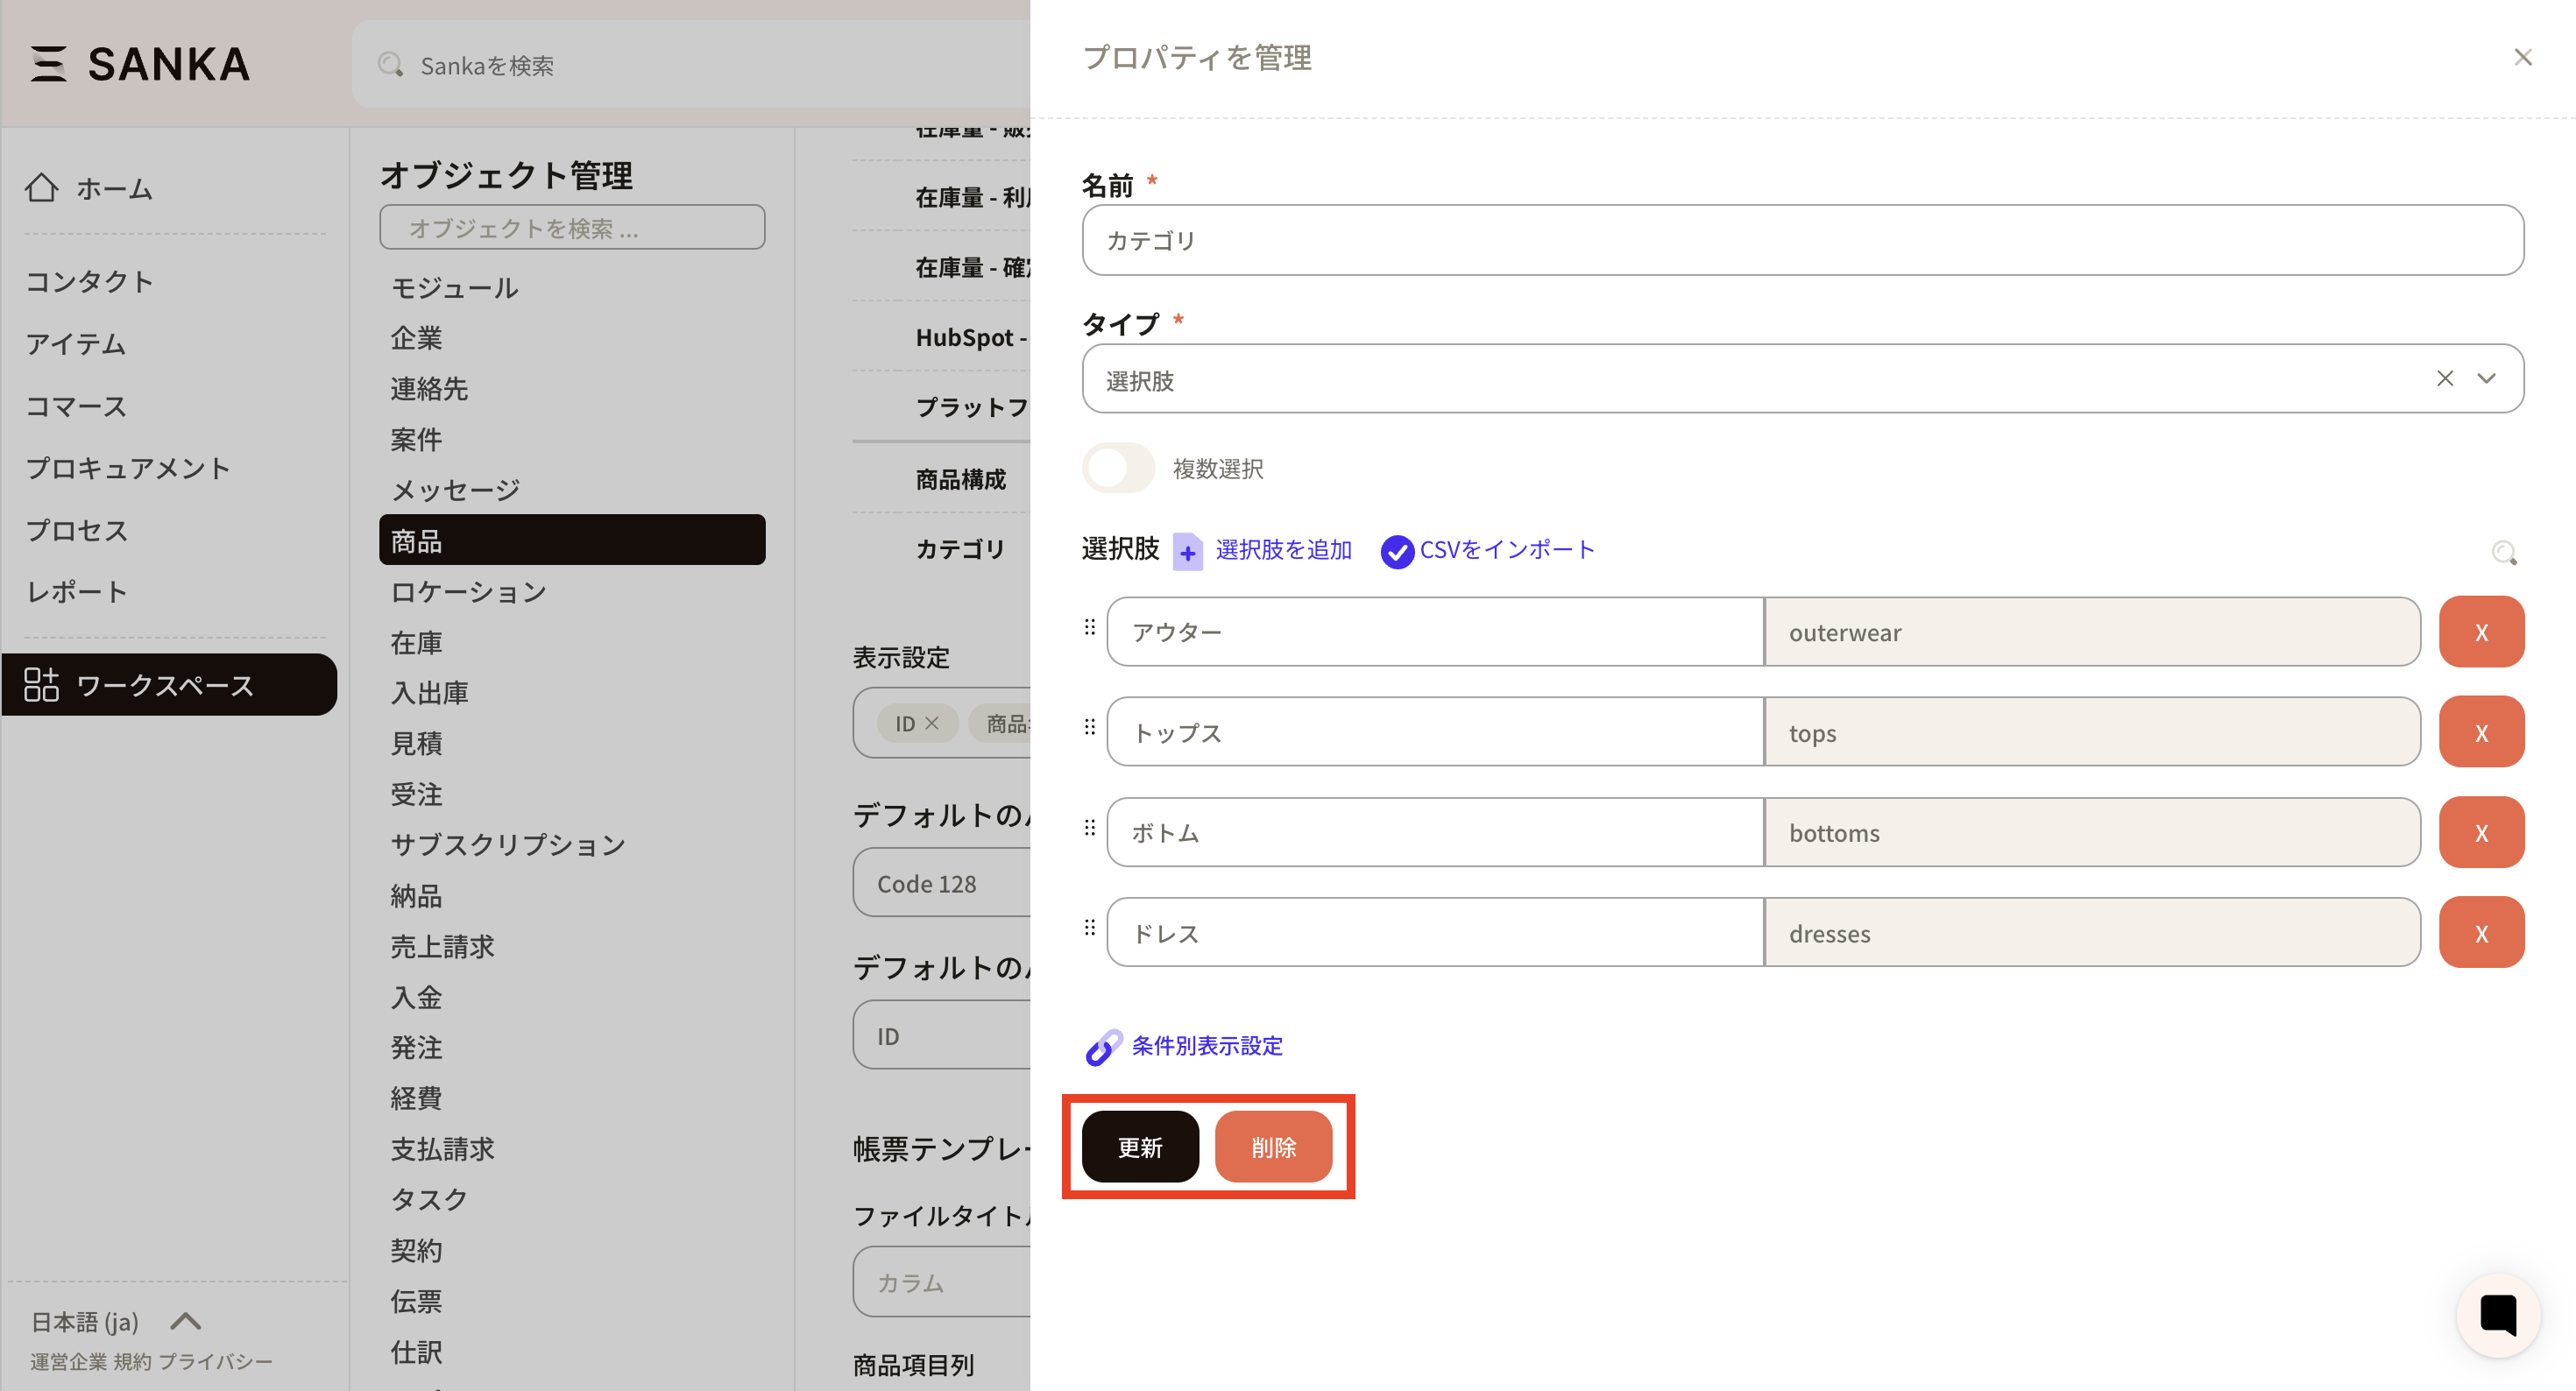
- As an example, edit the Category property added earlier. Select the Item object from Workspace, then select the property.
- The Manage property screen appears. Edit as needed and click Update. To delete a property, click Delete.
Property types
This section explains property types such as text and numbers.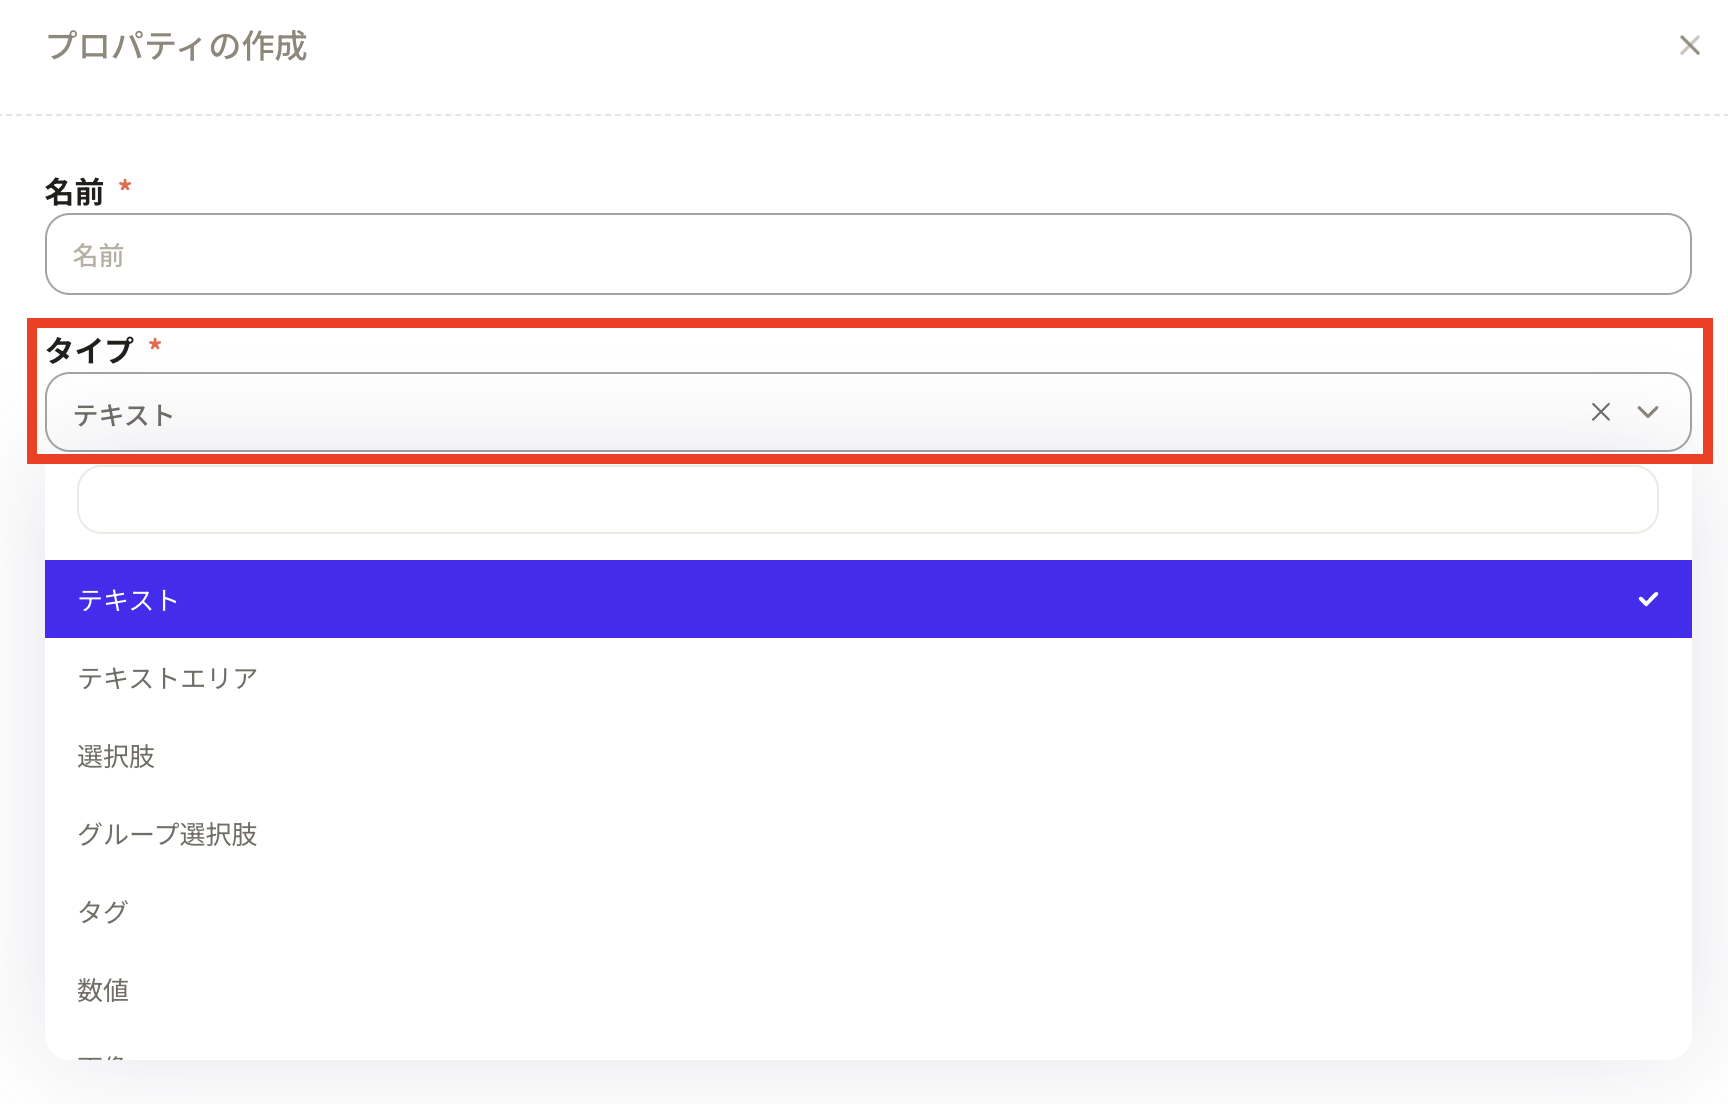
Text
Text: Store short text. Useful for notes or identifiers. You can also apply a unique restriction.
 Text area: A larger text box for long descriptions or notes.

Options
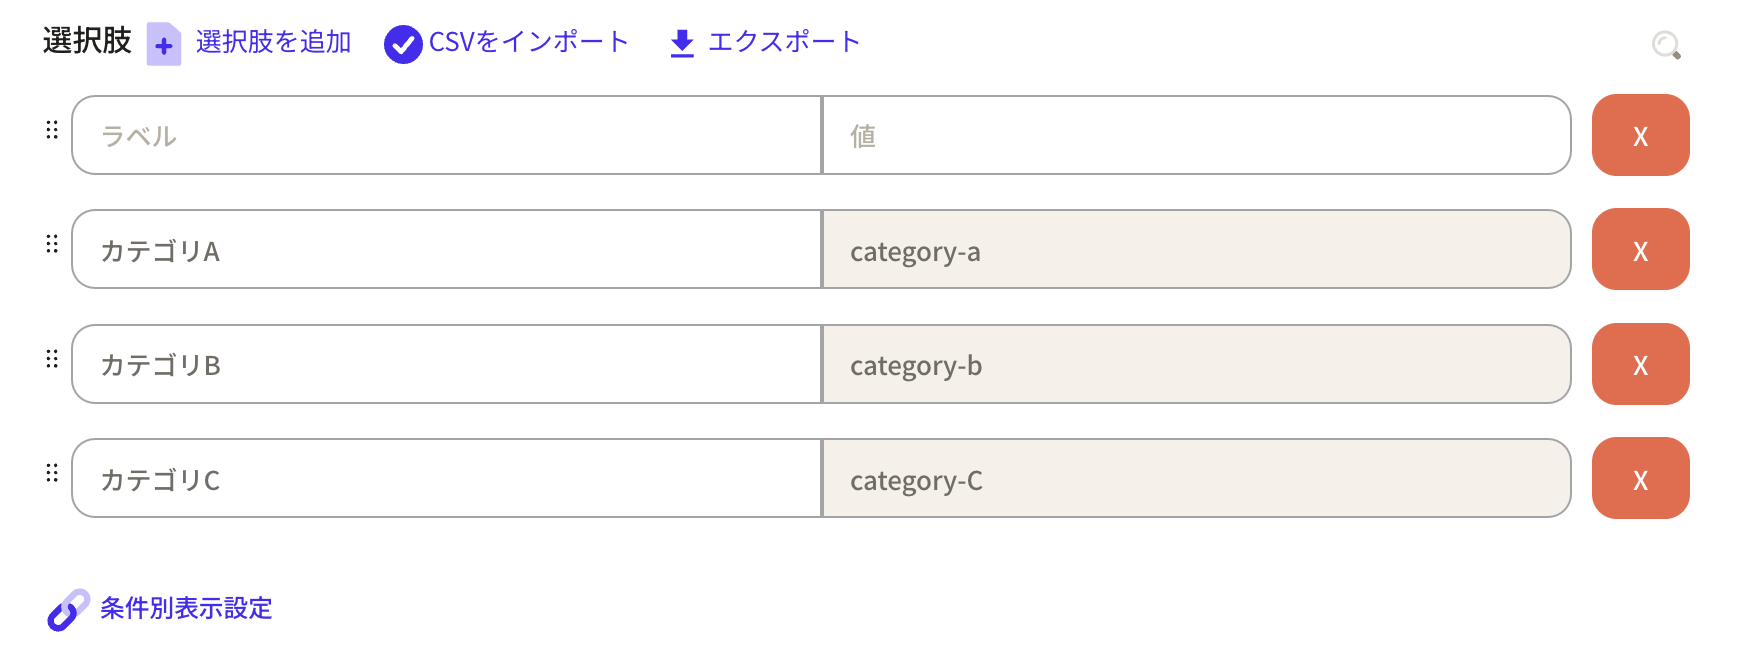
There are three option types: Options (simple list), Conditional display (dependent options using multiple properties), and Grouped options (options grouped in a list). Choose based on your workflow. Options: Create a list of choices. Useful when you want to categorize items or set types.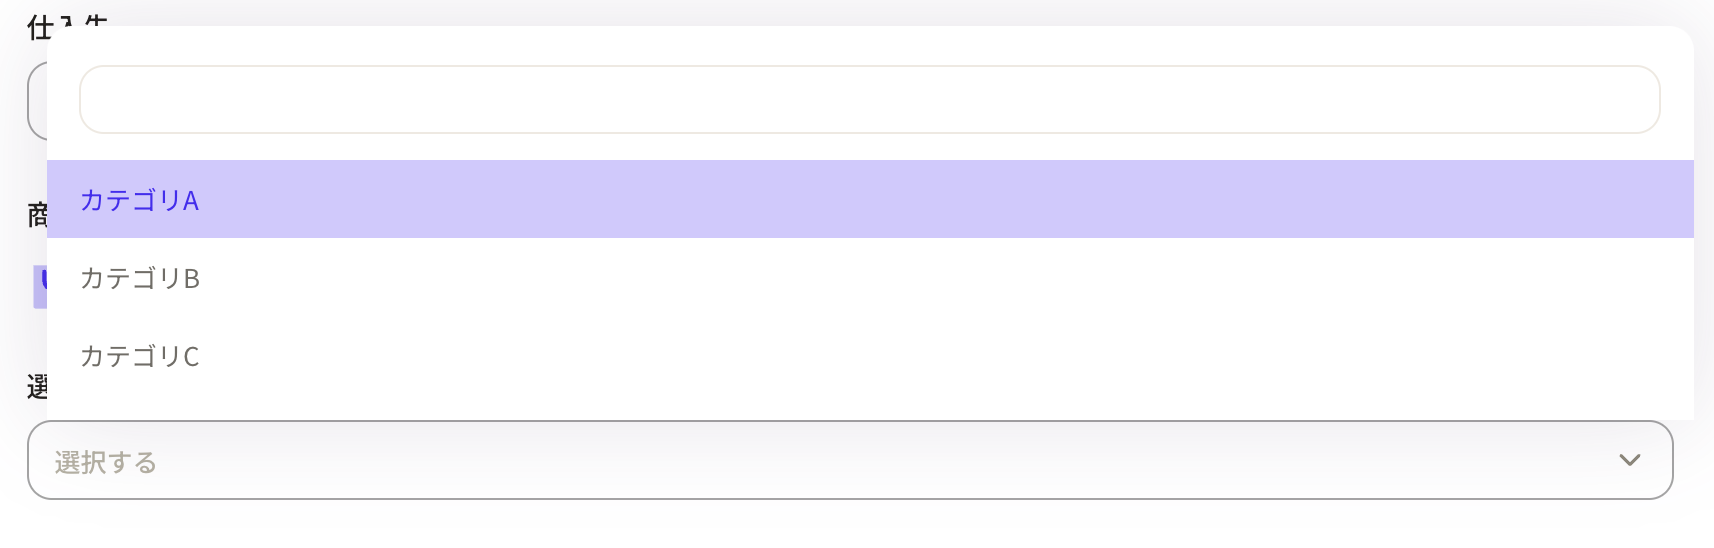 How to set up options
Click Add option to add rows.
How to set up options
Click Add option to add rows.
- Label: Display name in Sanka
- Value: Internal system name (cannot be changed later, so choose clearly)
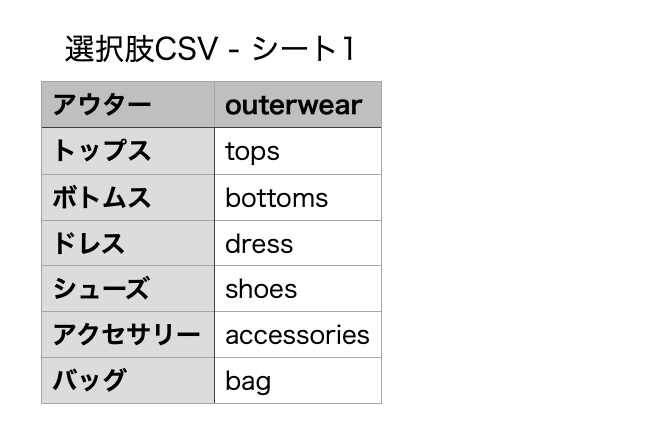
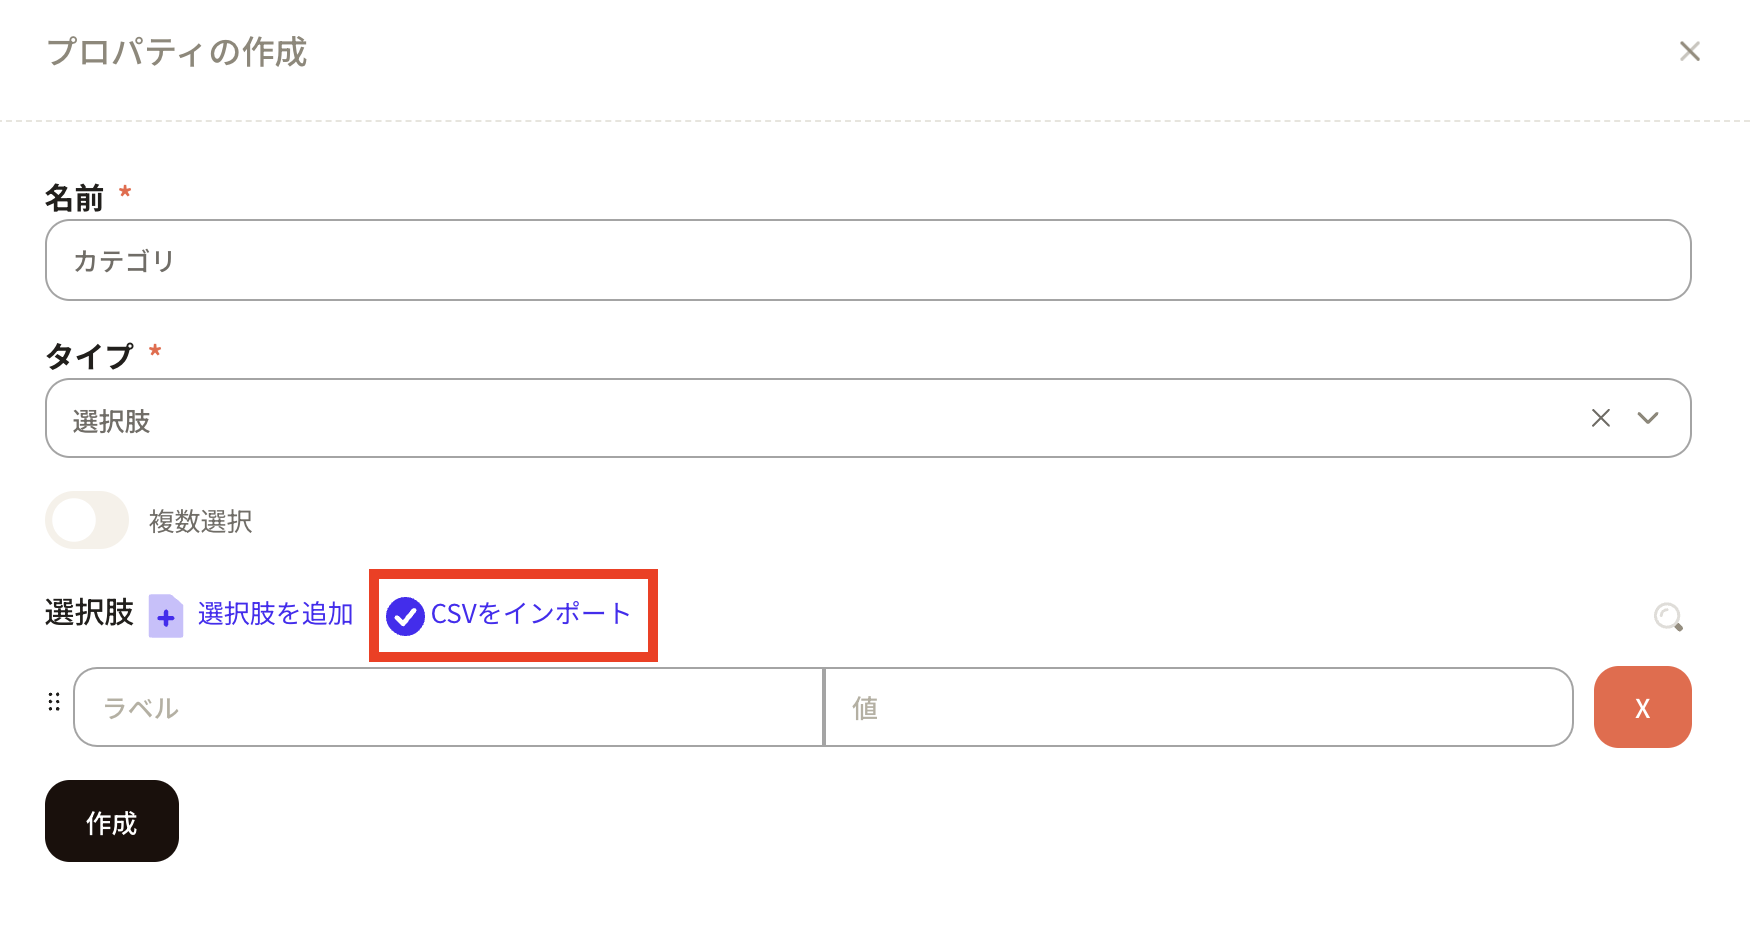
 How to import options via CSV
If you have many options, CSV import is faster than manual entry.
How to import options via CSV
If you have many options, CSV import is faster than manual entry.
- Prepare a CSV file with two columns: label on the left, value on the right. No headers are needed.
- Label: Display name in Sanka
- Value: Internal system name (cannot be changed later)
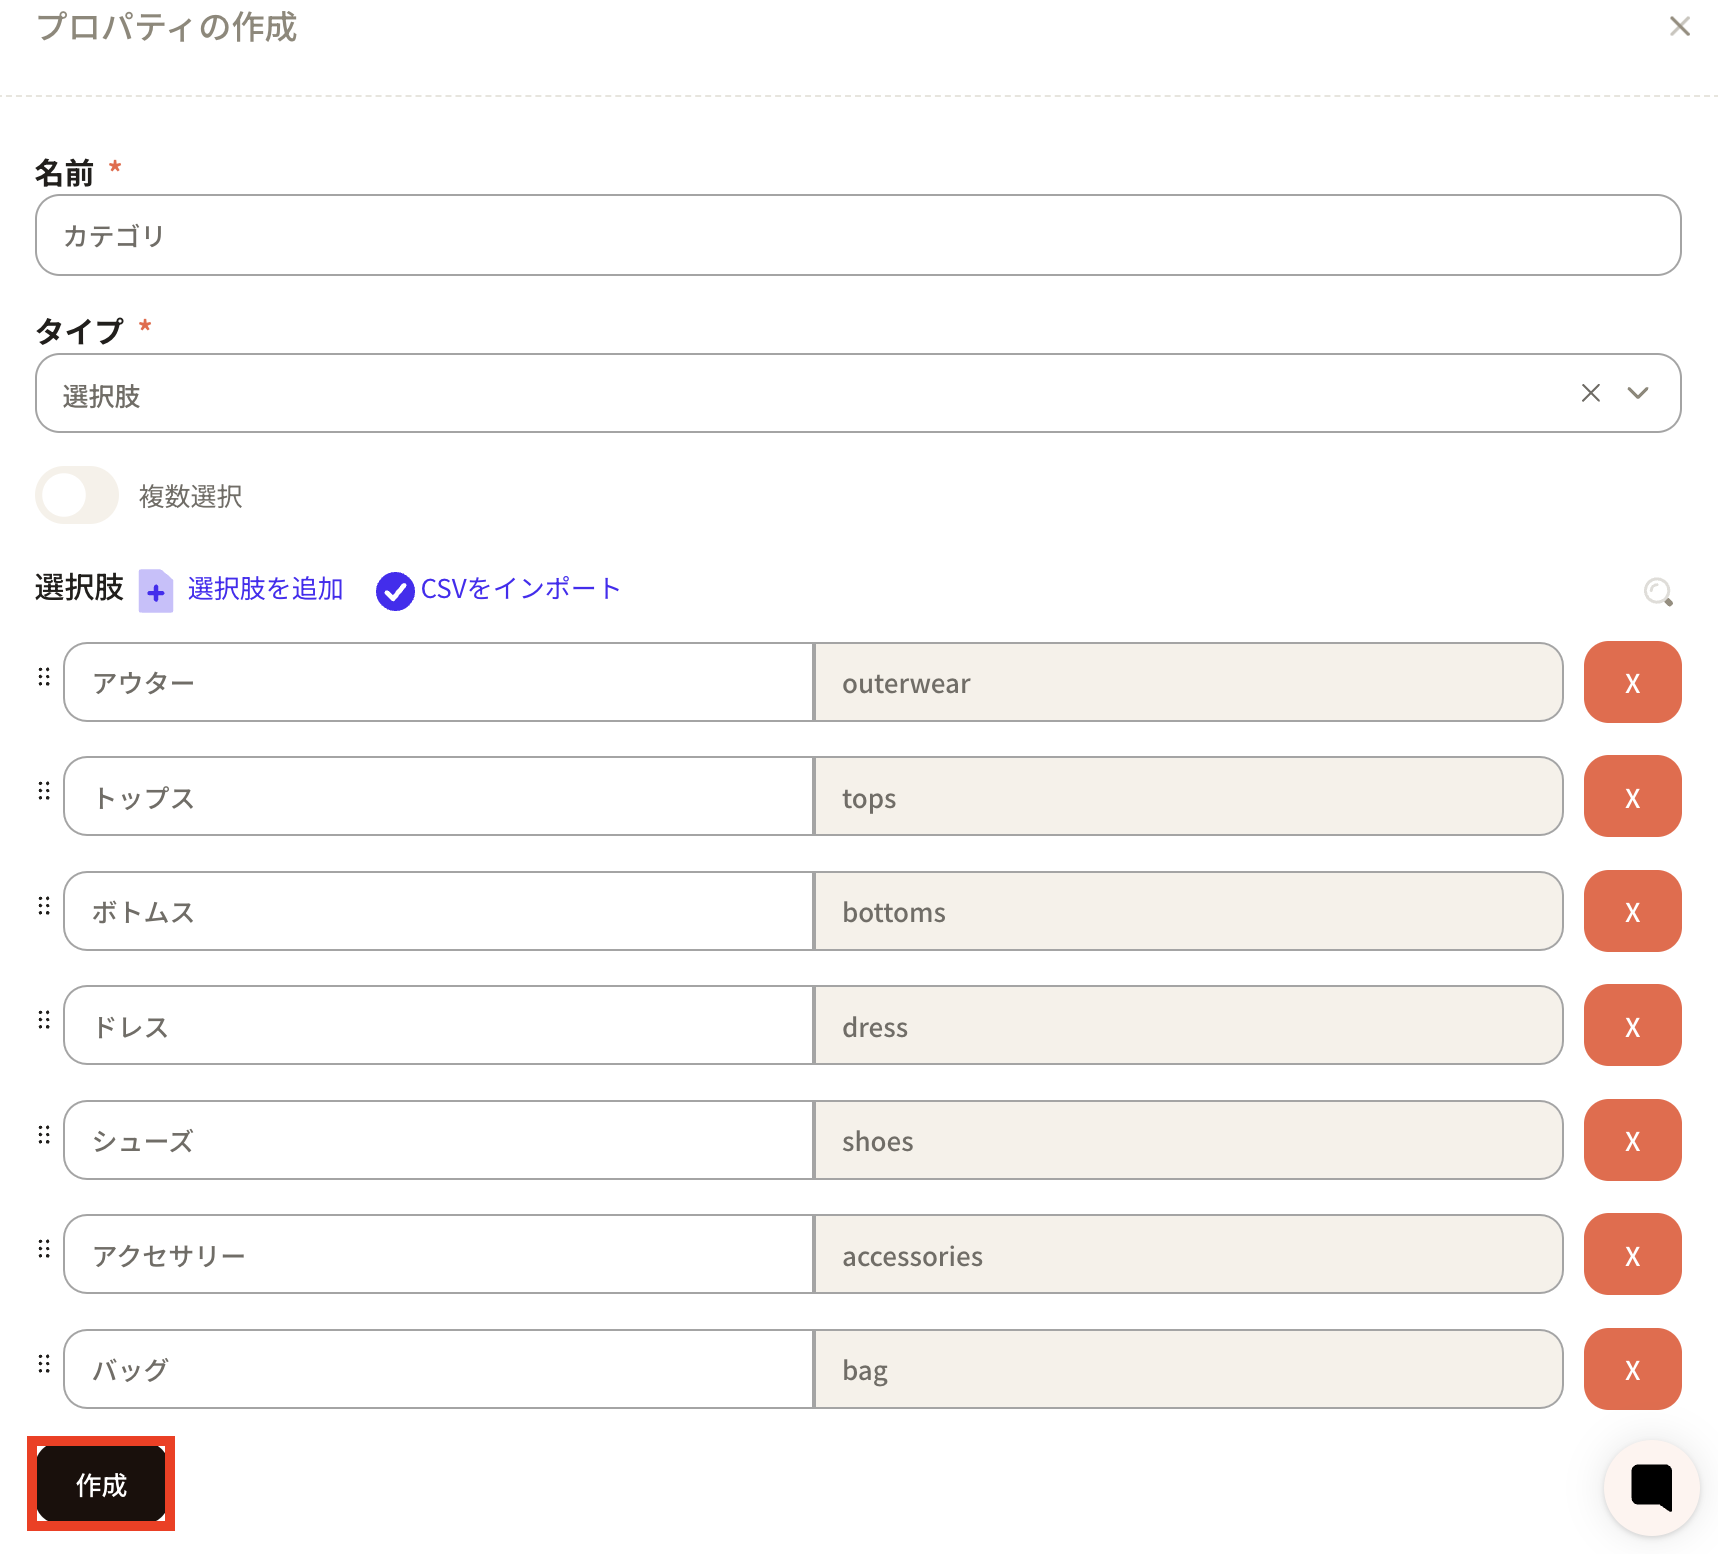
- In the property creation screen, enter the name and select Options as the type. The options section appears. Click Import CSV and import the file.
- The options are created. Click Create to apply them in Sanka.
 Conditional display: Uses two or more option properties to restrict choices. For example, when option A is selected, only options X and Y appear in another property.
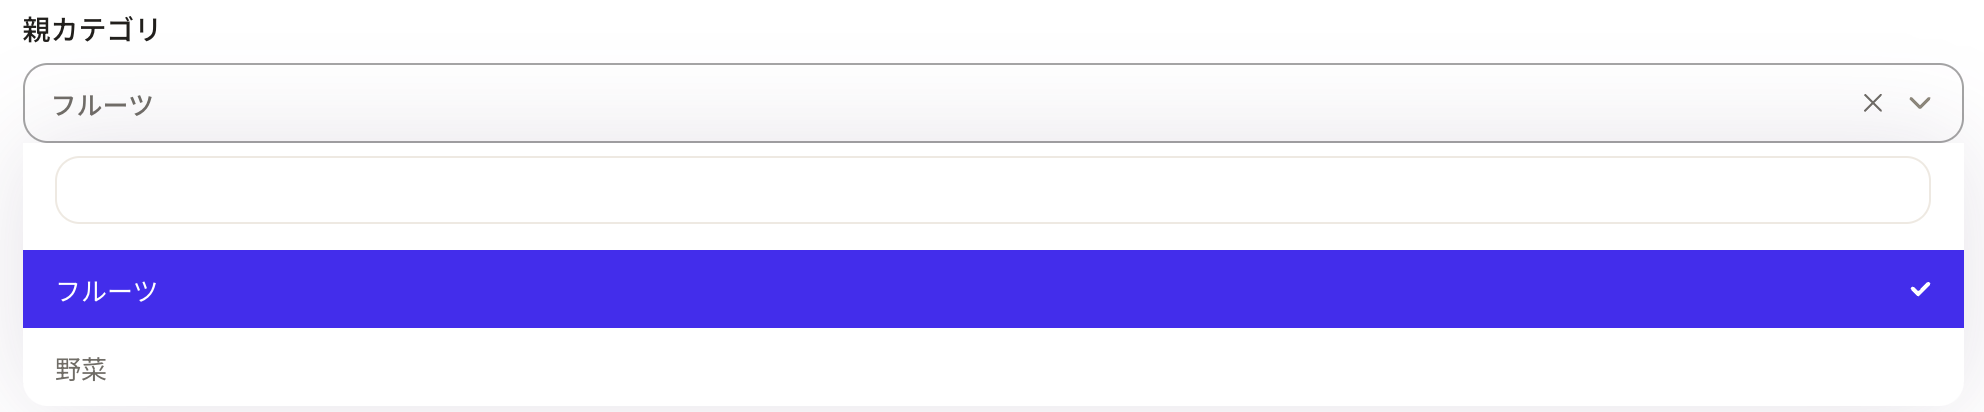
 Here is an example. When you select a parent category, a child category becomes selectable.
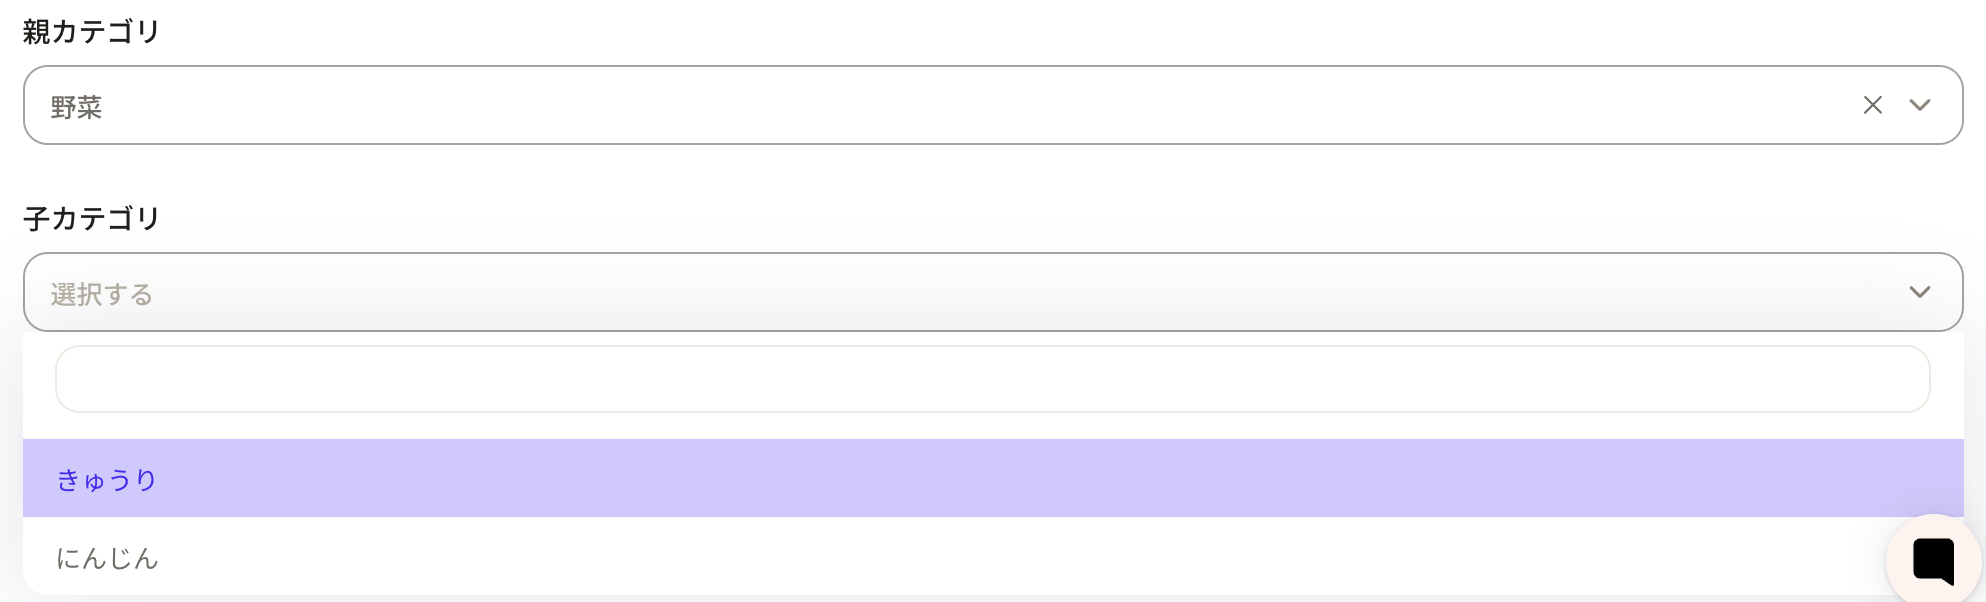
 The parent categories include Fruit and Vegetables. Here we selected Fruit.
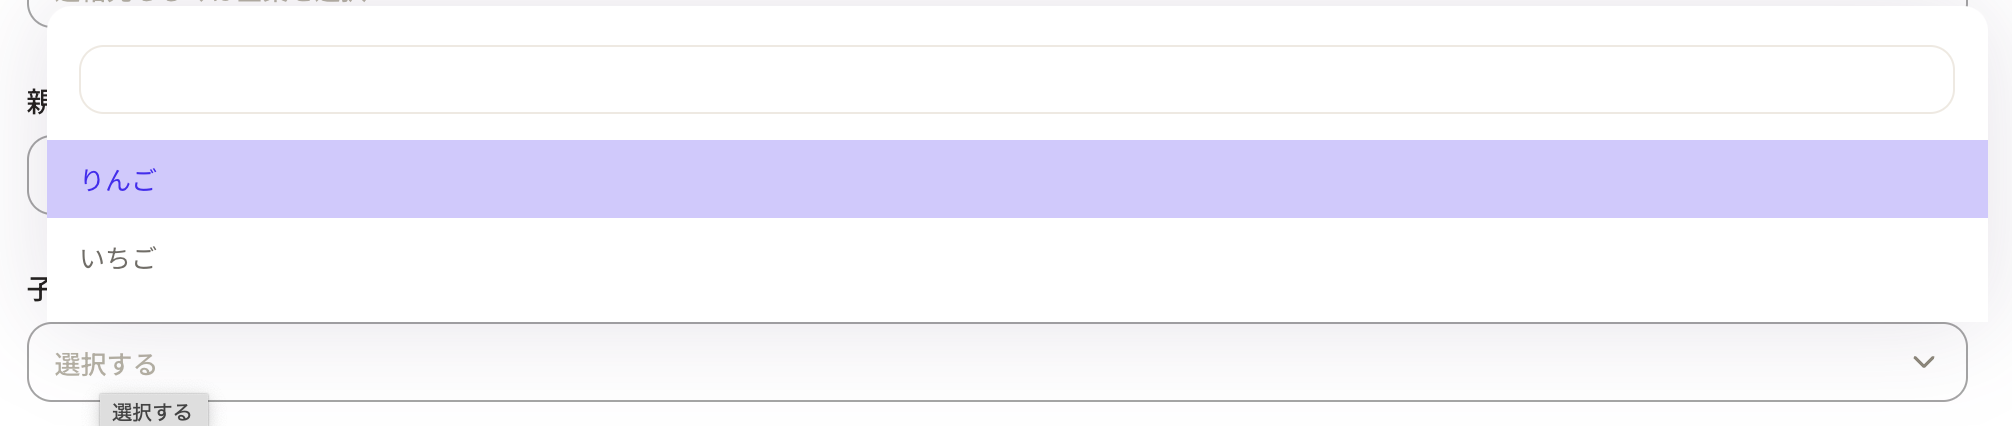
 Then the child category shows Apple and Strawberry. Select the appropriate one.
 If you select Vegetables in the parent category, the child category shows Cucumber and Carrot. This is how conditional display works.
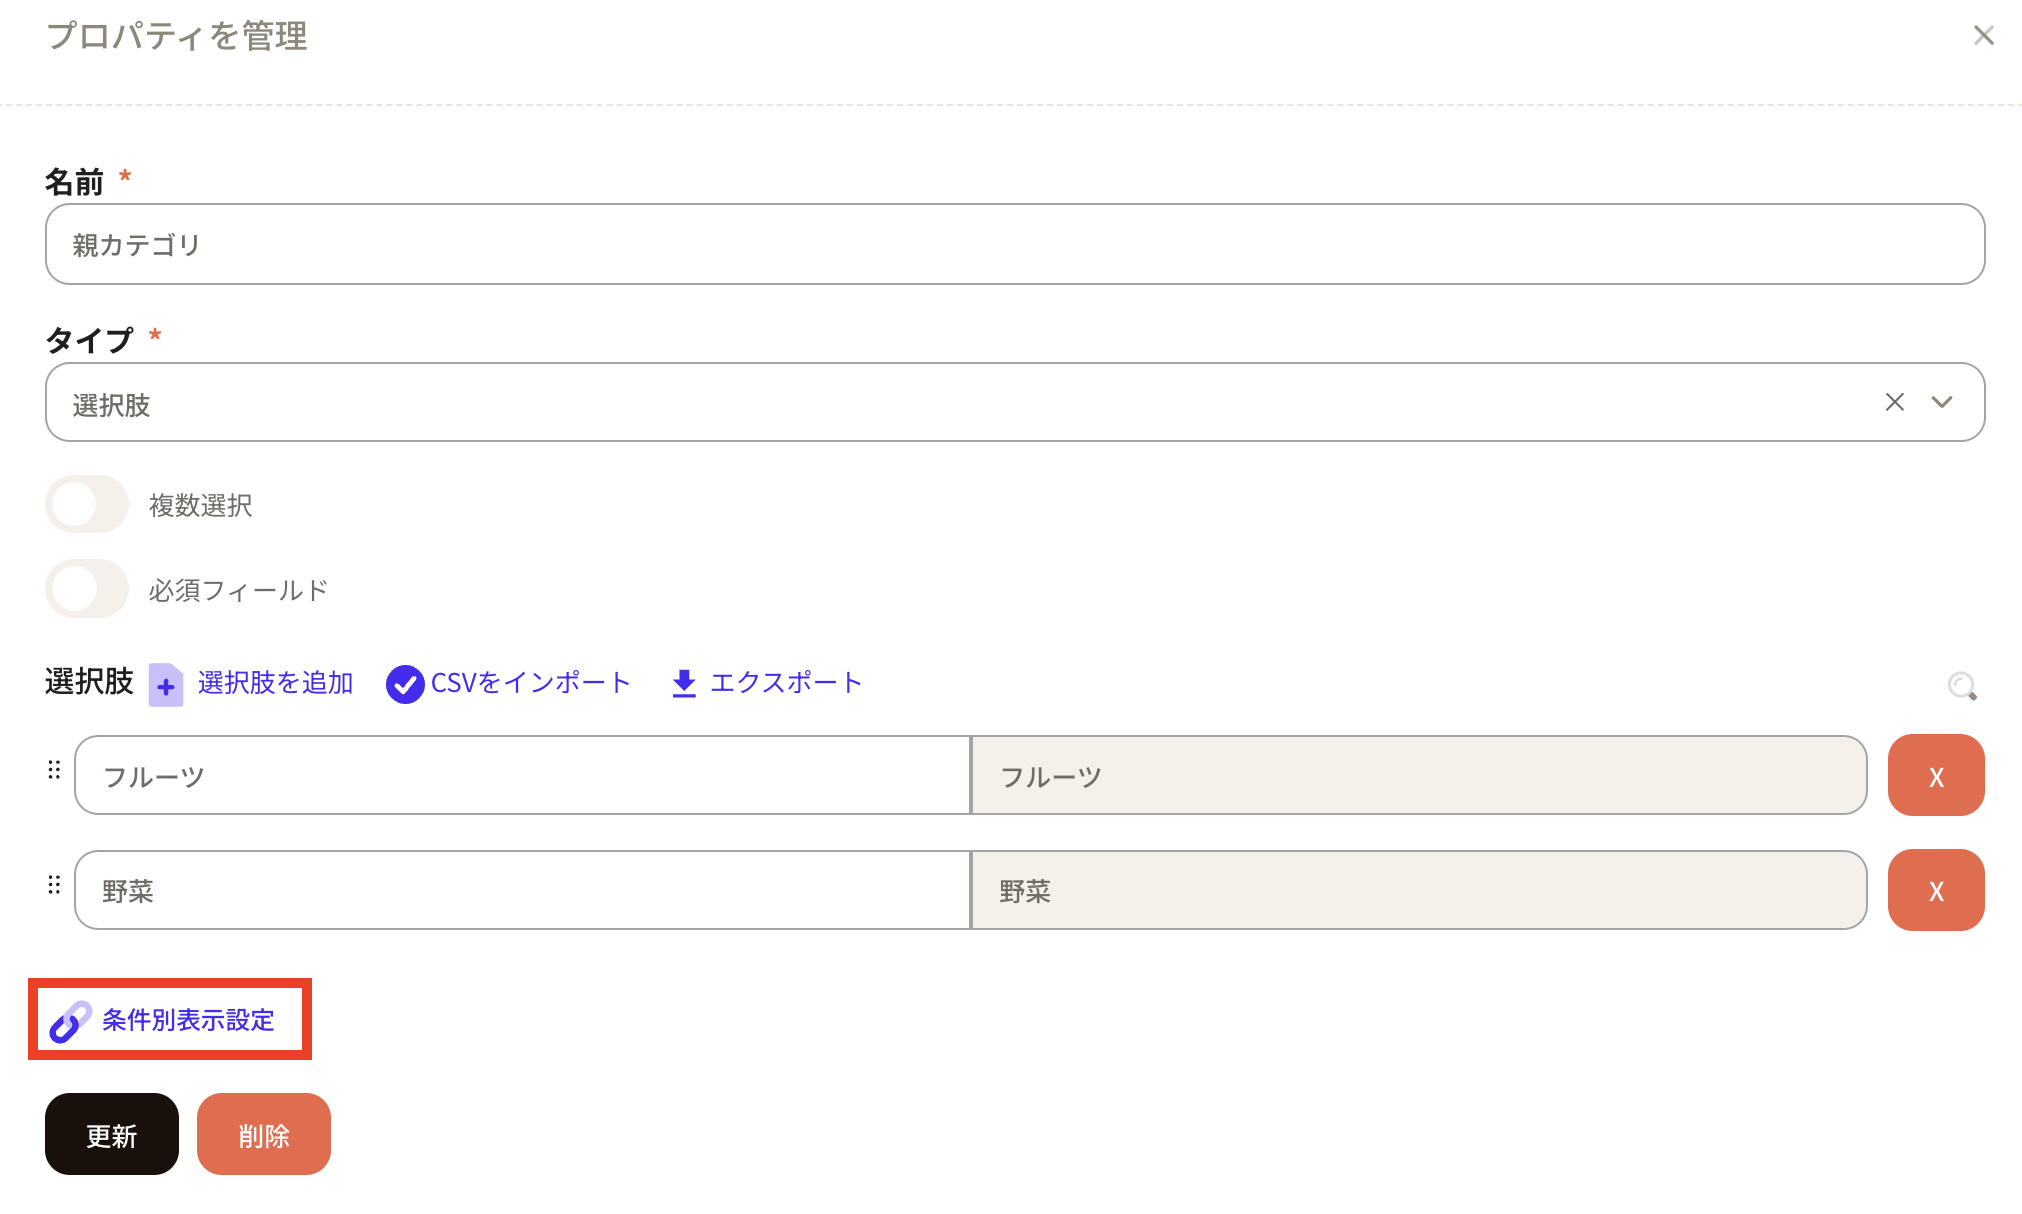
 How to configure conditional display
First, create option properties for Parent category and Child category.
How to configure conditional display
First, create option properties for Parent category and Child category.
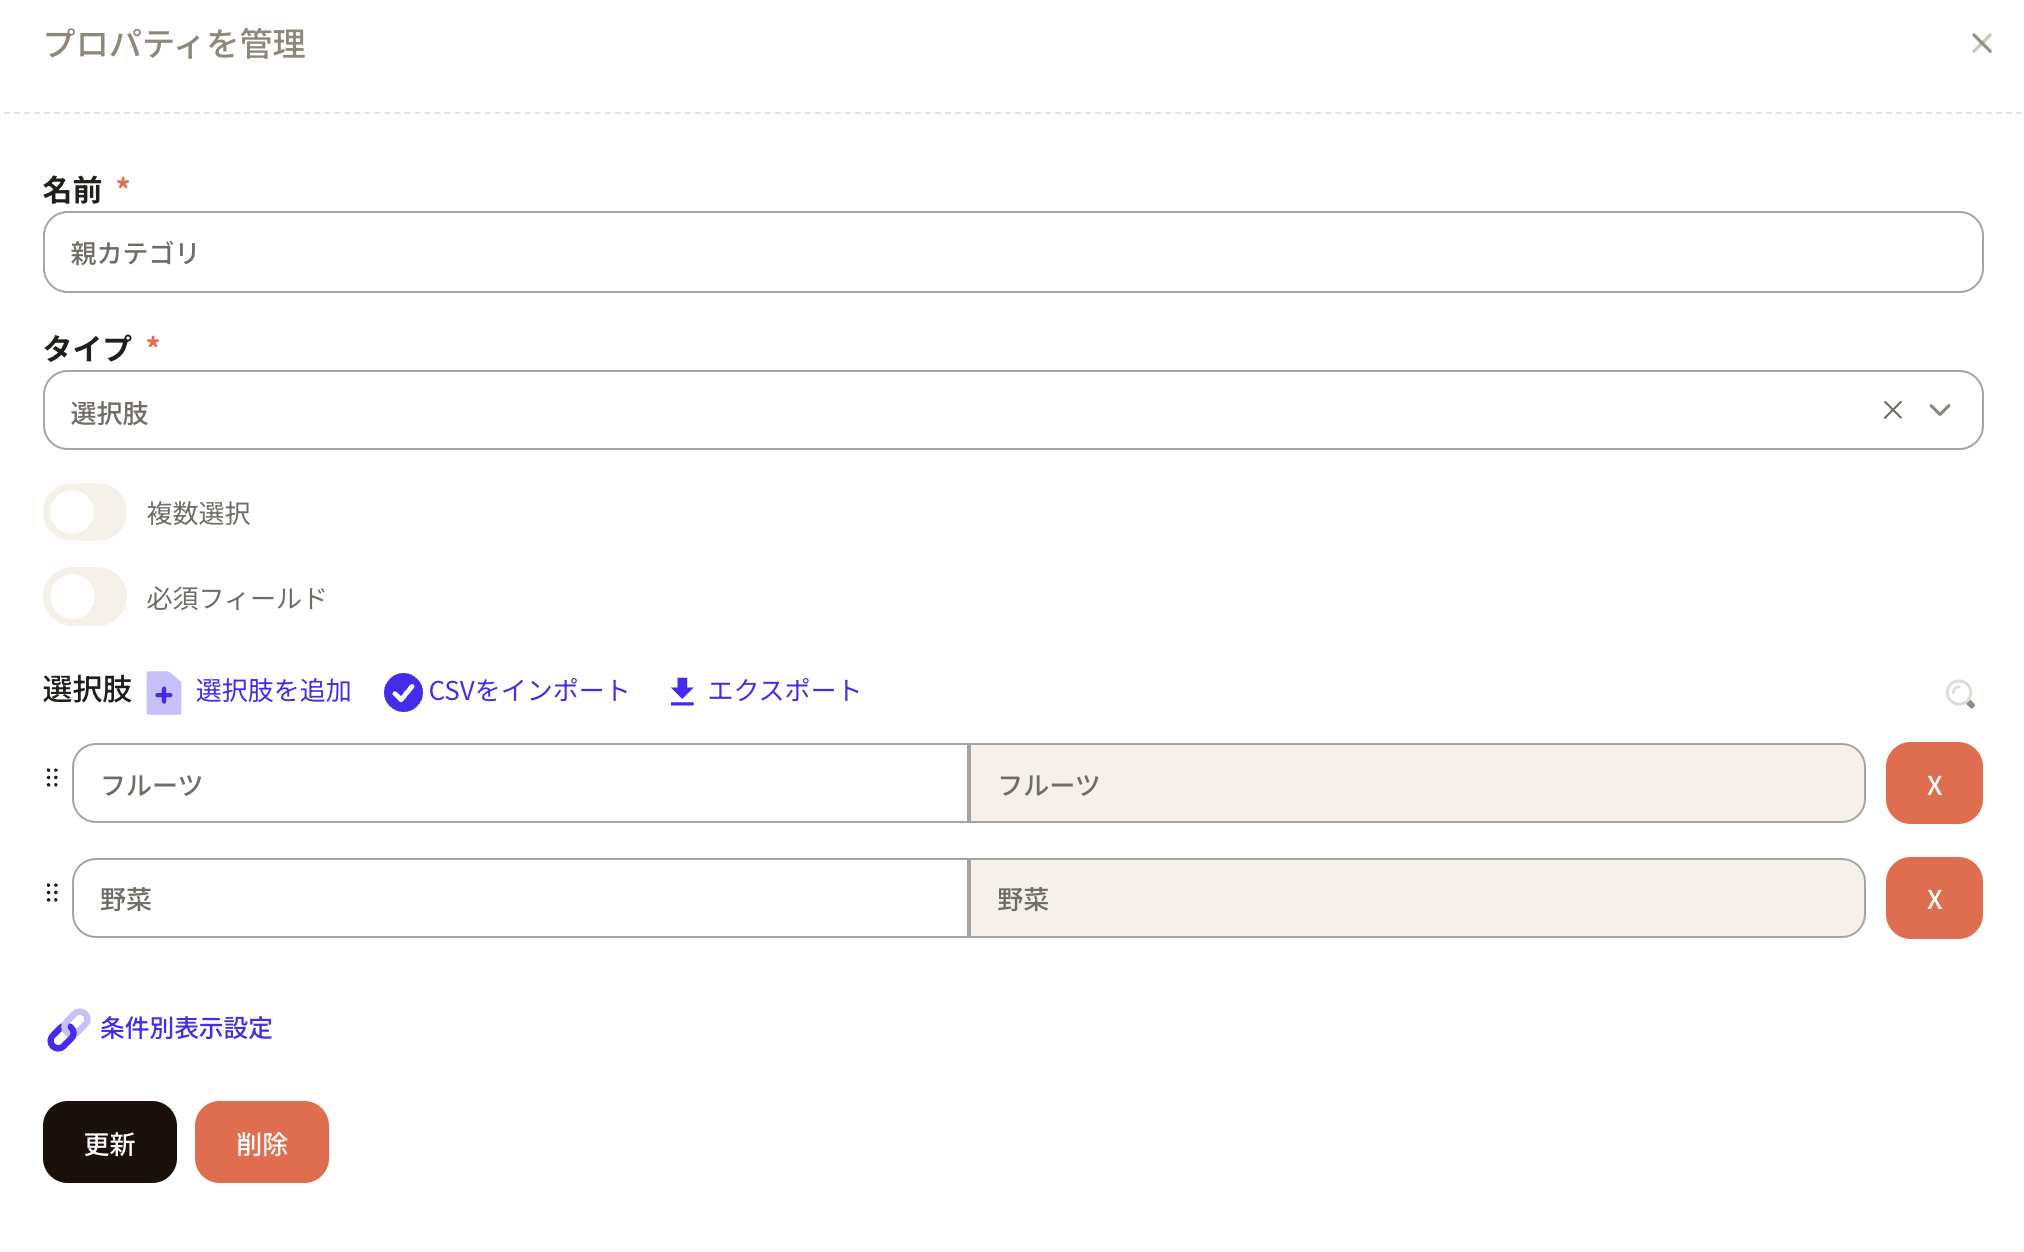
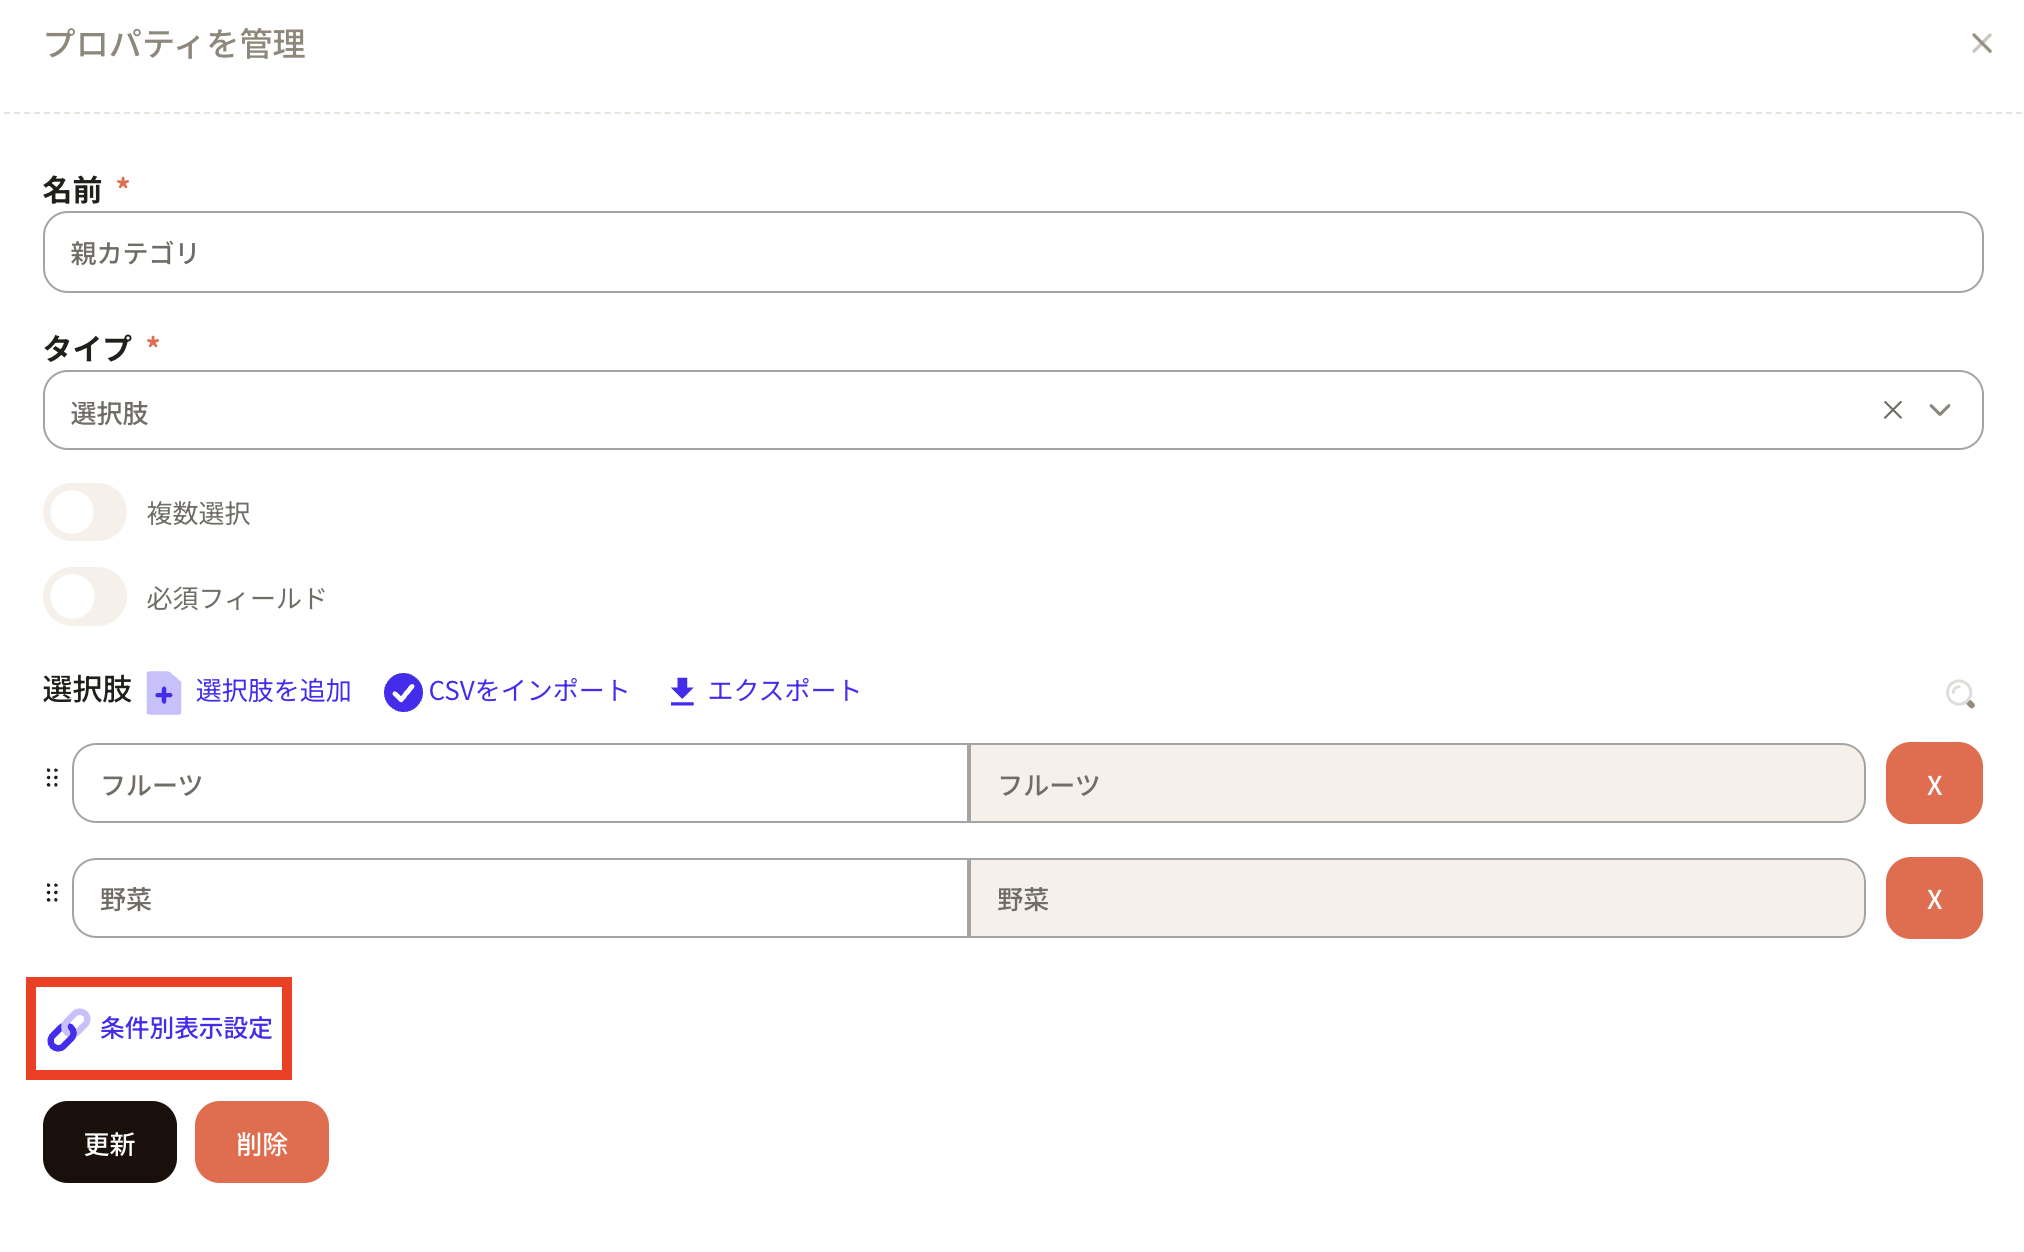
 Click Conditional display settings on the Parent category property.
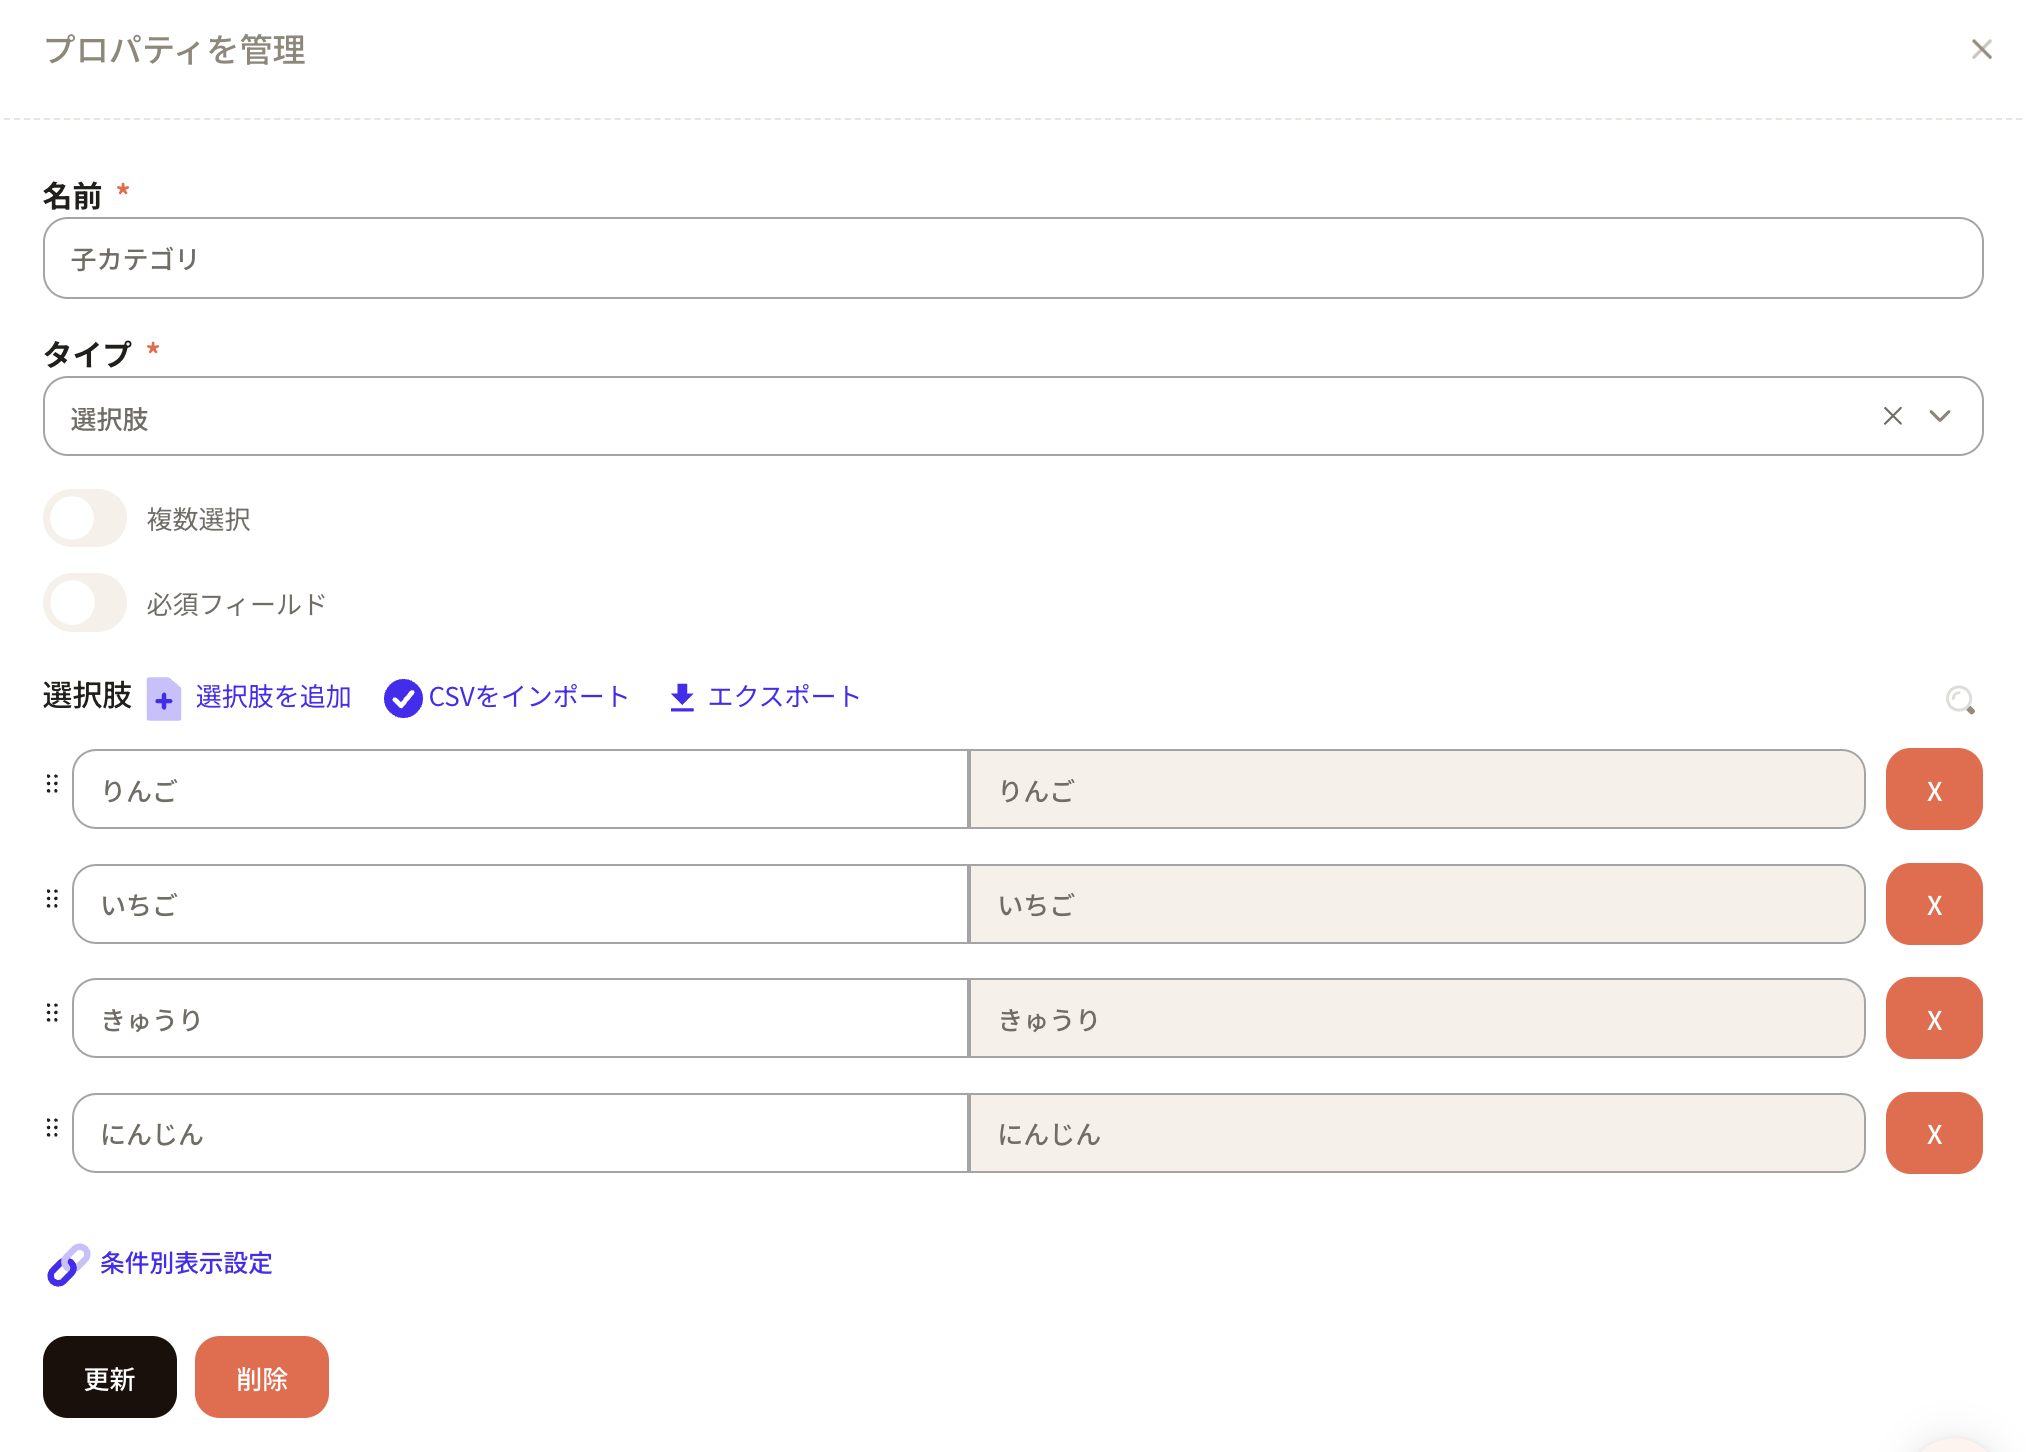
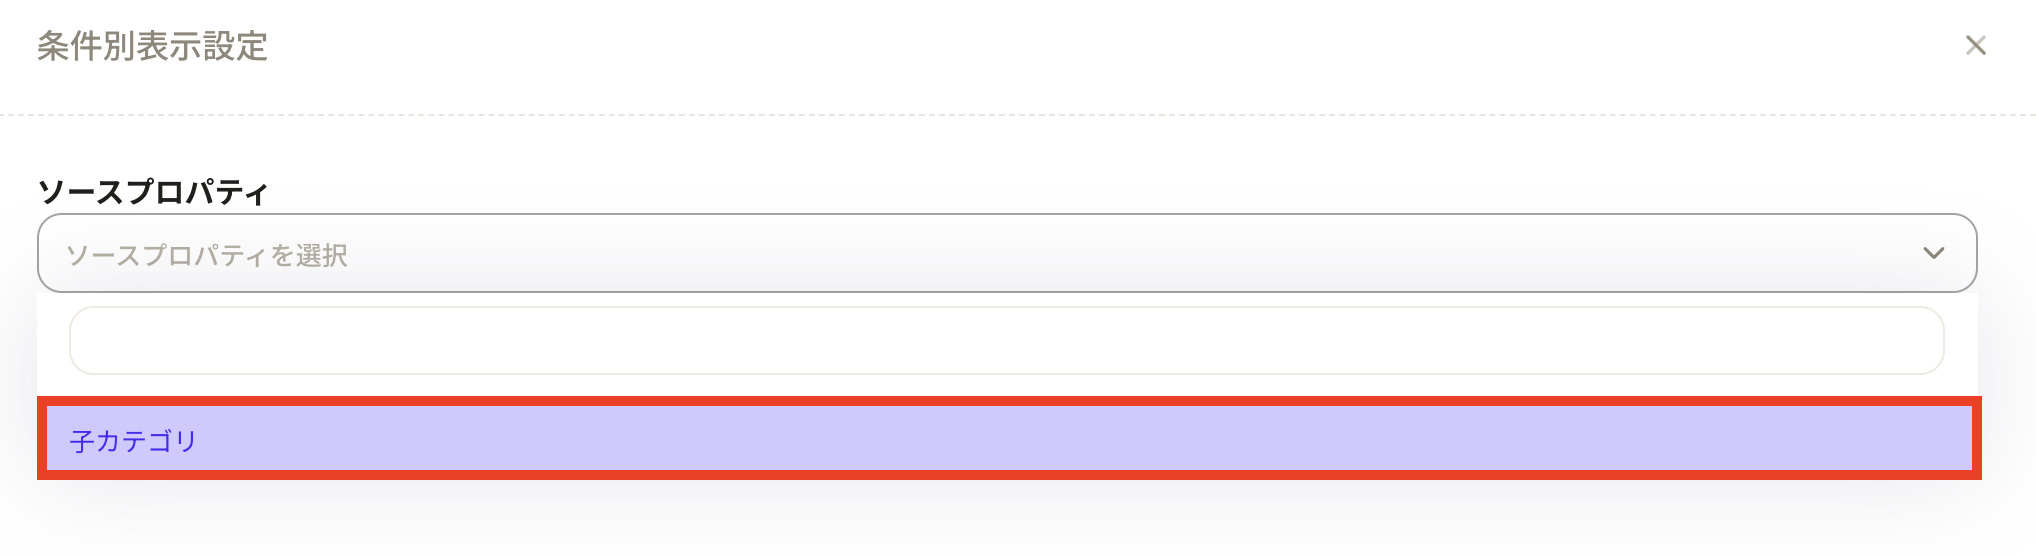
 The conditional display settings appear. Set the source property to Child category.
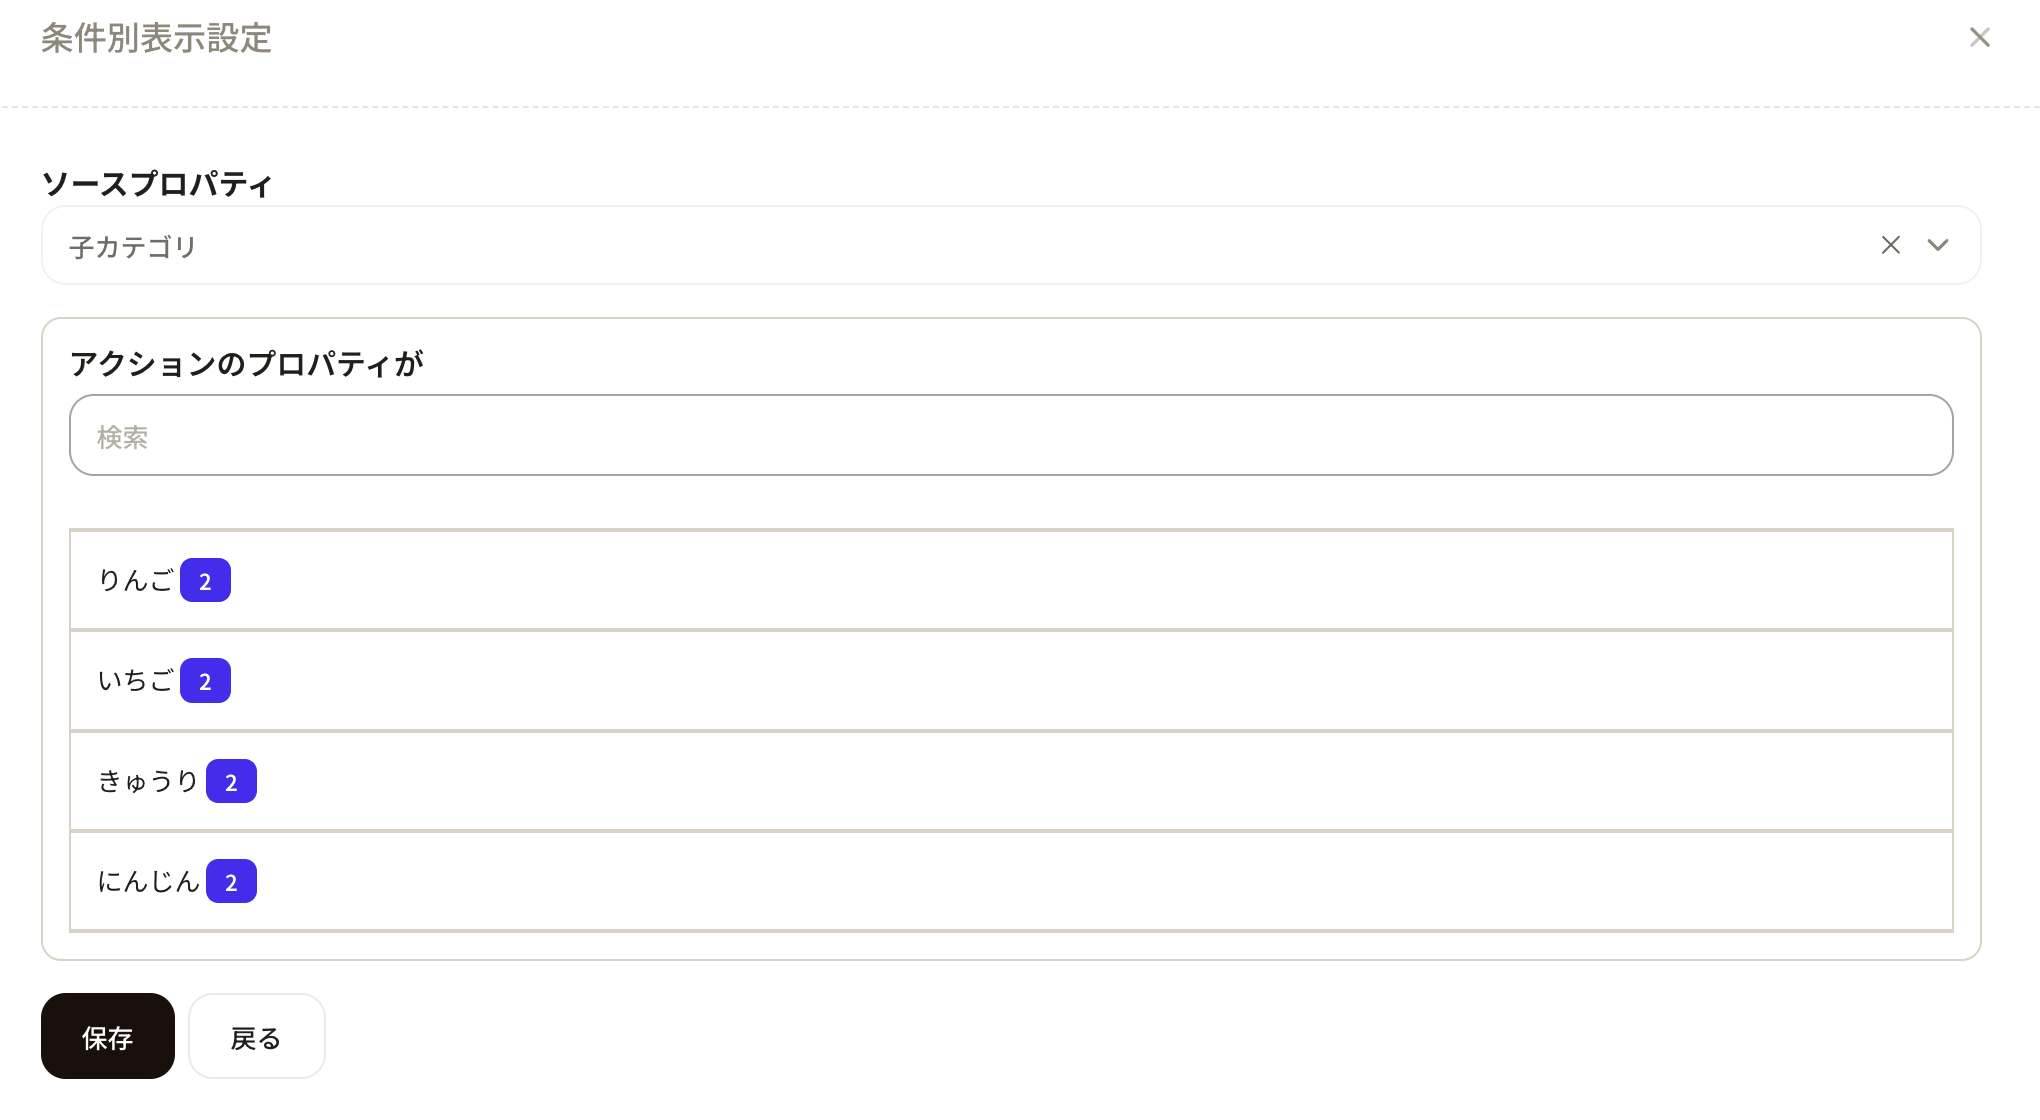
 The action property shows the options registered in Child category.
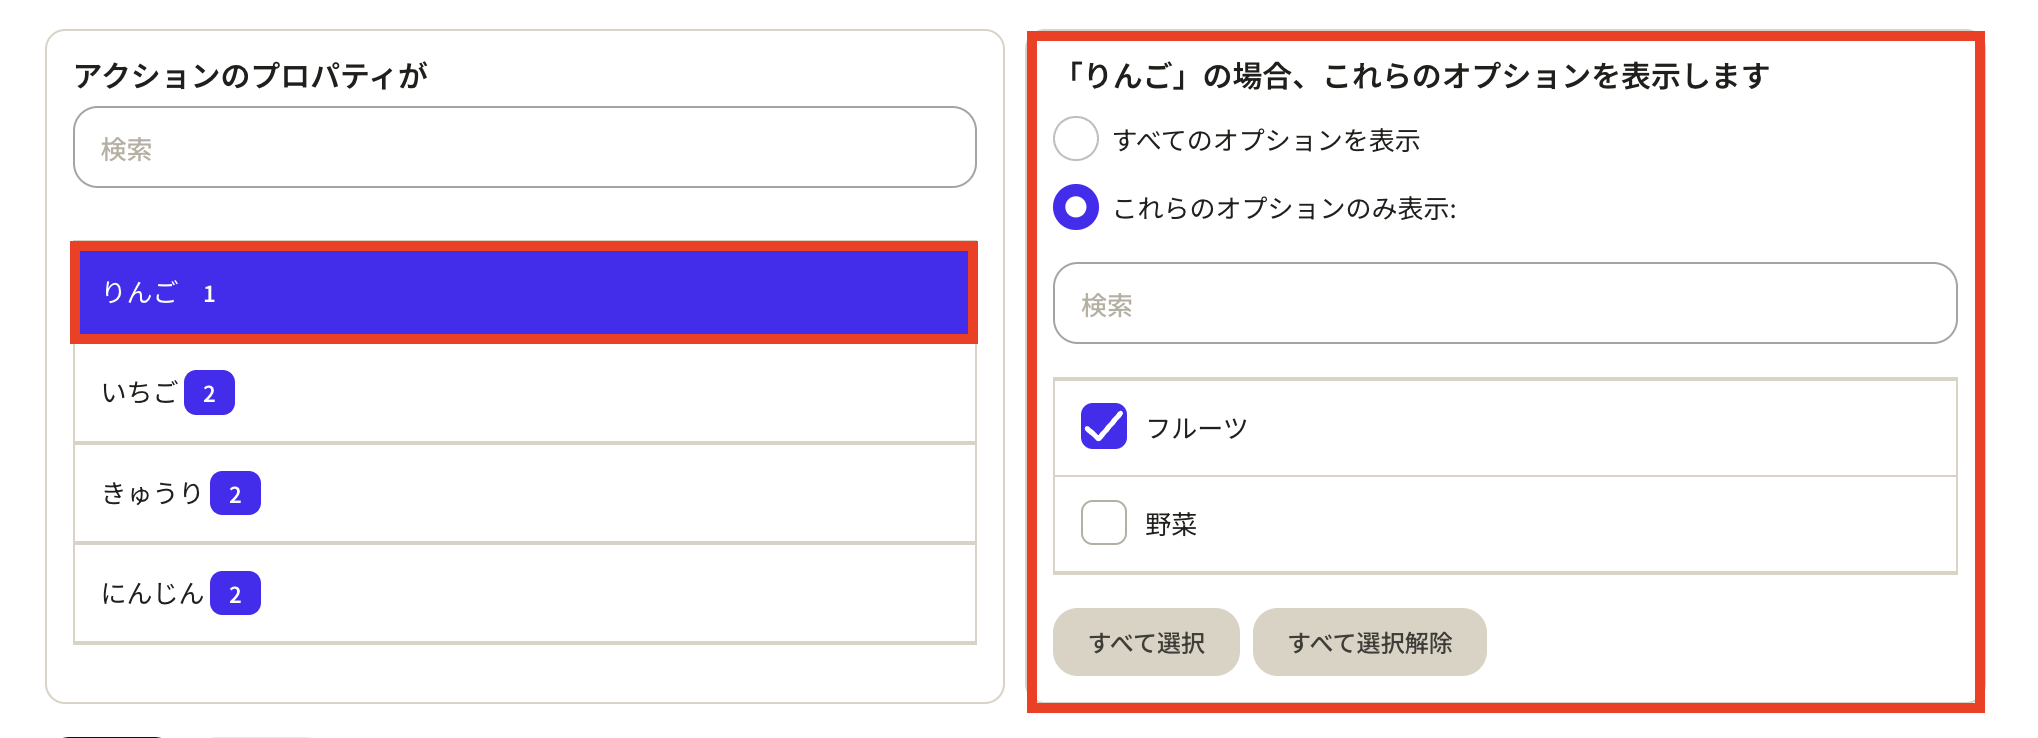
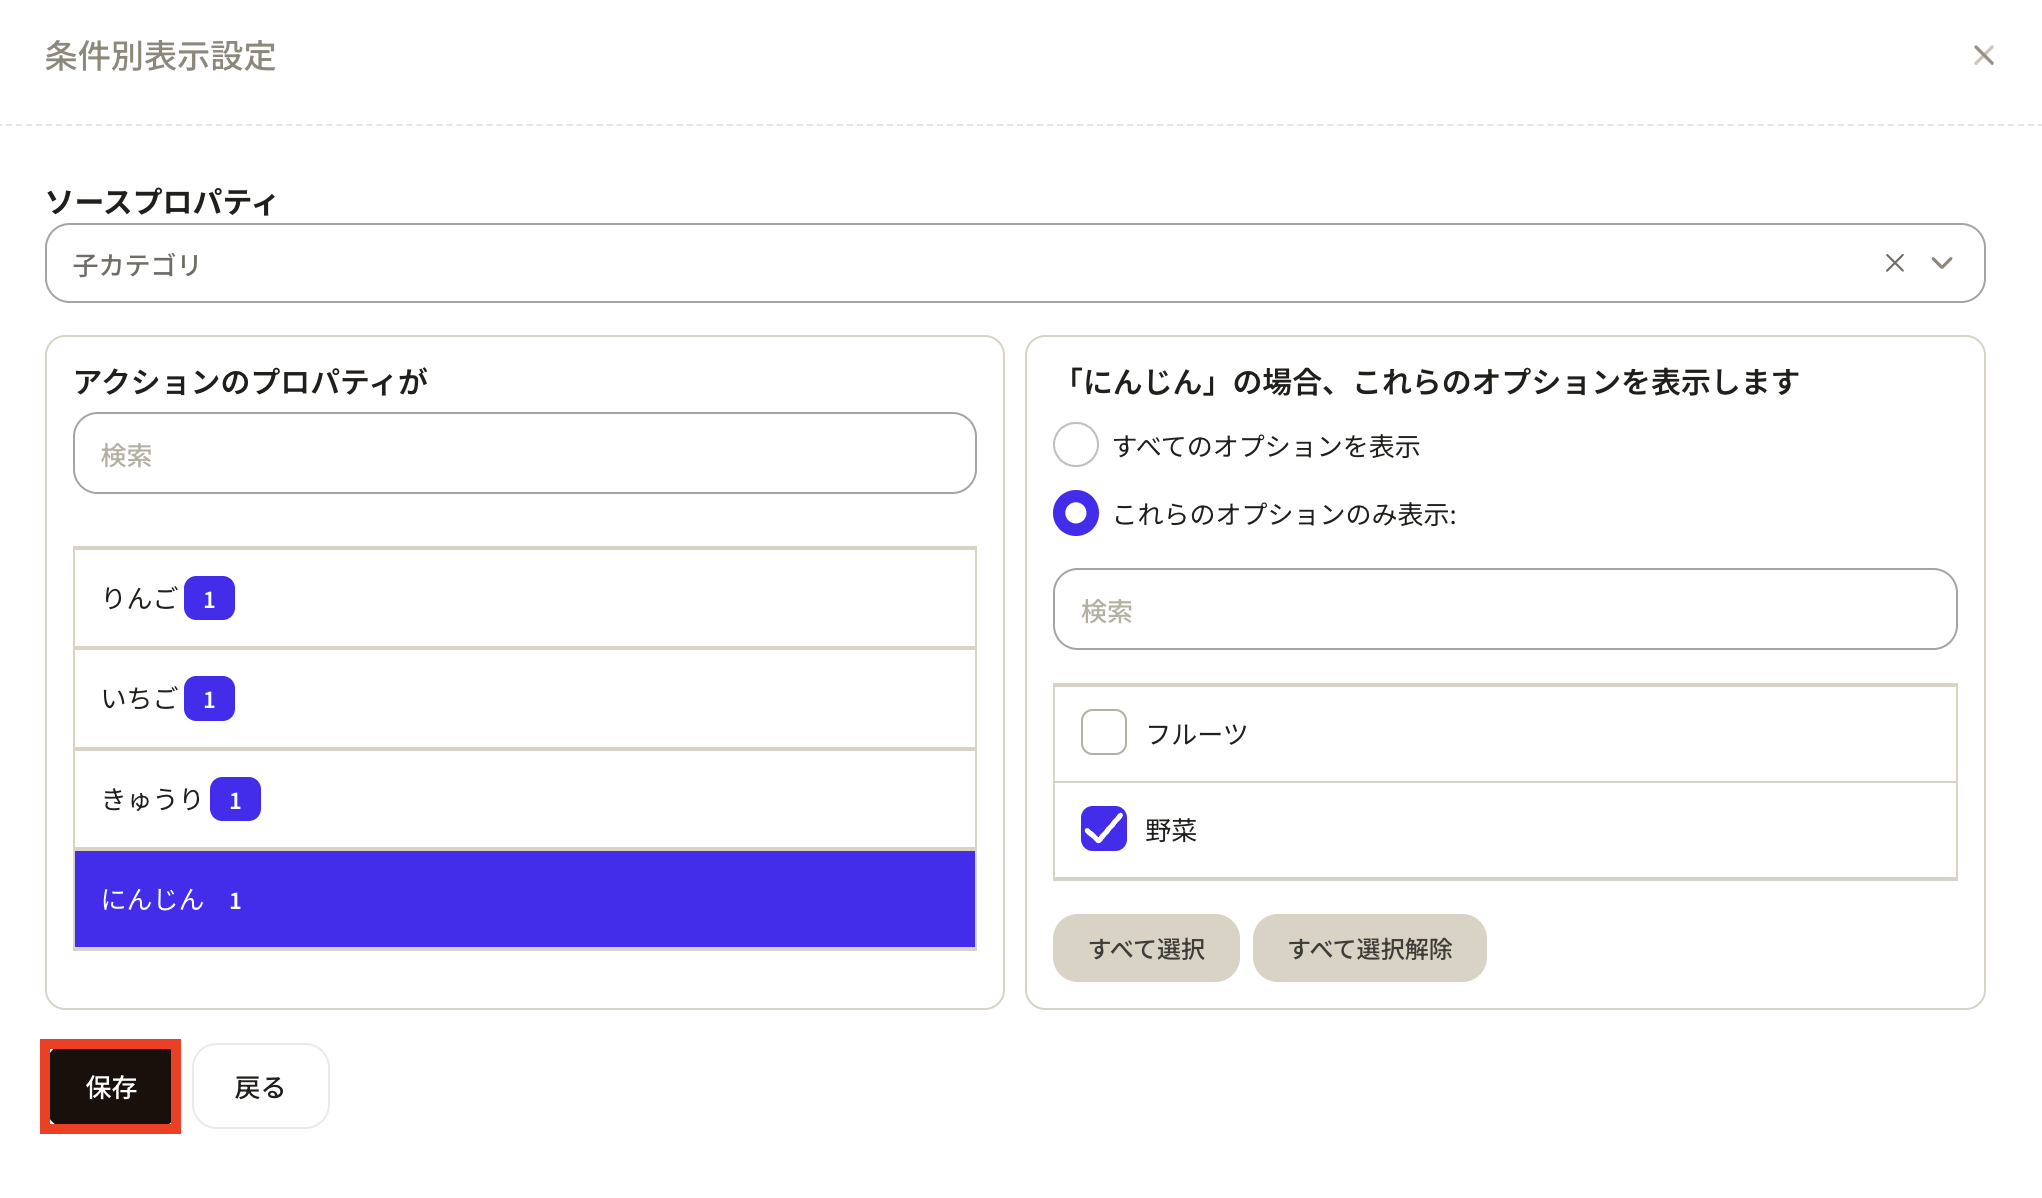
 Configure each child category option. For Apple, it should appear when Fruit is selected in the parent category, so choose Show only these options and check Fruit. Apply the same setting for Strawberry, Cucumber, and Carrot.
 When all settings are complete, click Save.
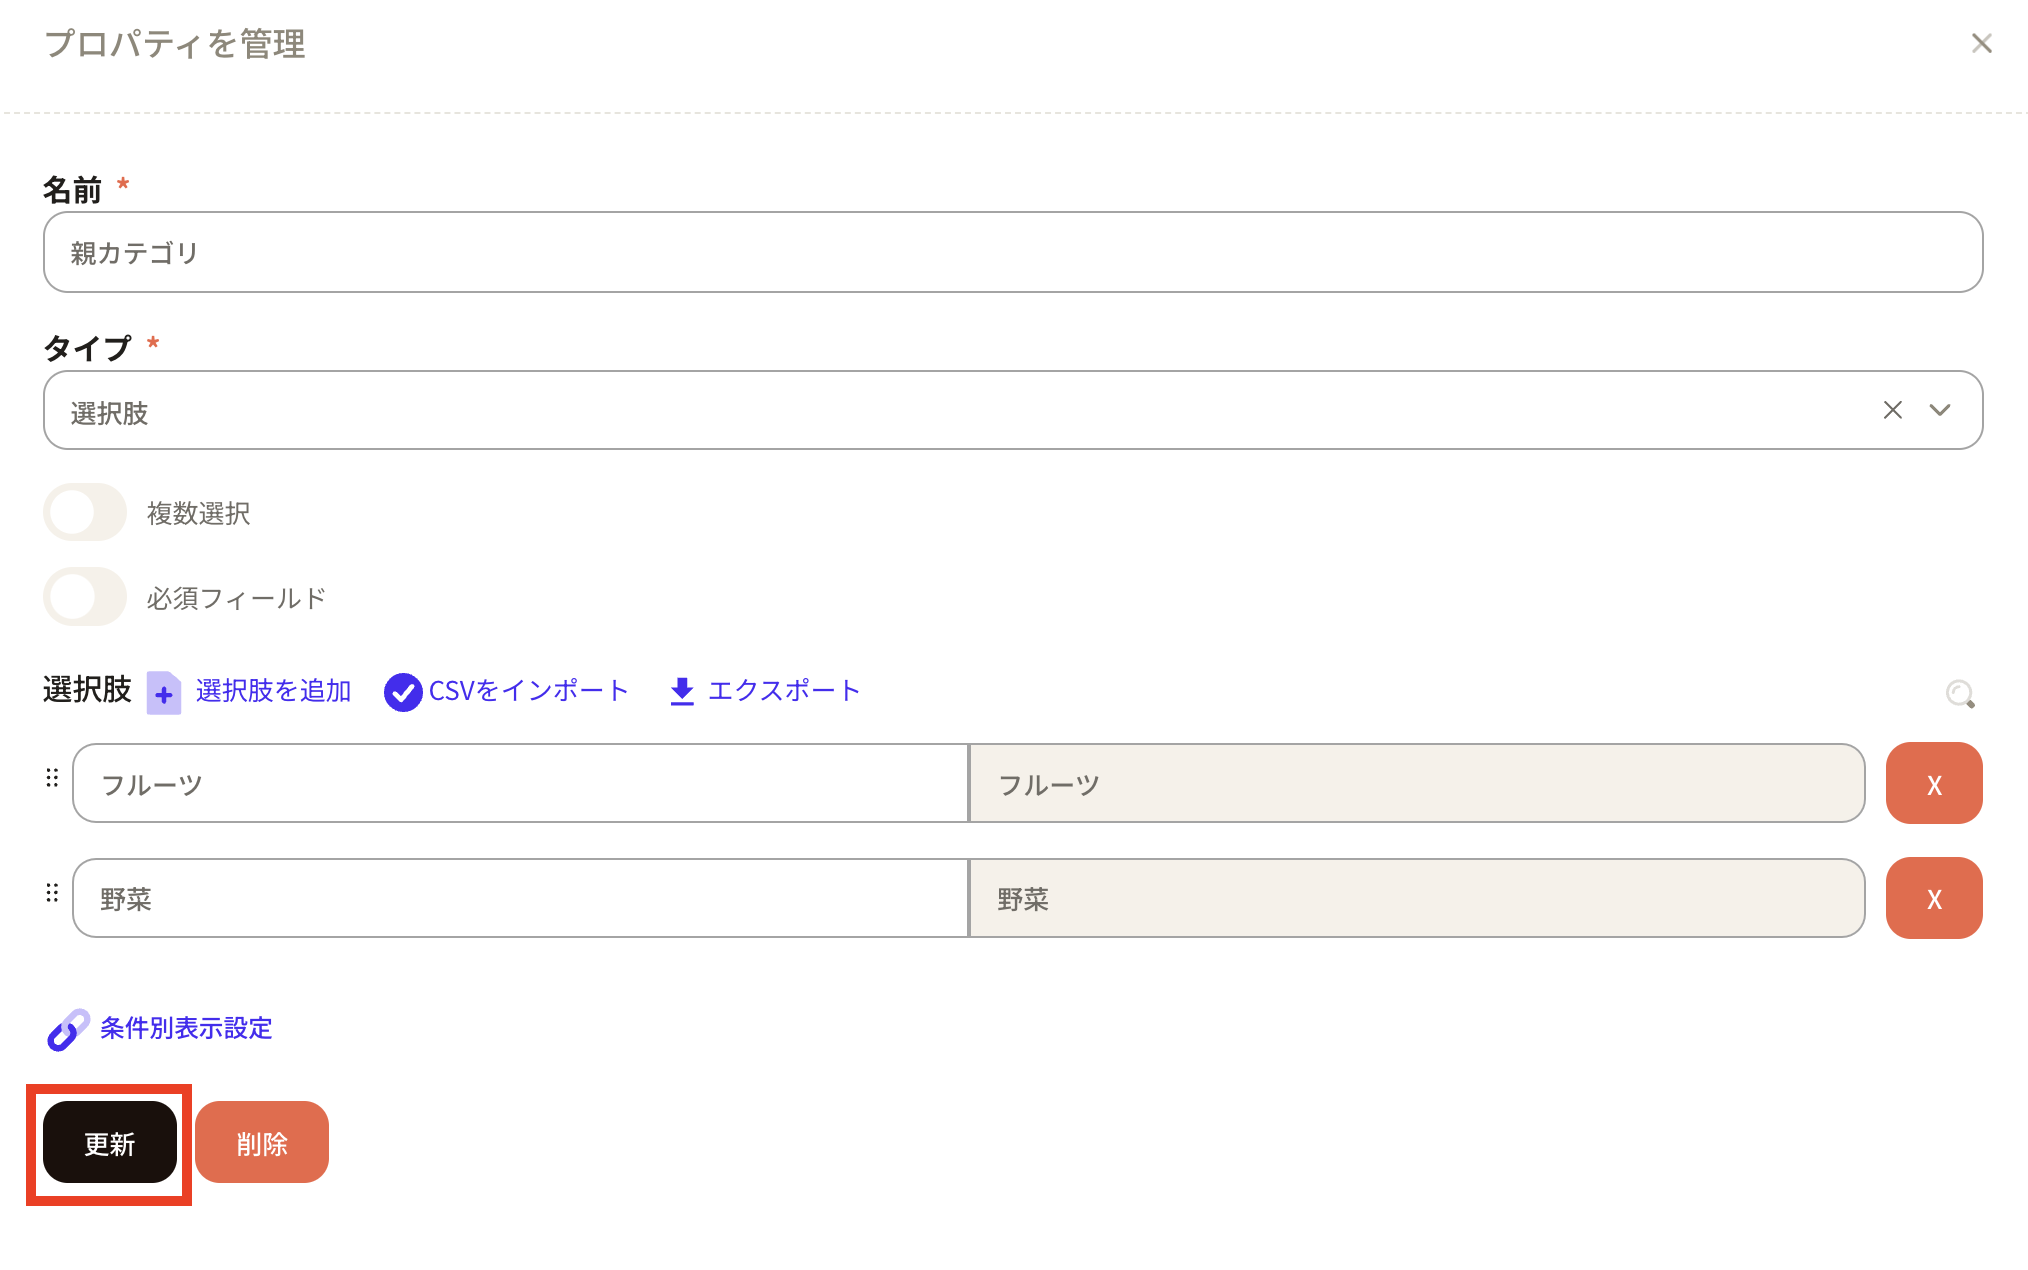
 After saving, return to the parent category property management screen and click Update to apply.
 Grouped options: Display options grouped by category.
 How to set up grouped options
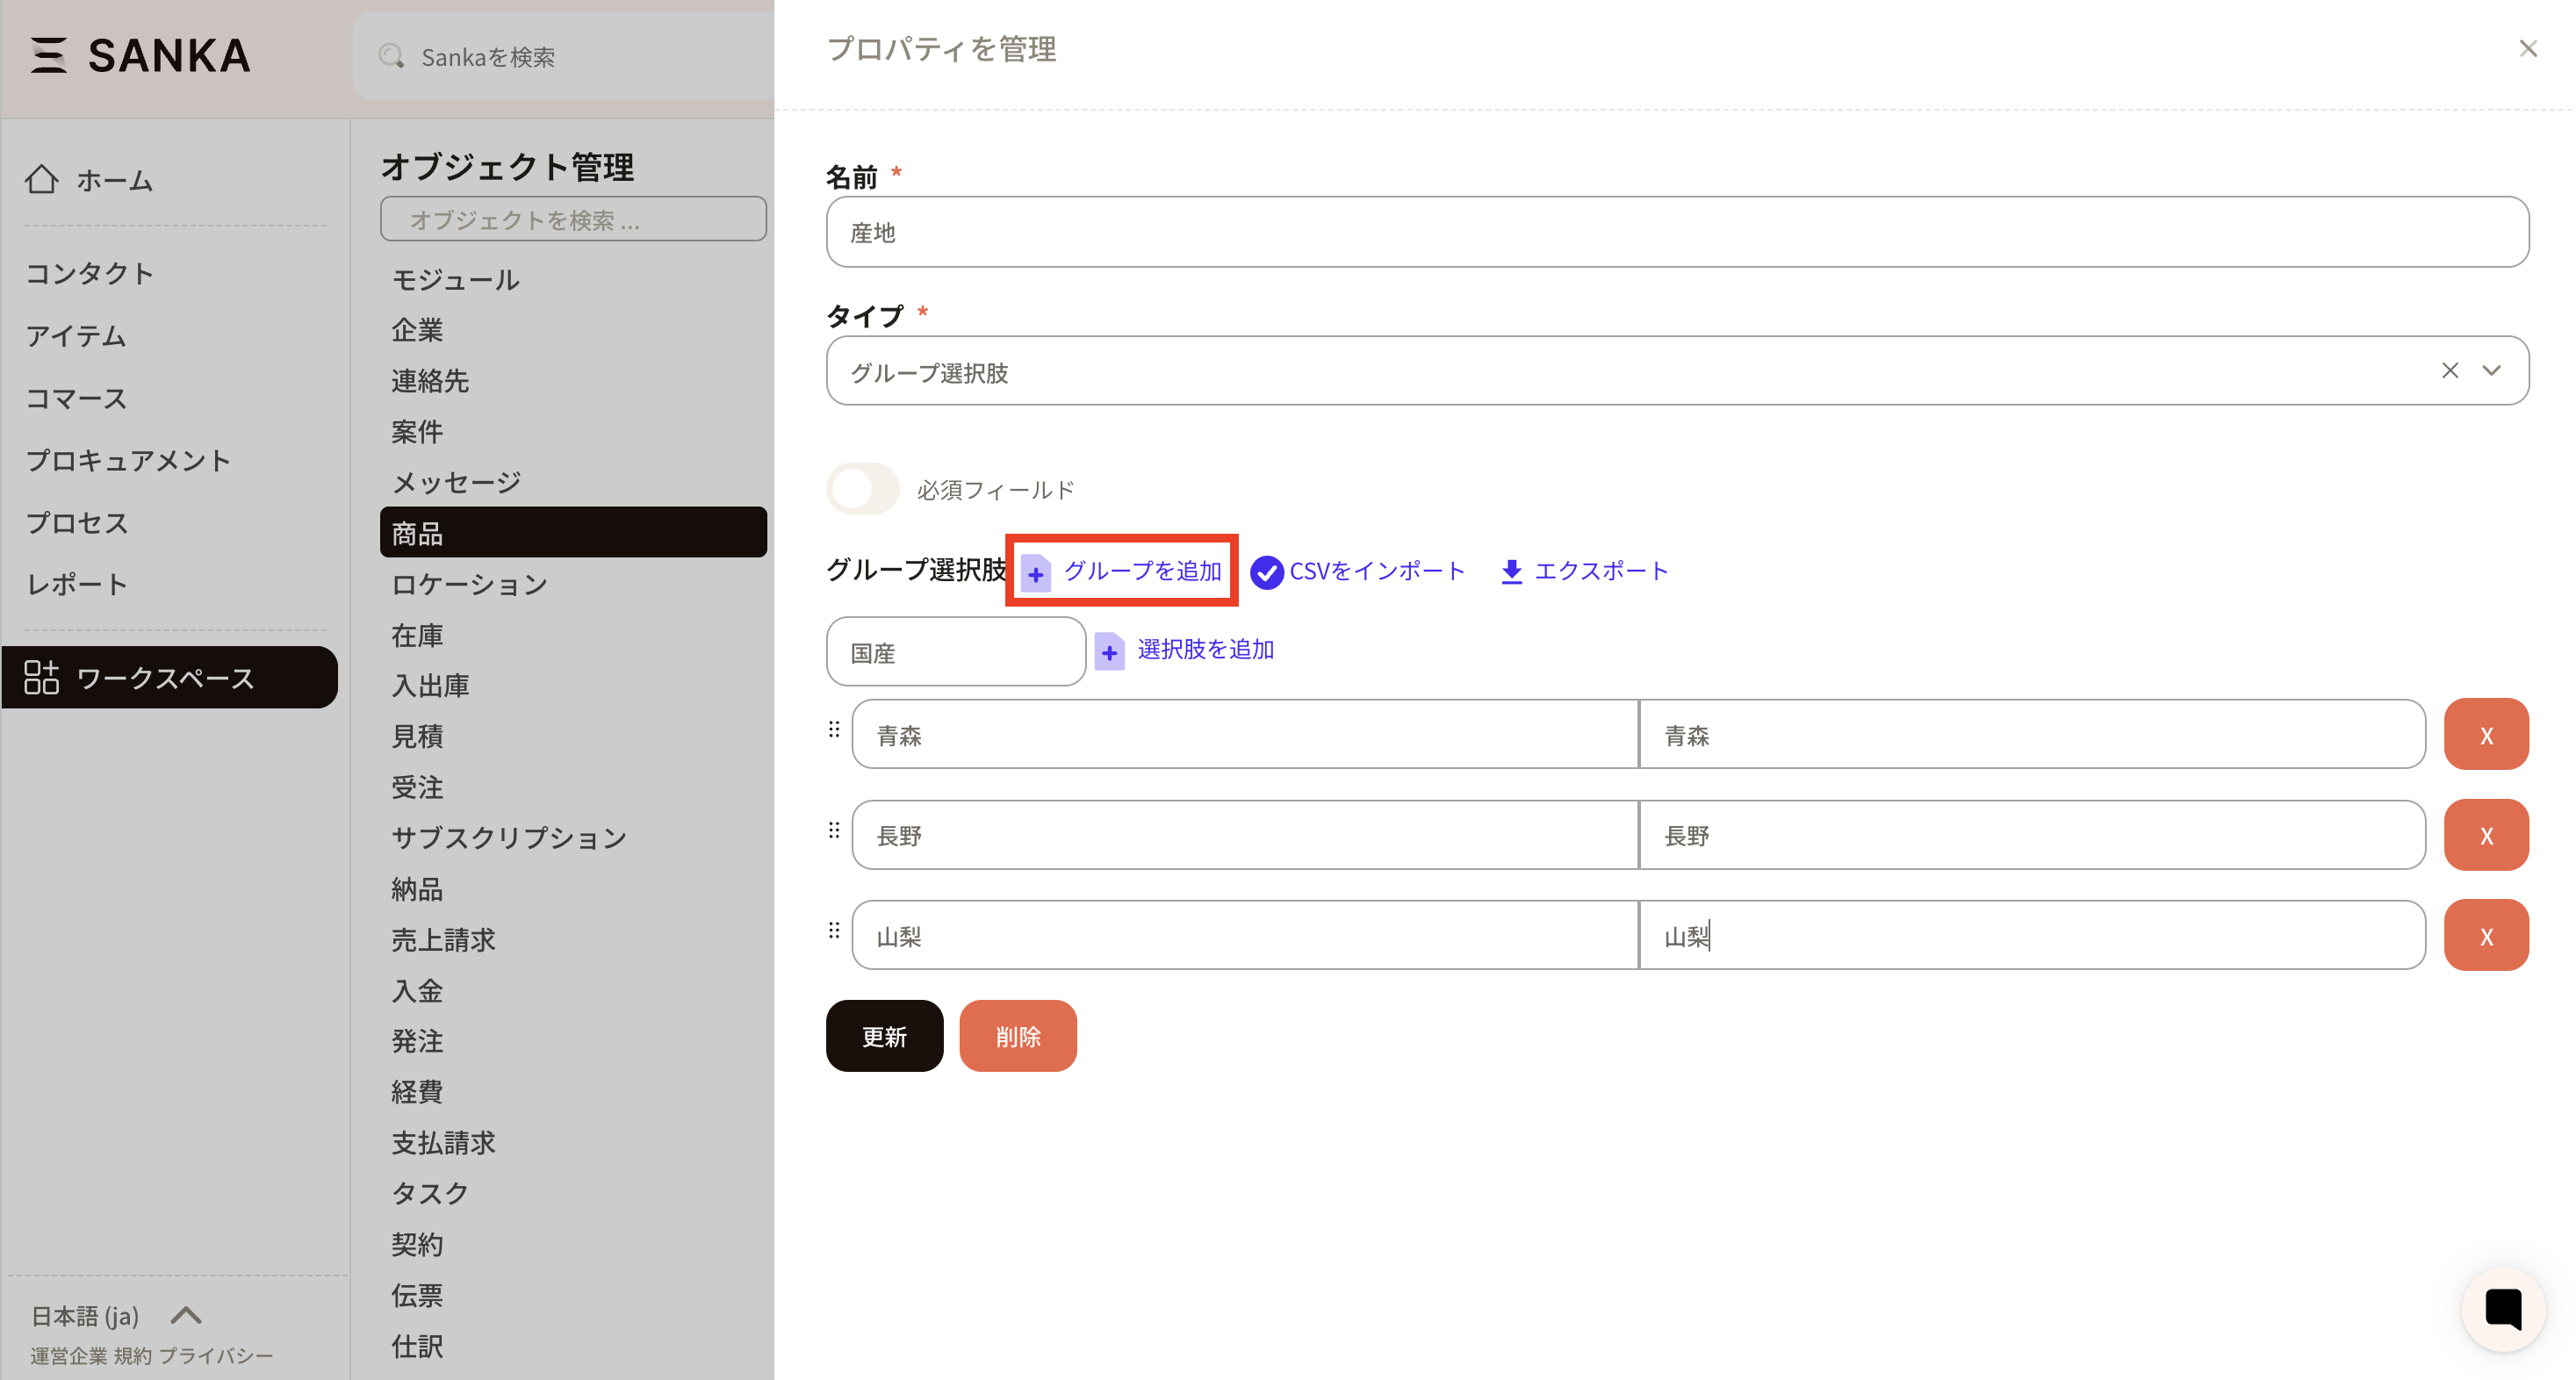
In this example, we create grouped options for place of origin.
How to set up grouped options
In this example, we create grouped options for place of origin.
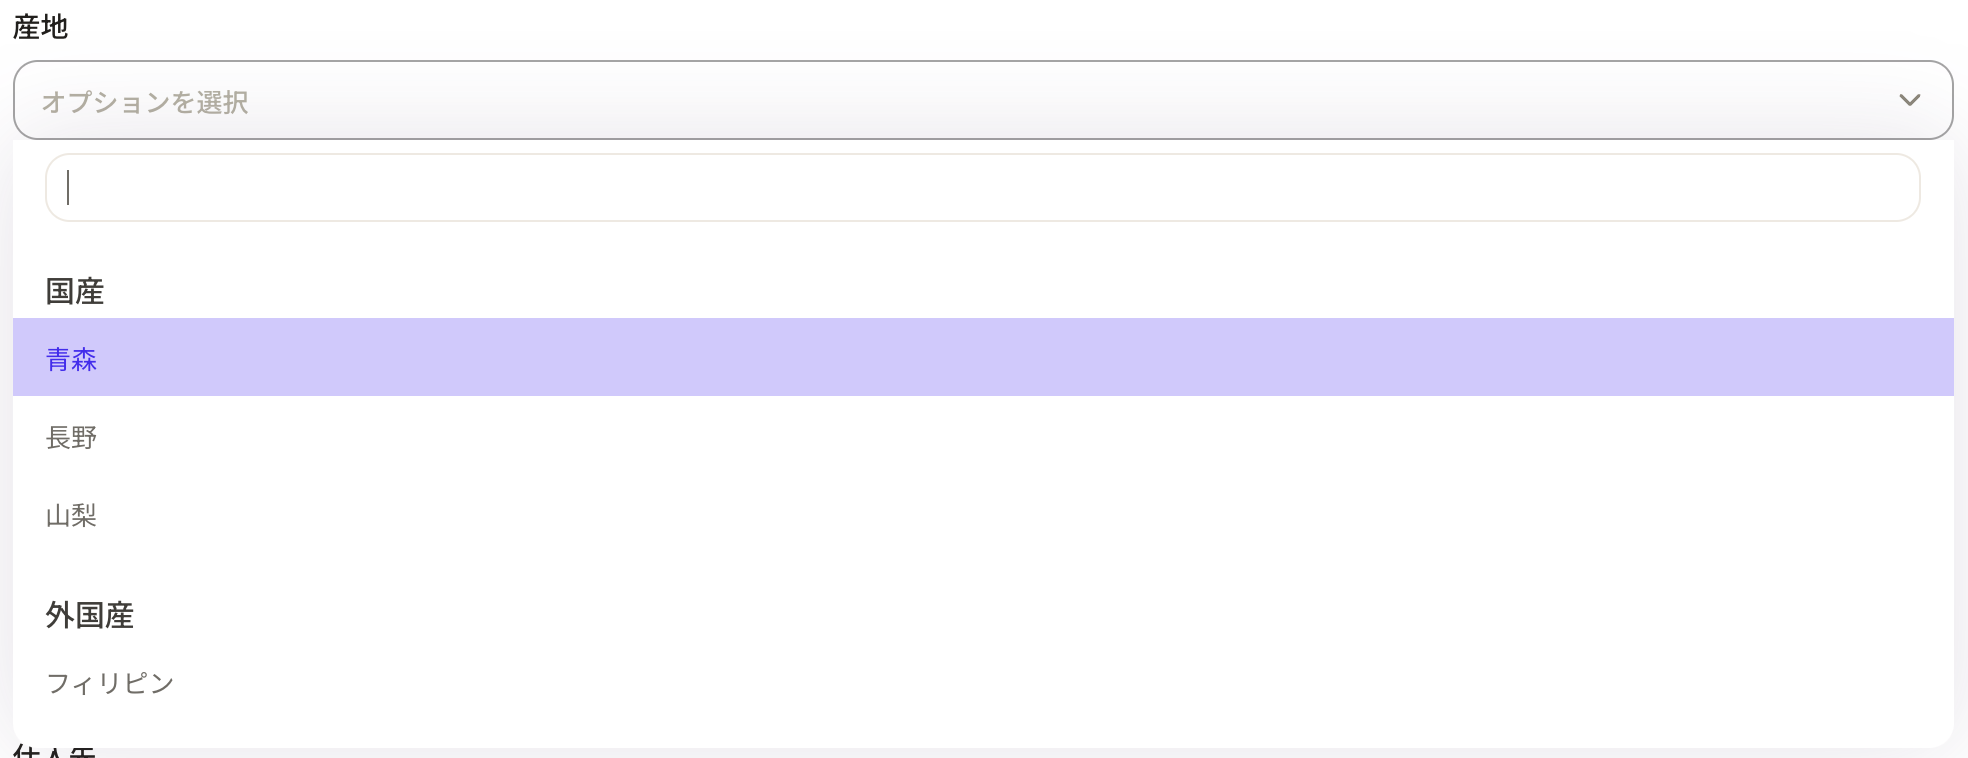
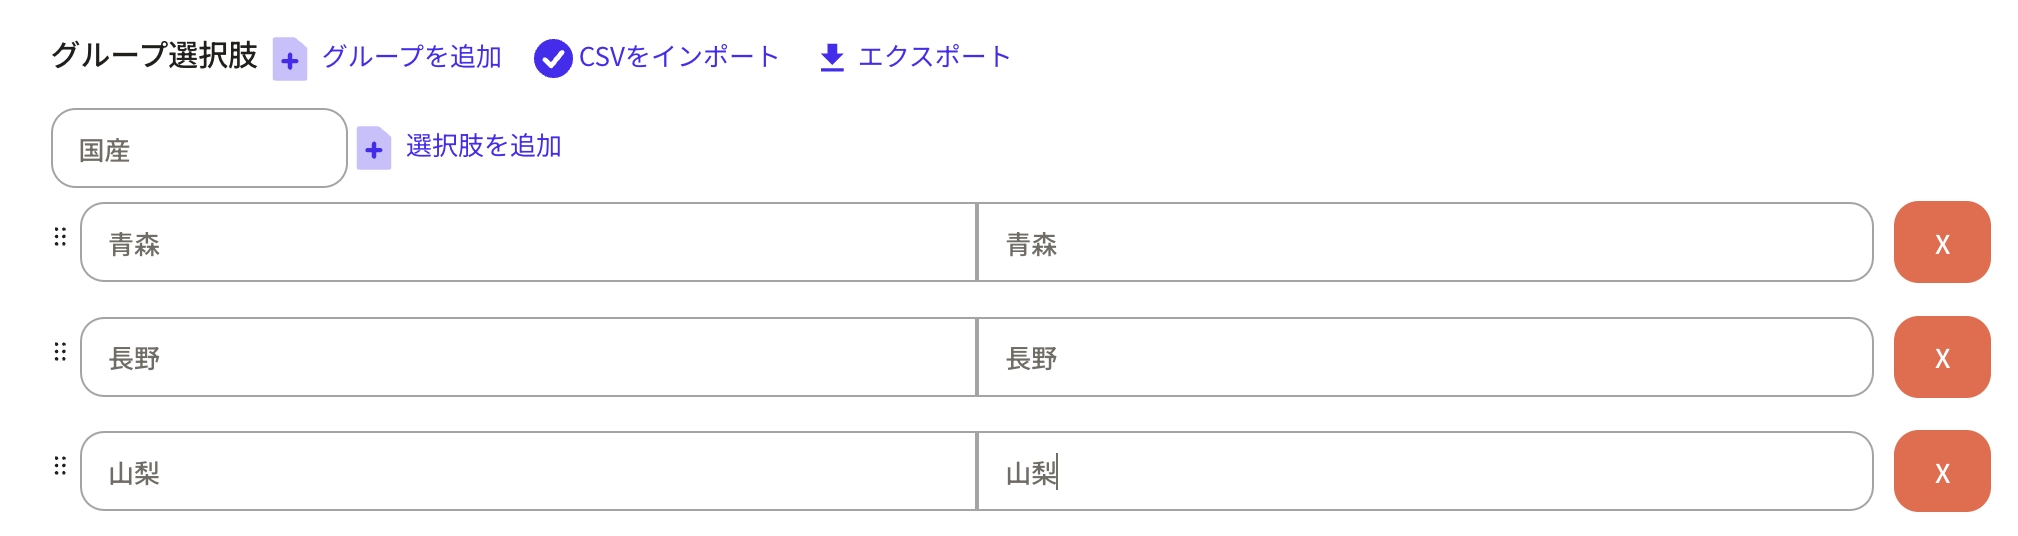
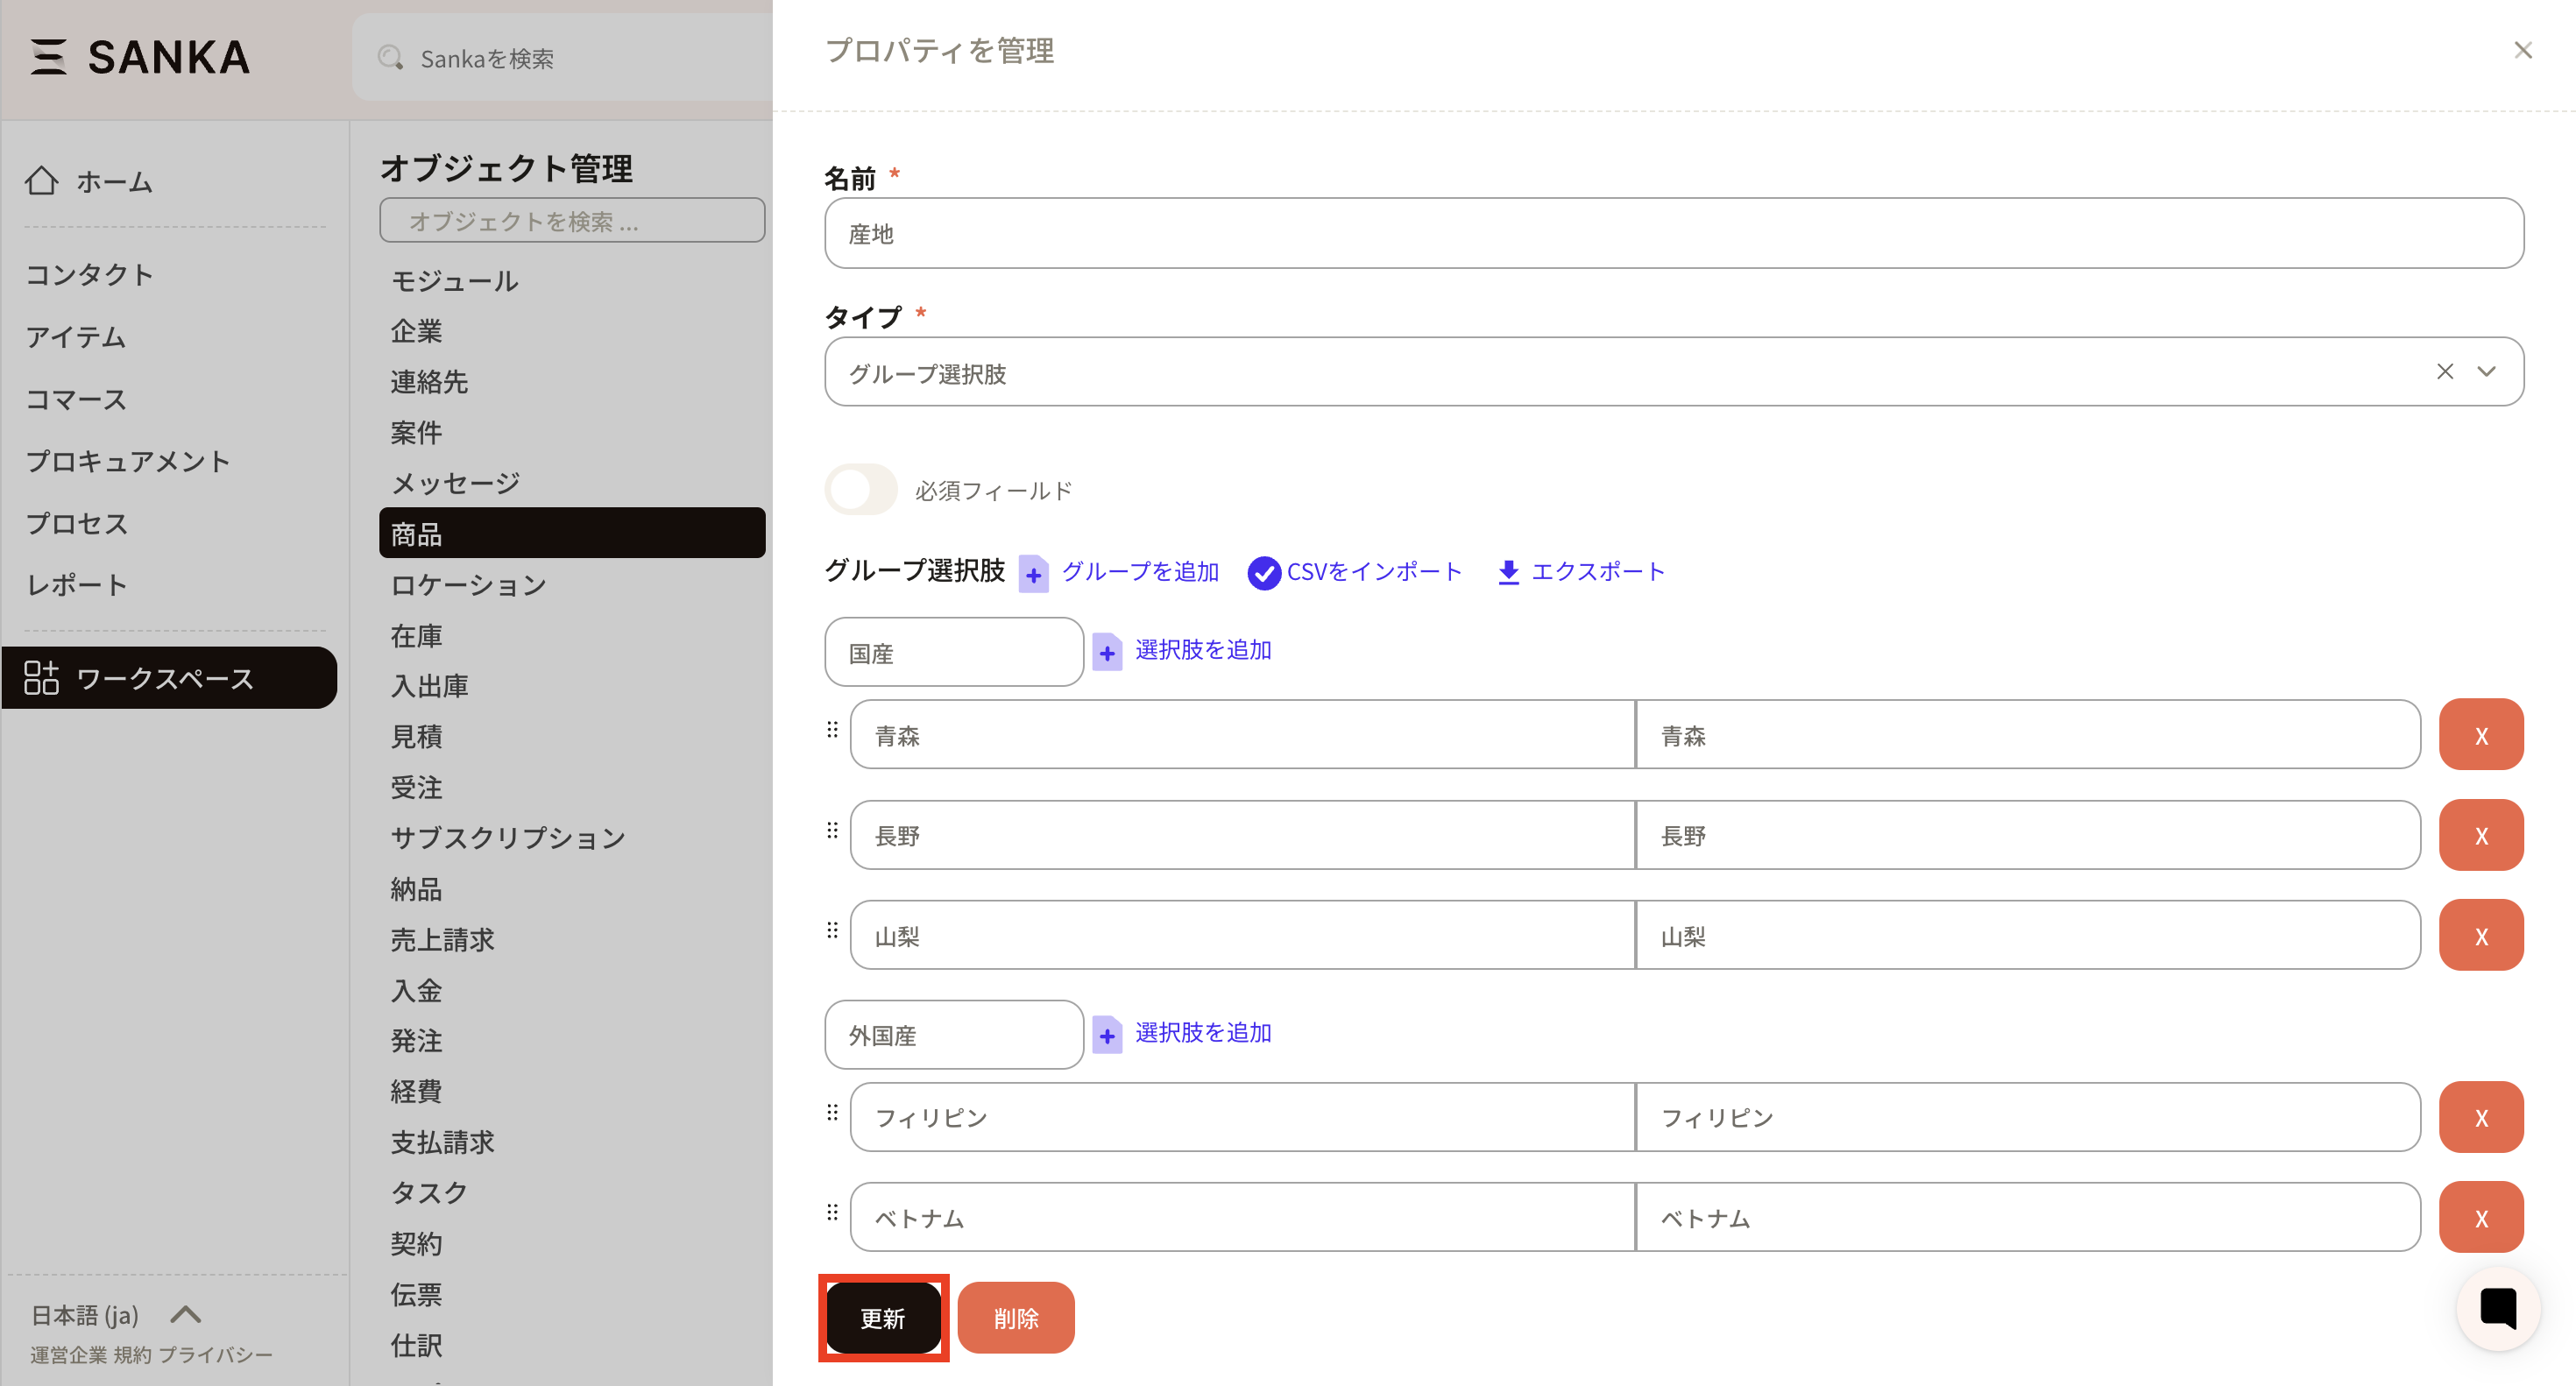
- Main group: Domestic, Sub options: Aomori, Nagano, Yamanashi
- Main group: Imported, Sub options: Philippines, Vietnam, China
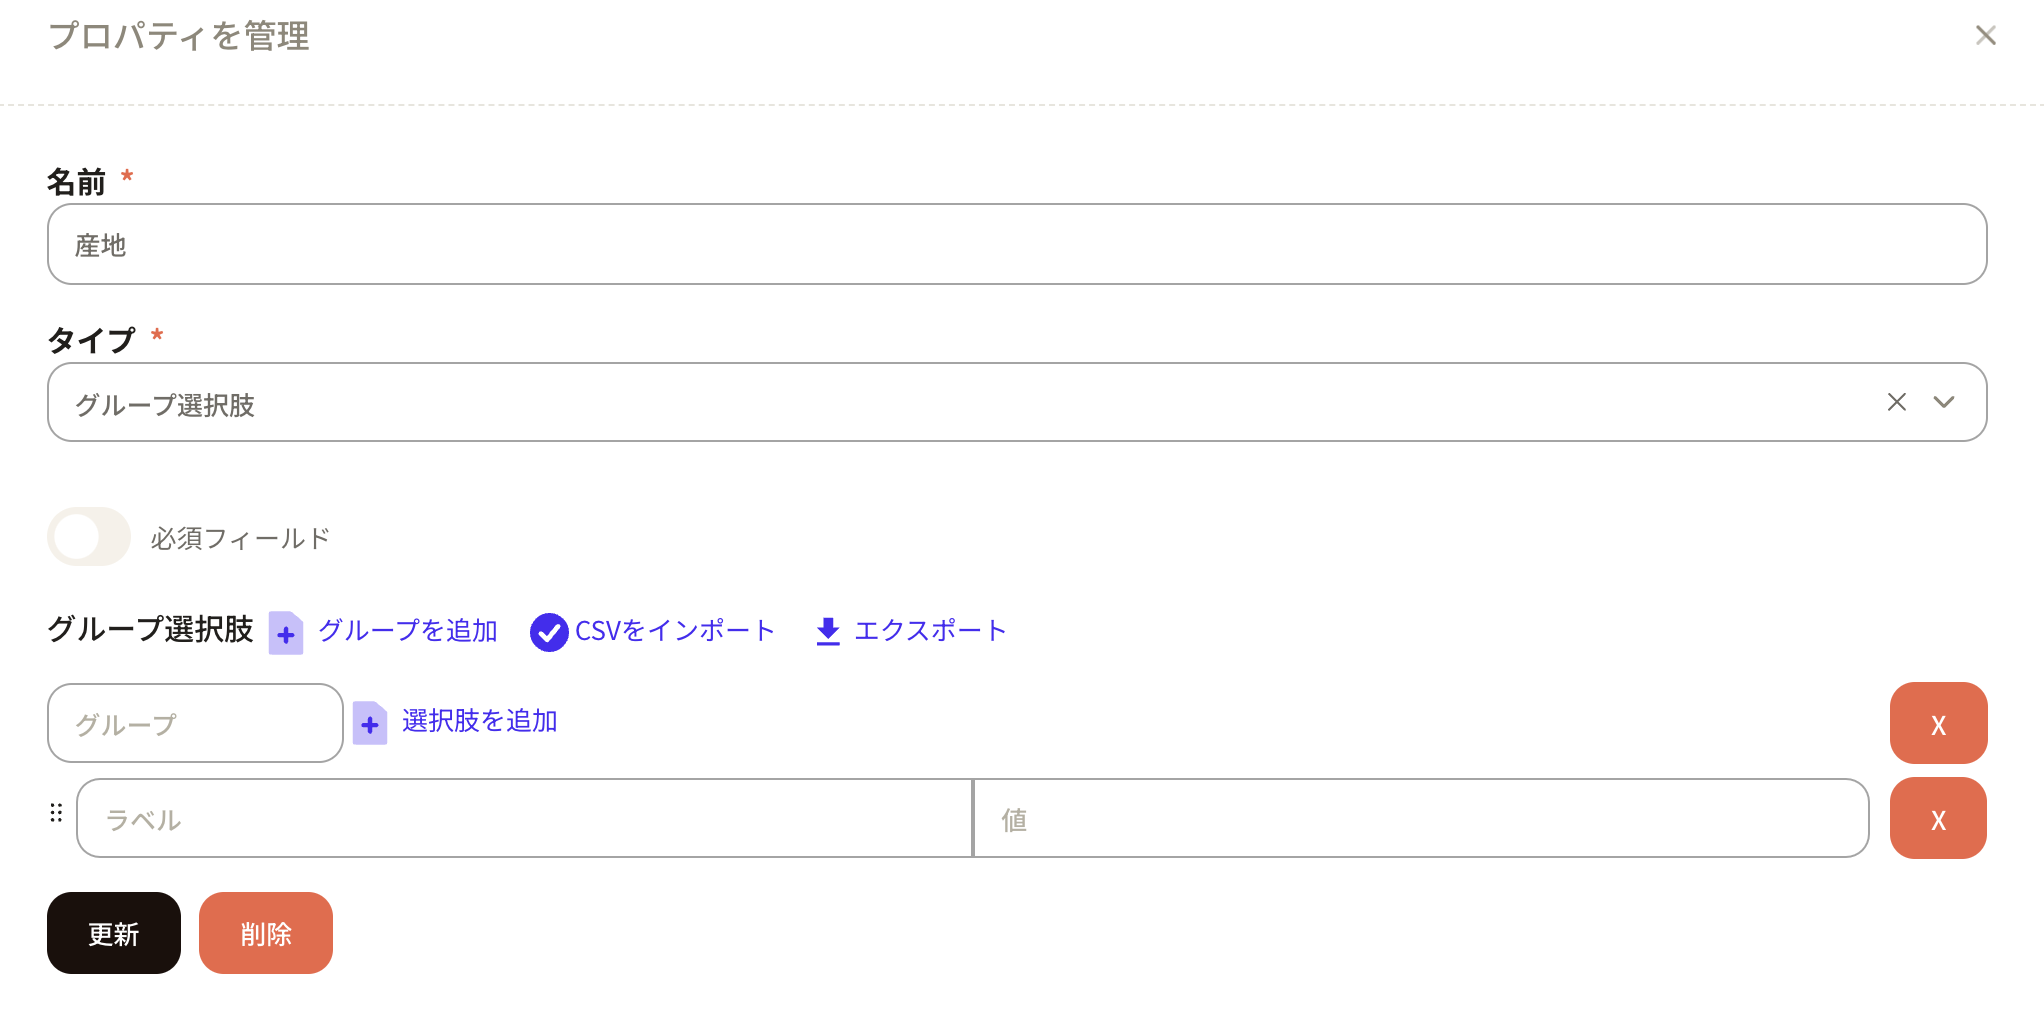 Set the main group name. The sub-option Label is the display name in Sanka, and Value is the internal name. Click Add option to add more sub-options.
 We entered Domestic with sub-options Aomori, Nagano, and Yamanashi.
 Next, click Add group again to create the Imported group.
 After adding the Imported group, click Update to apply.
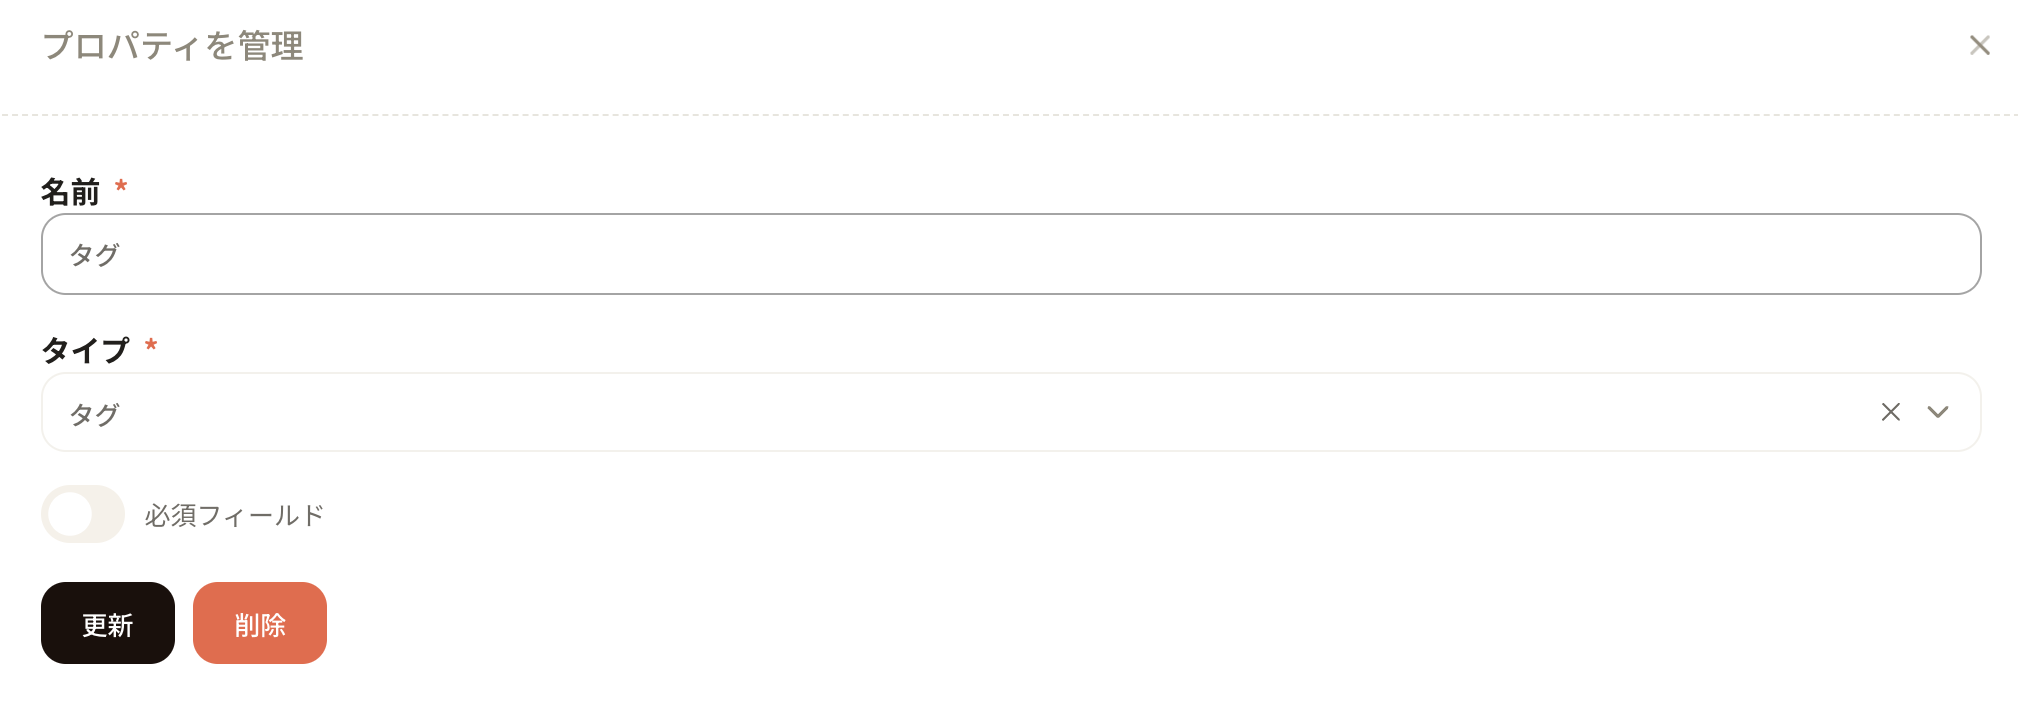
Tags
Tags let you add markers to record information.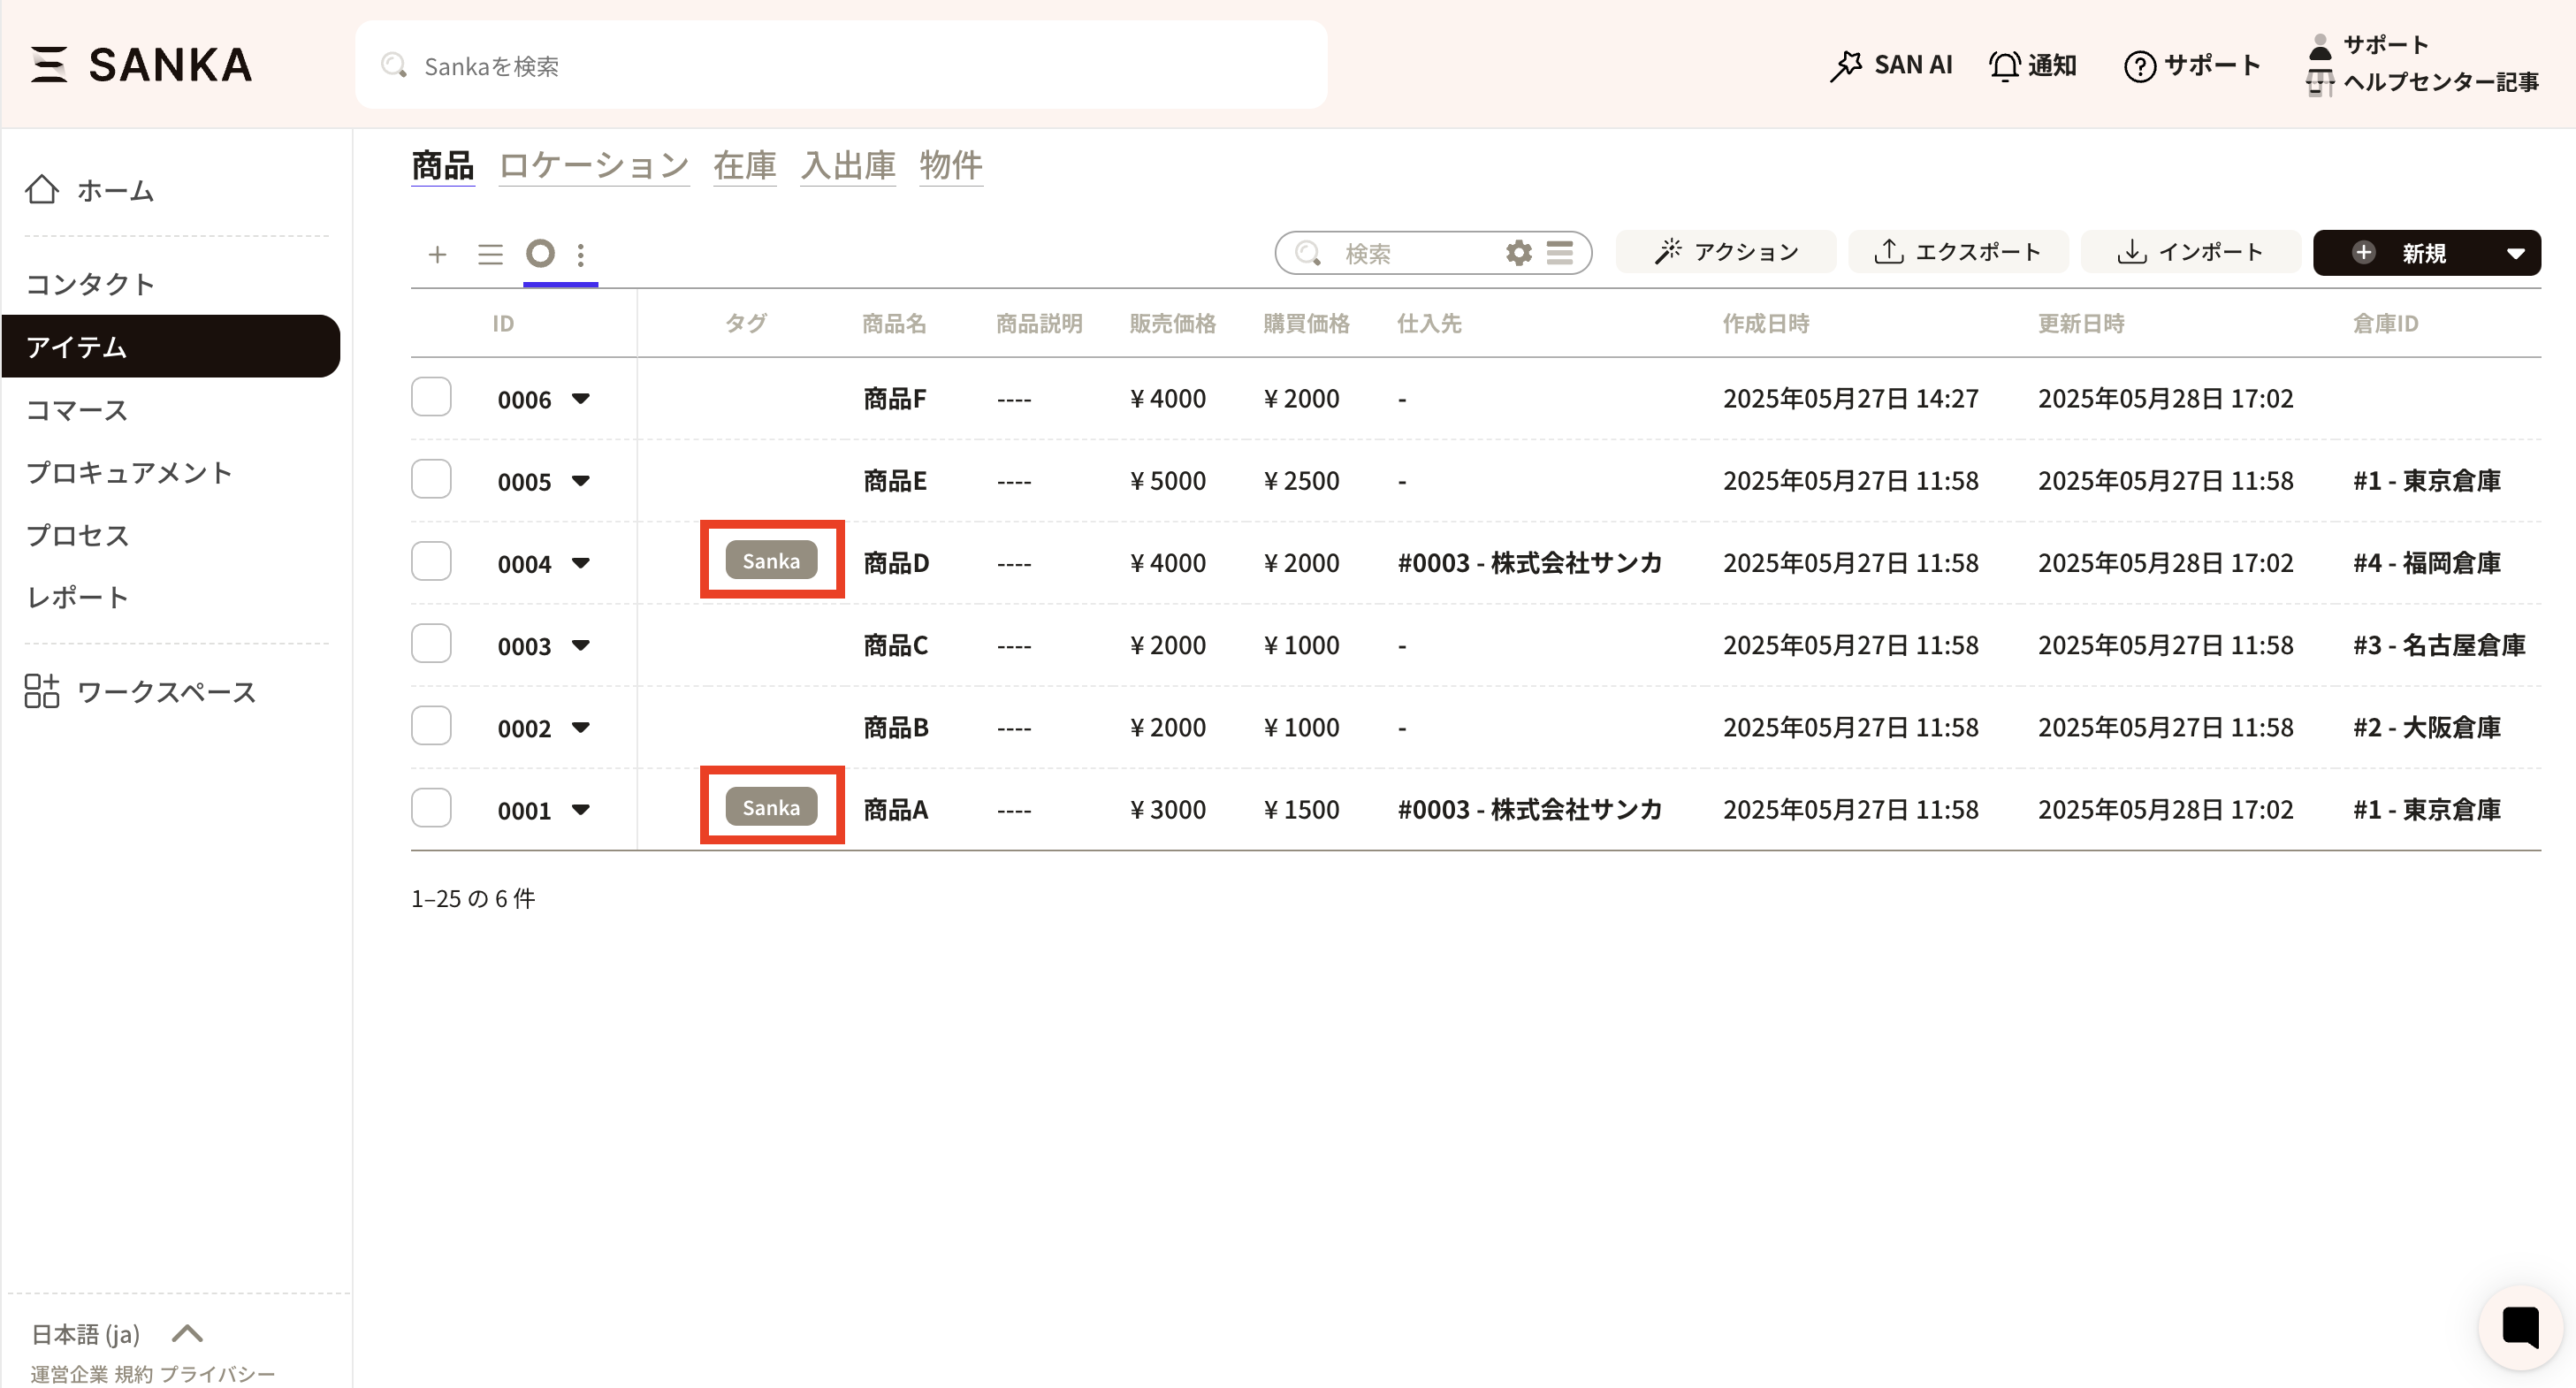 How to set up tags
In property settings, set the property type to Tag.
How to set up tags
In property settings, set the property type to Tag.
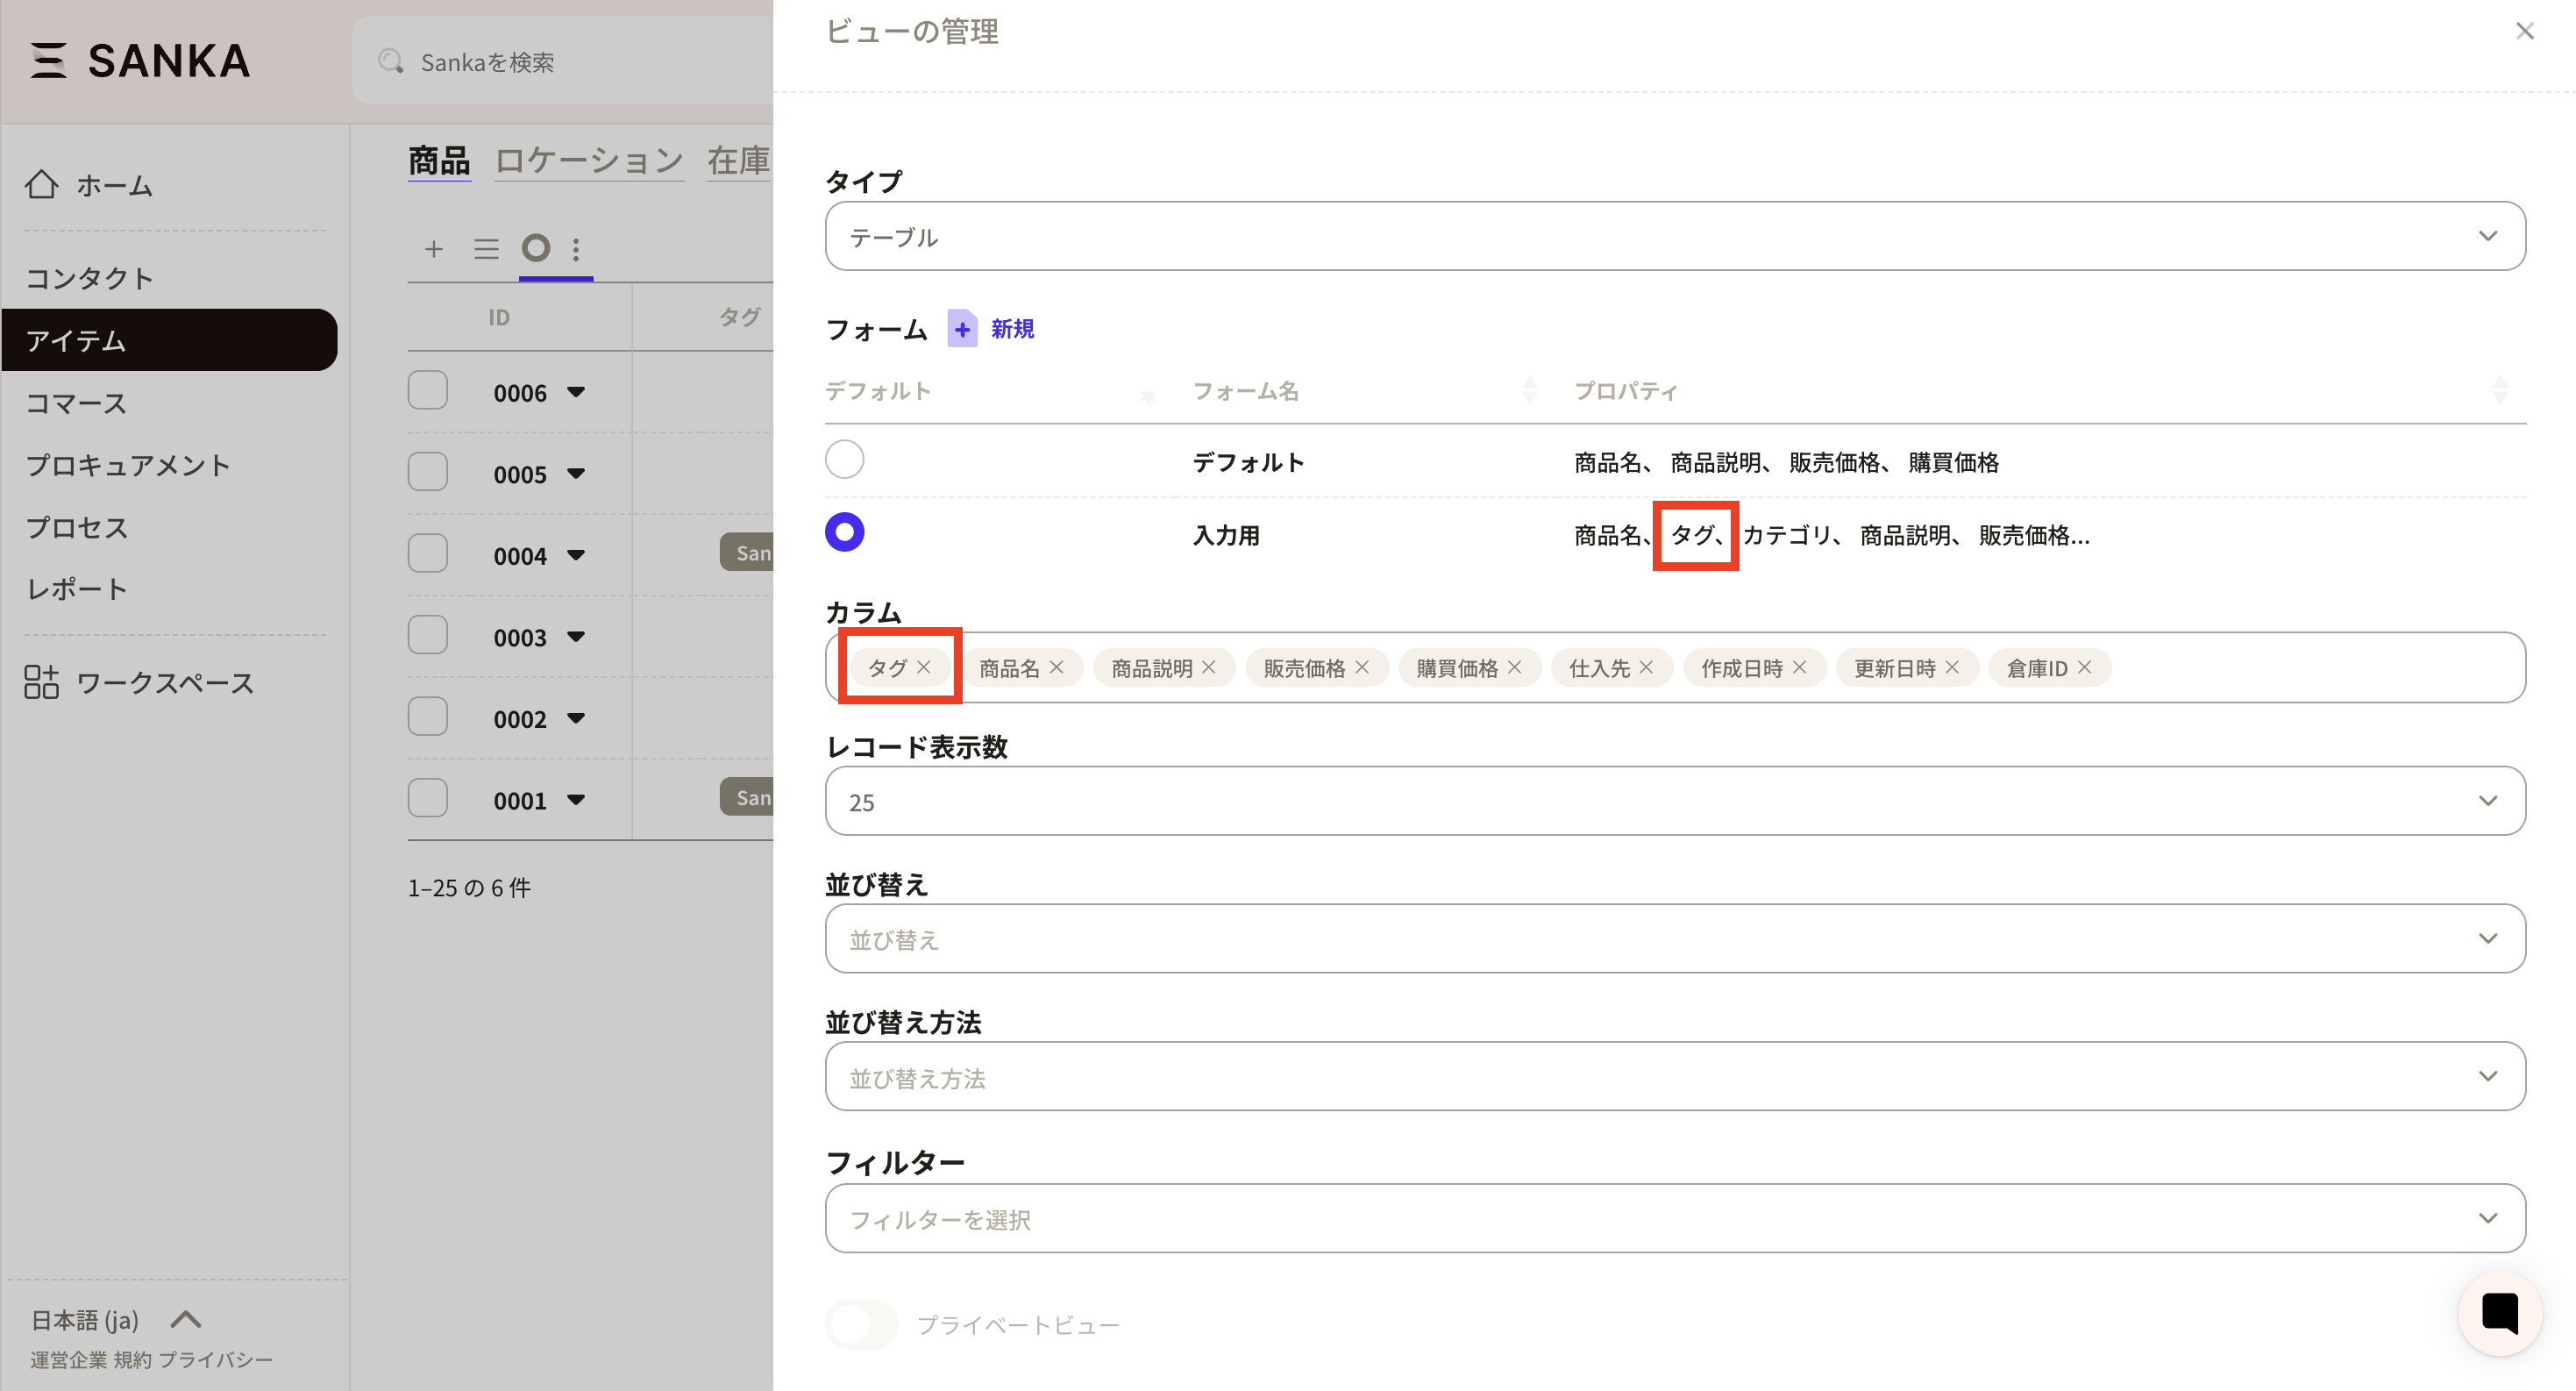
 Next, add the tag property to the form for the target object.
 Then click the tag field from the record screen.
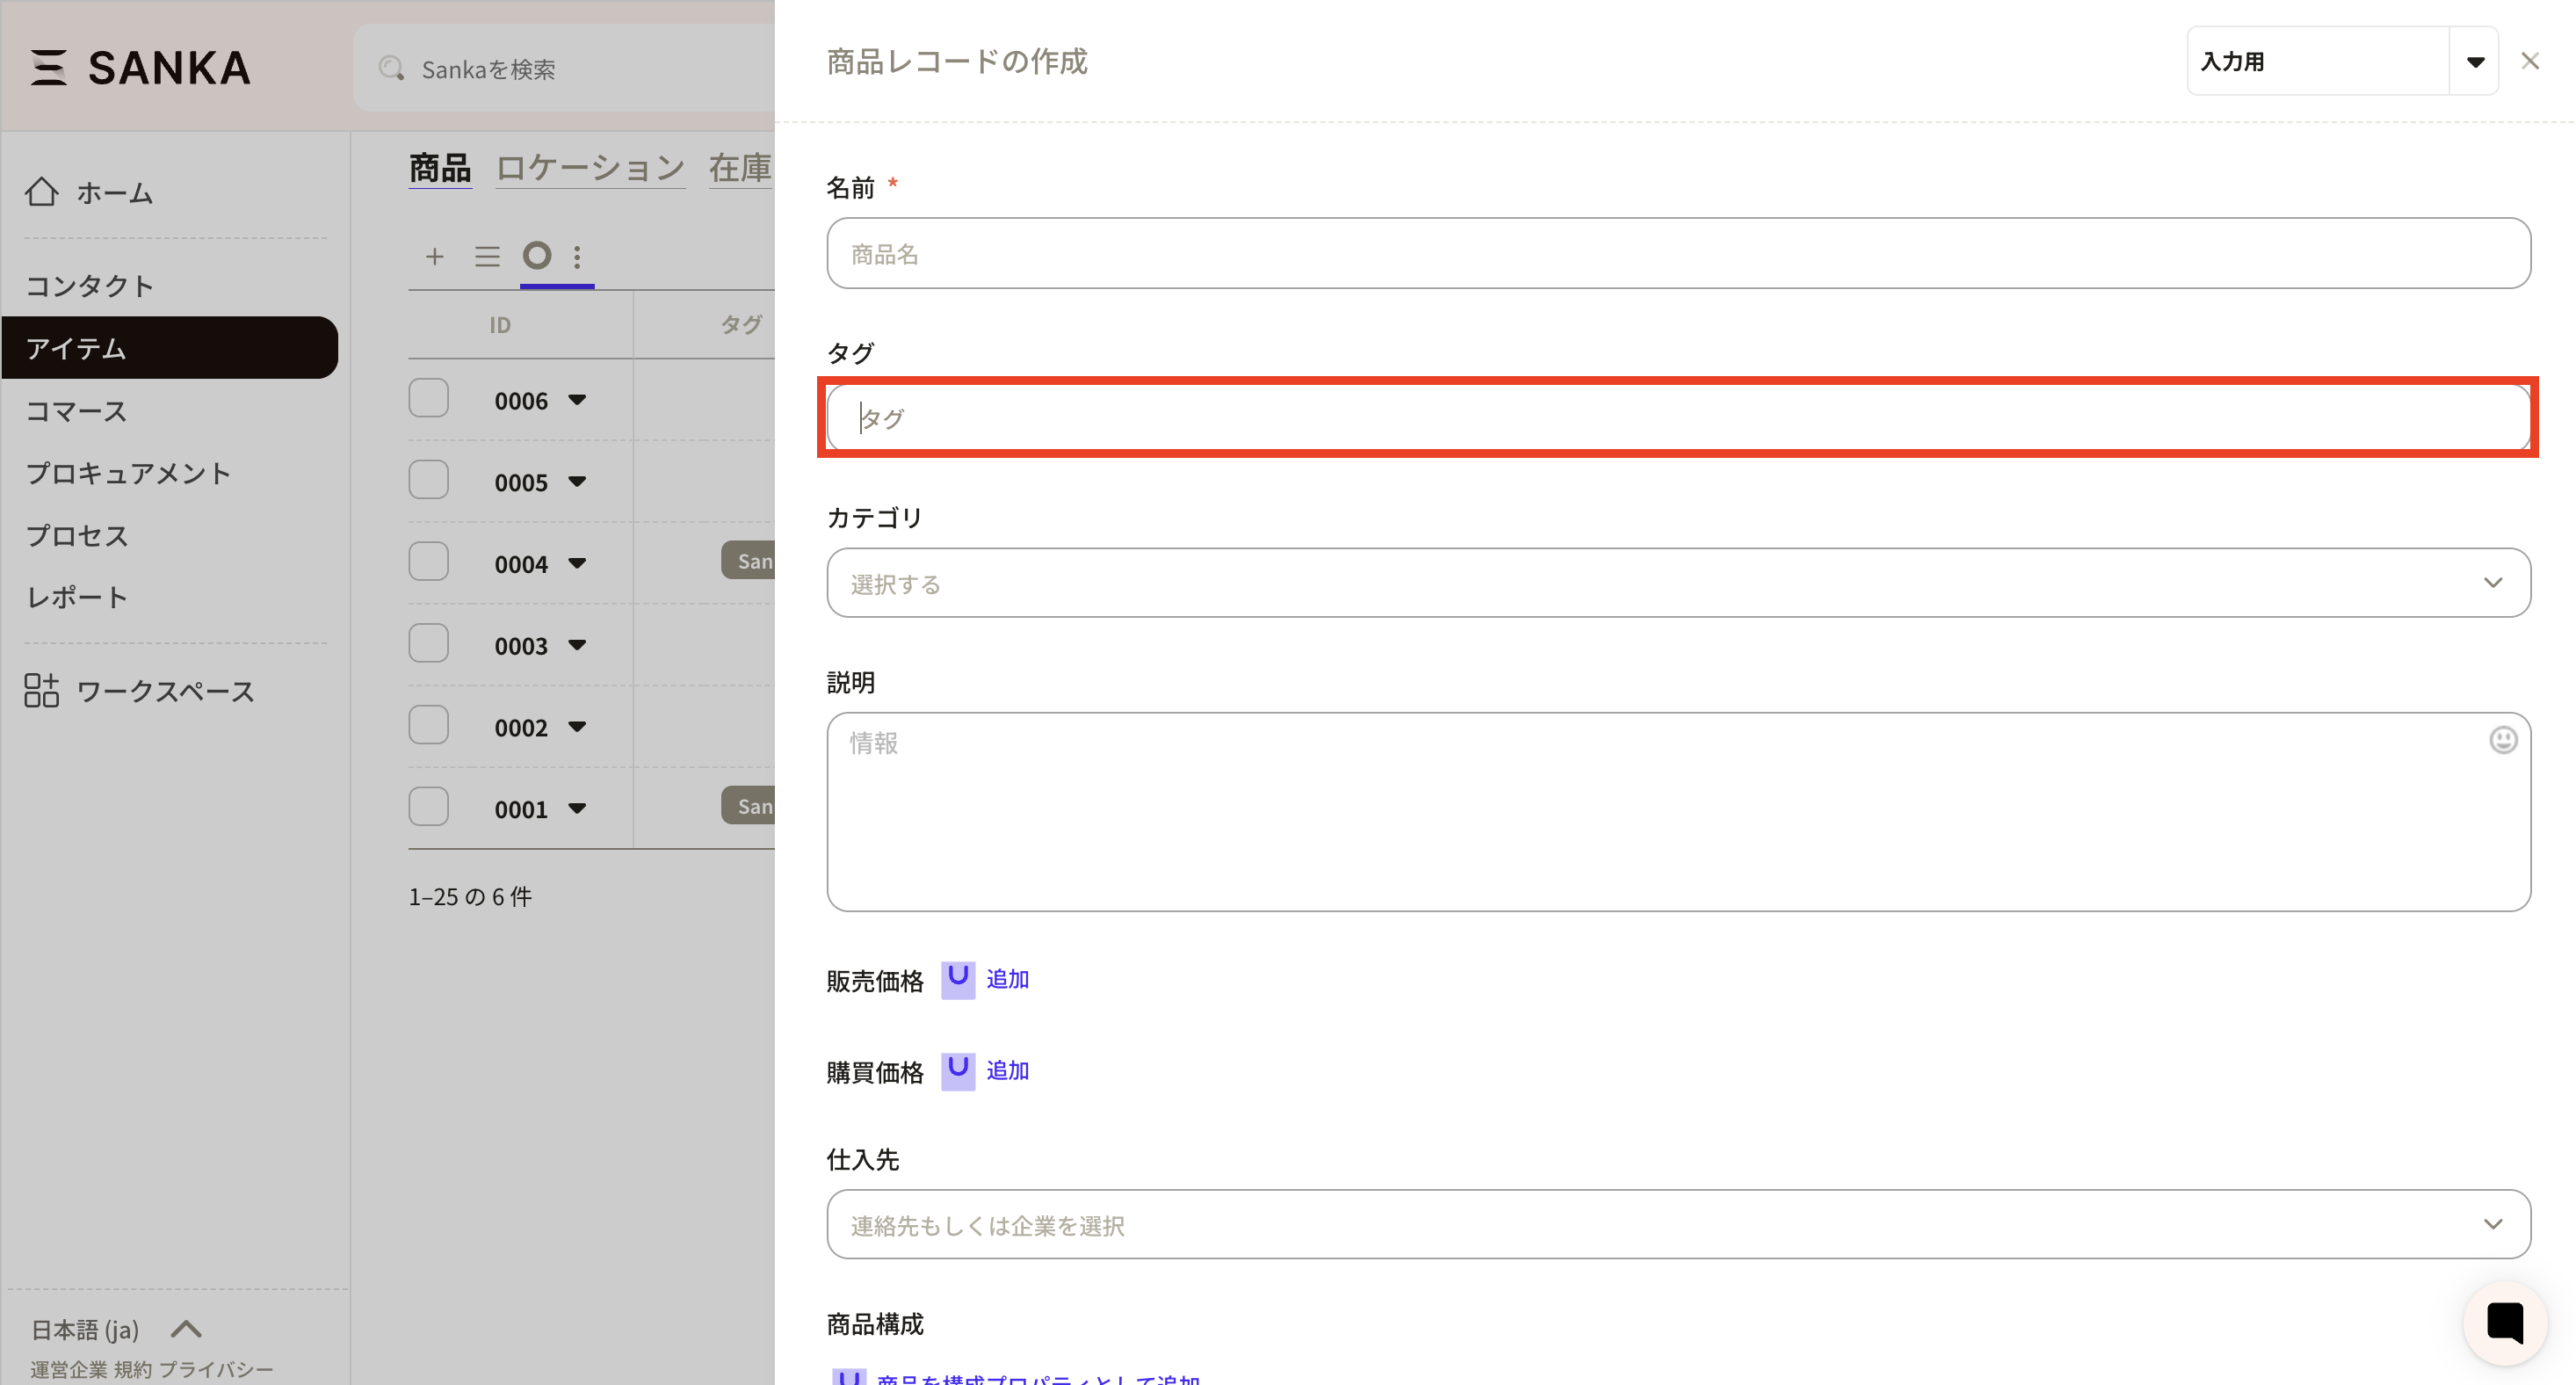 Enter the tag text manually. Once registered, the tag is saved and will appear in the suggestions below.

Deleting properties in use
Properties that contain data cannot be deleted.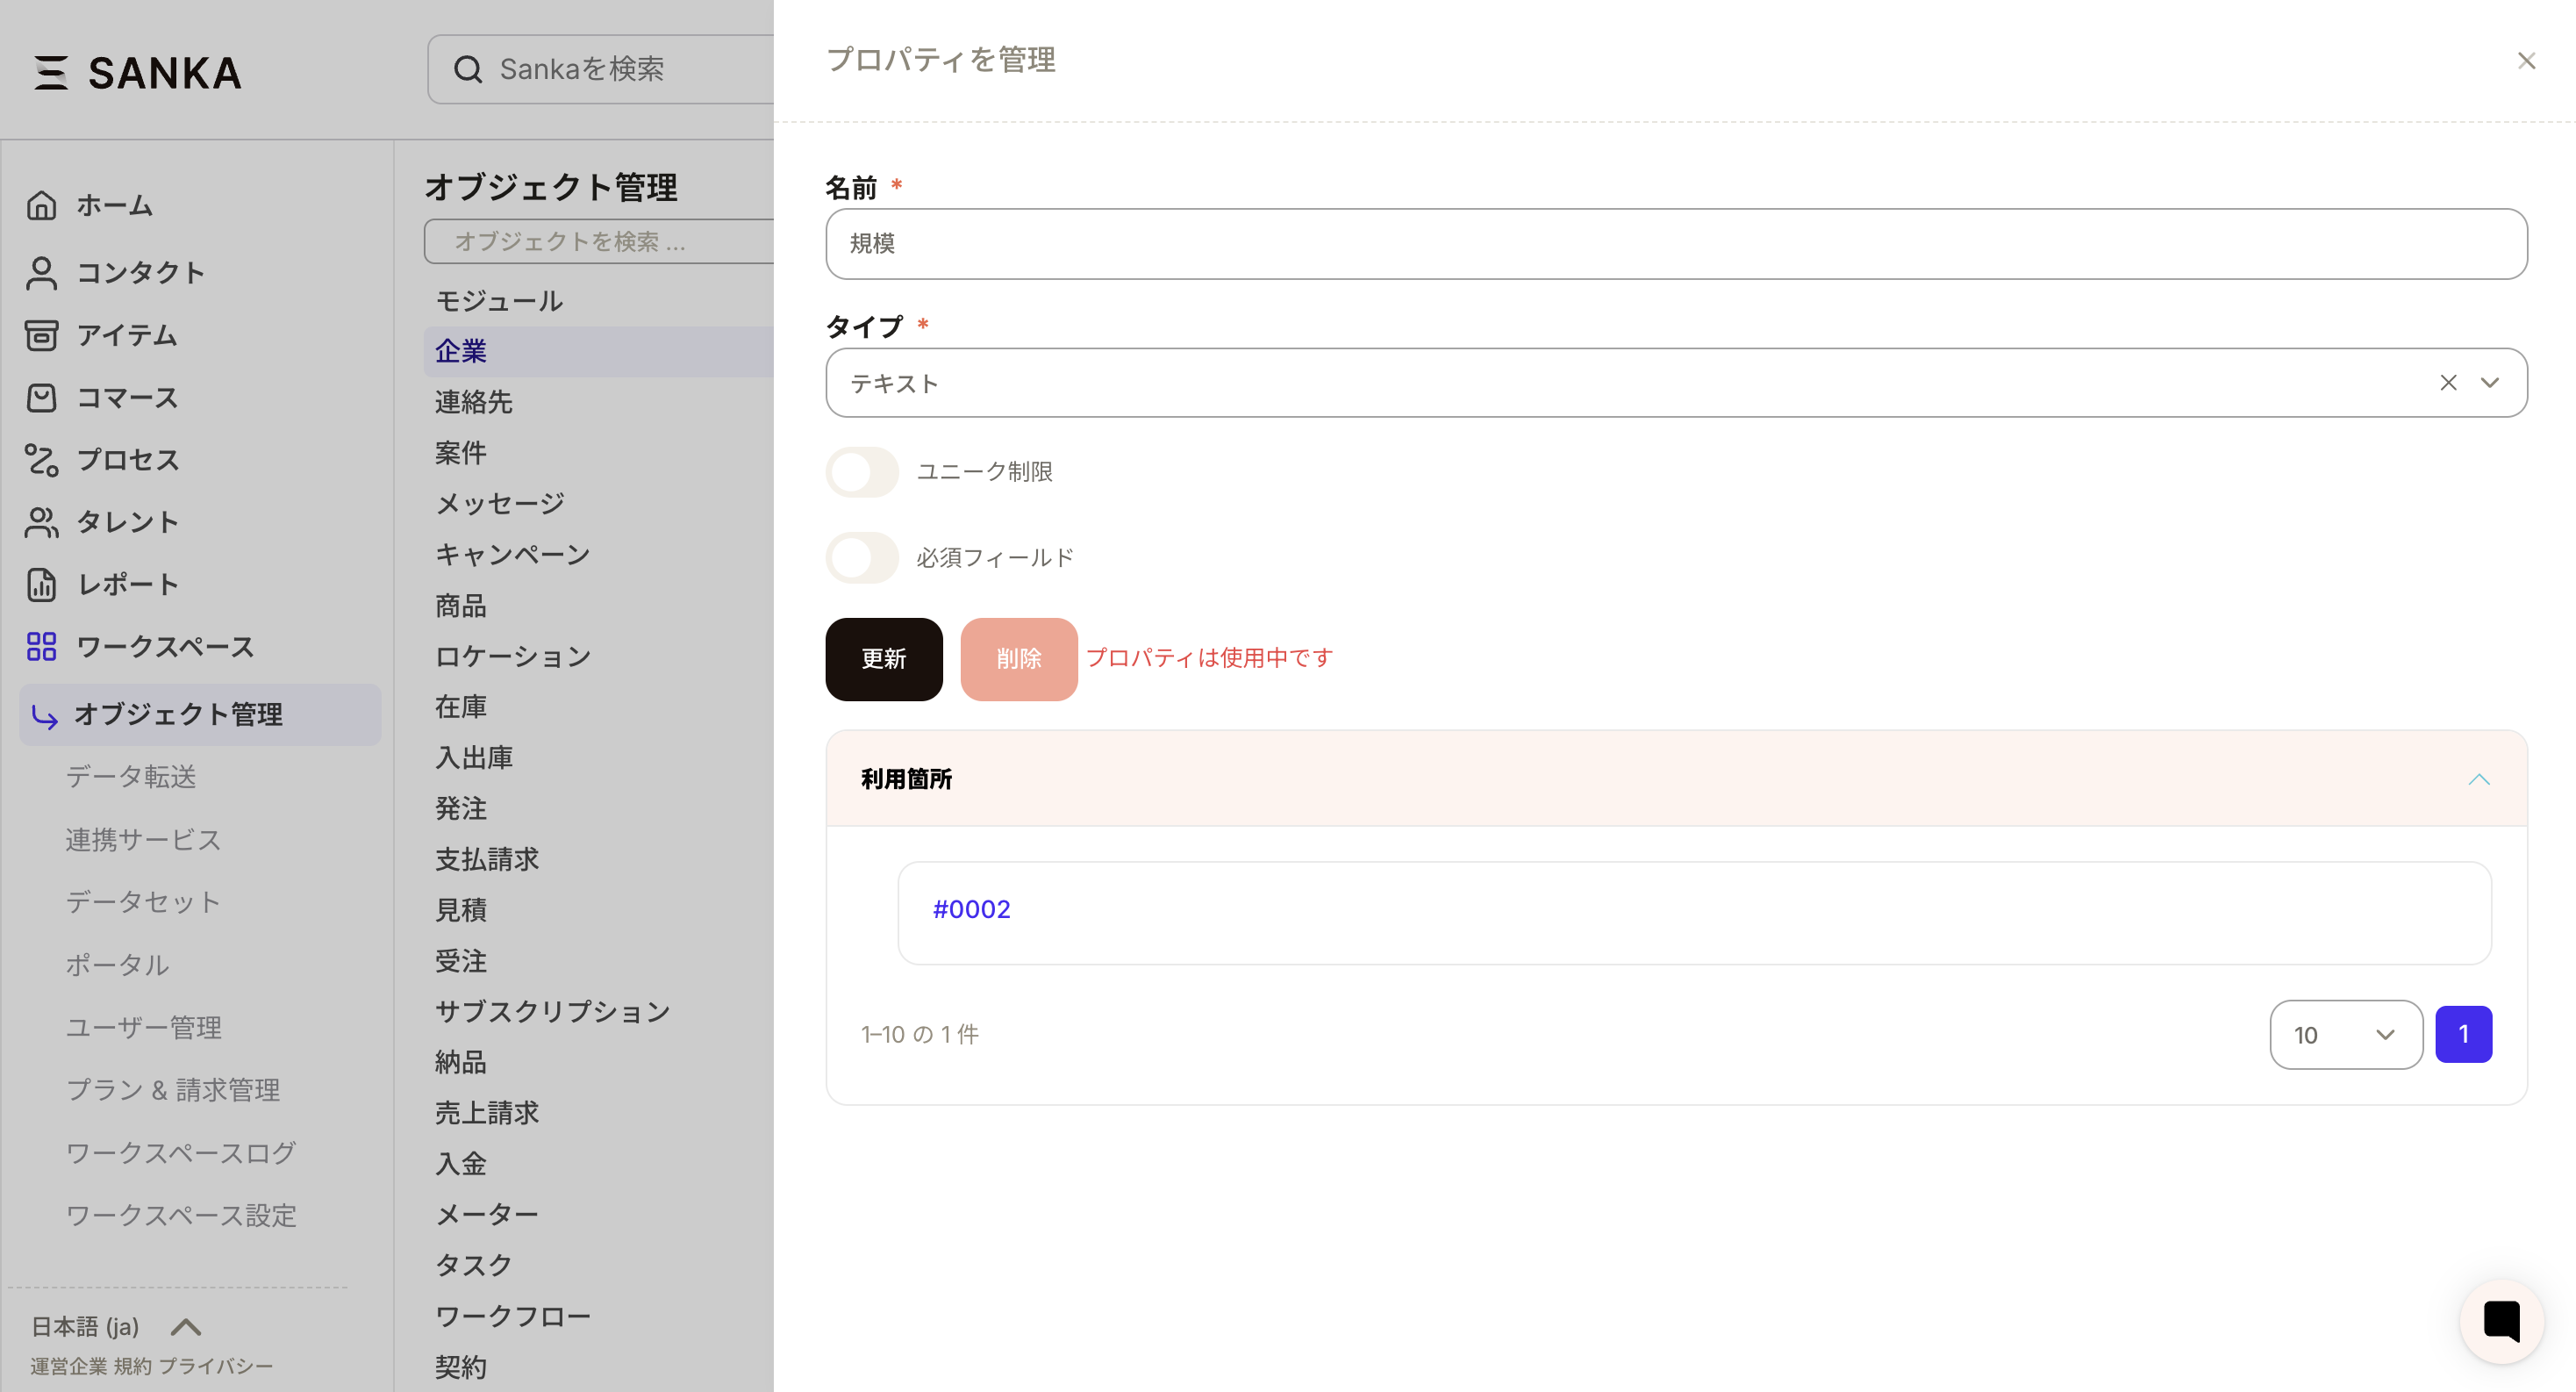 To delete a property, clear the property values in all records first.
To clear values in bulk, select records and use the Edit button to clear the property value.
To delete a property, clear the property values in all records first.
To clear values in bulk, select records and use the Edit button to clear the property value.